A Different Kind of Stash Project: Pukhlya and Zhuzhik Amigurumi Pattern Free
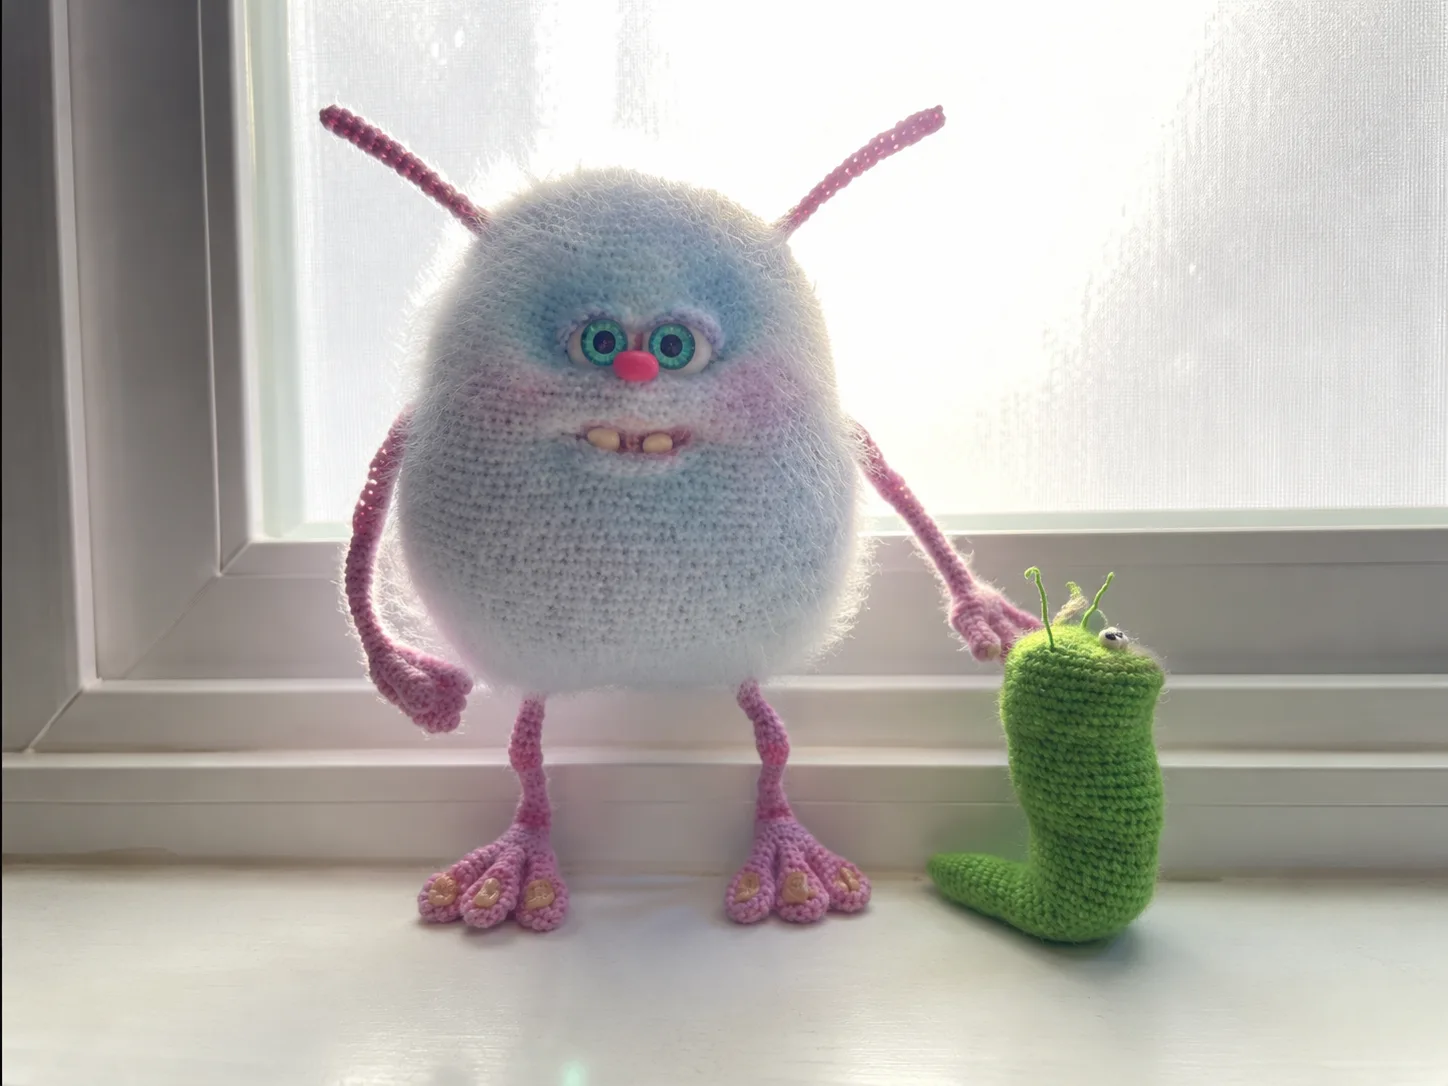
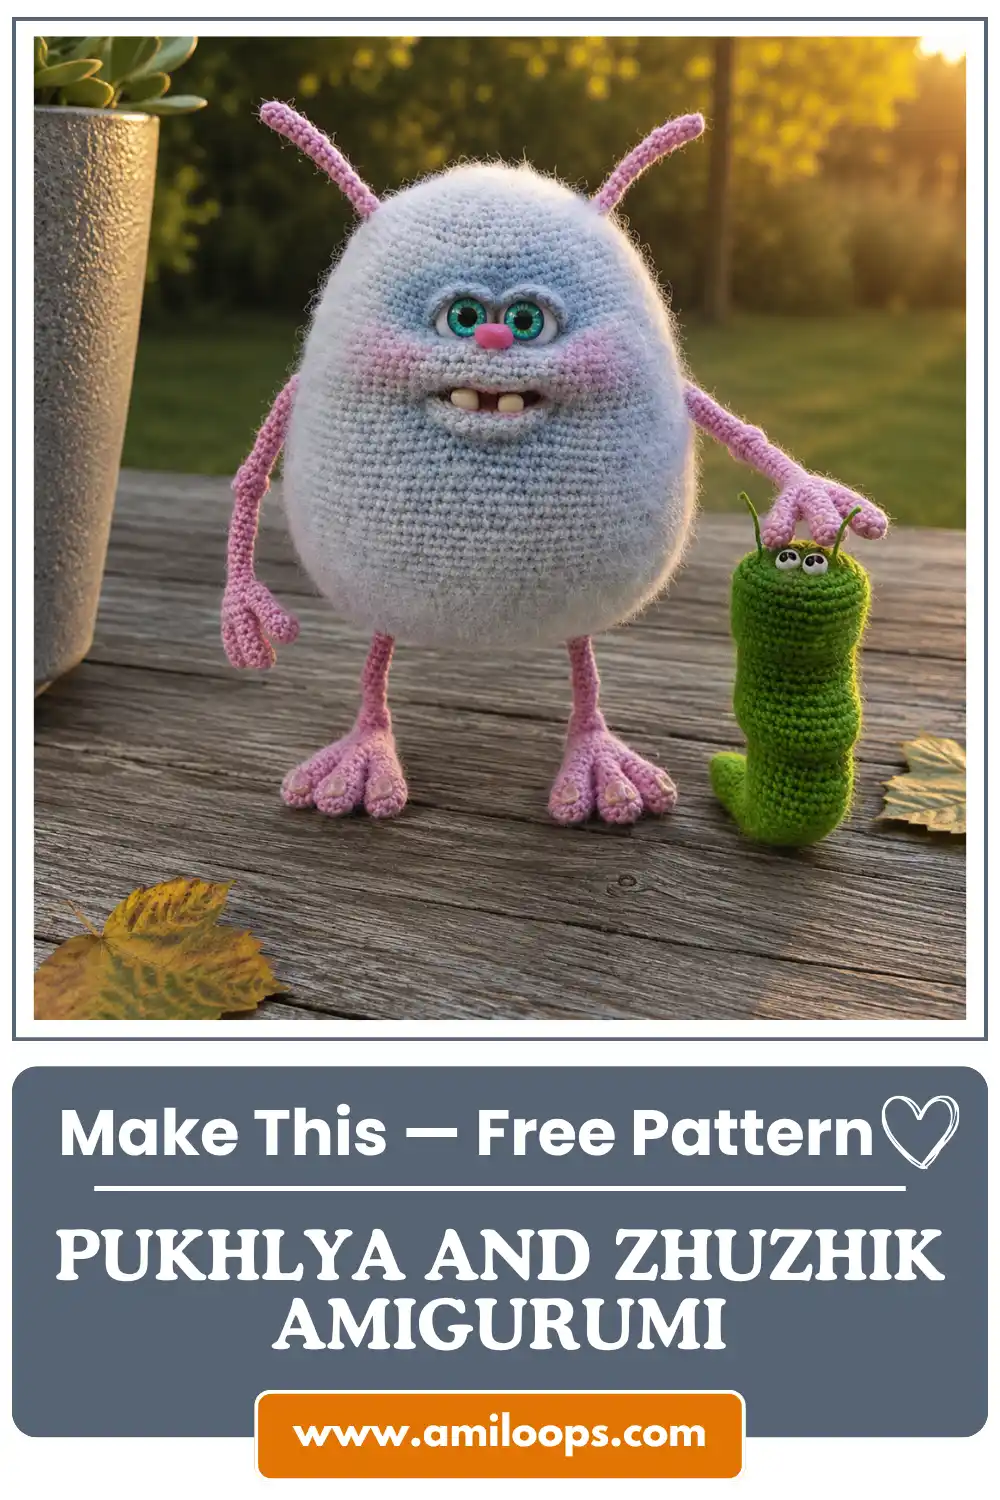
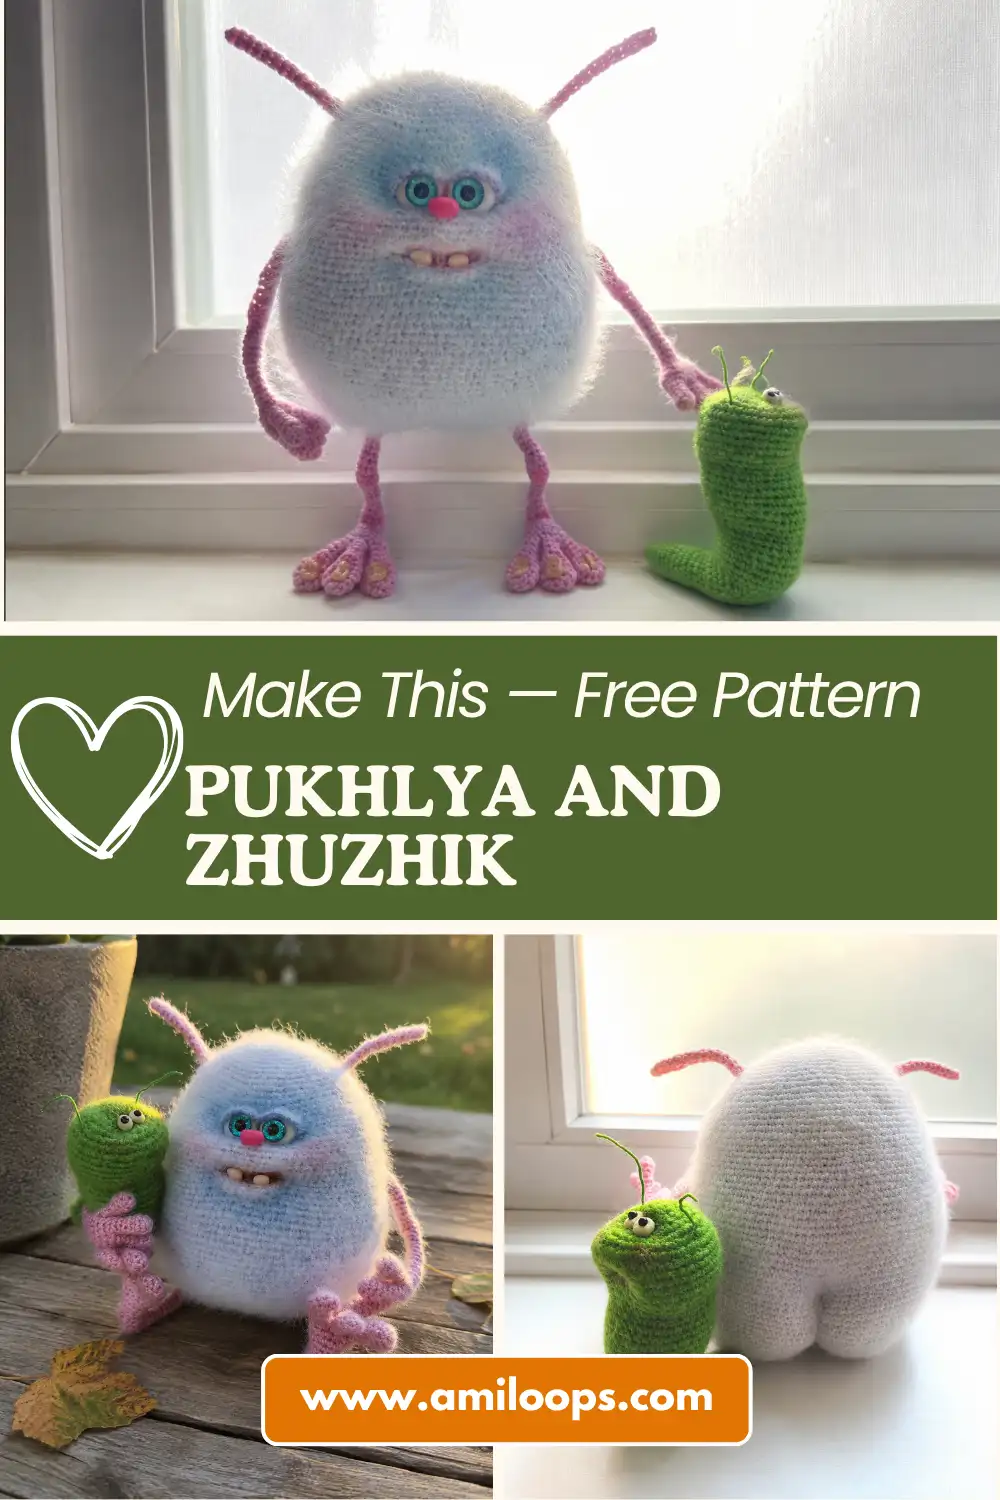
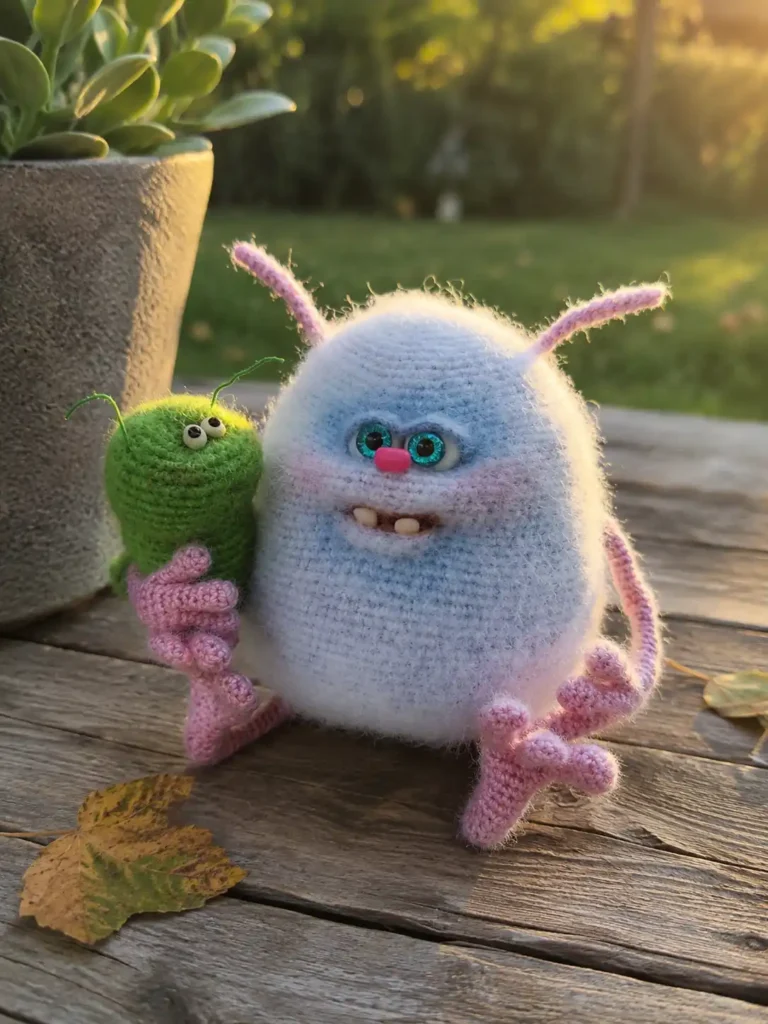
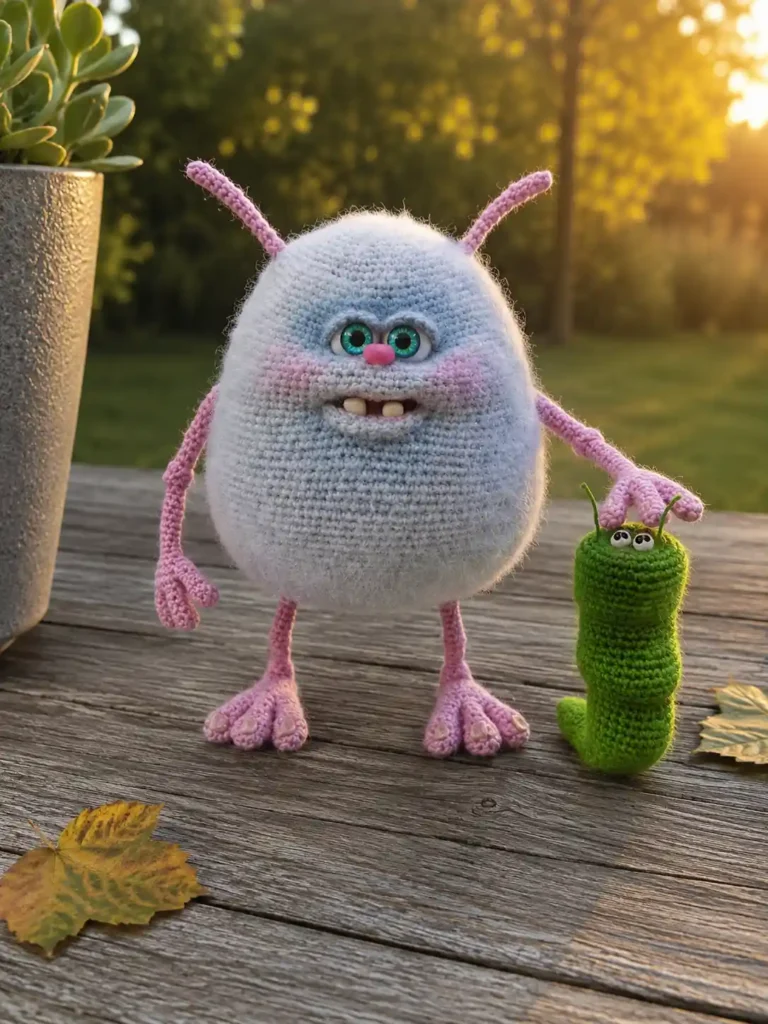
This pukhlya and zhuzhik amigurumi pattern free isn’t a quick keychain — I want to be upfront about that before you grab your hook. This is a wire-armature monster with a tiny caterpillar sidekick, and it’s built for crafters who want to sit with a project over several sessions, not knock it out during a coffee break. If that’s you, keep reading, because the payoff is a genuinely unique 9.8 in (25 cm) posable art doll unlike anything else in your collection.
🧶 What You’ll Need
- 💰 Yarn Needed: Not specified by the original designer — plan for more than a single skein. A lace/fingering-weight mohair blend held double, worked over 100+ rounds on the body alone, adds up fast.
- 🎨 Colors: White (or a soft light blue/white mohair blend) for Pukhlya’s body, pink or similar for the arms and legs, green (or any leftover green you have) for Zhuzhik the caterpillar
- 🪝 Hook: 1.8mm (no exact US letter size — closest common sizes are US B/1 at 2.25mm or a specialty steel/lace hook below that; a hook one size down from B/1 will get you closer to gauge)
- ⏱️ Time: Multiple sessions — this is not a one-evening project
- 📏 Finished Size: Pukhlya: 9.8 in (25 cm) | Zhuzhik: not specified, sized to sit comfortably alongside Pukhlya
- 💡 Difficulty: Advanced (the pattern itself uses beginner-friendly stitches, but the wire armature, polymer clay work, and needle sculpting push this well past a typical amigurumi skill level)
- 🎁 Great For: Display pieces, art-doll collectors, crafters who want to stretch beyond basic amigurumi — not intended as a children’s toy
Here’s the honest framing: you’re not just crocheting here. You’re building a small sculpture. There’s a copper wire skeleton running through the arms, legs, and body so the finished piece can be posed. There’s polymer clay involved for detailing. There’s needle sculpting and pastel tinting to shape the face and add color depth. None of that is scrap-bin territory — but if you’ve been wanting to level up past basic stuffed shapes, this is exactly the kind of project that teaches you a whole new set of skills in one go.
Materials for This Pukhlya and Zhuzhik Amigurumi Pattern
- Yarn: The original pattern uses a white “Angora Magic” delicate yarn (mohair/wool/acrylic blend) held together with a light blue mohair yarn for extra fluff. You don’t need that exact combination — any lace or fingering-weight mohair blend yarn worked double will get you a similar soft, fuzzy finish. For the arms and legs, a pink fingering-weight yarn (or whatever you have in a similar weight) works.
- Hook: 1.8mm, or the closest small hook you own that gives you a tight, dense fabric — tight tension matters here because you’re stuffing around a wire frame. This size falls outside the standard US hook size chart, so if you only own lettered hooks, go with the smallest one you have and adjust your tension accordingly.
- Stuffing: Polyester fiberfill.
- Copper wire: 1mm cross-section, for the arm, leg, and body armature. This is what lets the finished piece hold a pose.
- Polymer clay: Used for detail work (and optionally to sculpt the nose, if you’re not using a ready-made one).
- Soft art pastels: For tinting and shading the finished piece.
- Clear craft glue: A strong clear-drying glue for attaching small parts.
- Fabric-based adhesive (medical) tape: Used to wrap and secure wire joins where the limb armatures connect inside the body.
- Eyes: Two ready-made 9mm eyes.
- Nose: A ready-made nose, or sculpt one from polymer clay.
- Tapestry needle: A long needle for sewing pieces together and for needle sculpting the face and body shaping.
⚠️ Safety Note: Because this piece includes a wire armature, polymer clay components, glued-on eyes, and small detail pieces, it’s designed as a display or collector’s piece — not a toy for young children. If you’re gifting this, it’s best suited for teens and adults who’ll appreciate it as art rather than something to be handled roughly. For general guidance on safety components in handmade toys, the U.S. Consumer Product Safety Commission is a solid reference point.
Abbreviations Used in This Amigurumi Pattern
| Abbreviation | Meaning |
|---|---|
| ch | Chain |
| sc | Single Crochet |
| inc | Increase (2 sc in same stitch) |
| inv dec | Invisible Decrease (AmiLoops’ standard decrease method — worked through the front loops only for a seamless finish; the original pattern calls this simply “dec”) |
| sl st | Slip Stitch |
| dc | Double Crochet |
| hdc | Half Double Crochet |
| mr | Magic Ring |
| FO | Fasten Off |
| shift st | Shift Stitch — crochet one extra stitch so the next round’s starting point shifts by one; used to keep symmetry in the body |
pukhlya and zhuzhik amigurumi pattern free
Here’s a trick that saves you real frustration on this one: prep your wire armature pieces before you start crocheting the arms and legs, not after. You’ll be inserting the frame mid-part (the pattern flags exactly which row), and having the wire pre-cut and ready means you’re not scrambling to bend copper wire while holding live stitches on your hook.
If you’ve never worked a magic ring before, this pattern leans on it constantly — fingers, toes, the caterpillar’s body, all of it starts from a magic ring. Our magic ring tutorial covers the technique in under two minutes, and it’s worth having down cold before you start, since you’ll be repeating it eight separate times just for the fingers alone.
Every “dec” in the original pattern gets worked as an invisible decrease here — same stitch count, cleaner finish, no visible gap. With a body this large and this visible, that difference actually matters.
Since you’re sewing quite a few small pieces onto the body (the lip, the antennas, the eyes and nose), it’s worth reviewing our guide to sewing amigurumi parts together before you get to assembly — especially the placement tips, since positioning on a face this expressive is what sells the whole piece.
Pukhlya and Zhuzhik Amigurumi Pattern
Fingers (make 8)
Yarn: main color. Starting method: magic ring.
Row 1: 5 sc in mr (5)
Row 2: 5 inc = 10 (10)
Row 3: 10 sc (10)
Row 4: 5 inv dec (5)
Rows 5–6: 5 sc (5)
Note: Make 4 fingers for each hand. On 3 of the 4 fingers, cut the yarn and fasten off. Leave the yarn attached on the 4th finger — you’ll continue directly into the arm from there.
Right Arm (make 1)
Yarn: pink (or your chosen accent color). Starting method: continue directly from the fingers.
Row 1: 3 sc along 1st finger, 2 sc along 2nd, 5 sc along 3rd finger, 3 sc along 2nd, 2 sc along 1st finger (15)
Row 2: 15 sc (15)
Row 3: 5 sc, 2 sc together with thumb stitches, 8 sc (15)
Row 4: 5 sc, 3 sc along remaining thumb stitches, 8 sc (16)
Row 5: (2 sc, inv dec) ×4 (12)
Row 6: 12 sc (12)
Row 7: 6 inv dec (6)
Rows 8–19: 6 sc each row (12 rows total) (6)
Row 20: 3 sc, 3 inc (9)
Row 21: 3 sc, 3 inv dec (6)
Rows 22–31: 6 sc each row (10 rows total) (6)
Note: After row 5, pause and insert the wire frame before continuing. Stuff the arm lightly as you go — you want the wire to have room to bend, not a tightly packed tube.
Finishing: Cut yarn, fasten off.
Left Arm (make 1)
Yarn: pink (or your chosen accent color). Starting method: continue directly from the fingers.
Row 1: 3 sc along 1st finger, 2 sc along 2nd, 5 sc along 3rd finger, 3 sc along 2nd, 2 sc along 1st finger (15)
Row 2: 15 sc (15)
Row 3: 1 sc, 2 sc together with thumb stitches, 12 sc (15)
Row 4: 1 sc, 3 sc along remaining thumb stitches, 12 sc (16)
Row 5: (2 sc, inv dec) ×4 (12)
Row 6: 12 sc (12)
Row 7: 6 inv dec (6)
Rows 8–19: 6 sc each row (12 rows total) (6)
Row 20: 3 sc, 3 inc (9)
Row 21: 3 sc, 3 inv dec (6)
Rows 22–31: 6 sc each row (10 rows total) (6)
Note: Same as the right arm — pause after row 5 to insert the wire frame, and stuff lightly.
Finishing: Cut yarn, fasten off.
🧶 Scrap Check: The arms are actually one of the more forgiving parts here — a small amount of pink held from a previous project is more than enough for both, since each arm is a narrow tube.
Toes (for legs, make 6)
Yarn: pink (or your chosen accent color). Starting method: magic ring.
Row 1: 6 in mr (6)
Row 2: 6 inc (12)
Rows 3–4: 12 sc (12)
Row 5: (2 sc, inv dec) ×3 (9)
Row 6: (1 sc, inv dec) ×3 (6)
Rows 7–8: 6 sc (6)
Note: Make 3 toes per leg. Cut the yarn and weave in the end on 2 of the 3 toes. Leave the yarn attached on the 3rd toe to continue into the leg.
Finishing: Cut yarn and weave in on two pieces.
Legs (make 2)
Yarn: pink (or your chosen accent color). Starting method: continue directly from the toes.
Row 9: 3 sc along 3rd toe, 3 sc along 2nd toe, 6 sc along 1st, 3 sc along 2nd, 3 sc along 3rd toe (18)
Row 10: 18 sc (18)
Row 11: (4 sc, inv dec) ×3 (15)
Row 12: 15 sc (15)
Row 13: (3 sc, inv dec) ×3 (12)
Rows 14–15: 12 sc (12)
Row 16: 6 sl st, 6 dc (12)
Row 17: 6 sl st, 6 hdc (12)
Row 18: 12 sc (12)
Row 19: (2 sc, inv dec) ×3 (9)
Rows 20–22: 9 sc (9)
Row 23: (1 sc, inv dec) ×3 (6)
Rows 24–29: 6 sc each row (6 rows total) (6)
Row 30: 3 inc, 3 sc (9)
Row 31: 9 sc (9)
Row 32: 3 inv dec, 3 sc (6)
Rows 33–37: 6 sc each row (5 rows total) (6)
Row 38: (1 sc, inc) ×3 (9)
Note: In row 9, place a stitch marker — it will run along the side of the leg as a placement guide. After row 11, pause to prep and insert the wire frame, then stuff loosely.
Finishing: On the right leg, cut yarn and weave in the end. On the left leg, keep the yarn attached — you’ll transition straight into the body from here.
Body (make 1)
Yarn: main color (white/light blue). Starting method: continue directly from the left leg.
Row 39: 5 sc along left leg, ch 20, 9 sc along right leg, ch 10 (total not stated in original pattern)
Row 40: 10 sc along chain, 9 sc along left leg (watch leg positioning), 20 sc along chain, 9 sc along right leg, 10 sc along chain (58)
Row 41: 14 sc, inc, 28 sc, inc, 14 sc (60)
Row 42: (9 sc, inc) ×6 (66)
Row 43: 5 sc, inc, (10 sc, inc) ×5, 5 sc (72)
Row 44: (11 sc, inc) ×6 (78)
Row 45: 6 sc, inc, (12 sc, inc) ×5, 6 sc (84)
Row 46: 84 sc (84)
Row 47: (13 sc, inc) ×6 (90)
Row 48: 90 sc (90)
Row 49: 7 sc, inc, (14 sc, inc) ×5, 7 sc (96)
Row 50: (15 sc, inc) ×6 (102)
Row 51: 8 sc, inc, (16 sc, inc) ×5, 8 sc (108)
Row 52: (17 sc, inc) ×6 (114)
Rows 53–73: 114 sc each round (21 rounds total) (114)
Row 74: 26 sc, 3 sc together with left arm stitches (check arm positioning), 56 sc, 3 sc together with right arm stitches, 26 sc (114)
Row 75: 26 sc, 3 sc along remaining left arm stitches, 56 sc, 3 sc along remaining right arm stitches, 26 sc (114)
Row 76: (17 sc, inv dec) ×6 (108)
Rows 77–78: 108 sc (108)
Row 79: (16 sc, inv dec) ×6 (102)
Rows 80–90: 102 sc each round (11 rounds total) (102)
Row 91: (15 sc, inv dec) ×6 (96)
Row 92: 7 sc, inv dec, (14 sc, inv dec) ×5, 7 sc (90)
Row 93: (13 sc, inv dec) ×6 (84)
Row 94: 6 sc, inv dec, (12 sc, inv dec) ×5, 6 sc (78)
Row 95: (11 sc, inv dec) ×6 (72)
Row 96: 5 sc, inv dec, (10 sc, inv dec) ×5, 5 sc (66)
Row 97: (9 sc, inv dec) ×6 (60)
Row 98: 4 sc, inv dec, (8 sc, inv dec) ×5, 4 sc (54)
Row 99: (7 sc, inv dec) ×6 (48)
Row 100: 3 sc, inv dec, (6 sc, inv dec) ×5, 3 sc (42)
Row 101: (5 sc, inv dec) ×6 (36)
Row 102: 2 sc, inv dec, (4 sc, inv dec) ×5, 2 sc (30)
Row 103: (3 sc, inv dec) ×6 (24)
Row 104: 1 sc, inv dec, (2 sc, inv dec) ×5, 1 sc (18)
Row 105: (1 sc, inv dec) ×6 (12)
Row 106: 6 inv dec (6)
Note: In row 39, place a marker along the back-center — check symmetry constantly as you work the body, and work a shift stitch if you notice the sides drifting out of alignment. Between rows 75 and 76, connect the arm wire frames to the leg wire coming up through the body, and wrap every connection point with the fabric adhesive tape. Stuff tightly as you go — you won’t be able to reach in and stuff after the body is closed.
Finishing: Cut yarn, fasten off.
Lip (make 1)
Yarn: main color (white/light blue). Starting method: foundation chain.
Row 1: Ch 8. Starting from the 2nd chain from the hook, 7 sc (7)
Finishing: Fasten off, leaving a tail for sewing.
Zhuzhik the Caterpillar (make 1)
Yarn: green (or any leftover green from your stash — this piece is genuinely scrap-friendly, even if the rest of the pattern isn’t). Starting method: magic ring.
Row 1: 6 in mr (6)
Row 2: 6 inc (12)
Row 3: (1 sc, inc) ×6 (18)
Row 4: (2 sc, inc) ×6 (24)
Row 5: (3 sc, inc) ×6 (30)
Row 6: (4 sc, inc) ×6 (36)
Row 7: (5 sc, inc) ×6 (42)
Rows 8–13: 42 sc each round (6 rounds total) (42)
Row 14: (5 sc, inv dec) ×6 (36)
Row 15: (4 sc, inv dec) ×6 (30)
Row 16: (4 sc, inc) ×6 (36)
Rows 17–22: 36 sc each round (6 rounds total) (36)
Row 23: (4 sc, inv dec) ×6 (30)
Row 24: (3 sc, inv dec) ×6 (24)
Row 25: (3 sc, inc) ×6 (30)
Rows 26–31: 30 sc each round (5 rounds total) (30)
Row 32: (3 sc, inv dec) ×6 (24)
Row 33: (2 sc, inv dec) ×6 (18)
Row 34: (2 sc, inc) ×6 (24)
Rows 35–38: 24 sc each round (4 rounds total) (24)
Row 39: (2 sc, inv dec) ×6 (18)
Rows 40–41: 18 sc (18)
Row 42: (1 sc, inv dec) ×6 (12)
Rows 43–44: 12 sc (12)
Row 45: 6 inv dec (6)
Note: Insert the wire frame while crocheting the body, and stuff quite firmly as you go — this piece needs to hold a curled or wiggly pose.
Finishing: Finish crocheting, cut yarn, fasten off. Finish with needle sculpting to define the segments.
Assembly
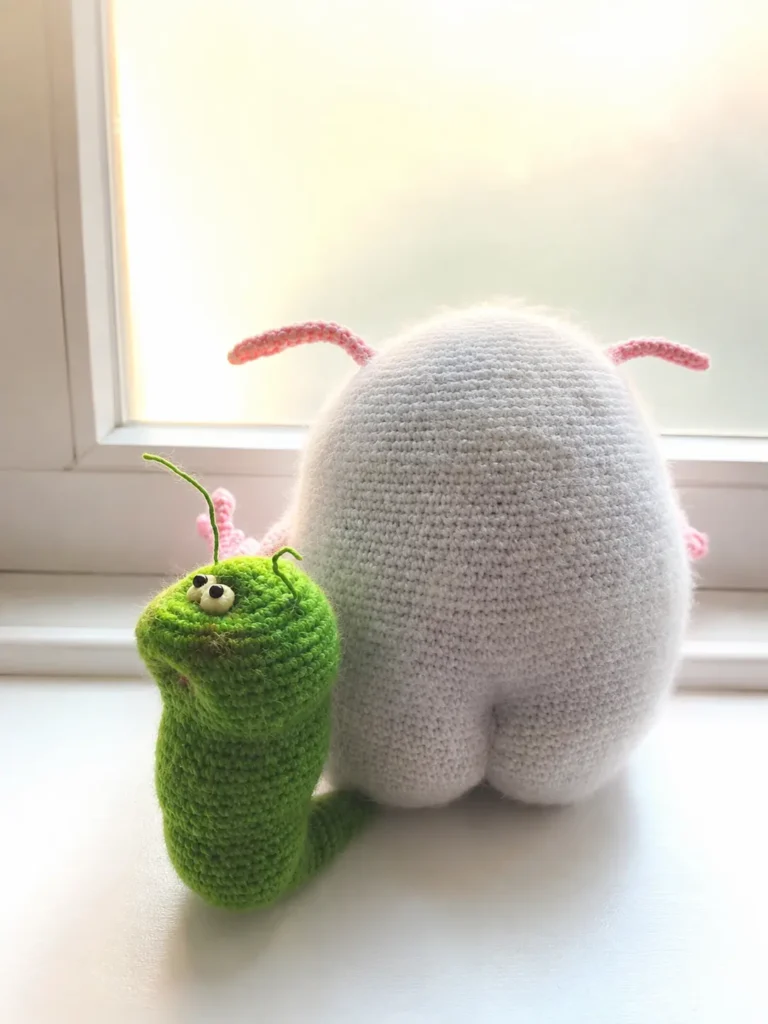
- Count down 12 rows from the crown of Pukhlya’s head and crochet the antennas from that point: pick up 6 sc along the head, then work 9 rounds of 6 sc for each antenna.
- Sew the lip piece onto the face, positioning it below where the eyes will go.
- Glue or sew the eyes, nose, and teeth in place.
- Count down 22 rows from the crown and mark that row for eye placement.
- Mark row 31 (counting from the crown) as the mouth level.
- Use needle sculpting to shape and refine the face and body contours.
- Sculpt the bottom of the body with needle sculpting so the piece can sit upright.
- Tint the piece with soft art pastels and brush out for a soft, blended color finish, if desired.
- For Zhuzhik: finish with needle sculpting to define the body segments, then glue or sew on the eyes.
- Make Zhuzhik’s antennas — these can be worked in yarn or formed from wire, to taste.
💡 Stretch It Further: Once you’ve built one wire-armature amigurumi, the skill transfers to any posable doll pattern — the technique of prepping the frame, wrapping joins with tape, and stuffing around it as you go is the same no matter what creature you’re building. If Pukhlya has you hooked on advanced builds, our free Vesper the Forest Dragon pattern is a good next step in the same spirit — big, characterful, and worth the time investment. And if you want a much smaller wire project to practice the technique first, a gnome amigurumi pattern is a gentler way to get comfortable with armature work before committing to something this size.
Mia’s Take
I’ll be honest — this isn’t the kind of project I usually reach for. I like scraps and quick wins, and this is neither. But there’s real value in a pattern that makes you slow down: wire armature, needle sculpting, pastel tinting — these are skills that carry over into everything else you make afterward, and once you’ve built Pukhlya, smaller projects start to feel almost effortless by comparison. Green scraps for Zhuzhik are the one part of this build that’s genuinely stash-friendly, so if you’re not ready to commit to the full monster, start there and work your way up.
FAQ
Is this Pukhlya and Zhuzhik amigurumi pattern suitable for beginners?
No, this is an advanced project. While the stitches are basic, it involves wire armature, needle sculpting, and polymer clay detailing.
Can I give this finished amigurumi to a young child?
It is not recommended for children. Due to the internal copper wire skeleton, glued parts, and pastels, it is best suited as a display art doll.
What yarn is best for the Pukhlya amigurumi?
A lace or fingering-weight mohair blend held double works perfectly to give the monster its signature soft, fuzzy texture.