A Crochet Elf Amigurumi Free Pattern That Actually Uses Up Your Leftover DK Cotton
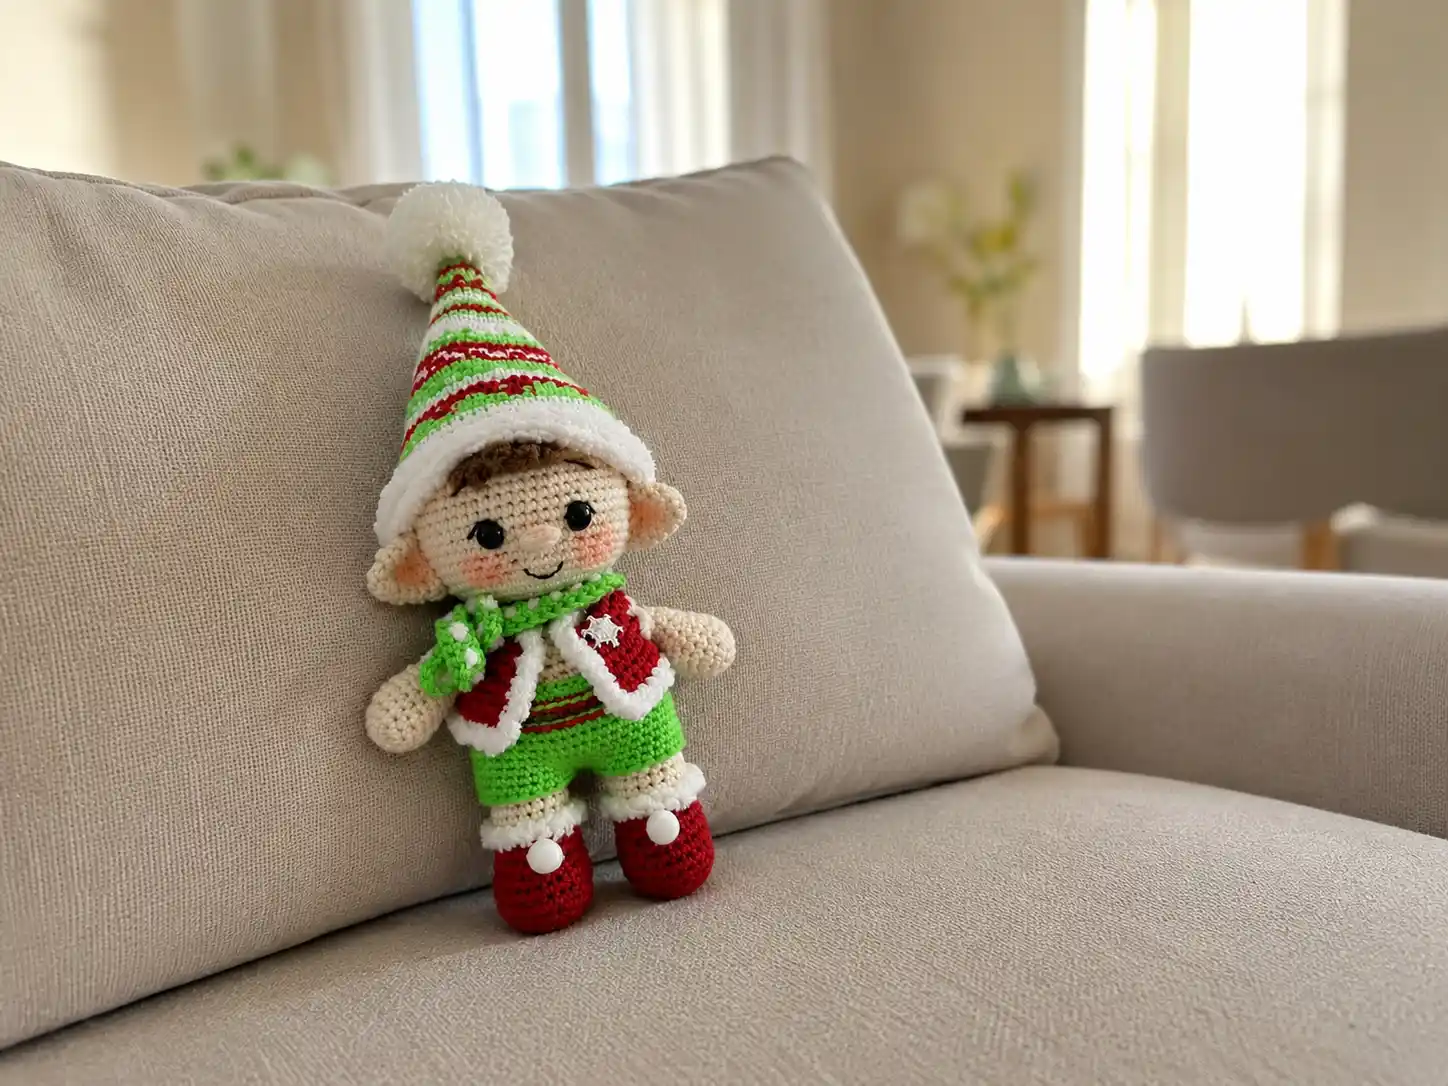
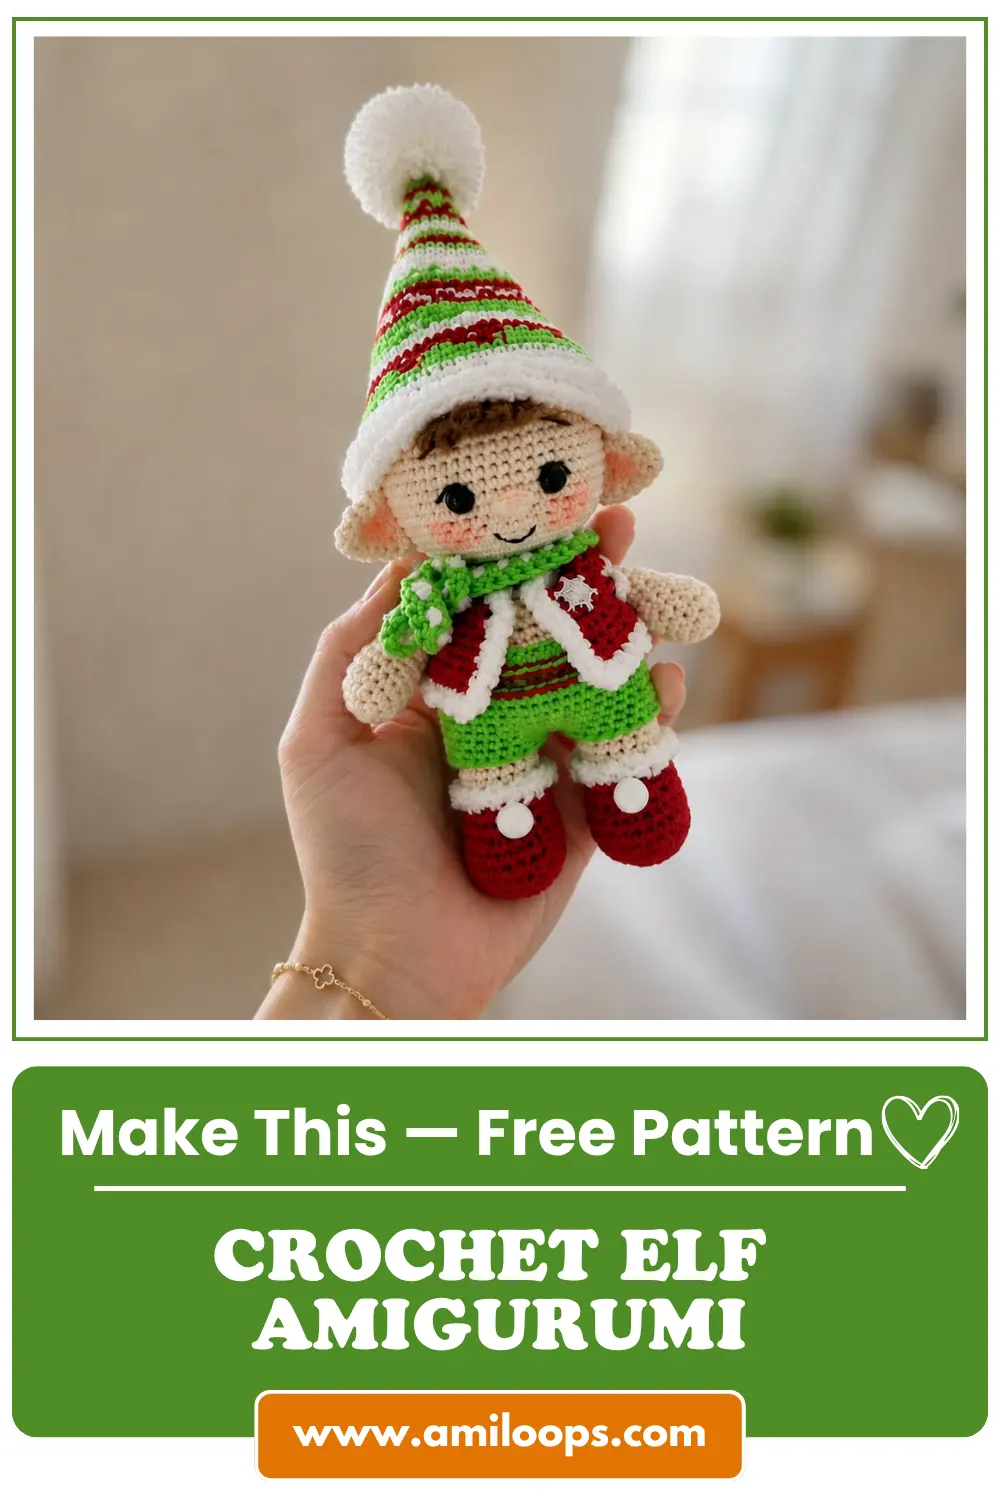
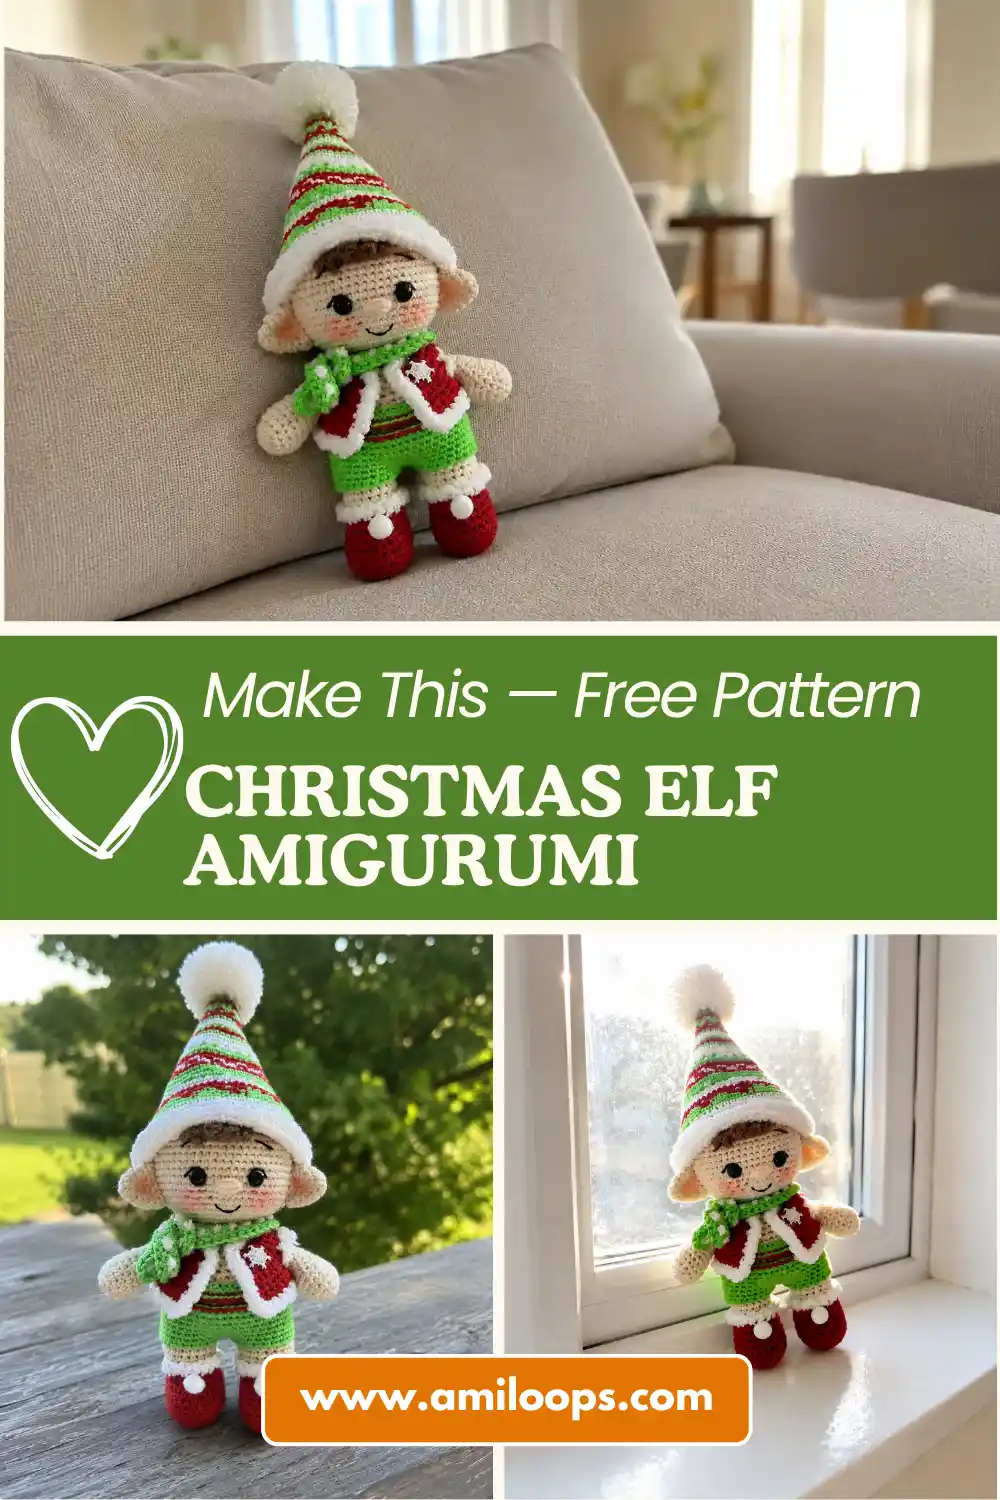
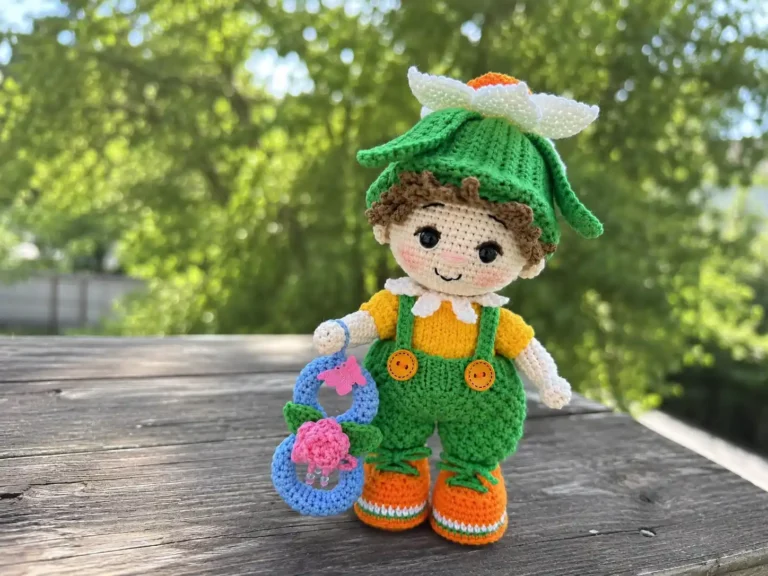
This crochet elf amigurumi free pattern is bigger than my usual quick scrap-bin wins, and I want to be upfront about that: it’s a multi-part build with a jacket, pants, hat, and scarf, so plan on a few sessions instead of one evening. What makes it worth the time is exactly what makes it Mia-friendly — nearly every part uses a small amount of a different leftover DK cotton color, so it’s one of the best “clean out the odds-and-ends bin” projects I’ve made all year. Grab your scraps and a small hook. Let’s get started.
🧶 What You’ll Need
- 💰 Yarn Needed: small amounts of DK-weight (3) cotton in 4-5 colors — exact yardage isn’t specified in the original pattern, so budget roughly a partial skein per color and expect leftovers
- 🎨 Colors: red, green, a cream or skin-tone shade for the body, white, a fluffy accent yarn for trim, and a hair color of your choice (or similar from your stash)
- 🪝 Hook: mainly 2.0mm (US steel 4); the ears use a smaller 1.9mm hook, which has no direct US letter equivalent
- ⏱️ Time: several hours across multiple sessions — this is a weekend project, not a quick one-sitting make
- 📏 Finished Size: not specified in the original pattern; expect a small standing amigurumi, roughly hand-sized once assembled
- 💡 Difficulty: Intermediate — multiple parts, several color changes, sewing, and simple embroidery
- 🎁 Great For: holiday gifts, shelf displays, and using up leftover DK cotton in several different colors
Materials for This Crochet Elf Amigurumi Free Pattern
You don’t need full skeins of anything here — this is a “raid your stash” project by nature, since the original pattern is already built from several different yarn lines and small quantities.
- Red DK cotton (originally Gazzal Baby Cotton) — for the boots and jacket. A US alternative like Drops Safran or Paintbox Cotton DK works well. Any leftover red DK cotton in your stash is fair game.
- Cream or skin-tone DK cotton (originally YarnArt Jeans) — the main color for the body, head, arms, and ears. Drops Muskat or Paintbox Cotton DK are close US substitutes.
- Green DK cotton (originally YarnArt Jeans) — for the hat and pants.
- A second red (originally YarnArt Jeans, a slightly different shade from the boot/jacket red) — used as an accent on the hat and as trim on the pants. If you only have one red on hand, that’s a fine simplification — just note the color change won’t be as visible.
- White DK cotton — for hat accents.
- A fluffy or textured accent yarn (originally Alize Softy) — used for trim on the boots, hat, and jacket. Any fuzzy yarn you have in a small amount works here; this is a great use for a lonely leftover ball of eyelash or bouclé-style yarn.
- Yarn for the hair — any color you like, worked in short chains.
- Small amount of brown embroidery floss — for freckles.
- Stuffing — polyester fiberfill.
- Screw safety eyes or bead eyes, plus a small button for the jacket.
- Hooks: 2.0mm (US steel 4) for most of the piece; 1.9mm for the ears (no direct US letter equivalent — see the note below).
🧶 Scrap Check: Because this pattern is already built from four or five small amounts of different yarn, it’s one of the most stash-friendly multi-part patterns I’ve worked. If you’re short on an exact match, substitute any DK cotton in a similar shade — the color-blocking is what sells the look, not brand consistency.
Abbreviations Used in This Crochet Elf Pattern
| Abbreviation | Meaning (US Standard) |
|---|---|
| sc | single crochet |
| inc | increase (2 sc in the same stitch) |
| dec | invisible decrease |
| mr | magic ring |
| ch | chain |
| BLO / FLO | back loop only / front loop only |
| sl st | slip stitch |
| dc | double crochet |
Smart Crafter Tips for This Elf Amigurumi Pattern
Here’s a trick that saves you a headache: every “dec” in this pattern means an invisible decrease, worked through the front loops only of the next two stitches. It keeps the elf’s shaping smooth with no visible gap — worth the extra two seconds per stitch.
This pattern starts from a magic ring for nearly every part, so if you’re not confident with that start yet, our tutorial covers it in under two minutes. It’s the one technique you’ll use the most here.
The hat alone switches colors more than a dozen times. If you haven’t worked a clean color change before, it’s worth a quick read before you start the hat — it’ll save you from messy jog lines on every round.
The 1.9mm hook called for on the ears doesn’t have a clean US letter match — you can find the closest metric equivalents on the Craft Yarn Council hook size chart, or simply use your smallest available steel hook and go up or down slightly on tension to compensate.
Crochet Elf Amigurumi Free Pattern
Legs (×2)
Yarn: Red DK cotton, switching to your main cream/skin-tone color partway through.
Start: Magic ring.
Row 1: 6 sc in mr (6)
Row 2: 6 inc (12)
Row 3: (1 sc, inc)*6 (18)
Row 4: 1 sc, inc, (2 sc, inc)*5, 1 sc (24)
Row 5: in BLO, 24 sc (24)
Rows 6-8: through both loops, 24 sc (3 rows) (24)
Row 9: 8 sc, 4 dec, 8 sc (20)
Row 10: 8 sc, 2 dec, 8 sc (18)
Row 11: 18 sc (18)
Row 12: in BLO, 18 sc — switch to your main color here (18)
Rows 13-16: 18 sc (4 rows) (18)
After Row 11, change to your main body color. On the first leg only: fasten off, cut yarn, weave in ends, and stuff the piece. Join the fluffy accent yarn into the front loops left open in Row 5 and single crochet around the edge of the boot. Crochet the second leg the same way, but do not cut the yarn — you’ll continue straight into the body.
Finishing the legs: Crochet 6 sc along the leg, then chain 2. Place the two legs together and find the point where they’ll stand straight, then join to the first leg: 18 sc along the first leg, 2 sc along the chain, 18 sc along the second leg, 2 sc along the opposite side of the chain. This gives you the 40 stitches you’ll need to start the body.
Body and Head
Yarn: Main cream/skin-tone color.
Start: Continue directly from the joined legs.
Row 1: 40 sc (40)
Row 2: 7 sc, inc, 18 sc, inc, 13 sc (42)
Row 3: 3 sc, inc, (6 sc, inc)*5, 3 sc (48)
Row 4: (11 sc, inc)*4 (52)
Row 5: 52 sc (52)
Row 6: (11 sc, dec)*4 (48)
Row 7: (dec, 10 sc)*4 (44)
Row 8: (9 sc, dec)*4 (40)
Row 9: (dec, 8 sc)*4 (36)
Row 10: (7 sc, dec)*4 (32)
Row 11: (dec, 6 sc)*4 (28)
Row 12: (5 sc, dec)*4 (24)
Rows 13-14: 24 sc (2 rows) (24)
Row 15: (dec, 4 sc)*4 (20)
Row 16: (2 sc, dec)*5 (15)
Row 17: 15 sc (15)
Add stuffing after Row 14. Starting at Row 17, you’ll continue directly into the head — no break needed.
Row 18: 15 inc (30)
Row 19: 2 sc, inc, (4 sc, inc)*5, 2 sc (36)
Row 20: (5 sc, inc)*6 (42)
Row 21: 3 sc, inc, (6 sc, inc)*5, 3 sc (48)
Row 22: (7 sc, inc)*6 (54)
Row 23: 4 sc, inc, (8 sc, inc)*5, 4 sc (60)
Row 24: (9 sc, inc)*6 (66)
Rows 25-34: 66 sc (10 rows) (66)
Row 35: (9 sc, dec)*6 (60)
Row 36: 4 sc, dec, (8 sc, dec)*5, 4 sc (54)
Row 37: (7 sc, dec)*6 (48)
Row 38: 3 sc, dec, (6 sc, dec)*5, 3 sc (42)
Row 39: (5 sc, dec)*6 (36)
Row 40: 2 sc, dec, (4 sc, dec)*5, 2 sc (30)
Row 41: (3 sc, dec)*6 (24)
Row 42: 1 sc, dec, (2 sc, dec)*5, 1 sc (18)
Row 43: (1 sc, dec)*6 (12)
Row 44: 6 dec (6)
Add stuffing again after Rows 39 and 43, firming up the neck and top of the head as you go. Slip stitch into the next stitch to close the opening, fasten off, cut the yarn, and weave in the end.
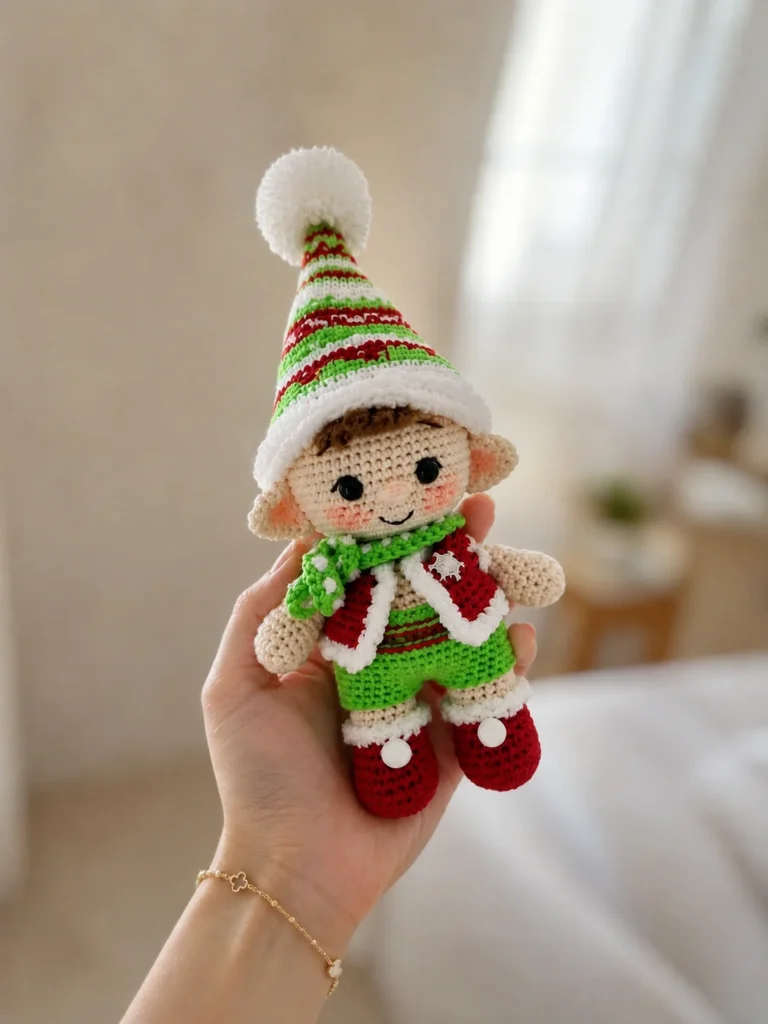
Hat
Yarn: Green, red, and white, changing frequently — plus white for the hook noted below.
Start: Magic ring.
Row 1: 6 sc in mr [green] (6)
Row 2: 6 inc [green] (12)
Row 3: 12 sc [green] (12)
Row 4: (3 sc, inc)*3 [red] (15)
Row 5: (1 sc [red], 1 sc [green])*7, 1 sc [red] (15)
Row 6: (4 sc, inc)*3 [green] (18)
Row 7: (1 sc [green], 1 sc [red])*9 (18)
Row 8: (5 sc, inc)*3 [red] (21)
Row 9: 21 sc [green] (21)
Row 10: (6 sc, inc)*3 [white] (24)
Row 11: 24 sc [green] (24)
Row 12: (3 sc, inc)*6 [red] (30)
Row 13: 30 sc [green] (30)
Row 14: 30 sc [white] (30)
Row 15: (4 sc, inc)*6 [white] (36)
Row 16: (1 sc [white], 1 sc [green])*18 (36)
Row 17: 36 sc [green] (36)
Row 18: (5 sc, inc)*6 [red] (42)
Row 19: (2 sc [red], 2 sc [white])*10, 2 sc [red] (42)
Row 20: (2 sc [white], 2 sc [red])*10, 2 sc [white] (42)
Row 21: (6 sc, inc)*6 [red] (48)
Rows 22-23: 48 sc [green] (2 rows) (48)
Row 24: (3 sc [green], 1 sc [white])*12 (48)
Row 25: (7 sc, inc)*6 [white] (54)
Row 26: 54 sc [red] (54)
Row 27: (2 sc [red], 1 sc [green])*18 (54)
Row 28: 1 sc [green], (3 sc [red], 3 sc [green])*8, 3 sc [red], 2 sc [green] (54)
Row 29: 3 sc [green], 1 sc [red], (5 sc [green], 1 sc [red])*8, 2 sc [green] (54)
Row 30: (8 sc, inc)*6 [green] (60)
Row 31: 60 sc [white] (60)
Row 32: (9 sc, inc)*6 [white] (66)
Row 33: 66 sc [red] (66)
Row 34: 66 sc [green] (66)
Row 35: in BLO, 66 sc [white] (66)
Finishing: Crochet around the hat’s edge with the fluffy accent yarn, and again into the front loops left open in Row 35. Fasten off all threads and weave in ends. Make a small pompom and sew it onto the top of the hat.
Bangs / Hair
Yarn: Your hair color of choice.
Start: Join yarn to the middle of the hat, at the front.
Row 1: 3 ch, 2 sc in the second ch from hook, sl st in the next st (3)
Row 2: 4 ch, 3 sc in the second ch from hook, sl st in the next st (4)
Rows 3-4: 5 ch, 4 sc in the second ch from hook, sl st in the next st (worked twice) (5 per strand)
Row 5: 4 ch, 3 sc in the second ch from hook, sl st in the next st (4)
Row 6: 3 ch, 2 sc in the second ch from hook, sl st in the next st (3)
Fasten off and cut the yarn. This creates a little fringe of bangs peeking out from under the hat.
Arms (×2)
Yarn: Main cream/skin-tone color.
Start: Magic ring.
Row 1: 6 sc in mr (6)
Row 2: 6 inc (12)
Row 3: (1 sc, inc)*6 (18)
Rows 4-6: 18 sc (3 rows) (18)
Row 7: (1 sc, dec)*6 (12)
Rows 8-10: 12 sc (3 rows) (12)
Rows 11-12: 2 dec, 3 sc, 2 inc, 3 sc (worked twice) (12)
Rows 13-16: 12 sc (4 rows) (12)
Row 17: 6 dec (6)
Lightly stuff just the fist section after Row 10, so it fills out without making the arm stick straight out. Fasten off, cut yarn, weave in ends, and repeat for the second arm.
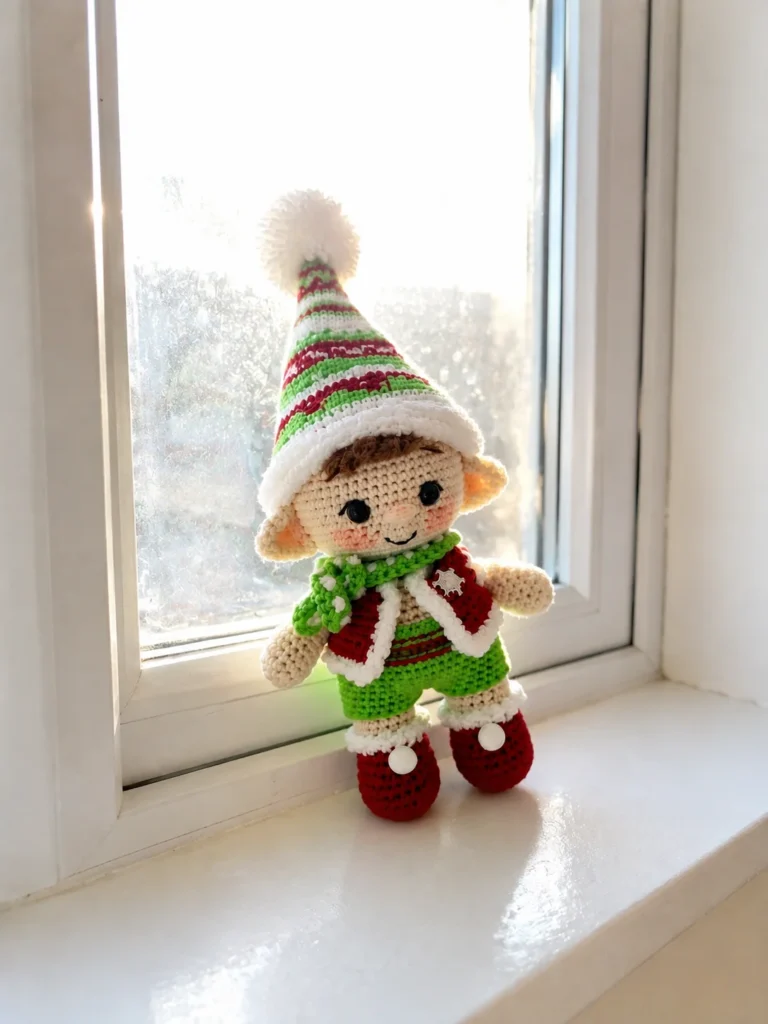
Ears (×2)
Yarn: Main cream/skin-tone color.
Hook: 1.9mm.
Start: Magic ring.
Row 1: 6 sc in mr (6)
Row 2: 3 inc, 3 sc (9)
Row 3: 2 sc, 3 inc, 4 sc (12)
Row 4: 12 sc (12)
Row 5: 4 sc, 3 inc, 3 sc, dec (14)
Row 6: 14 sc (14)
Fasten off, leaving a yarn tail for sewing, and cut the yarn.
Jacket
Yarn: Red DK cotton.
Hook: 2.0mm.
Start: Chain 27, starting from the second chain from the hook.
Rows 1-2: 26 sc, ch 1 turning chain, turn (2 rows) (26)
Row 3: (2 sc, inc)*4, 2 sc, (inc, 2 sc)*4, ch 1 turning chain, turn (34)
Row 4: (3 sc, inc)*4, 2 sc, (inc, 3 sc)*4, ch 1 turning chain, turn (42)
Row 5: (3 sc, inc)*5, 2 sc, (inc, 3 sc)*5, ch 1 turning chain, turn (52)
Row 6: 8 sc, 5 ch, skip 9 sc (sleeve), 18 sc, 5 ch, skip 9 sc (sleeve), 8 sc, ch 1 turning chain, turn (44)
Rows 7-8: 44 sc, ch 1 turning chain, turn (2 rows) (44)
Row 9: 44 sc (44)
Finishing: Join the fluffy accent yarn and single crochet around the entire jacket, working 2 sc into each corner. Join the fluffy yarn again and crochet around each sleeve opening.
Pants
Yarn: Green DK cotton, with a red trim.
Hook: 2.0mm.
Start: Chain 46, plus 1 to join into a ring. Worked in continuous rounds.
Rounds 1-3: in BLO, 46 sc (3 rounds) (46)
Rounds 4-8: 46 sc (5 rounds) (46)
Divide the stitches into two groups of 23 and join the yarn on the opposite side to shape each pant leg.
Leg 1: 23 sc, then finish with a slip stitch, fasten off, and cut the yarn.
Leg 2: Join yarn and repeat 23 sc, then finish the same way.
Join the red trim color into the front loops left open in Round 2 and work a round of slip stitches, then repeat in the front loops left open in Round 3.
Scarf
Yarn: Green DK cotton, with a fluffy accent trim.
Hook: 2.0mm.
Start: Chain 100.
Row 1: starting from the 3rd chain from the hook, dc in each chain to the end (98)
Fasten off and cut the yarn. With the fluffy accent yarn, work down the middle of the scarf: (1 ch, skip 1 dc, sl st) repeated to the end of the row. This adds texture and makes the scarf reversible.
Assembly
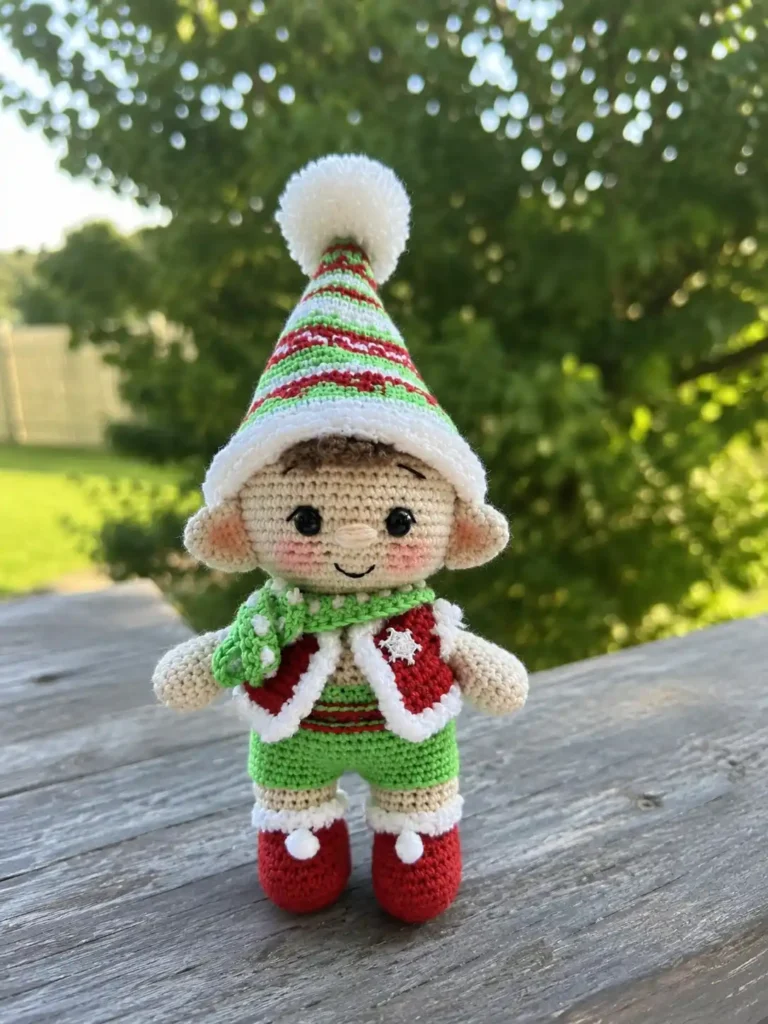
- Mark where the arms should sit on the body, then sew them on securely using a thread joint.
- Sew the ears onto the head using the tails left for sewing. If you haven’t sewn amigurumi parts before, our guide to sewing amigurumi parts together covers a clean, invisible stitch.
- Sew the button onto the front of the jacket.
- The legs are already joined to the body during crocheting, so there’s no separate step for them.
Decoration
Before placing the eyes, hold them up to the head and step down slightly from the very top to find a natural position — the distance between the two eyes should be about 5-6 single crochet stitches. If this is your first time working with plastic eyes on a toy, our safety eye tutorial walks through spacing and placement.
- Insert screw safety eyes or sew on bead eyes at your marked spot.
- Embroider a small nose using the body’s main color yarn.
- Embroider a simple mouth, plus tiny arrow shapes above the eyes for eyebrows.
- Embroider freckles using the brown embroidery floss.
- Add a little blush to the cheeks, and a touch inside each ear.
💡 Stretch It Further: Once you’ve made one elf, the outfit is the easiest part to remix — swap the green pants and hat for burgundy and cream for a “winter cottage” look, or keep the green but swap the red trim for gold for a slightly more formal finish. Since every piece here already uses a small amount of yarn, a second or third elf in different colorways is a genuinely low-cost way to build a little shelf collection or a set of holiday gifts, without buying anything new.
Mia’s Take
This one took longer than my usual scrap projects, and I’m not going to pretend otherwise — but it’s also one of the best uses I’ve found for a drawer full of “not quite enough for anything” DK cotton. Four or five small leftover colors, one small hook, and a few sessions of steady progress, and you end up with a fully dressed little elf that would’ve cost real money at a craft fair. If you’ve got the odds and ends sitting around, this is the project that finally uses them.
FAQ
What yarn is best for this crochet elf amigurumi free pattern?
This pattern is designed for DK-weight cotton yarn. It is a scrap-friendly project, so you can mix and match small amounts of leftover cotton from brands like YarnArt Jeans, Drops Safran, or Paintbox Cotton DK.
Can beginners make this crochet elf amigurumi?
This pattern is best suited for intermediate crocheters. It involves multiple parts, frequent color changes, sewing, and simple embroidery, but ambitious beginners can complete it by taking it one step at a time.
What hook size do I need for this pattern?
You will primarily need a 2.0mm (US steel 4) hook for most of the body and clothing, and a slightly smaller 1.9mm hook specifically for crocheting the ears to keep the stitches tight.