This Crochet Bunny and Duck Easter Eggs Pattern Is Almost Too Cute
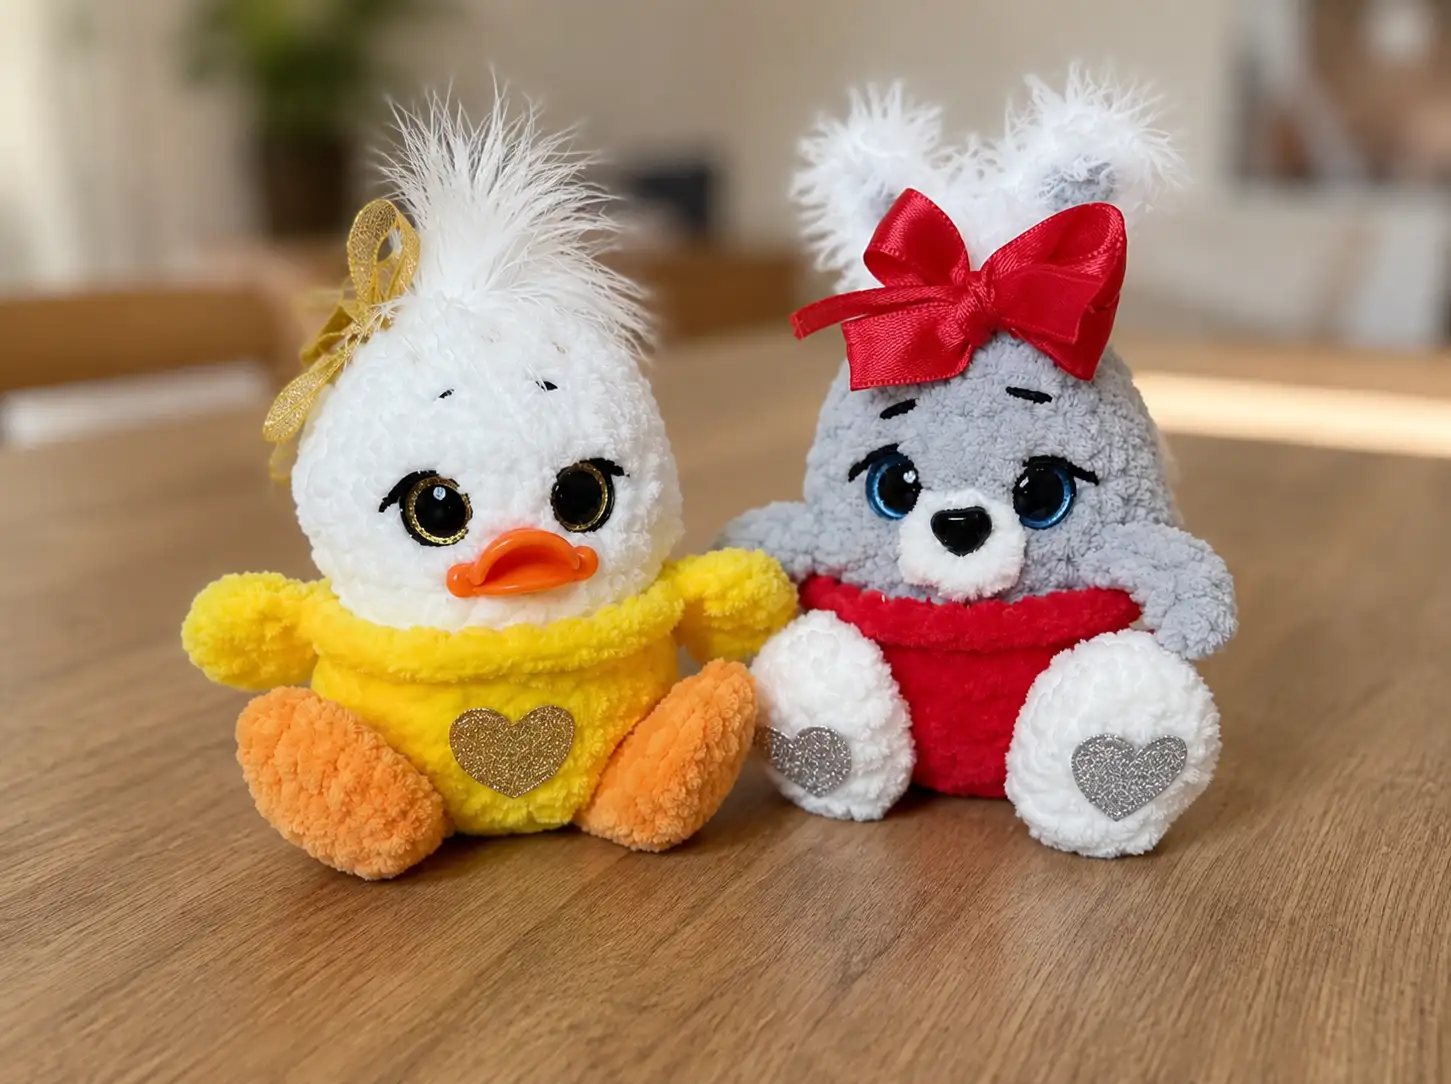
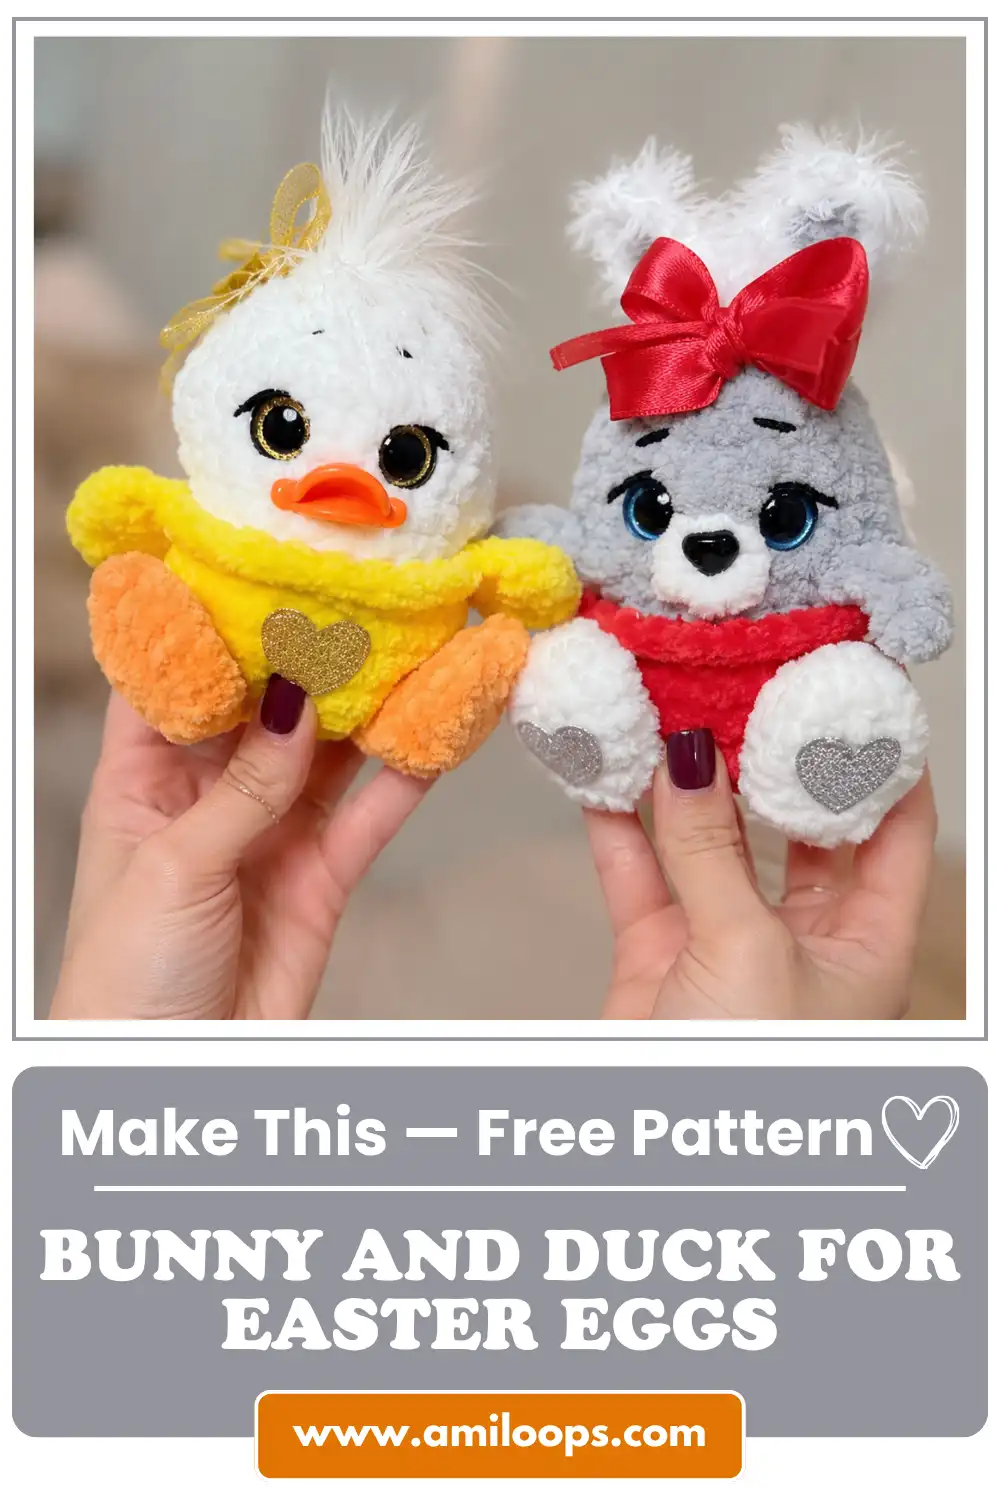
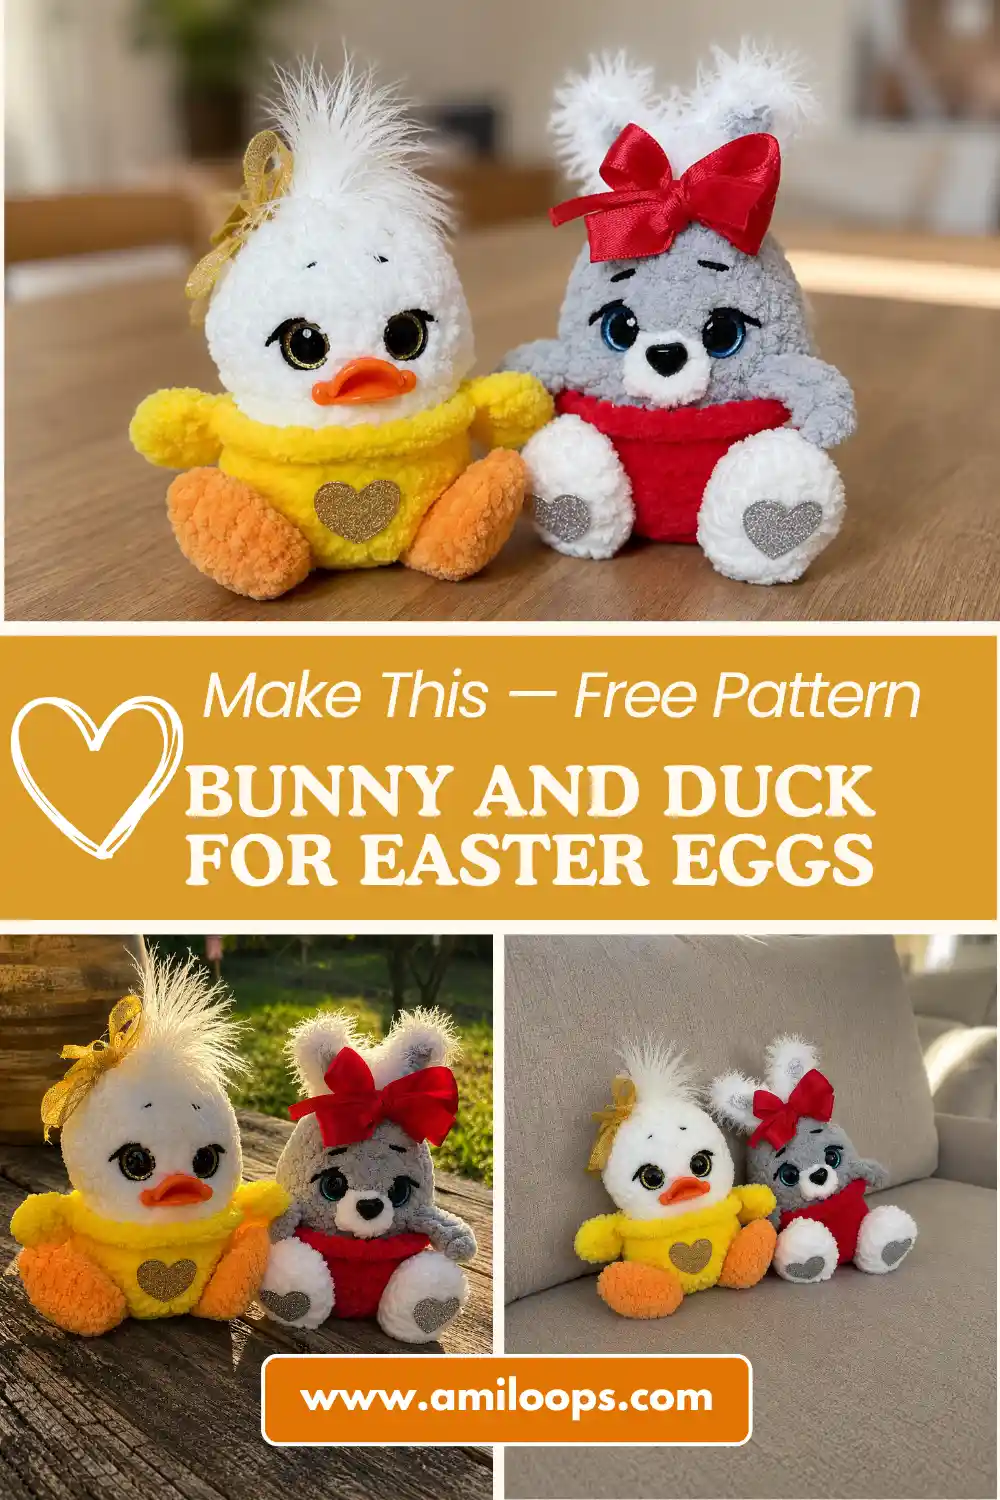
This crochet bunny and duck easter eggs free pattern turns two simple egg shapes into the softest little friends you’ve ever tucked a treat inside. The bunny comes in warm gray with fluffy white ears, the duck in sunny yellow with a tiny orange beak, and both start life as a cherry-red or golden-yellow “shell” before the animal colors take over. Let’s make them together.
🩷 Pattern Highlights
- Cuteness Rating: 🩷🩷🩷🩷🩷
- Finished Size: 3.5 in (9 cm)
- Difficulty: Beginner/Intermediate
- Hook Size: 4.0mm (US G/6)
- Yarn Palette: cherry red & soft dove gray (Bunny), buttery yellow & cloud white (Duck), plus fluffy white faux fur trim
- Key Detail: glossy 12mm safety eyes, a fuzzy tail or tuft, and a little pocket inside that holds a real egg
- Estimated Time: 4-6 hours total, about 2-3 hours per toy (estimated)
One quick heads-up before you dive in — these two aren’t stuffed solid the way most of our amigurumi are. The egg-shaped body is built to hold an actual egg inside, so only the little tails get a puff of fiberfill. Think of it more like a soft egg cozy with the sweetest possible face.
What You’ll Need for This Crochet Bunny and Duck Easter Eggs Pattern
Both toys use the same yarn family, just in different colorways, so you can make one of each from a single supply run.
| For | Material | Notes |
|---|---|---|
| Both — egg base & body | Plush/chenille-style yarn, Bulky (5) weight, in cherry red, buttery yellow, cloud white, soft dove gray, and marigold orange | Look for a bulky (5) chenille or velvet-style yarn — Bernat Baby Velvet and Lion Brand Comfy are easy finds at Joann or Michaels |
| Bunny ears & tail edging | White faux fur yarn | Something like Lion Brand Fun Fur or Red Heart Boutique Fur works — check your local craft store’s specialty yarn wall |
| Eye/nose details | Black DK/Light Worsted (3) yarn | Drops Muskat or Paintbox Cotton DK are lovely US-friendly swaps |
| Duck’s fuzzy tuft | White worsted/DK yarn | Any smooth white worsted from your stash works beautifully here |
| Hook | 4.0mm (US G/6) | — |
| Safety eyes | 12mm, colored | Shared by both toys — the glossy shine is what really brings them to life |
| Safety nose | 10mm, black | For the Bunny’s muzzle |
| Duck beak | 25mm plastic beak (optional) — or crochet the beak below | The pattern includes a fully written crocheted beak; the plastic beak is a store-bought alternative if you’d rather skip that step |
| Stuffing | Fiberfill, a small amount | Only needed for the tails |
| Ribbon | Satin, 0.5–0.6 in (1.2–1.5 cm) wide, 14–16 in (35–40 cm) long | For the bow that holds the egg-shaped pocket closed |
| Other | Strong white sewing thread, wide-eye tapestry needle, stitch markers, scissors, lighter, strong glue (such as B-7000) | The lighter is for gently melting and flattening safety eye/nose posts on the inside |
Abbreviations Used in This Pattern
| Abbreviation | Meaning |
|---|---|
| ch | chain |
| mr | magic ring |
| sl st | slip stitch |
| sc | single crochet |
| hdc | half double crochet |
| dc | double crochet |
| inc | increase |
| dc-inc | double crochet increase (2 dc worked into one stitch) |
| inv dec | invisible decrease |
| FLO | front loop only |
| BLO | back loop only |
Wherever you see something in parentheses followed by ×n (like “(1 sc, inc)×3”), repeat that instruction the number of times listed. The bold number at the end of each row is your total stitch count for that row — a lifesaver for staying on track.
Before You Begin — A Few Detail Tips
Both bodies start the exact same way, just in different colors, so getting comfortable with the shared base first makes the rest of this pattern feel much less overwhelming.
Every closed-off round in this pattern begins with a magic ring, so if that’s still new to you, our magic ring tutorial will get you a perfectly snug center every time.
The decreases in this pattern are worked as invisible decreases to keep the shaping smooth and gap-free — our invisible decrease tutorial walks through the technique if it’s new to you.
And because both faces come together from several small sewn-on pieces — muzzle, beak, paws, tail — our guide to sewing amigurumi parts is worth a peek before you start attaching things, especially for keeping everything sitting straight and centered.
Let’s Start With the Shared Egg Body
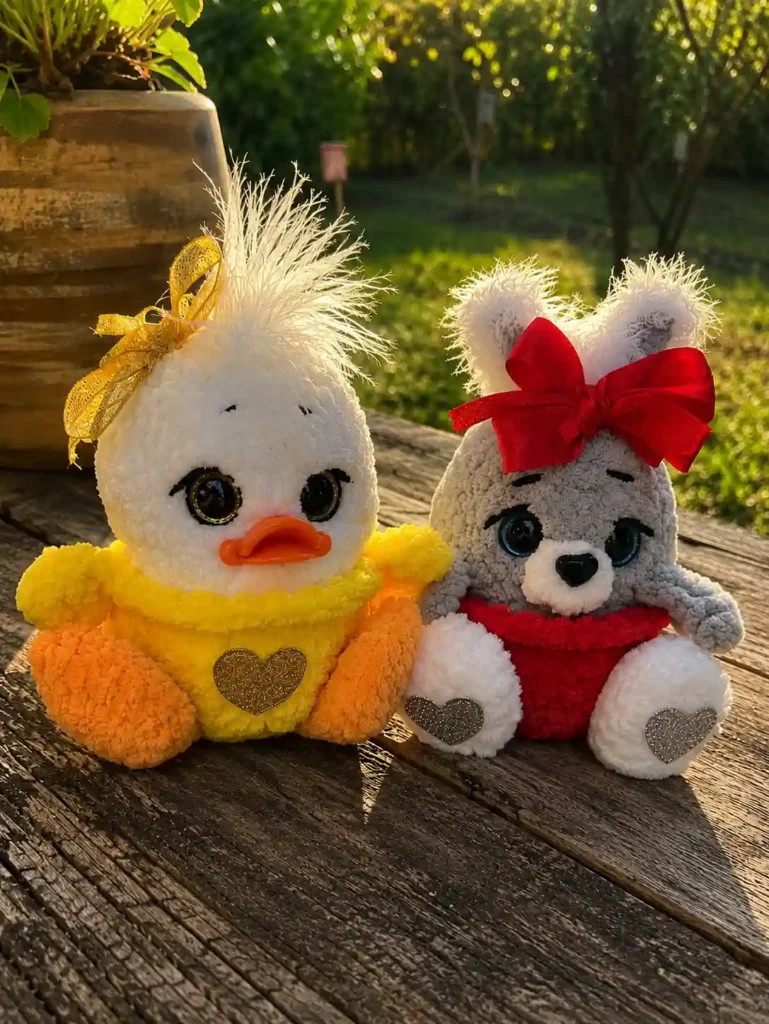
Both the Bunny and the Duck start from this exact same construction — you’ll just swap in different colors. The Bunny uses red as its “shell” color and gray as its main color; the Duck uses yellow as its shell and white as its main. Make one full body for each toy.
Body
Starting method: magic ring, in the additional color (RED for the Bunny, YELLOW for the Duck).
Row 1: 7 sc in mr (7)
Row 2: 7 inc (14)
Row 3: (1 sc, inc) ×7 (21)
Row 4: (2 sc, inc) ×7 (28)
Rows 5-7: 28 sc, worked even (3 rows) (28)
Row 8: (5 sc, inv dec) ×4 (24)
This is where the little “shell” bottom rounds out and it’s genuinely so satisfying to watch — like a tiny painted egg forming in your hands.
Now switch to the main color (WHITE for the Duck, GRAY for the Bunny). Don’t cut the shell color — leave it hanging in front of your work, because you’ll come back to edge those front loops with it later.
Row 9: in BLO, 24 sc, main color (24)
From here, the body splits into two turned halves worked back and forth, without turning chains — you’ll simply flip your work and start each row from the second loop from the hook.
First Half of the Body
Continue directly from Row 9.
Row 10: 11 sc, turn (11)
Row 11: 10 sc, turn (10)
Row 12: 9 sc, turn (9)
Row 13: 8 sc, turn (8)
Row 14: 7 sc, turn (7)
Row 15: 6 sc (6)
Ch 1, cut the yarn, leaving a 4 in (10 cm) tail. Pull the tail along the edge to the base of this half and secure it on the wrong side.
Second Half of the Body
Where the first half’s tail was fastened off, join the main color, then lay both tails against the edge and crochet over them as you work Row 10.
Row 10: 12 sc, turn (12)
Row 11: 11 sc, turn (11)
Row 12: 10 sc, turn (10)
Row 13: 9 sc, turn (9)
Row 14: 8 sc, turn (8)
Row 15: 7 sc, turn (7)
Row 16: 6 sc (6)
Don’t cut the yarn. Now sc around the edge of both halves together to close everything up, adding increases in the top corners to form two little peaks: down the side of the second half 6 sc, up the side of the first half 5 sc, inc in the peak, along the top edge 4 sc, inc in the peak, down the side 5 sc, up the side of the second half 5 sc.
For the Duck: work 1 sc in the peak, ch 1, cut the yarn. You won’t edge the top of the second half.
For the Bunny: work an inc in the peak, then 1 sc along the top edge of the second half. Don’t cut the yarn — you’ll continue straight into the ears below.
Ears for the Bunny
Continue directly from the top edge of the second half.
Row 1: (ch 7, starting in 2nd ch from hook: 3 hdc, 3 sc, sl st into the base of the ear, 2 sc along the top edge of the body) ×2 (12 sts + 4 sc)
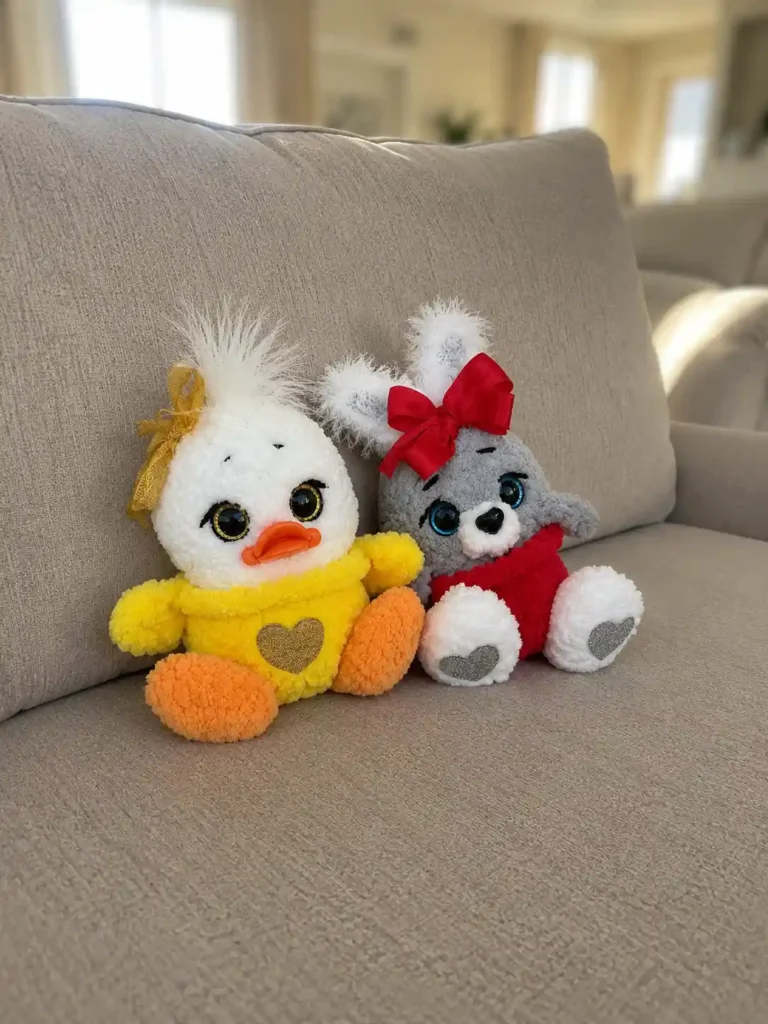
Ch 1, cut the yarn, thread the tail down the side and secure on the wrong side. Edge both ears in half double crochet using the white faux fur yarn — this is what gives them that soft, fluffy halo.
Front-Loop Body Edging (Both Toys)
Return to the unworked front loops left behind from Row 9 — this is the shell-colored yarn you set aside earlier.
Row: in FLO, 24 sc (24)
Sl st to join, cut the yarn, and secure it on the wrong side. This little trim row is what creates that clean color break between the egg shell and the body above it.
The Little Parts That Make Them Both So Cute
From here, each toy branches off into its own small, adorable pieces.
Upper Paws for the Bunny (make 2)
Attach GRAY yarn with a sl st behind the post between Rows 9 and 10, on the side of the half where the ears sit, about 1 sc in from the edge.
Row 1: ch 6, starting in 2nd ch from hook: 5 hdc (5)
Ch 1, cut the yarn and secure the tails on the wrong side. Crochet the second paw symmetrically on the other edge of the same half, spacing the two paws about 7-8 sc apart.
Muzzle for the Bunny
Starting method: magic ring, WHITE.
Row 1: 7 sc in mr (7)
Sl st, cut the yarn.
Beak for the Duck
Starting method: chain, ORANGE.
Row 1: ch 2, starting in the 2nd chain from the hook: 3 sc, 4 dc (7)
Sl st, cut the yarn. All seven stitches nestle into that same base chain stitch, fanning out into a small curved shape — the top of the beak is where the 4 dc sit.
🩷 Chloe’s Detail Tip: if you’d rather skip this step, the materials list also allows for a purchasable 25mm plastic duck beak that glues right on. Both work — the crocheted version just matches the rest of the toy’s texture a little more sweetly.
Wings for the Duck (make 2)
On the front-loop edging row you just worked, mark 3 sc on each side. Join YELLOW yarn to the first marked stitch.
Row 1: 3 sc, ch 1, turn (3)
Row 2: 3 dc-inc (6)
Ch 2, sl st into the base of the wing, cut the yarn, secure the tails on the wrong side. Crochet the second wing exactly the same way on the opposite side.
Lower Paws for the Bunny (make 2)
Starting method: magic ring, WHITE.
Row 1: 6 sc in mr (6)
Row 2: (1 sc, inc) ×3 (9)
Rows 3-4: 9 sc, worked even (2 rows) (9)
Row 5: (2 sc, inc) ×3 (12)
Row 6: 12 sc (12)
Row 7: 6 inv dec (6)
Sl st, cut the yarn, and close the opening through the front loops.
Paws for the Duck (make 2)
Starting method: magic ring, ORANGE.
Row 1: 6 sc in mr (6)
Row 2: (1 sc, inc) ×3 (9)
Row 3: 9 sc (9)
Row 4: (2 sc, inc) ×3 (12)
Row 5: 12 sc (12)
Fold the piece in half and crochet through both layers, 6 sc, joining them together into a flat little webbed foot.
Tail for the Duck
Starting method: magic ring, YELLOW.
Row 1: 5 sc in mr (5)
Row 2: 4 sc, inc (6)
Row 3: (1 sc, inc) ×3 (9)
Row 4: 9 sc (9)
Sl st, cut the yarn, and flatten the tail on top.
Tail for the Bunny
Starting method: magic ring, white faux fur yarn.
Row 1: 7 sc in mr (7)
Row 2: 7 inc (14)
Row 3: 14 sc (14)
Row 4: 7 inv dec (7)
Sl st, cut the yarn. Give this one a puff of fiberfill — this is the only piece in the whole pattern that actually gets stuffed — then close the opening through the front loops. So squishy.
Assembly — Bringing Bunny and Duck to Life
- Insert the safety eyes between Rows 12 and 13, spacing the posts about 4 sc apart. Once the washers click into place, gently melt the eye and nose posts on the inside with a lighter and flatten them.
- Attach the safety nose to the Bunny’s muzzle.
- Sew the muzzle (Bunny) and the beak (Duck) one row below the eyes. The beak only needs to be sewn along its center — if you’re using a plastic beak with no fastener, glue it instead.
- Sew the Lower Paws onto the Bunny and the Paws onto the Duck at the front, spacing them about 5 sc apart. The heels sit in the 3rd row of each paw.
- Sew the Duck’s tail to the back, between Rows 5-6.
- Sew the Bunny’s tail to the back, between Rows 5-6.
Making It Extra Cute — Finishing Details
This is where they go from “cute little egg shape” to “I can’t put this down.”
For the Duck, work 3 hdc on top of the front half using the white worsted yarn, sl st to finish, then pull all the strands out with your needle and trim to your desired length — this is what gives the Duck that fuzzy little tuft of feathers right on top of its head.
Embroider a small eye line and eyebrows in black thread on both toys — it’s a tiny detail, but it’s the one that gives them their expression.
🩷 Chloe’s Detail Tip: before you snap those safety eye washers in, hold the piece up under a bright lamp and check straight-on from the front. Once they click, there’s no going back, so it’s always worth that extra thirty seconds to make sure they sit level.
🩷 Optional touch: this one isn’t in the original pattern, but I love adding a tiny blush of pink embroidery or pastel marker just under each eye — it softens the whole face and gives them that warm, just-woke-up-from-a-nap look. Totally optional, but so worth it.
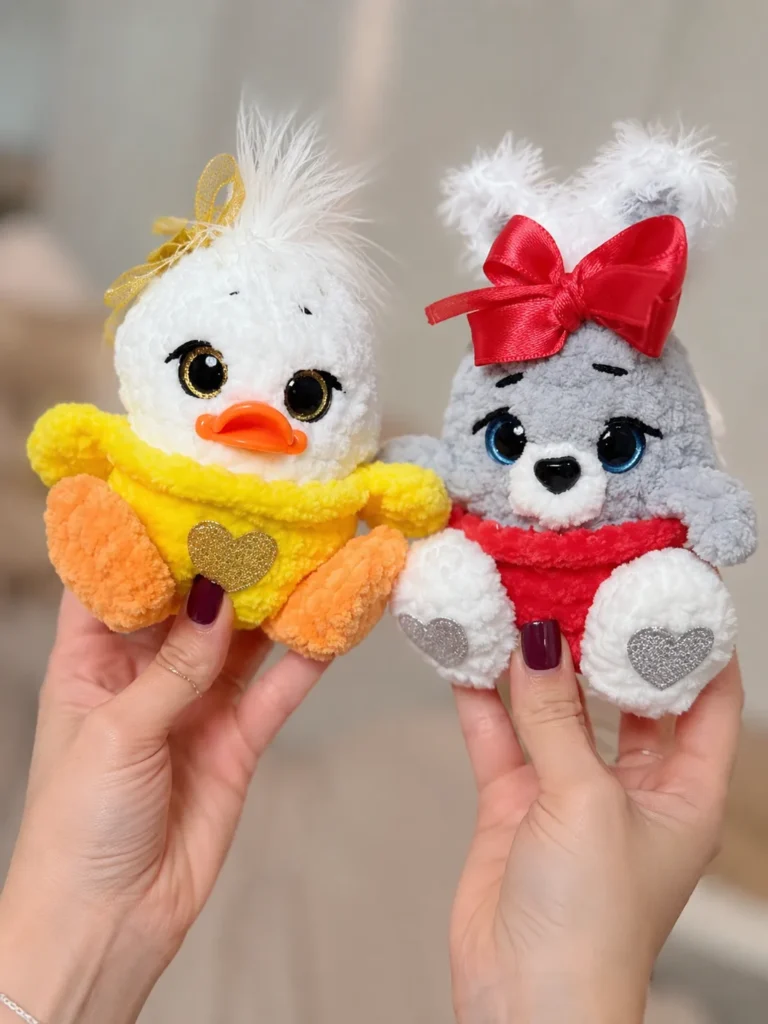
Hide all your yarn tails inside and melt the ends with a lighter for a clean finish. Then place an egg inside the toy, thread your ribbon through the top edge of both halves with the wide-eye needle, and tie a bow — on the side for the Duck, in front for the Bunny.
If you’d like to take it even further, glue on tiny shiny hearts — on the soles for the Bunny, on the tummy for the Duck.
Chloe’s Final Look at This Crochet Bunny and Duck Easter Eggs Pattern
I keep picking these two up off my desk just to look at them again — that little duck tuft, the bunny’s lopsided fluffy ears, the ribbon bow holding everything closed like a tiny present. Try making a whole basket of them in different pastel shells for an Easter table nobody will want to clear away. If you loved this one, our Easter egg amigurumi pattern is another sweet spring project worth a look. 🩷
This pattern uses a Bulky (5) weight yarn for the main body, which gives these little egg holders their soft, huggable shape. And since safety eyes and noses are involved, it’s always worth reviewing the CPSC’s toy safety guidance if this one is headed for a small child’s Easter basket.
FAQ
What yarn is best for this crochet bunny and duck amigurumi?
A bulky (weight 5) chenille or velvet-style yarn works best for a soft, plush finish. You’ll also need a bit of white faux fur yarn for the bunny’s fluffy details.
How long does it take to crochet these Easter egg holders?
Each toy takes approximately 2 to 3 hours to make, meaning you can complete the pair in roughly 4 to 6 hours.
Can I put real Easter eggs inside these amigurumi toys?
Yes! These toys are specifically designed with a hollow body cavity and a ribbon closure to securely hold a real or plastic Easter egg inside.