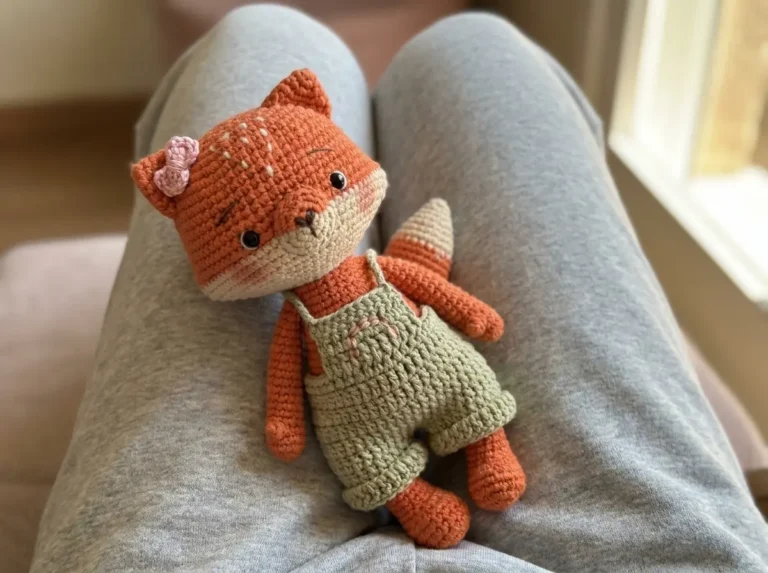
Free Cat Crochet Amigurumi Pattern — Kitten in Overalls
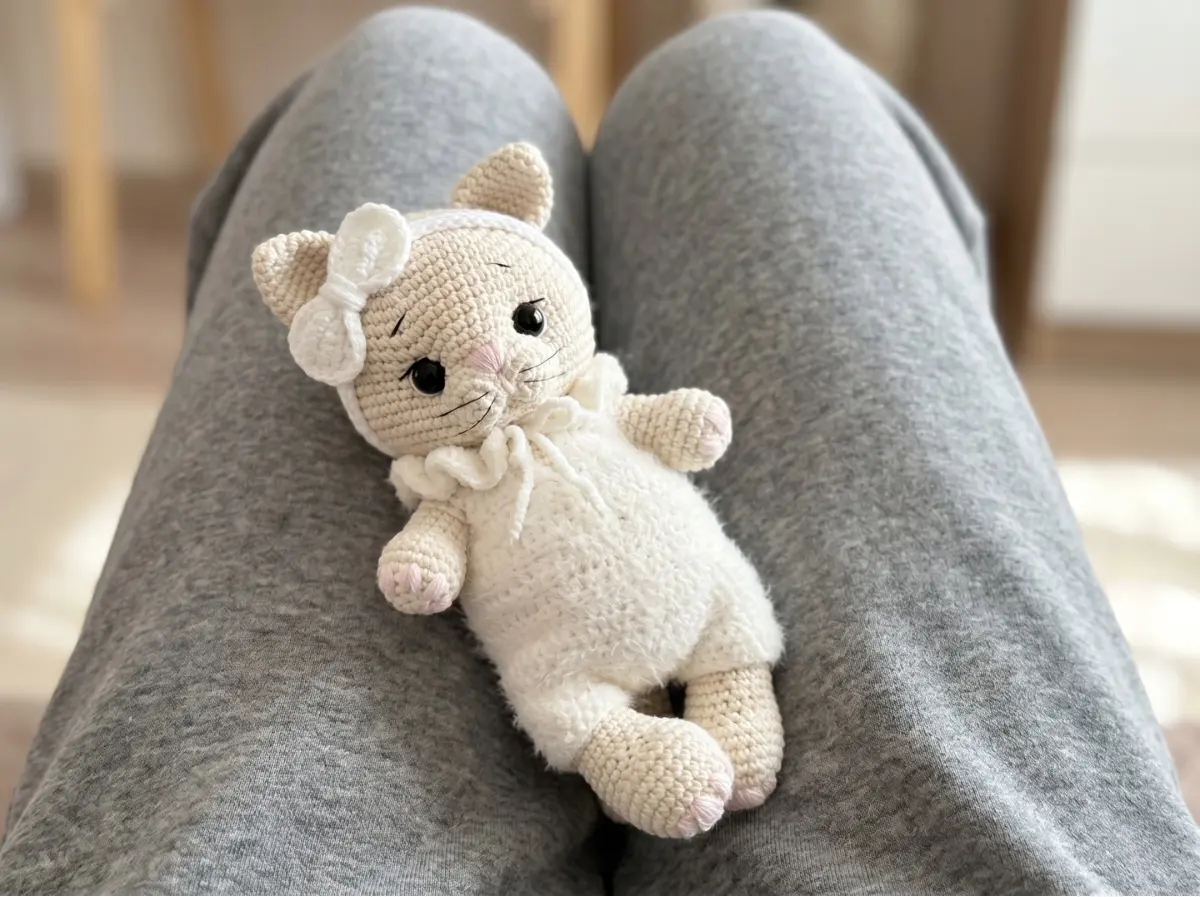
This cat crochet pattern free amigurumi project is one of the most involved kittens I’ve worked on — and worth every hour of it. The result is a fully dressed kitten complete with handmade overalls, a bow headband, sculpted eyes, and embroidered whiskers. I’ve double-checked every stitch count across all thirteen pieces. Grab your 2.0mm hook and a few shades of DK cotton-blend, and let’s build this together.
📋 Pattern Quick Stats
- Difficulty: Advanced
- Finished Size: 9 in (23 cm) excluding ears
- Hook Size: 2.0mm (approx. US 4 steel) or 1.75mm
- Yarn Weight: DK / Light Worsted (3) — cotton-acrylic blend
- Techniques: magic ring, invisible decrease, color changes, BLO, flat rows, joining in the round, eye sculpting, embroidery
- Estimated Time: 12–18 hours
Materials for This Free Cat Crochet Amigurumi Pattern
This pattern uses multiple yarn colors and a variety of notions. Take your time gathering everything before you sit down — this is not the kind of project where you want to pause in the middle of a leg to hunt for your tapestry needle.
Yarn
- Main body color (#05): DK / Light Worsted (3) cotton-acrylic blend (such as YarnArt Jeans, Drops Muskat, or Paintbox Simply DK) — 1 full skein. 55% cotton / 45% acrylic, approx. 160 yds (146 m) per 50 g skein. Light beige or cream works beautifully for the body.
- Contrast color (#03): Same yarn in a lighter shade — used for muzzle, paws, and ear tips. A small amount from a second skein is enough.
- Nose color (shade 74): A small amount of the same yarn in a warm pink or dusty rose shade.
- Eye whites (shades 62 and 74): Very small amounts of off-white and the same pink shade for embroidering around the safety eyes.
- Headband and bow (shade 20): Small amount of the same DK blend in your preferred accent color.
- Overalls yarn: A fluffy or velvet-finish DK / Light Worsted (3) yarn — approx. 1/4 skein. Look for something with a soft, slightly fuzzy texture. Good US alternatives: Lion Brand Go For Fleece (DK), Bernat Baby Velvet (bulky — swatch carefully), or any DK chenille. Choose a pastel color for that classic kitten-in-overalls look.
💡 Emma’s Tip: The fluffy overalls yarn matters more than you’d think. I’ve used a standard DK acrylic as a substitute and the result is perfectly fine — it just won’t have that soft, cloud-like texture. If you can find a lightweight chenille at your local Joann or Michaels, grab it.
Other Supplies
- 2.0mm hook (approx. US 4 steel) — or 1.75mm if your tension runs looser. These are very fine hooks for DK weight, and that’s intentional. Tight tension keeps stuffing from showing through the fabric.
- 12mm safety eyes (×2)
- Polyester fiberfill (Poly-Fil or equivalent)
- Stitch marker
- Tapestry needle (yarn needle)
- Tailoring pins for positioning before sewing
- Scissors
- Lighter — for melting the backs of the safety eye posts for extra security
- 2 buttons, 9mm — for the overalls closures
- Black thin embroidery thread or split yarn — for eyebrows and eyelashes
- Dark brown or black sewing thread — for whiskers
For yarn weight reference, this pattern uses CYCA category 3 (DK / Light Worsted) as the base yarn throughout the body and accessories.
Abbreviations Used in This Cat Crochet Pattern
| Abbreviation | Meaning |
|---|---|
| mr | magic ring |
| ch | chain |
| sc | single crochet |
| hdc | half double crochet |
| dc | double crochet |
| sl st | slip stitch |
| inc | increase — 2 sc (or 2 hdc) worked into the same stitch |
| dec | invisible decrease — insert hook through front loops only of next 2 stitches simultaneously |
| hdc-inc | half double crochet increase — 2 hdc worked into the same stitch |
| BLO | back loop only |
| FLO | front loop only |
| RS | right side |
| WS | wrong side |
Techniques Used in This Free Cat Crochet Amigurumi
This is an advanced project, and there are several techniques at play. If any of these are unfamiliar, I’ve linked to our full tutorials below — take the time to practice before you start the actual pattern. It’s always worth it.
- Magic Ring: Nearly every part starts this way. If you haven’t used one before or want a refresher, our step-by-step magic ring tutorial walks through it from scratch.
- Invisible Decrease: This is the only decrease method used in this pattern. It creates a clean, gap-free finish that matters on a project with this much detail. Our invisible decrease tutorial covers exactly how to work it through the front loops.
- Color Changes: This pattern has frequent color transitions — the legs, ears, and tail all switch from the contrast color to the main shade mid-piece. Smooth changes make or break the finished look. See our guide on how to change colors seamlessly in amigurumi.
- Eye Sculpting: This pattern includes a specific eye-sculpting technique using a needle and thread to shape the eye area. The assembly section covers this in full — read it before you stuff and close the head.
- Flat Row Construction (Overalls): The overalls are worked in turning rows and then joined into a round — a different rhythm than the rest of the project. Read those rows carefully.
Free Cat Crochet Amigurumi Pattern — All Parts
This project has thirteen separate parts. I recommend making them in the order listed — the head, body, and limbs first, so you can check proportion and placement as you go.
Head (×1)
Yarn: Main color #05 | Start: magic ring | Work in continuous rounds
Row 1: 6 sc in mr (6)
Row 2: 6 inc (12)
Row 3: (1 sc, inc) × 6 (18)
Row 4: 1 sc, inc, (2 sc, inc) × 5, 1 sc (24)
Row 5: (3 sc, inc) × 6 (30)
Row 6: 2 sc, inc, (4 sc, inc) × 5, 2 sc (36)
Row 7: (5 sc, inc) × 6 (42)
Row 8: 3 sc, inc, (6 sc, inc) × 5, 3 sc (48)
Row 9: 48 sc (48)
Row 10: (7 sc, inc) × 6 (54)
Rows 11–15: 54 sc (5 rows) (54)
Row 16: 4 sc, inc, (8 sc, inc) × 5, 4 sc (60)
Row 17: 60 sc (60)
Row 18: (9 sc, inc) × 6 (66)
Rows 19–23: 66 sc (5 rows) (66)
⚠️ Safety Eyes: Insert the 12mm safety eyes between rows 16 and 17, with exactly 9 sc between them. Once positioned, melt the backs of the eye posts carefully with a lighter for added security. Install eyes before continuing to the decrease rows — you cannot do this after closing. See our full guide on how to attach safety eyes safely.
Row 24: (9 sc, dec) × 6 (60)
Row 25: 4 sc, dec, (8 sc, dec) × 5, 4 sc (54)
Row 26: (7 sc, dec) × 6 (48)
Row 27: 3 sc, dec, (6 sc, dec) × 5, 3 sc (42)
Row 28: 21 dec (21)
Finishing: Leave a long tail for sewing the head to the body. Do not stuff very firmly — the head should have some give. This is one of those details that makes all the difference when you’re sculpting the eyes later.
Body (×1)
Yarn: Main color #05 | Start: magic ring | Work in continuous rounds
Row 1: 6 sc in mr (6)
Row 2: 6 inc (12)
Row 3: (1 sc, inc) × 6 (18)
Row 4: 1 sc, inc, (2 sc, inc) × 5, 1 sc (24)
Row 5: (3 sc, inc) × 6 (30)
Row 6: 2 sc, inc, (4 sc, inc) × 5, 2 sc (36)
Row 7: (5 sc, inc) × 6 (42)
Row 8: 3 sc, inc, (6 sc, inc) × 5, 3 sc (48)
Row 9: (7 sc, inc) × 6 (54)
Row 10: 4 sc, inc, (8 sc, inc) × 5, 4 sc (60)
Rows 11–15: 60 sc (5 rows) (60)
Row 16: 4 sc, dec, (8 sc, dec) × 5, 4 sc (54)
Rows 17–18: 54 sc (2 rows) (54)
Row 19: (7 sc, dec) × 6 (48)
Rows 20–21: 48 sc (2 rows) (48)
Row 22: 3 sc, dec, (6 sc, dec) × 5, 3 sc (42)
Rows 23–24: 42 sc (2 rows) (42)
Row 25: (5 sc, dec) × 6 (36)
Rows 26–27: 36 sc (2 rows) (36)
Row 28: 2 sc, dec, (4 sc, dec) × 5, 2 sc (30)
Rows 29–30: 30 sc (2 rows) (30)
Row 31: (3 sc, dec) × 6 (24)
Row 32: 24 sc (24)
Row 33: (6 sc, dec) × 3 (21)
Finishing: No need to leave a long tail — you will sew the head and body together using the yarn tail left from the head. Pay attention to the neck join. Add stuffing as you sew the pieces together, not before.
Lower Legs (×2)
Yarn: Contrast color #03, then main color #05 | Start: magic ring
Row 1: 6 sc in mr [#03] (6)
Row 2: 6 inc [#03] (12)
Row 3: (1 sc, inc) × 6 [#03] (18)
Row 4: (2 sc, inc) × 6 [#03] (24)
Rows 5–8: 24 sc (4 rows) [#03] (24)
💡 Color Change: On the very last stitch of row 8, change to main color #05. This keeps the transition clean at the ankle. If you need a refresher on mid-row color changes, our color change tutorial has you covered.
Row 9: 7 sc, (1 sc, dec) × 3, 8 sc [#05] (21)
Rows 10–11: 21 sc (2 rows) [#05] (21)
Row 12: 3 inc, 6 sc, 3 dec, 6 sc [#05] (21)
Rows 13–14: 21 sc (2 rows) [#05] (21)
Row 15: 3 dec, 15 sc [#05] (18)
Row 16: dec, 16 sc [#05] (17)
Rows 17–24: 17 sc (8 rows) [#05] (17)
💡 Emma’s Tip: Stuff the legs firmly from the toe up to about row 21, paying special attention to the heel shape. After row 24, crochet 3 additional shifting stitches (offset stitches) — the exact number may vary slightly, but you want enough so that when you fold the leg in half, it sits perfectly flat. This is what gives the leg a natural forward-pointing position when sewn onto the body. Take your time with this.
Finishing: Fold the leg flat and crochet 8 sc through both sides to close. Leave a long yarn tail for sewing to the body.
Upper Legs (×2)
Yarn: Contrast color #03, then main color #05 | Start: magic ring
Row 1: 6 sc in mr [#03] (6)
Row 2: 6 inc [#03] (12)
Row 3: (1 sc, inc) × 6 [#03] (18)
Row 4: (8 sc, inc) × 2 [#03] (20)
Row 5: 20 sc [#03] (20)
Row 6: 8 sc, 2 dec, 8 sc [#03] (18)
Rows 7–8: 18 sc (2 rows) [#03] (18)
💡 Color Change: On the last stitch of row 8, change to main color #05.
Row 9: 4 sc, dec, 6 sc, dec, 4 sc [#05] (16)
Rows 10–17: 16 sc (8 rows) [#05] (16)
Row 18: (2 sc, dec) × 4 [#05] (12)
Row 19: 12 sc [#05] (12)
💡 Emma’s Tip: Stuff the upper legs only up to rows 9–10, and keep it light — these arms need to hang naturally, not stick out. After row 19, work 3 shifting stitches the same way you did on the lower legs.
Finishing: Fold flat and crochet 5 sc through both sides to close. Leave a long tail for sewing.
Ears (×2)
Yarn: Contrast color #03, then main color #05 | Start: magic ring
Row 1: 6 sc in mr [#03] (6)
Row 2: (1 sc, inc) × 3 [#03] (9)
💡 Color Change: Change to main color #05 on the last stitch of row 2.
Row 3: (2 sc, inc) × 3 [#05] (12)
Row 4: (5 sc, inc) × 2 [#05] (14)
Row 5: (6 sc, inc) × 2 [#05] (16)
Row 6: (7 sc, inc) × 2 [#05] (18)
Row 7: (8 sc, inc) × 2 [#05] (20)
Row 8: 20 sc [#05] (20)
Finishing: Fold the ear in half and crochet 9–10 sc through both sides to close the bottom edge. Do not stuff. Leave a long tail for sewing.
Tail (×1)
Yarn: Contrast color #03, then main color #05 | Start: magic ring
Row 1: 6 sc in mr [#03] (6)
Row 2: 6 inc [#03] (12)
Row 3: 12 sc [#03] (12)
Row 4: (1 sc, inc) × 6 [#03] (18)
Rows 5–9: 18 sc (5 rows) [#03] (18)
💡 Color Change: At the end of row 9, change to main color #05.
Row 10: 18 sc [#05] (18)
Row 11: (7 sc, dec) × 2 [#05] (16)
Rows 12–17: 16 sc (6 rows) [#05] (16)
Row 18: (6 sc, dec) × 2 [#05] (14)
Rows 19–22: 14 sc (4 rows) [#05] (14)
Row 23: (5 sc, dec) × 2 [#05] (12)
Rows 24–26: 12 sc (3 rows) [#05] (12)
Finishing: Fold flat and crochet 5–6 sc through both sides to close. A very small amount of stuffing at the base of the tail (the contrast-color tip) adds a nice rounded shape — but keep it minimal.
Muzzle (×2 pieces, then joined)
Yarn: Contrast color #03 | Start: magic ring
Crochet two identical small circles.
Row 1: 6 sc in mr (6)
Row 2: 6 inc (12)
Fasten off and cut the yarn on one circle only. Leave a working yarn on the second.
💡 Joining the Muzzle Pieces: Do not stuff the muzzle. To join: sl st into the first piece, crochet 12 sc around it, sl st into the 12th stitch of the first piece, then continue with 11 sc around the second piece. Where you finish crocheting is the bottom of the muzzle.
Row 3 (joining round): sl st, 12 sc around first piece, sl st into 12th stitch of first piece, 11 sc around second piece (25)
Finishing: Leave a long tail for sewing. Gently flatten and stretch the muzzle with your hands before pinning it to the head.
Overalls (×1)
Yarn: Fluffy/velvet DK yarn (overalls color) | Start: foundation chain
⚠️ Important: Rows 1–15 are worked in turning rows (flat). At the end of each row, chain 1 and turn. All increases in this section are hdc increases (2 hdc in the same stitch). After row 15, the work is joined into a round with a sl st, and the following rows are worked in the round with a sl st and ch 1 at the end of each round.
Row 1: Ch 34 + 1 turning chain (35 chains total, 34 working stitches) (35)
Row 2: sc in each ch (34)
Row 3: 4 hdc, 2 hdc-inc, 5 hdc, 2 hdc-inc, 8 hdc, 2 hdc-inc, 5 hdc, 2 hdc-inc, 4 hdc (42)
Row 4: 5 hdc, 2 hdc-inc, 7 hdc, 2 hdc-inc, 10 hdc, 2 hdc-inc, 7 hdc, 2 hdc-inc, 5 hdc (50)
Row 5: 6 hdc, inc, 11 hdc, inc, 12 hdc, inc, 11 hdc, inc, 6 hdc (54)
Row 6 (armhole row): 7 hdc, inc, ch 6, skip 11 hdc of previous row, inc, 14 hdc, inc, ch 6, skip 11 hdc of previous row, inc, 7 hdc (48)
💡 Row 6 Note: The two ch-6 bridges create the armholes. The 11 skipped stitches on each side form the shoulder gap. Count carefully — this is the most technically demanding row of the overalls.
Row 7: 8 hdc, inc, 6 hdc, inc, 16 hdc, inc, 6 hdc, inc, 8 hdc (52)
Row 8: 9 hdc, inc, 6 hdc, inc, 18 hdc, inc, 6 hdc, inc, 9 hdc (56)
Row 9: 10 hdc, inc, 6 hdc, inc, 20 hdc, inc, 6 hdc, inc, 10 hdc (60)
Rows 10–15: 60 hdc (6 rows) (60)
💡 Joining Note: At the end of row 15, join the work into a circle with a sl st. From here, work in the round. At the end of each round: ch 1. The piece is now a tube.
Rows 16–18: 60 hdc, sl st, ch (3 rounds) (62)
Row 19 (tail hole): 27 hdc, ch 6, skip 6 hdc of previous row, 27 hdc, sl st, ch (62)
💡 Row 19 Note: The chain-6 gap in row 19 is the tail opening. Make sure it lines up with the back of the overalls before working this row.
Rows 20–25: 60 hdc, sl st, ch (6 rounds) (60)
💡 Length Check: Before moving to the pant legs, try the overalls on the kitten body. The bottom edge should reach just far enough so the front and back panels meet between the legs. Crochet more or fewer rows as needed.
Division: Divide the work into two pant legs of 23 hdc each, with 7 hdc left unworked on each side (front and back) between the legs — these will be sewn together after the pant legs are complete.
Pant Legs (×2)
Yarn: Fluffy/velvet DK yarn | Start: Join yarn for first leg
Rows 1–3: 23 hdc, sl st, ch (3 rounds) (25)
Row 4: 23 sc, sl st (24)
Finishing: Cut the yarn, fasten off, and weave the tail into the inside of the overalls. Repeat for the second leg. Once both legs are complete, sew up the gap between the legs.
Collar (×1)
Yarn: Fluffy/velvet DK yarn | Start: Join yarn at the corner of row 1 of the overalls | Work in turning rows, ch 1 at end of each row
Row 1: 3 sc in each stitch across to the end of row 1 of the overalls
Row 2: 1 dc, then (dc, dc-inc) repeat to the end of the row
Row 3: dc in each stitch across
Row 4: sc in each stitch across
Finishing: Cut yarn, fasten off, weave in ends.
Button Loops & Finishing the Overalls
Edge the neckline of the overalls on one shoulder side with sc. At the buttonhole positions: ch 4, skip 2 stitches on the overalls, then continue with sc. Make two loops, spaced to match your 9mm buttons. If your buttons are larger or smaller, adjust the number of ch stitches in the loops accordingly.
💡 Emma’s Tip: Once the overalls are finished, give them a gentle blast of warm air from a hair dryer. The fluffy yarn will puff up beautifully — it makes a real difference in the final look.
Ties (×2) — Optional
Yarn: Fluffy/velvet DK yarn | Start: Join yarn under the collar
Row 1: Ch 45 foundation chain (45)
Finishing: Make a knot at each end. Optionally, attach a small bead or fur pom-pom to each end for decoration. Make ties on both sides.
Headband (×1)
Yarn: Accent color #20 | Start: Ch foundation chain
Row 1: Chain enough stitches to fit around the head of your finished kitten — both ends should meet when joined.
Row 2: Join the two ends with a sl st, then work one round of sc around the band.
Finishing: Leave a long yarn tail for sewing to the head. Set aside — the bow is sewn to the headband before placement.
Bow (×1)
Yarn: Accent color #20 | Start: Ch foundation chain | Work in turning rows, ch 1 at end of each row
Row 1: ch 15 + 1 turning chain (16)
Rows 2–7: Work 6 rows in turning rows (15)
Row 8: Edge around all 4 sides with sc
Finishing: Leave a long piece of yarn. Thread it through the center of the bow from one side to the other, then wrap tightly around the middle several times to pinch the bow shape. Fasten off. Sew the bow to the center of the headband.
Assembly — Cat Crochet Amigurumi
- Eye Sculpting (do this first, before sewing anything): Mark three points at the base of the head — one central point (1), one toward the left eye (2), and one toward the right eye (3). Insert your tapestry needle at the central point (1). Bring the needle out just below the left eye, insert it above the eye, and return to point (1). Repeat from point (2) on the opposite side of the left eye, returning to (1) each time. Do the same with the right eye using point (3). Pull gently and evenly — the eyes should sink slightly into the face. Do not pull too tight. Hide all knots inside the head.
- Muzzle: Sew the muzzle only after eye sculpting is complete. Gently flatten and stretch it by hand before pinning. Position it between rows 17 and 18 of the head, centered below the eyes. Use tailoring pins to check placement before sewing.
- Ears: Pin the ears in position between rows 5–6 and rows 11–12 of the head, arranged in a gentle curve across the top. Step the back of each ear 3 stitches toward the back of the head. Sew through the BLO of the head stitches for a clean attachment.
- Tail: Sew the tail at the same level as the lower legs, between rows 12–13 of the body, centered on the back.
- Upper Legs: Sew the arms one row below the head join. They should sit directly above the lower legs.
- Lower Legs: Sew between rows 12 and 13 of the body. Mark the center of the body and count 9–10 stitches out from it in each direction for leg placement. Once sewn, go two rows down from the attachment point, pick up one stitch from the inner leg, and stitch it to the body. Repeat on both sides of both legs — this keeps the legs pointing forward rather than splaying outward.
- Overalls: Dress the kitten and sew on the two 9mm buttons to match the button loops. Give the overalls one final blast of warm air from a hair dryer.
- Headband and Bow: Sew the completed headband (bow already attached) to the top of the head, positioning it between the ears.
Finishing Details — Embroidery and Surface Decoration
This is the part I always set aside extra time for. The embroidery is what makes this kitten look finished. Take your time — small adjustments at this stage make a noticeable difference.
- Nose: Embroider with shade 74 (pink or warm brown), positioned above the muzzle with 3 stitches of space. The nose covers 2 rows (rows 17–18 of the head).
- Eye whites: Using shades 62 and 74, embroider a small arc of stitches around the outside of each black pupil to create an eye white effect.
- Eyebrows: Embroider with thin black thread (or yarn split into 4 strands) at row 12 of the head, directly above each eye. Each eyebrow is 2 stitches wide.
- Eyelashes: Use the same black thread as the eyebrows. Work 2–3 small straight stitches angling outward from the outer corner of each eye.
- Whiskers: Thread a length of dark brown or black sewing thread through the muzzle using your tapestry needle, pulling it through to create 3–4 whiskers on each side. Trim to a consistent length.
- Paw pads on upper legs: Embroider with contrast color #03. Work 4 small round pads in a row between rows 1 and 3 up from the magic ring, spacing them 1 sc apart. Add one larger central pad between rows 2 and 4.
- Paw pads on lower legs: 4 upper pads: top point between rows 3 and 4 from the mr, bottom point just below the mr (1 sc between each). Central pad: between rows 4 and 5, 3 stitches wide, with a bottom point between rows 7 and 8. Heel pad at row 13, approximately 2 stitches wide. Work each pad with several layers of stitching to add volume and definition.
💡 Emma’s Tip: For the paw pads, I do a first pass of basting stitches to map out placement, then go over each pad two or three more times. The built-up layers give them a raised, round appearance that looks much more polished than a single-layer embroidered dot.
Emma’s Note
I’ve sewn more amigurumi parts together than I can count, and the assembly on this kitten is genuinely one of the more satisfying ones — the moment you pin on the ears and the whole face comes together is worth the hours of counting. If this is your first time working with eye sculpting, go slowly and check after each thread pull; it’s easier to loosen than to fix over-tight eyes. And if your pant legs come out slightly uneven, no one will ever notice once the overalls are on. Happy hooking. 🧶
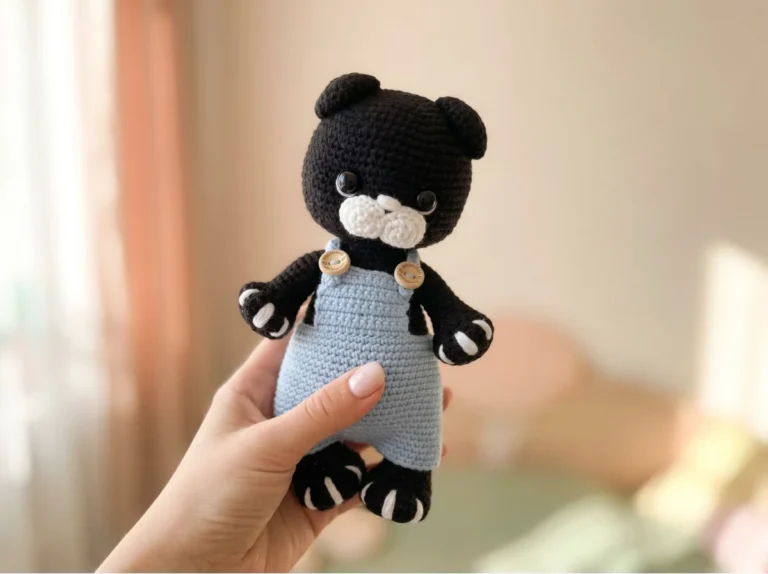
If you enjoy detailed animal amigurumi, you might also like our cozy gray kitty pattern for a simpler take on the same silhouette, or our classic amigurumi bear for a project that uses similar assembly techniques.
What yarn is best for this cat crochet pattern free amigurumi?
A DK / Light Worsted (3) cotton-acrylic blend is ideal for the kitten’s body to maintain structure, while a fluffy or velvet-finish DK yarn works perfectly for the soft overalls.
How long does it take to crochet this kitten in overalls?
This is an advanced amigurumi project with thirteen separate pieces and detailed embroidery. It typically takes between 12 and 18 hours to complete.
What size hook do I need for this amigurumi cat?
You should use a very fine 2.0mm (approx. US 4 steel) or 1.75mm crochet hook to ensure tight tension so the polyester stuffing doesn’t show through the stitches.