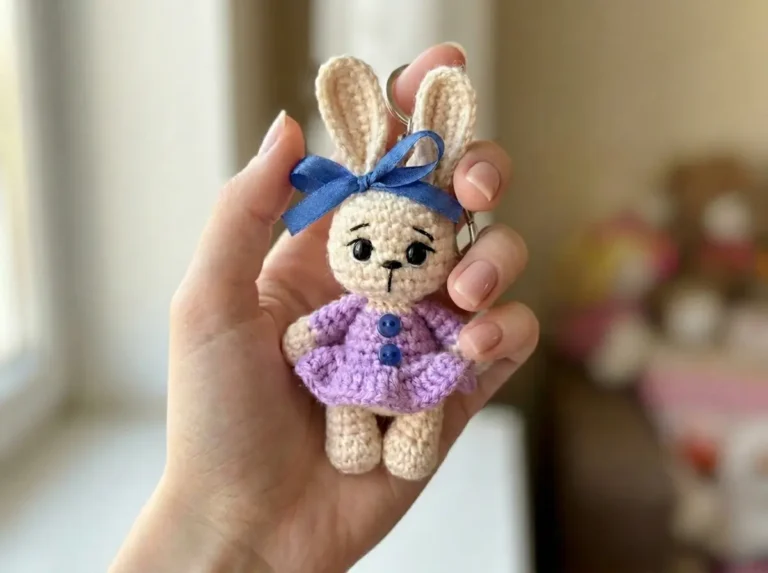
Free Amigurumi Bunny Pattern — Squishy Plush Mini Pillow Toy
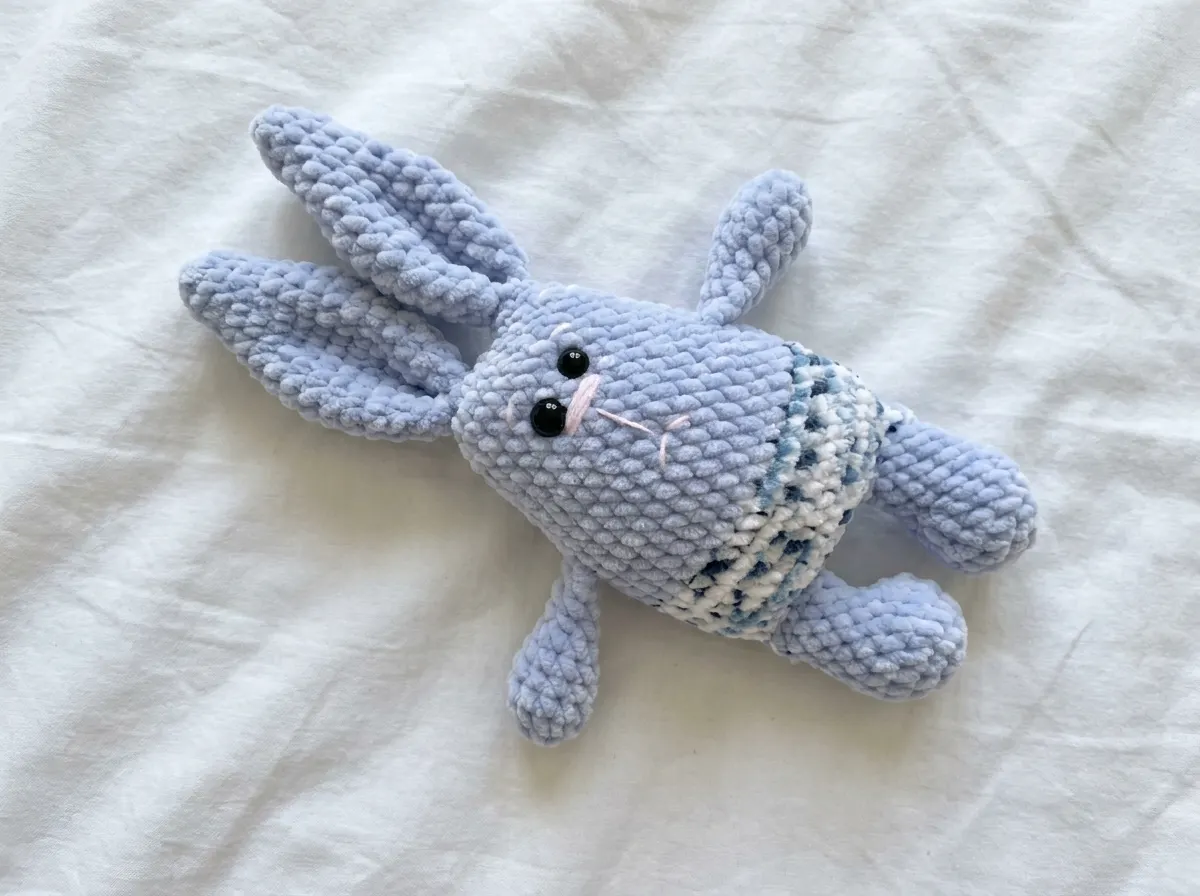
This free amigurumi bunny pattern creates the softest, plushiest little bunny you’ll ever hold — designed specifically as a mini pillow toy that begs to be hugged. The combination of fuzzy yarn and DK-weight accents creates this incredibly squishy texture, and when you add that embroidered face with rosy cheeks, it becomes absolutely irresistible. It’s the kind of amigurumi bunny that fits perfectly in your palm but somehow makes you feel like you’re cradling something impossibly precious.
🩷 Pattern Highlights
- Cuteness Rating: 🩷🩷🩷🩷🩷
- Finished Size: Approximately 4–5 in (10–12.5 cm) tall
- Difficulty: Beginner–Intermediate
- Hook Size: G/6 (4.0 mm)
- Yarn Palette: Plush/fuzzy yarn (primary), soft blush pink DK-weight for accents
- Key Detail: 12mm glossy safety eyes and hand-embroidered rosy cheeks that bring the face to life
- Estimated Time: 3–4 hours
Materials You’ll Need
Yarn:
- One skein (or less) of plush/fuzzy yarn in your chosen main color — this is what makes the bunny so squishy and pillow-like. Any plush or chenille-style yarn works beautifully here. Think soft pastels: pale pink, mint green, powder blue, or even neutral cream.
- YarnArt Jeans (or US alternatives: Drops Muskat or Paintbox Cotton DK — DK/Light Worsted weight 3) in soft blush pink for accents and embroidered details
Tools & Notions:
- Crochet hook: G/6 (4.0 mm)
- Safety eyes: 12mm glossy black (these are the perfect size for a bunny this scale)
- Fiberfill stuffing — polyester fiberfill like Poly-Fil works perfectly
- Yarn needle (blunt tapestry needle for sewing and embroidering)
- Stitch marker to track your rounds
- Sewing pins (helpful for positioning before you sew)
- Scissors
Abbreviations
| Abbreviation | Meaning |
|---|---|
| mr | Magic ring |
| sc | Single crochet |
| inc | Increase (2 sc in same stitch) |
| dec | Decrease (invisible decrease) |
| ch | Chain |
| sl st | Slip stitch |
| FO | Fasten off |
| × n | Repeat pattern n times |
Before You Begin — The Details That Make It Perfect
🩷 Chloe’s Bunny Tips: This pattern is designed as a pillow toy, which means you want to stuff it softly and gently — not packed tight. You’re going for that huggable, squishable feel. Use our guide to stuffing amigurumi properly to get that perfect balance. And here’s the magic: when you’re crocheting with plush yarn, your stitches will look slightly softer and less defined than with regular yarn. That’s exactly what you want — it adds to the adorable, cuddly vibe.
🩷 Eye Placement Matters: For this little bunny, the 12mm safety eyes go between Rows 28–29 of the body section. Before you press those washers in, position the eyes so they’re looking slightly forward and centered on the head. I always hold the piece under a lamp and step back a few inches to check the expression before committing. Once those washers click, the bunny’s personality is set — so take that extra moment to get it just right.
🩷 Color Variations: This pattern can be made two ways: all one color (which is absolutely stunning in a soft pastel), or with a two-tone design using shorts. If you’re making the two-tone version, the pattern notes when to change colors. I love pairing a pale pink plush bunny with blush pink shorts, or a mint green bunny with pastel pink accents.
Pattern — Amigurumi Bunny
Arms (Make 2)
Yarn Color: Main plush yarn color
Starting Method: Magic ring
Row 1: 6 sc in mr (6)
Row 2: 6 inc (12)
Row 3–5: 12 sc (3 rows) (12)
Row 6: (1 sc, dec) × 4 (8)
Row 7–9: 8 sc (3 rows) (8)
Note: Stuff only the bottom of the arm — you want it soft and floppy, not firm. Fold the piece in half and sc 4 stitches through 2 loops together.
Finishing: Cut yarn and weave in the end.
Ears (Make 2)
Yarn Color: Main plush yarn color
Starting Method: Magic ring
Row 1: 6 sc in mr (6)
Row 2: (1 sc, inc) × 3 (9)
Row 3: 9 sc (9)
Row 4: 9 sc (9)
Row 5: (2 sc, inc) × 3 (12)
Row 6: 12 sc (12)
Row 7: (1 sc, inc) × 6 (18)
Row 8–13: 18 sc (6 rows) (18)
Row 14: (1 sc, dec) × 6 (12)
Note: These ears start narrow and then widen beautifully — you’ll see them take shape and it’s so satisfying to watch. Fold the piece in half and sc 6 stitches through 2 loops together. Fold in half again and sc 3 stitches.
Finishing: FO and cut yarn. Weave in the end.
Body & Legs (Make 1)
Yarn Color: Main plush yarn color
Starting Method: Magic ring
Row 1: 6 sc in mr (6)
Row 2: 6 inc (12)
Row 3: (1 sc, inc) × 6 (18)
Row 4: 18 sc (18)
Row 5: 5 sc, 4 dec, 5 sc (14)
Row 6: 5 sc, 2 dec, 5 sc (12)
Row 7: 4 sc, 2 dec, 4 sc (10)
Row 8–10: 10 sc (3 rows) (10)
Note: Stuff only the bottom part of the leg lightly. This is where the bunny’s feet will be. Now, here’s where it gets interesting — you’re about to create the second leg and connect them. FO and cut yarn on the first leg. If you’re making the bunny with shorts (two colors), cut yarn on the second leg here and change to your accent color. If you’re keeping it one color, do not cut yarn yet.
Connecting the Legs: Fold the first leg in half (make a few offset stitches if needed to center it), and sc 5 stitches through 2 loops together. Chain 5. Attach the second leg by folding it in half and sc 5 stitches along the second leg.
Row 11: 1 ch, bind around the back loop—5 sc along leg, 5 sc along ch, 5 sc along second leg, turn work and continue 5 sc along leg, 5 sc along ch, 5 sc along leg (30)
Row 12: (4 sc, inc) × 6 (36)
Row 13: (5 sc, inc) × 6 (42)
Row 14–18: 42 sc (5 rows) (42)
Note: Change yarn color to your accent/body color here if crocheting the bunny with shorts. If you’re keeping it one color, simply continue in the same yarn.
Row 19–22: 42 sc (4 rows) (42)
Row 23: 20 sc, 4 sc with arm, 16 sc, 2 sc with arm (42)
Row 24: 2 sc with arm, 40 sc (42)
Note: This is the magic moment — the arms are being integrated into the body! The bunny is really coming together now.
Row 25: (5 sc, dec) × 6 (36)
Row 26–27: 36 sc (2 rows) (36)
Row 28: (4 sc, dec) × 6 (30)
Row 29–30: 30 sc (2 rows) (30)
Row 31: (3 sc, dec) × 6 (24)
Row 32–33: 24 sc + 3 sc for offset (24)
Note: The head is forming now — the decreases are creating that rounded bunny head shape. This is where you’ll insert the safety eyes between Rows 28–29. Leave the yarn attached for sewing the top closed.
Assembly — Bringing Your Bunny to Life
- Insert the safety eyes: Position the 12mm glossy safety eyes between Rows 28–29, centered on the head. Hold the piece under good lighting and check that they’re level and symmetrical before pressing the washers in. This is where your bunny’s personality comes alive.
- Stuff gently: Fill the body with fiberfill, remembering that this is a pillow toy — you want it soft and squishy, not packed tight. Stuff the arms and legs lightly as well so they remain huggable.
- Close the top: Fold the top of the body in half and sew with your yarn needle, creating a neat seam.
- Attach the ears: Position the ears symmetrically on top of the head. Sew them securely using your yarn needle and the plush yarn, making sure they’re angled slightly outward for that classic bunny look.
- Weave in all ends: Use your yarn needle to hide all loose ends inside the bunny — this keeps it looking clean and finished.
Making It Extra Cute — The Embroidered Face
Okay, this is my favorite part — the embroidered details that transform your bunny from sweet to absolutely irresistible. The face is what gives this little amigurumi bunny all its personality.
Embroidered Cheeks
Using your blush pink DK-weight yarn and a yarn needle, embroider two soft rosy cheeks. Thread your needle and make small satin stitches (or French knots for an even softer look) on either side of the face, positioned about three rows below the safety eyes. The placement matters — you want them to sit naturally where a bunny’s cheeks would be. I always step back and look at the face from different angles to make sure they’re symmetrical and give the bunny that blushing, bashful expression.
Nose & Mouth (Optional but Adorable)
If you want to go full kawaii mode, you can embroider a tiny nose with a few straight stitches in pink, and a small curved mouth below it. Keep it minimal — just a few stitches can create an incredibly sweet expression. Some people love a simple nose, others add a full smile. Whatever feels right for your bunny.
Color & Style Variations
This amigurumi bunny is endlessly customizable:
- Monochromatic Dreamer: Make the entire bunny in one soft pastel — pale pink, mint green, powder blue, or creamy lavender. The plush yarn means the entire bunny will have that velvety softness.
- Adorable Overalls Look: Use one plush color for the arms, ears, and legs, then switch to a contrasting pastel for the body/torso to create the look of a bunny wearing overalls or a dress. Pair cream with soft pink, or mint with pale yellow.
- Rosy Bunny: Make the bunny in pale pink plush yarn and embroider darker pink cheeks and a tiny nose. Add a pink ribbon bow on top of one ear for extra sweetness.
🩷 Pro Tip from Chloe: The plush yarn texture means your stitches won’t look crisp and defined — and that’s the whole point. This yarn creates soft, fuzzy edges that make the bunny look genuinely cuddly. Don’t worry if it looks a bit less precise than amigurumi made with regular yarn. The softness is the feature, not a bug. This is what makes it feel like a pillow toy.
Assembly Tips for Sewing Parts
If you’re new to sewing amigurumi parts, our complete guide to sewing amigurumi parts together shows you exactly how to create invisible seams. For this bunny, the ears are the most visible stitching, so take your time positioning and sewing them.
Chloe’s Final Look 🩷
I’ve been holding this little bunny for way too long and I genuinely cannot put it down. That soft plush body, the way those glossy eyes catch the light, those rosy cheeks that make it look like it’s blushing — it’s everything. This is the kind of amigurumi bunny that you make one of and then immediately think, “I need to make ten more in different colors.” It fits perfectly in the palm of your hand but somehow feels like the most precious little creature ever.
The pillow-toy design means this bunny is built for hugging. It’s soft, it’s squishy, it’s absolutely begging to be loved. Try making a whole family of bunnies in graduated pastels — pale pink, soft lavender, mint green, powder blue — and line them up on a shelf. Or make one as a gift for someone you really care about. Trust me, nobody can resist a face this cute. 🩷
What yarn is best for this amigurumi bunny?
Any high-quality plush, chenille, or fuzzy yarn works beautifully for the primary body to achieve that signature squishy, pillow-like texture.
Can beginners crochet this amigurumi bunny pattern?
Yes! The pattern utilizes basic amigurumi techniques like single crochet, increases, and invisible decreases, making it ideal for beginner-to-intermediate levels.
What size safety eyes are recommended for this bunny?
Glossy 12mm black safety eyes provide the perfect, expressive proportions for this specific 4–5 inch plush layout.