Crochet Owl Keychain Free Pattern: Your New One-Evening Favorite
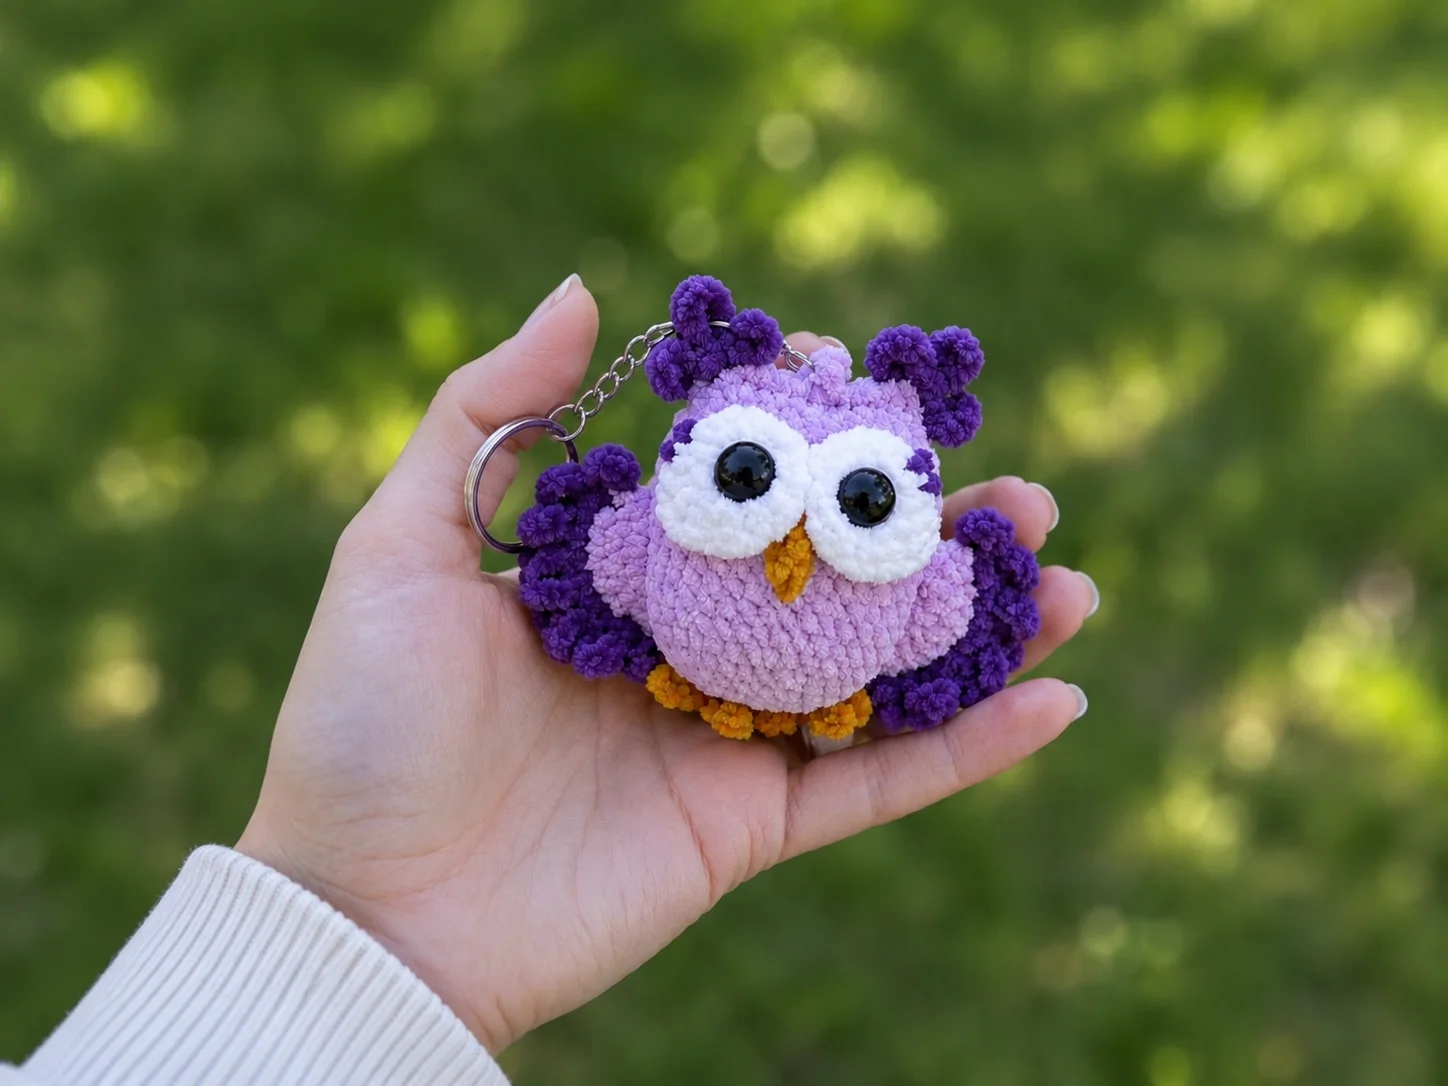
This crochet owl keychain free pattern is exactly the kind of quick win I live for. It’s tiny, it’s made almost entirely from scraps, and honestly? You could have this little owl clipped to your bag before your evening show is even over. Grab a small amount of chenille yarn in a couple of colors and let’s make something ridiculously cute.
🧶 Why You’ll Love This Pattern
- ⭐ Difficulty: EASY
- ⏱️ Time: 1.5–2 hours — easily a one-evening project
- 🪡 Sewing: Standard — the wings, legs, and eyes all get sewn on
- 🧵 Yarn: Chunky chenille — soft, squishy, and fast to work up
- 💰 Yarn needed: Less than 1 skein — a great scrap-buster
Okay, real talk before we start: this one does involve some sewing. I know, I know — you already know I’ll dodge a sewing needle if I can. But the pieces here are tiny and there are only a few of them, so it’s genuinely not a big deal. Promise.
What You’ll Need for This Crochet Owl Keychain Free Pattern
- A small amount of chenille-style yarn (the original uses Himalaya Dolphin Fine) in light purple, purple, and white — this is a Bulky (5) weight yarn, so any similar chunky chenille from your stash will work beautifully
- 12mm safety eyes
- Hook: 2.5mm (no exact US letter match — grab your smallest hook, close to a US B/1)
- Polyester stuffing
- Yarn needle, for sewing the pieces together
- A keychain ring or lobster clasp
Don’t stress about matching the exact yarn brand. Any soft chenille or velvet yarn in a similar weight will give you that same squishy little owl — it’s available at Joann, Michaels, or Hobby Lobby if you need to grab some.
Abbreviations You’ll See
| Abbreviation | What It Means |
|---|---|
| mr | magic ring — the adjustable loop you start most amigurumi with |
| ch | chain — your basic starting stitch |
| sc | single crochet — the stitch you’ll use for almost this entire project |
| sl st | slip stitch — a quick stitch used to join or move across stitches |
| inc | increase — 2 single crochets worked into the same stitch, to add width |
| dec | invisible decrease — worked through the front loops of 2 stitches to shrink the round without leaving a gap |
Beginner Tips Before You Start
Never made a magic ring before? No worries — our magic ring tutorial walks you through it in under two minutes. It sounds fancy, but it’s really just a loop.
The decrease rounds are the one spot people get nervous about. Don’t be — our invisible decrease tutorial shows you exactly how to keep it neat and gap-free.
Since this pattern has a few small parts to attach, take a peek at our guide to sewing amigurumi parts before you get to assembly. Pinning everything in place first makes a huge difference.
Time to Crochet Your Owl Keychain Free Pattern
This little owl comes together in five small parts. None of them take long, so just work through them one at a time — you’ll be done before you know it.
Part 1: Head-Body (make 1)
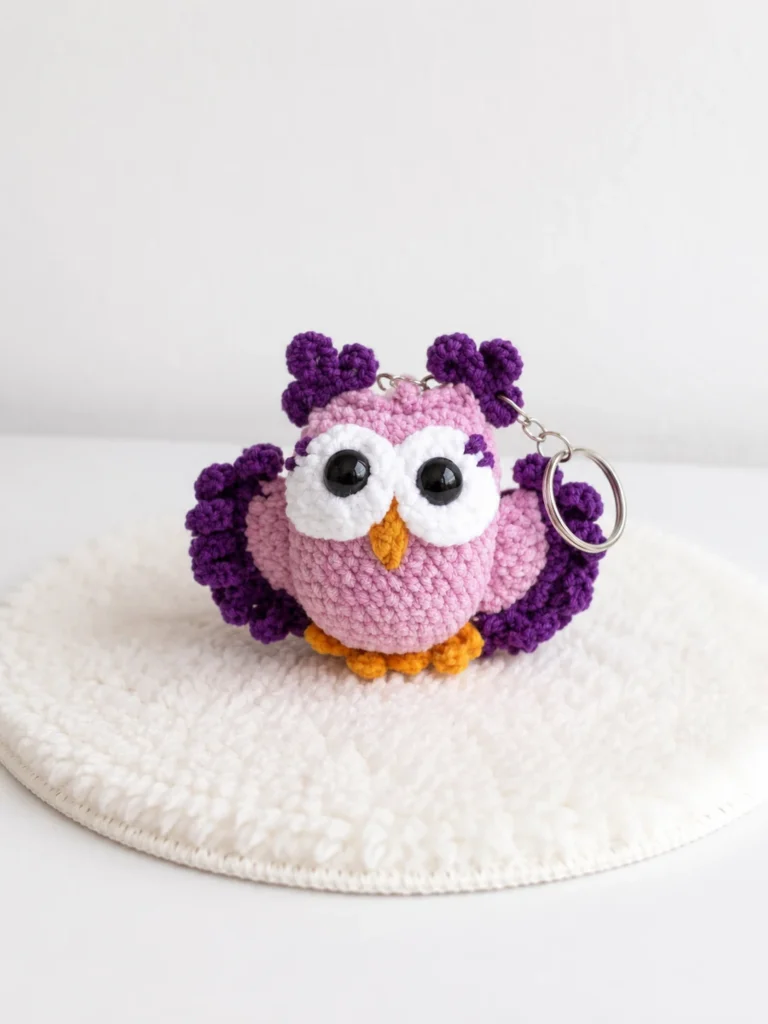
Yarn: light purple | Start: ch 6
Row 1: 6 ch, starting from the second ch from hook work 4 sc, work 3 sc in one st, turn the work and along the other side crochet 3 sc, 1 inc (12)
Row 2: 1 inc, 3 sc, 3 inc, 3 sc, 2 inc (18)
Row 3: (2 sc, 1 inc) × 6 (24)
Row 4: (3 sc, 1 inc) × 6 (30)
Row 5: (4 sc, 1 inc) × 6 (36)
Rows 6–14: sc around, 9 rows total (36)
🎉 Look at that shape! That’s your owl’s whole head and body worked in one piece — no seam down the middle. You’re already most of the way there.
Row 15: (7 sc, 1 dec) × 4 (32)
Row 16: sc around (32)
Crochet one shift stitch here before you continue on to the next row.
Row 17: (6 sc, 1 dec) × 4 (28)
Rows 18–19: sc around, 2 rows total (28)
Time to add some stuffing — squeeze it in there and shape it as you go. Not sure how much is too much? Our stuffing guide has you covered.
Row 20: Fold the piece in half and crochet through both sides together, 14 sc (14)
Finishing: Fasten off and cut yarn, leaving a tail about 7.8 in (20 cm) long — you’ll use this to make the keychain loop later.
Part 2: Crocheted Eye Parts (make 2)
Yarn: white | Start: magic ring
Row 1: 6 sc in mr (6)
Row 2: 6 inc (12)
Row 3: (1 sc, inc) × 6, sl st to fasten off (18)
Insert your safety eyes between rows 1 and 2 before you finish this piece — it’s much easier to do now than after the piece is sewn on.
Finishing: Fasten off, leaving a tail about 7.8 in (20 cm) long for sewing.
Part 3: Ear Tassels (make 2)
Yarn: purple | Start: worked directly onto the outermost stitches of the last row of the head-body
Row 1: Ch 8, sl st into the same sc you started the chain from — repeat this 3 times
🎉 No-sew bonus! These little tassels are worked straight onto the head — one part of this project you don’t have to sew at all.
Note: the original pattern doesn’t give a total stitch count for this part — that’s normal for a simple looped tassel like this one, since it’s really just three little chain loops rather than a shaped piece.
Part 4: Legs (make 2)
Yarn: not specified in the original pattern — I’d reach for purple or white to keep it coordinated, but honestly any leftover scrap works | Start: ch 6
Row 1: ch 5, starting from the second ch from hook work 4 sl st
Finishing: Fasten off, leaving a short tail for sewing.
Again, no total count is given here — the legs are just a short row of slip stitches, so there’s nothing more to it than that.
Part 5: Wings (make 2)
Yarn: light purple, then purple | Start: magic ring
Row 1: 6 sc in mr (6)
Row 2: 6 inc (12)
Row 3: (1 sc, inc) × 6 (18)
Row 4: sc around (18)
Row 5: Fold in half and crochet through both sides together, 9 sc (9)
Switch to purple yarn here.
Row 6: (ch 8, sl st into the same sc the first ch was started from, sl st) × 9 [purple]
The source pattern doesn’t list a total for this fringed row either — it’s a feather-fringe edge, not a counted round, so that’s expected.
🎉 Almost finished! Every piece is made. Now it’s just a matter of putting your owl together.
Assembly: Putting Your Owl Keychain Together
Here’s where those sewing skills come in — but with pieces this small, it goes fast. Pin everything first so you can check placement before you commit.
- Sew the wings and legs onto the sides of the head-body.
- Sew the eye pieces (with the safety eyes already inserted) onto the front of the head.
Need a refresher on neat, even seams? Our sewing amigurumi parts guide walks through exactly this kind of small-piece assembly.
Finishing Touches
- Embroider eyebrows and a little beak using leftover yarn or embroidery floss.
- Using the yarn tail left at the top of the head, chain 9–11 stitches to form the keychain loop, then attach your keyring or lobster clasp.
Your finished owl should measure about 3.1–3.5 in (8–9 cm) including the ear tassels — small enough to clip onto a bag, backpack, or keys without adding any bulk.
You Did It!
Look at that little face! You just made a full amigurumi — sewing and all — in one sitting. This one’s small enough to whip up a whole flock of them in different colorways, so don’t be surprised if you’re back here making a second owl before the week is out. Tag us if you share yours — I want to see every squishy little version. 🧶
FAQ
What yarn is best for this owl amigurumi?
Chunky chenille or velvet yarn (Bulky weight 5) is perfect for a soft, squishy result. You only need a small amount, making it a great scrap-buster project.
How long does it take to crochet this owl keychain?
It takes about 1.5 to 2 hours, making it a very quick and easy one-evening project.
Can beginners make this pattern?
Yes! The pattern uses basic stitches like single crochet, increases, and invisible decreases, making it very beginner-friendly.