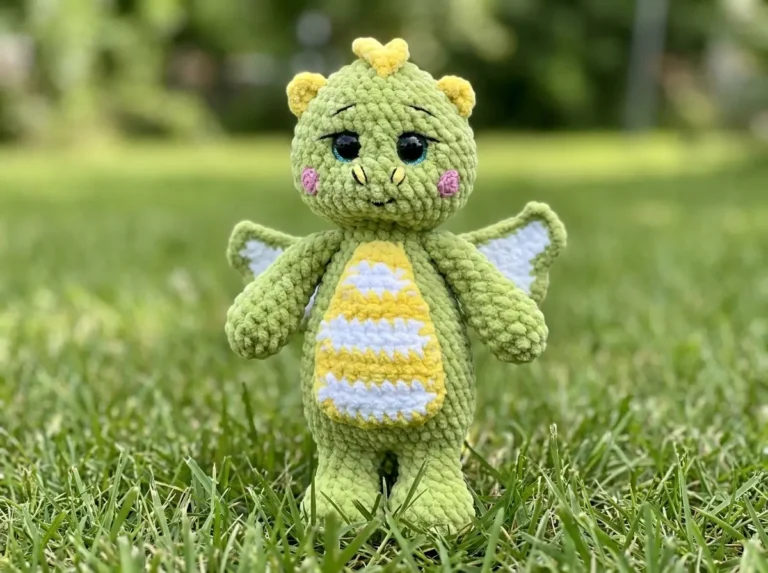
Free Cute Dragon Amigurumi Crochet Pattern — Poseable Baby Dragon with Wings
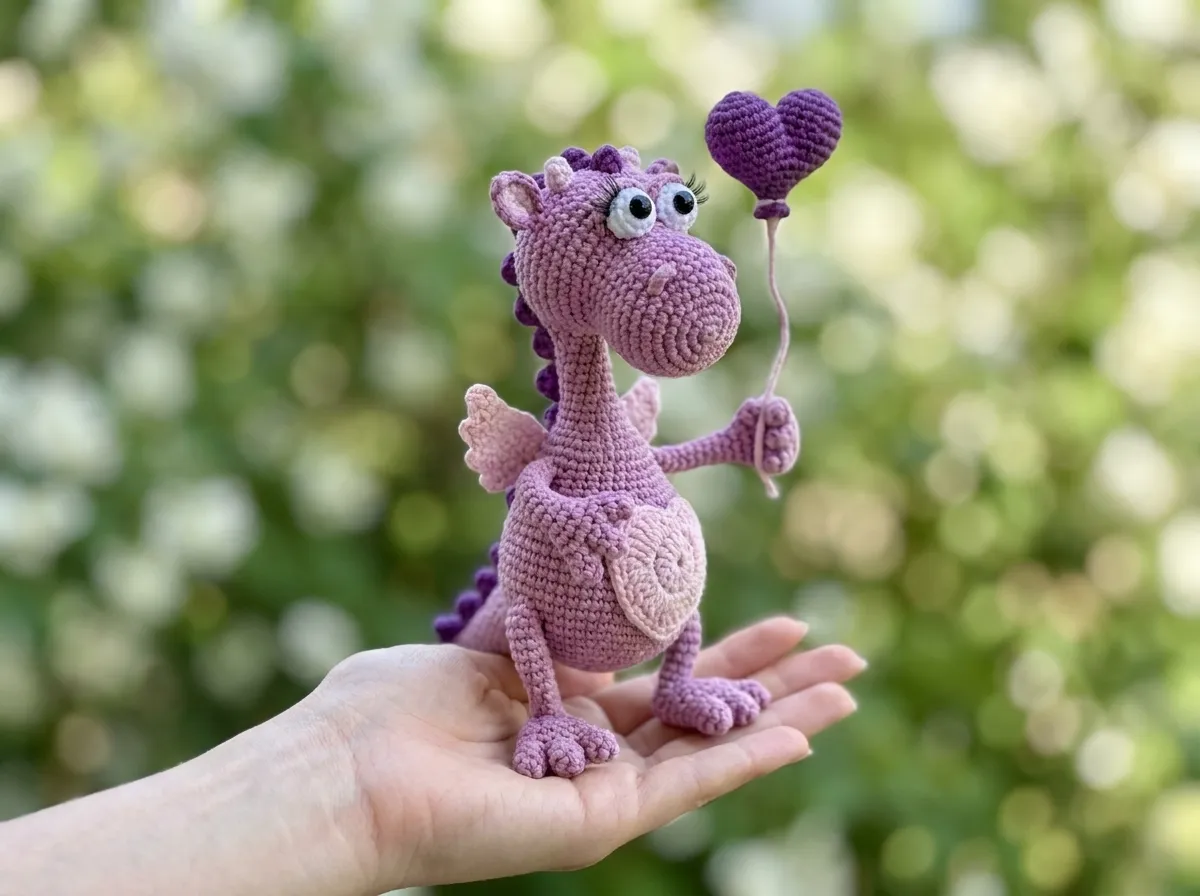
This cute dragon amigurumi crochet pattern is genuinely one of the most impressive things you will ever pull off with a hook and some yarn. Meet Moxy — a tiny baby dragon with wings, a spiky ridge down her back, and a little heart she carries in her hand. She’s poseable (yes, really — wire frame inside!), she has eyelashes, and she has a face so expressive you’ll spend ten minutes just looking at her before you can put her down. And here’s the thing — she’s absolutely doable. Take it one part at a time and you’ll have her finished before you know it.
🧶 Why You’ll Love This Pattern
- ⭐ Difficulty: Intermediate
- ⏱️ Time: 8–12 hours across a few sessions
- 🪡 Sewing: Standard — wings, horns, and ears are sewn on (totally worth it)
- 🧵 Yarn: DK/Light Worsted — fine detail, beautiful stitch definition
- 💰 Yarn needed: About 1 skein main color + small amounts of accent colors
- 🔧 Special feature: Wire frame inside — Moxy is fully poseable!
Materials for Your Cute Dragon Amigurumi Crochet Project
- Main yarn: DK/Light Worsted (CYCA weight 3) in your main color — about 1 full skein. Gazzal Jeans is the original; US alternatives include Paintbox Cotton DK or Drops Muskat. Check out the Craft Yarn Council yarn weight system if you’re unsure whether your yarn qualifies.
- Accent yarn: A small amount of a contrasting or complementary color for the spikes, wings, ears, heart patch, and heart ball. You can raid your scrap basket for this — it’s tiny amounts.
- White yarn: A small scrap for the eye whites. Really just a few yards.
- Hook: 1.5mm — this is a very fine hook, so take your time. It produces beautifully tight, detailed stitches that make Moxy look polished.
- Safety eyes or half-bead cabochons: 2 small half-bead eyes (the original uses cabochon beads glued on — see Face Detailing section)
- Decorative eyelashes: Available at craft stores or online — these make Moxy’s face come alive
- Polyester fiberfill: For stuffing the head, legs, arms, and heart ball. Any brand works — Poly-Fil is widely available at Joann, Michaels, or Hobby Lobby.
- Armature wire: 2mm wrapped wire, 110cm total length + 30cm of bare 2mm wire. This creates the poseable skeleton inside Moxy’s body. Find it at craft stores or Amazon.
- Medical tape or athletic tape: For wrapping the wire before inserting it into the body and head. This protects the yarn from the wire ends.
- Transparent craft glue: Moment Crystal or similar (any strong clear-dry adhesive) — for gluing the bead eyes and eyelashes.
- Tapestry/yarn needle: For sewing parts and weaving in ends.
- Stitch markers: Non-negotiable for tracking rounds in a pattern this complex. Clip one at the start of every round.
Abbreviations Used in This cute dragon amigurumi crochet Pattern
| Abbreviation | What it means |
|---|---|
| mr | Magic ring — an adjustable loop start. If this is new to you, it’s easier than it sounds! |
| ch | Chain stitch |
| sc | Single crochet — your main stitch for this whole pattern |
| hdc | Half double crochet — slightly taller than sc, used in the face section |
| dc | Double crochet — used for the bobble spikes |
| inc | Increase — 2 sc worked into the same stitch |
| dec | Decrease — 2 sc worked together into 1 stitch |
| FLO | Front loop only — insert hook into the front loop of the stitch only |
| BLO | Back loop only — insert hook into the back loop of the stitch only |
| 3-in-1 | 3 sc worked into one stitch — creates a sharp point, used in the eye whites and ears |
| sh st | Shift stitch — a slip stitch used to reposition the beginning-of-round marker. Does not add to the stitch count. Do not count it in your total. |
| sl st | Slip stitch — used to join rounds or close pieces |
Beginner Tips Before You Start Your Cute Dragon Amigurumi
This pattern has a lot of parts — and that’s okay. The trick is to work one section at a time. Finish the mouth. Set it aside. Finish the toes. Set those aside. By the time you’re working the body, you’ll feel like an expert because you’ll have already made 10 mini-pieces. Break it down and it stops feeling overwhelming.
The magic ring is your best friend here. Almost every single part of Moxy starts with one — the mouth, the toes, the fingers, the head, the horns, the heart ball. If you’re not confident yet, stop now and check out our magic ring tutorial before you begin. Ten minutes of practice and you’ll nail it every single time.
Two colors means keeping track. Moxy has a main color and at least one accent color — and you’ll switch between them across many different parts. Our guide on changing colors in amigurumi will help you keep everything clean with no color bleed. It’s a quick read and 100% worth it for a project this detailed.
About the wire frame: Don’t be intimidated. The wire just sits inside the body — you insert it after crocheting, wrap it with tape so it doesn’t poke through, and that’s genuinely all there is to it. The result is a dragon that holds whatever pose you put her in. That’s not extra work. That’s a superpower.
The Pattern — Part by Part
Mouth (×1) — Main Color
Start with a magic ring.
Row 1: 6 sc in mr (6)
Row 2: (inc) × 6 (12)
Rows 3–4: 12 sc (12)
Fold the piece in half and sc through both layers: 6 sc. (6)
FO, leave a long tail. Set aside — this will be worked into the head in Row 14.
Lower Legs — Toes (×3 per leg, ×2 legs = 6 toes total) — Main Color
Make 3 toes per leg. Start each toe with a magic ring.
Row 1: 6 sc in mr (6)
Rows 2–3: 6 sc (6)
FO on the first two toes. On the third toe, do not cut yarn — you’ll continue directly into joining.
Lower Legs — Main Body (×2 legs) — Main Color
After completing 3 toes, continue from the third toe without cutting yarn.
Row 4: 6 sc along toe 1, 3 sc along toe 3, 6 sc along toe 2, 3 sc along toe 3 (18)
Row 5: 18 sc (18)
Row 6: (4 sc; dec) × 3 (15)
After Row 6: Insert your pre-cut 19cm wire frame into the leg.
Row 7: (3 sc; dec) × 3 (12)
Row 8: 12 sc (12)
Row 9: (2 sc; dec) × 3 (9)
Row 10: (1 sc; dec) × 3 (6)
After Row 10: Stuff the leg with fiberfill before continuing.
Rows 11–25: 6 sc — repeat for 15 rows (6)
FO, cut yarn. Make the second leg the same way.
🎉 Two legs done! Seriously — the toes were the trickiest part and you just cruised through them. Everything from here is bigger and faster.
Upper Arms — Fingers (×3 per arm, ×2 arms = 6 fingers total) — Main Color
Make 3 fingers per arm. Start each finger with a magic ring.
Row 1: 4 sc in mr (4)
Rows 2–3: 4 sc (4)
FO on the first two fingers. On the third finger, do not cut yarn — continue directly into joining.
Upper Arms — Main Body (×2 arms) — Main Color
Row 4: 4 sc along finger 1, 2 sc along finger 3, 4 sc along finger 2, 2 sc along finger 3 (12)
Row 5: 12 sc (12)
After Row 5: Insert wire frame (cut lengths of 10 cm + 3 cm + 3 cm, one per finger channel).
Row 6: (2 sc; dec) × 3 (9)
Row 7: (1 sc; dec) × 3 (6)
Rows 8–17: 6 sc — repeat for 10 rows (6)
FO, cut yarn. Make the second arm the same way.
Face/Head (×1) — Main Color
This is the centerpiece of Moxy. Take your time here — every row matters.
Start with a magic ring.
Row 1: 6 sc in mr (6)
Row 2: (inc) × 6 (12)
Row 3: (1 sc; inc) × 6 (18)
Row 4: (2 sc; inc) × 6 (24)
Row 5: (3 sc; inc) × 6 (30)
Row 6: (4 sc; inc) × 6 (36)
Row 7: 36 sc (36)
Row 8: 20 sc; 5 hdc in one loop; 10 sc; 5 hdc in one loop; 4 sc (40)
Row 9: 20 sc; 1 sc BLO; 10 sc; 1 sc BLO; 4 sc (36)
Row 10: 36 sc (36)
Row 11: (10 sc; dec) × 3 (33)
Row 12: 33 sc (33)
Row 13: (9 sc; dec) × 3 (30)
Row 14: 5 sc; 6 sc joined with mouth loops; 19 sc (30)
This is where your pre-made mouth piece gets worked in — hold it in position against the face and crochet through its loops.
Row 15: 30 sc (30)
Row 16: 12 sc; (2 sc; inc) × 6 (36)
Row 17: 12 sc; (3 sc; inc) × 6 (42)
Row 18: 8 sc; 8 ch (skip 2 sts); 32 sc (48)
Row 18 creates the chain opening at the back of the neck — this is where the body will attach later. Keep it open and don’t skip it.
Row 19: 8 sc; 8 sc along ch; 32 sc (48)
Rows 20–21: 48 sc (48)
Row 22: (6 sc; dec) × 6 (42)
Row 23: 42 sc (42)
Row 24: (5 sc; dec) × 6 (36)
Row 25: (4 sc; dec) × 6 (30)
After Row 25: Shape your 37cm wire frame, wrap it completely with medical tape, and insert it into the head. Now stuff the head firmly with fiberfill around the wire before continuing to close.
Row 26: (3 sc; dec) × 6 (24)
Row 27: (2 sc; dec) × 6 (18)
Row 28: (1 sc; dec) × 6 (12)
Row 29: (dec) × 6 (6)
Cut yarn, pull tight to close completely.
🎉 The head is done — and it’s already incredible. That little muzzle shape from the hdc rows? That’s all you. The body is next and it’s going to come together fast now that the hardest part is behind you.
Eye Whites (×2) — White Yarn
Start from a chain foundation (not a magic ring).
Row 1: 3 ch; starting from 2nd ch from hook — 3-in-1; in next ch — 3-in-1 (6)
Row 2: (1 sc; 3-in-1; 1 sc) × 2 (10)
Row 3: 2 sc; inc; 4 sc; inc; 2 sc (12)
FO, leave a long tail for sewing. Make two.
Eyelids (×2) — Main Color
Start from a chain foundation.
Row 1: 6 ch; starting from 2nd ch from hook — 5 sc (5)
Row 2: 5 sc joined with white loops (5)
Cut yarn, leave a long tail. Join each eyelid to the top of an eye white. Lightly stuff the eye assembly, then sew both eyes to the face in your preferred position.
Ears (×2) — Accent Color (inner) + Main Color (outer)
Each ear is made of two layers — work both from a chain foundation.
Inner piece (accent color):
Row 1: 5 ch; starting from 2nd ch from hook — 3 sc; 3-in-1; 3 sc along second side. Ch, turn (9)
Row 2: 4 sc; 3-in-1; 4 sc (11)
Cut yarn.
Outer piece (main color): Work the same rows as the inner piece. Do not cut yarn on the outer piece.
Place both pieces together (wrong sides facing) and join with sc around the edge. FO, leave a long tail. Fold the base in half and take a couple of tacking stitches to hold the fold. Repeat for the second ear. Sew both ears to the head.
Horns (×2) — Main Color or Accent Color
Start with a magic ring.
Row 1: 4 sc in mr (4)
Row 2: inc; 3 sc (5)
Row 3: inc; 4 sc (6)
FO, leave a long tail. Make two. Sew both horns to the top of the head.
Body (×1) — Main Color
The body is worked directly from the head. Join your yarn to the chain stitches you made at the back of the head in Face/Head Row 18.
Row 1: 4 sc; 2 sc along Row 17 loops of head; 4 sc (10)
Rows 2–5: 10 sc — repeat for 4 rows (10)
Row 6: (4 sc; inc) × 2 (12)
Rows 7–8: 12 sc (12)
Row 9: (5 sc; inc) × 2 (14)
Row 10: 14 sc (14)
Row 11: (6 sc; inc) × 2 (16)
Row 12: (7 sc; inc) × 2 (18)
Row 13: (2 sc; inc) × 6 (24)
Row 14: (3 sc; inc) × 6 (30)
Row 15: 9 sc; 3 sc joined with 3 loops of arm; 12 sc; 3 sc joined with 3 loops of arm; 3 sc (30)
Row 16: 9 sc; 3 sc along arm; 12 sc; 3 sc along arm; 3 sc (30)
After Row 16: Stuff the body so far. Then twist the two arm wires together inside the body and wrap the joined section with medical tape before continuing.
Row 17: (4 sc; inc) × 6 (36)
Row 18: 36 sc (36)
Row 19: 18 sc; (1 sc; inc) × 3; 12 sc (39)
Row 20: 18 sc; (2 sc; inc) × 3; 12 sc (42)
Row 21: 42 sc (42)
Row 22: 20 sc; (2 sc; inc) × 3; 13 sc (45)
Row 23: 45 sc (45)
Row 24: 20 sc; (3 sc; inc) × 3; 13 sc (48)
Rows 25–28: 48 sc — repeat for 4 rows (48)
Row 29: 15 sc; 3 sc joined with leg loops; 25 sc; 3 sc joined with leg loops; 2 sc (48)
Row 30: 15 sc; 3 sc along leg; 25 sc; 3 sc along leg; 2 sc (48)
Row 31: 6 sc; inc; 22 sc; dec; 17 sc (48)
After Row 31: Twist the two leg wires together inside the body and wrap with medical tape before continuing.
Row 32: 17 sc; dec; (11 sc; dec) × 2; 3 sc (45)
Row 33: ⚠️ [VERIFY BEFORE PUBLISHING — see editorial note] 7 sc; dec; 14 sc; dec; 11 sc; dec; 7 sc (42)
Row 34: 8 sc; inc; 13 sc; dec; 2 sc; dec; 3 sc; dec; 2 sc; dec; 5 sc (39)
Row 35: 9 sc; inc; 10 sc; (dec; 3 sc) × 3; dec; 2 sc (36)
Row 36: 9 sc; inc; 16 sc; dec; 8 sc (36)
Row 37: 10 sc; inc; 10 sc; (dec; 2 sc) × 3; dec; 1 sc (33)
Row 38: 10 sc; inc; 15 sc; dec; 5 sc (33)
Row 39: 21 sc; (2 sc; dec) × 3 (30)
At the end of Row 39: work 4 sh st to reposition your marker. Remember: sh st does not count toward your stitch total.
Row 40: 7 sc; inc; 8 sc; dec; (2 sc; dec) × 3 (27)
Row 41: 8 sc; inc; 8 sc; dec; 1 sc; (dec) × 2; 1 sc; dec (24)
Row 42: 18 sc; (dec) × 3 (21)
Row 43: 9 sc; inc; 9 sc; dec (21)
At the end of Row 43: work 2 sh st. Keep stuffing as you go — don’t leave this until the end or you won’t be able to reach inside!
Row 44: 15 sc; (dec) × 3 (18)
Row 45: 8 sc; inc; 7 sc; dec (18)
Row 46: 18 sc (18)
At the end of Row 46: work 5 sh st.
Row 47: 4 sc; inc; 6 sc; (dec) × 2; 3 sc (17)
Row 48: 12 sc; dec; 3 sc (16)
Row 49: 5 sc; inc; 5 sc; (dec) × 2; 1 sc (15)
Row 50: 15 sc (15)
At the end of Row 50: work 3 sh st.
Row 51: 2 sc; inc; 5 sc; (dec) × 2; 3 sc (14)
Row 52: 14 sc (14)
Row 53: 4 sc; inc; 4 sc; (dec) × 2; 1 sc (13)
Row 54: 10 sc; dec; 1 sc (12)
At the end of Row 54: work 1 sh st.
Row 55: 4 sc; inc; 3 sc; (dec) × 2 (11)
Row 56: 9 sc; dec (10)
Row 57: (dec; 3 sc) × 2 (8)
Row 58: 8 sc (8)
Row 59: (dec; 2 sc) × 2 (6)
Row 60: 6 sc (6)
Pull tight to close the tail tip completely.
🎉 60 rows. You just crocheted an entire dragon body — from the neck all the way to the tip of the tail. That is genuinely impressive and you should feel amazing. Moxy is almost complete. Just a few finishing touches left.
Spikes — Bobble Ridge (along head and back) — Accent Color
Starting 1 row above the eyelids, join accent color yarn and work the bobble spike ridge down the center of the head and the full length of Moxy’s back to the tail tip.
Bobble stitch (repeat every 2–3 rows): 3 ch; 4 dc in the same stitch. Remove the hook, insert it into the top chain of the 3-ch column, and pull the loop through to close the bobble. Continue to the end of the tail, spacing one bobble every 2–3 rows.
Secure yarn at the tail tip.
Spike placement follows the center back ridge. No chart required — just space evenly as described.
Wings (×2) — Accent Color
⚠️ Chart required: The wings are worked from a hand-drawn chart included in the original source pattern. Refer to the original designer’s materials before beginning this section.
After working the wings from the chart, sc around the entire edge of each wing. Leave a long tail for sewing. Sew both wings firmly to Moxy’s back — position them slightly behind the shoulder area for best posture.
Heart Patch (×1) — Accent Color
⚠️ Chart required: The flat heart patch is worked from a chart included in the original source pattern. Refer to the original designer’s materials before beginning this section.
Once complete, sew the heart patch flat against Moxy’s belly.
Heart Ball (×1) — Accent Color
This is the little heart Moxy carries — worked in two halves and joined together. Start each half with a magic ring.
First half:
Row 1: 6 sc in mr (6)
Row 2: (inc) × 6 (12)
Row 3: (1 sc; inc) × 6 (18)
Rows 4–5: 18 sc (18)
FO. Make a second identical half.
After completing both halves (18 sts each), place them together with wrong sides facing. Join accent color yarn and work Row 6 continuously around both pieces — 36 sts total.
Row 6: 36 sc (36)
Row 7: 36 sc (36)
Row 8: (4 sc; dec) × 6 (30)
Row 9: (3 sc; dec) × 6 (24)
Row 10: (2 sc; dec) × 6 (18)
After Row 10: Insert your 30cm wire into the heart ball so it extends out one end (this wire goes into Moxy’s hand). Stuff the heart ball with fiberfill.
Row 11: (4 sc; dec) × 3 (15)
Row 12: (3 sc; dec) × 3 (12)
Row 13: (2 sc; dec) × 3 (9)
Row 14: (1 sc; dec) × 3 (6)
Row 15: (inc FLO) × 6 (12)
FO, cut yarn. Apply a thin layer of clear glue to the wire extending from the heart ball and wrap it tightly with yarn all the way to the end. Insert this wrapped wire into Moxy’s arm — she’s holding her heart now.
Assembly — Putting Your Cute Dragon Amigurumi Together
The good news: most of Moxy’s assembly happened while you were crocheting, so the separate sewing steps are fewer than they look. Our guide to sewing amigurumi parts together has all the detail you need if any of these steps feel new.
- The mouth was already integrated into the face at Row 14. No action needed if you did this during the pattern. ✓
- The wire frame inside the head was inserted and taped after Row 25 of the face. ✓
- The eyes (whites + eyelids) were lightly stuffed and sewn to the face after completing the eye sections. ✓
- The ears are folded at the base and sewn to either side of the head — position them above and slightly behind the eye level.
- The body was attached directly to the back of the head via the chain loop opening in Face Row 18. ✓
- The arms were crocheted into the body at Rows 15–16. ✓
- The legs were crocheted into the body at Rows 29–30. ✓
- Sew the horns to the top of the head — center them between the ears.
- Sew the wings to Moxy’s back — angle them slightly upward for a mid-flight look, or flat for a resting pose.
Face Detailing — Finishing Moxy’s Expression
This is the step that makes Moxy go from “cute crochet piece” to “how is this even real.”
- Apply a small drop of clear craft glue to the back of each half-bead cabochon. Press firmly onto the crocheted eye whites and hold for 30 seconds. Let dry completely before handling.
- Glue the decorative eyelashes along the upper edge of each eye. Trim them if needed for scale — Moxy looks best with medium-length lashes that don’t overpower her small face.
- The spike ridge in accent color was worked directly onto the body during the Spikes section. If you haven’t done this yet, do it before the wings so you can see where the wings should sit.
- Sew the flat heart patch to Moxy’s belly — center it and keep it flat so it doesn’t bunch.
- Slide the yarn-wrapped wire of the heart ball into Moxy’s arm from the open end. Position the heart ball where you want it and bend the wire inside the arm slightly to hold it in place.
You Did It! Your Cute Dragon Amigurumi Crochet Is Complete
Look at her. Just look at her. You made a poseable baby dragon with eyelashes, a spine of spikes, wings, and a tiny heart — and you did it stitch by stitch. That is not a small thing. If this is your first ambitious project, you should be ridiculously proud. If you’re a seasoned maker, I hope Moxy felt just as satisfying as she looks.
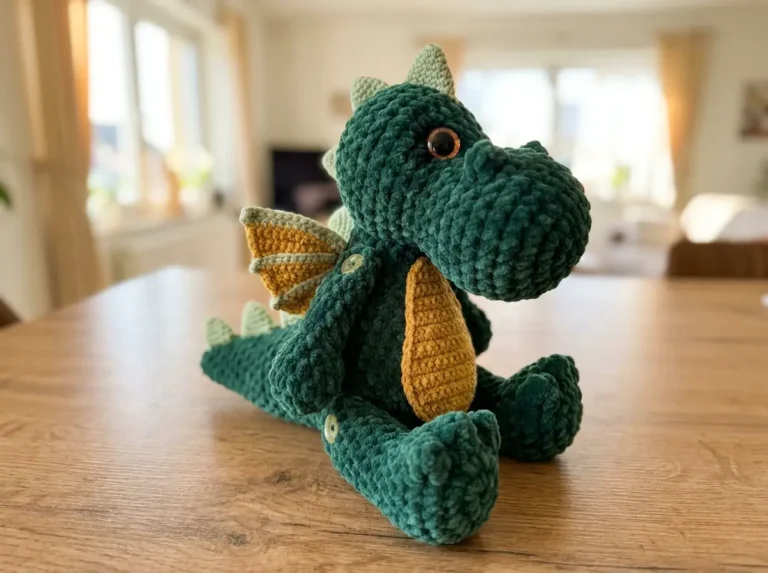
Share your finished dragon and tag us — I genuinely want to see every single version of Moxy that exists in the world. And if you loved making a fantasy creature, our free Vesper dragon pattern and our fluffy chenille unicorn are waiting for you next. 🧶
What yarn is best for this cute dragon amigurumi crochet pattern?
A DK/Light Worsted yarn (CYCA weight 3) is best for achieving the fine details and crisp stitch definition required for Moxy the dragon.
Can a beginner make this poseable amigurumi dragon?
This is an intermediate-level pattern due to the complex shaping, multiple small parts, and internal wire frame. However, confident beginners can succeed by tackling it one small section at a time.
How do I make the dragon amigurumi poseable?
Moxy becomes fully poseable by inserting a taped 2mm armature wire frame into the channels of the arms, legs, and body as you crochet, creating a flexible internal skeleton.