A Free Crochet Easter Bunny Amigurumi Pattern for the Softest Little Pair
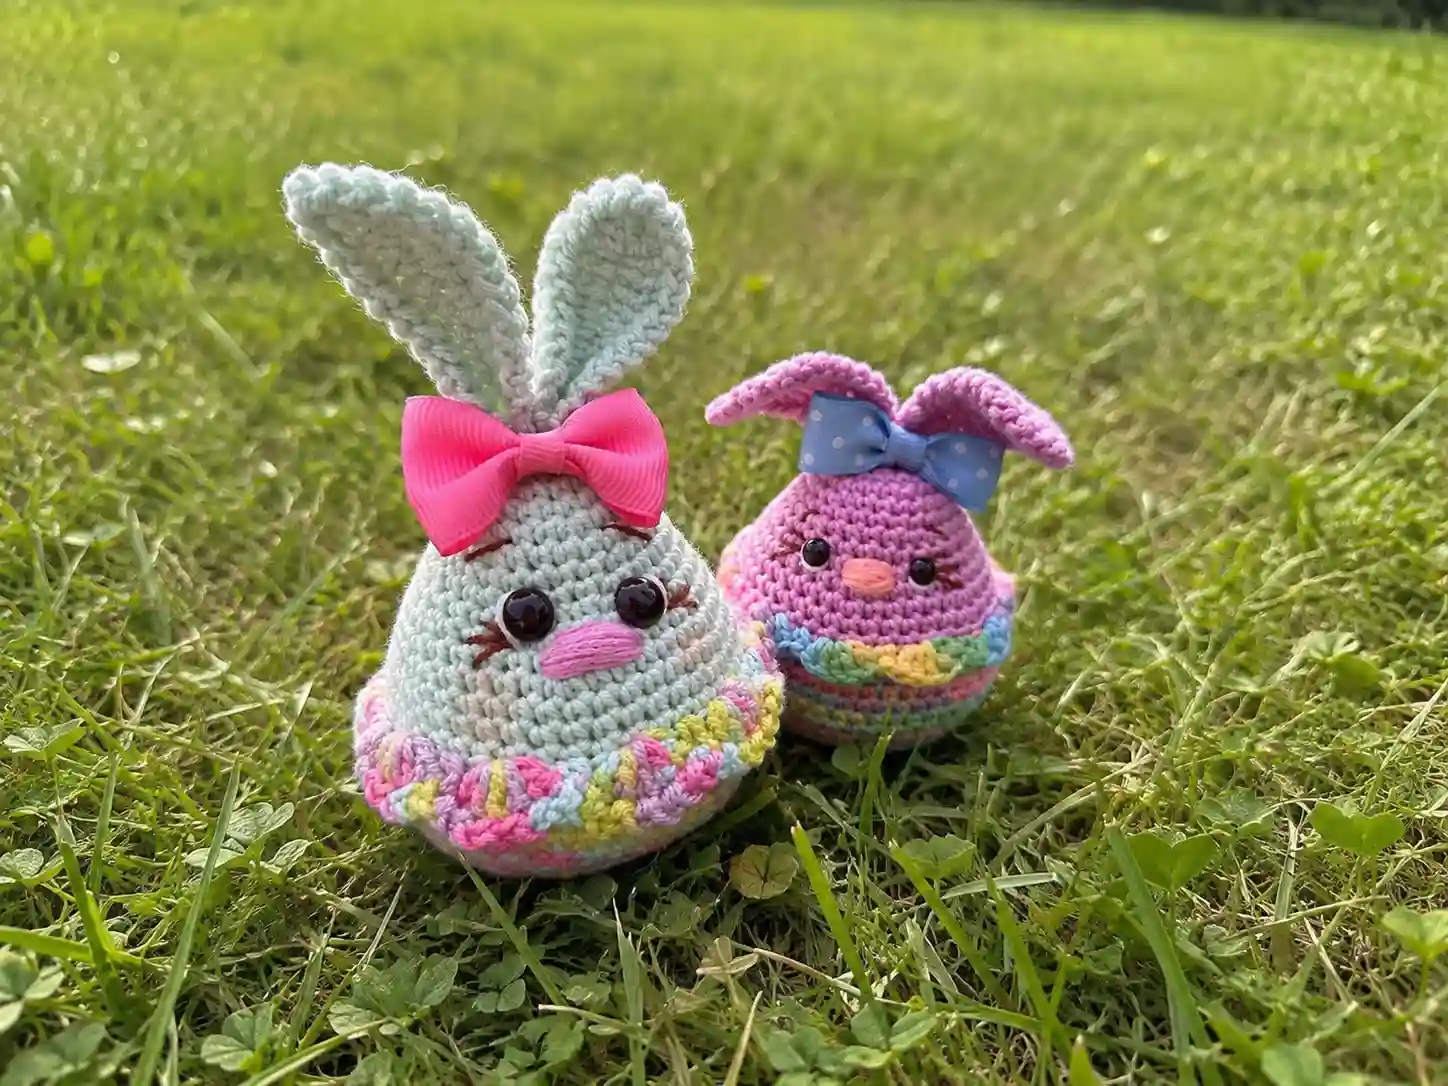
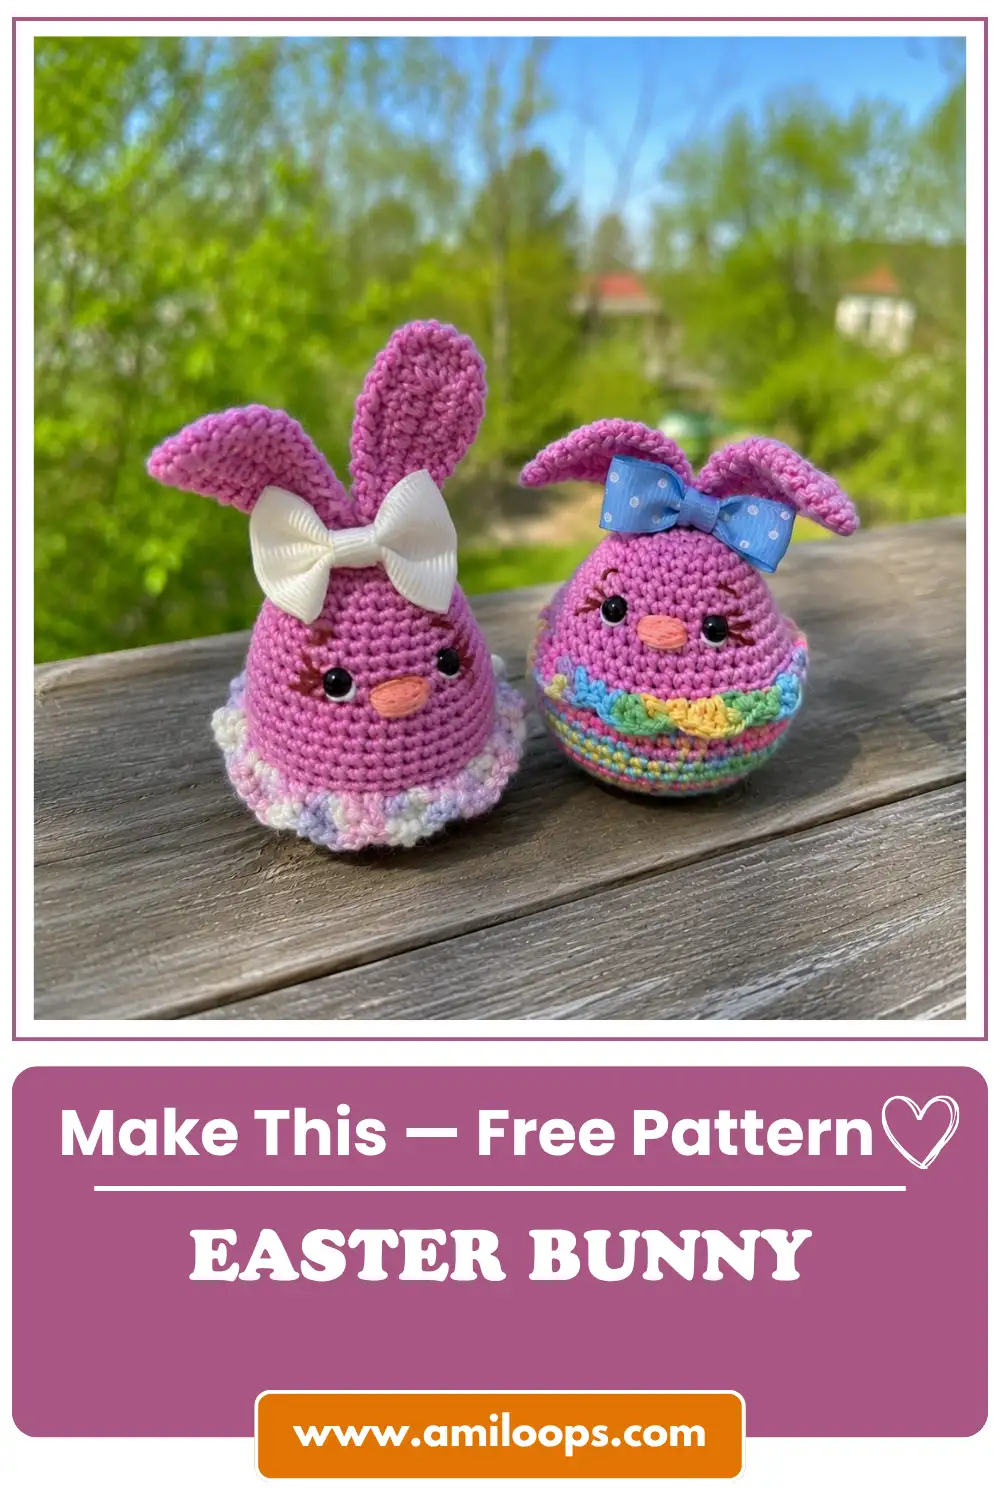
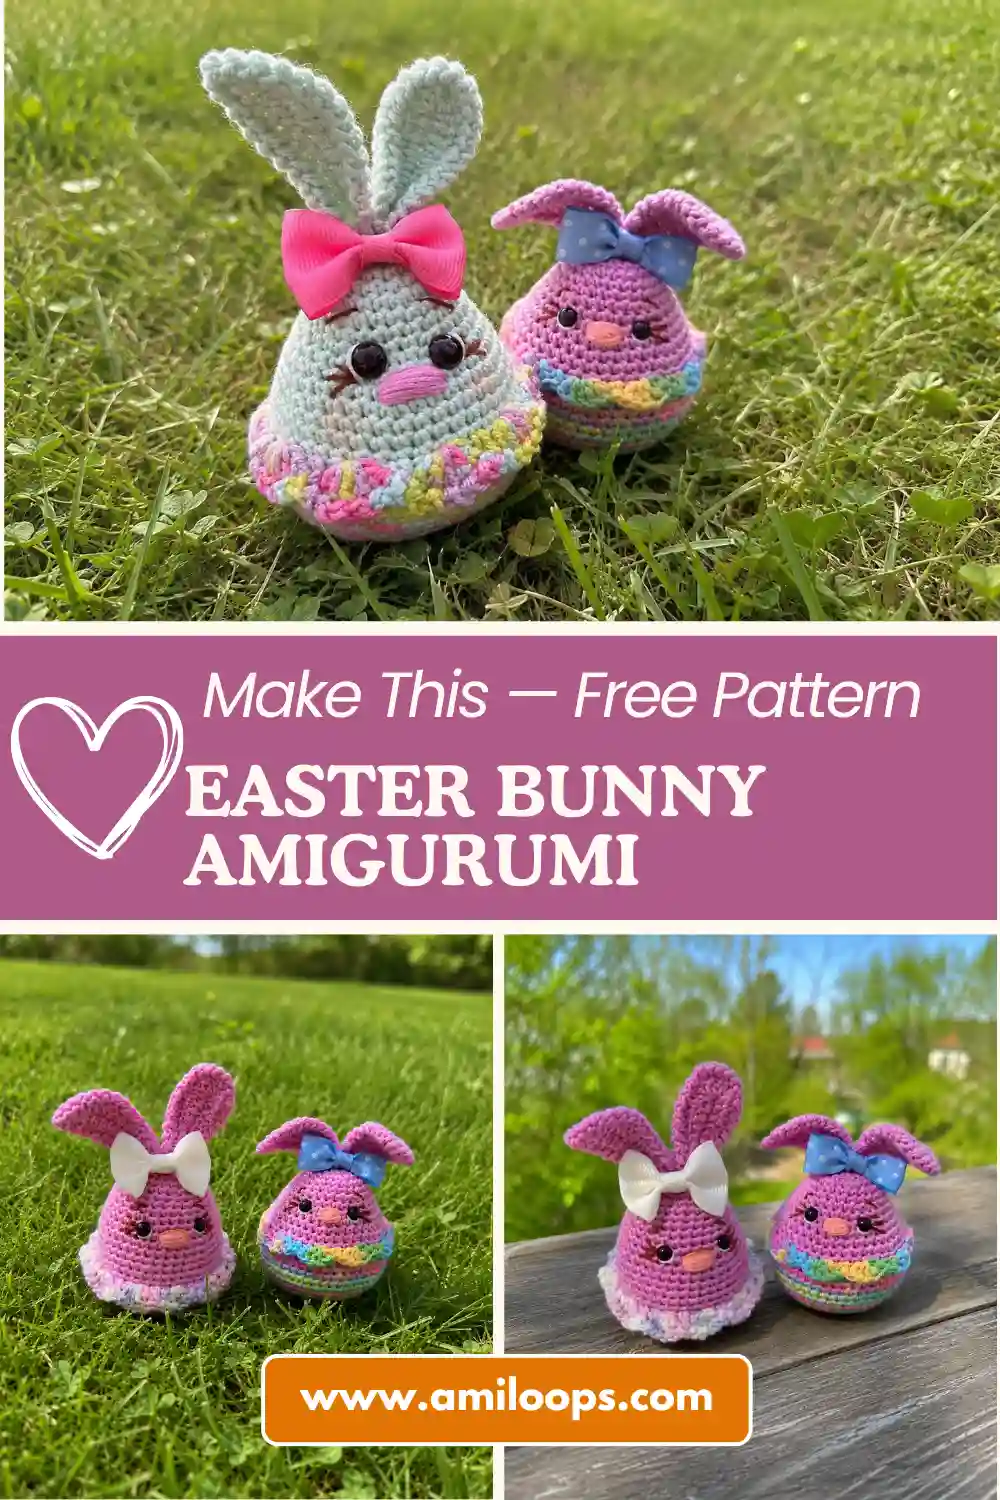
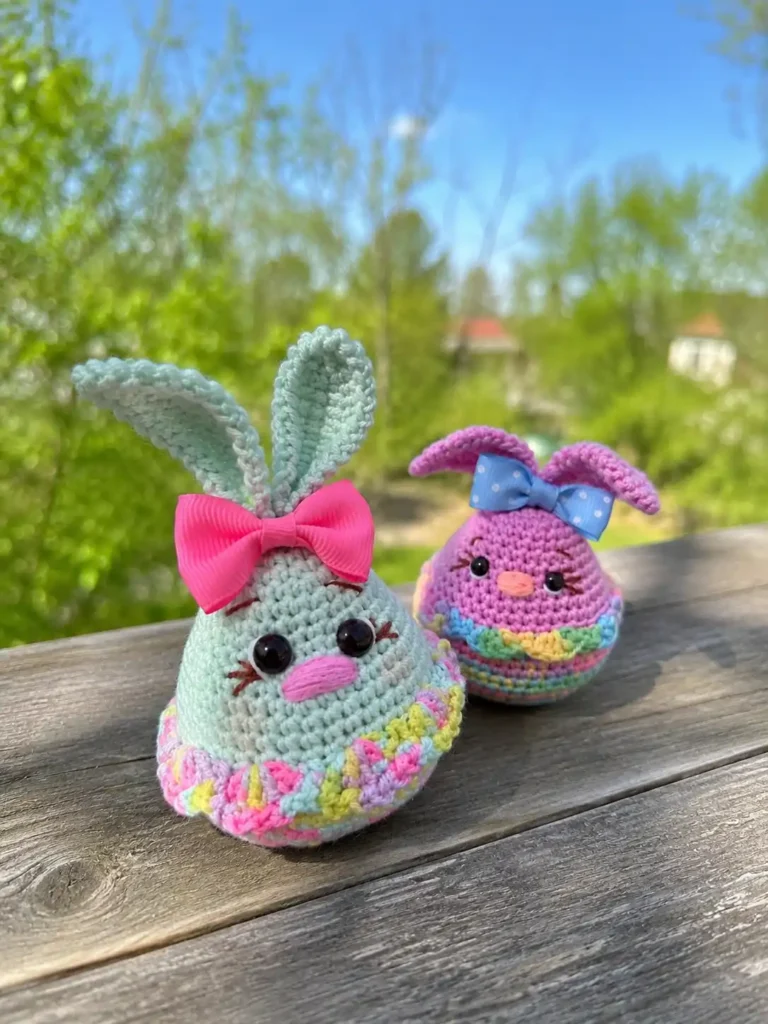
This crochet easter bunny amigurumi free pattern makes the softest little bunny pair you’ve ever seen — one dressed as a boy in solid pastel fur, one wearing the sweetest melange skirt with a tiny bow tucked by one ear. Each bunny sits at just under three inches tall, with glossy glued eyes, hand-embroidered lashes, and the softest blushed cheeks. Let me show you how these two tiny sweethearts come together.
🩷 Pattern Highlights
- Cuteness Rating: 🩷🩷🩷🩷🩷
- Finished Size: 2.75 in (7 cm) body + 2 in (5 cm) ears
- Difficulty: Intermediate (estimated)
- Hook Size: 1.75mm (fine/steel range — see note below)
- Yarn Palette: soft solid pastel for the head and ears, a dusty melange blend for the lower body and skirt, and a whisper of blush pink for the nose
- Key Detail: glued half-bead eyes with hand-embroidered whites and lashes, plus a tiny crocheted bow for the girl bunny
- Estimated Time: 3-4 hours (estimated)
Materials for This Crochet Easter Bunny Amigurumi
Here’s everything you’ll want pulled out and ready before you start this crochet easter bunny amigurumi pattern:
- Main color yarn (solid) — for the head, ears, and tail. This is your bunny’s “fur,” so pick something soft and a little fuzzy-looking even before you’ve stuffed it. A pale cream, soft blush, or powder blue all work beautifully here.
- Additional color yarn (melange/variegated) — for the lower body and, for the girl bunny, the little skirt. A speckled or heathered pastel gives this part a sweet, textured look against the smooth solid fur above it.
- Small amount of yarn for the nose — a dusty rose or soft coral is perfect for that little embroidered nose.
- Embroidery thread — for the eyelashes and eyebrows. A dark brown or soft black keeps the expression gentle rather than harsh.
- White thread — for embroidering the whites of the eyes around the beads, which is what really gives them that glossy, alive look.
- Hook: 1.75mm — this is a fine, steel-range hook size. There isn’t a clean US letter equivalent for a hook this small, so we’re listing it in millimeters only — just look for the closest steel or lace-weight hook you have on hand.
- Stuffing — fiberfill or holofiber, added gradually so the shape stays smooth and round.
- Half-bead eyes + craft glue — instead of the washer-back safety eyes we usually reach for, this pattern uses glued half-bead eyes, which is what gives these bunnies their soft, almost vintage little faces.
- Sewing needle — a tapestry needle for attaching all the little pieces.
- Oil pastel — for tinting the cheeks with that soft, powdery blush.
Because of the fine hook size here, you’ll want a correspondingly fine yarn — think lace or fingering weight, the kind classified under the Craft Yarn Council’s yarn weight system as the thinnest categories. It’s what lets all those tiny details — the ears, the skirt shells, the bow — stay so delicate.
Abbreviations Used in This Crochet Easter Bunny Amigurumi Free Pattern
| Abbreviation | Meaning |
|---|---|
| mr | magic ring |
| ch | chain |
| sc | single crochet |
| inc | increase (two sc in one stitch) |
| inv dec | invisible decrease |
| hdc | half double crochet |
| dc | double crochet |
| sl st | slip stitch |
| BLO | back loop only |
| FLO | front loop only |
| ( )* | repeat the indicated number of times |
Before You Begin — Making This Easter Bunny Amigurumi Extra Sweet
🩷 Chloe’s Detail Tip: The color change from solid to melange happens right at Row 15 of the body, worked in the back loop only. That little ridge it creates isn’t just structural — it’s the line where the “fur” meets the skirt or the boy bunny’s edging, so keep it nice and even as you work it.
If magic rings still feel a little fiddly, our magic ring tutorial walks through getting that center hole to close up snug every time — you’ll use one to start the body, tail, and the little bow.
Every “dec” in this pattern is worked as an invisible decrease, which keeps the closing rounds smooth instead of leaving little gaps — especially important on a face this small, where every stitch shows.
Since there are quite a few tiny pieces to attach — ears, tail, and for the girl bunny, a bow — our guide to sewing amigurumi parts together is worth a peek before you get to assembly.
Crochet Easter Bunny Amigurumi Pattern — Body (×1)
Yarn Color: Solid yarn, changing to melange at Row 15
Starting Method: 5 sc in mr
Row 1: inc*5 (10)
Row 2: (1 sc, inc)*5 (15)
Row 3: (2 sc, inc)*5 (20)
Row 4: (3 sc, inc)*5 (25)
Rows 5-6: 25 sc (25)
Row 7: (4 sc, inc)*5 (30)
Row 8: 30 sc (30)
Row 9: (4 sc, inc)*6 (36)
Row 10: 36 sc (36)
Row 11: (5 sc, inc)*6 (42)
Rows 12-14: 42 sc (42)
This is the point where you’ll want to switch from your solid main color to the melange yarn — right as you start Row 15.
Row 15: work in BLO (6 sc, inc)*6 (48)
Rows 16-18: 48 sc (48)
This is where the shape starts to round back inward — so satisfying to watch that soft belly curve take form.
Row 19: (6 sc, inv dec)*6 (42)
Row 20: 42 sc (42)
Row 21: (5 sc, inv dec)*6 (36)
Row 22: 36 sc (36)
Row 23: (4 sc, inv dec)*6 (30)
Row 24: (3 sc, inv dec)*6 (24)
Add your stuffing gradually starting around here — a little at a time so the shape stays round instead of lumpy.
Row 25: (2 sc, inv dec)*6 (18)
Row 26: (1 sc, inv dec)*6 (12)
Row 27: 6 inv dec (6)
Finishing: Add the last of the stuffing and close the opening. Where this round started — right at the back of the color change — is exactly where the tail will go, and the very top (your original magic ring) marks the crown of the head, which is where the ears will sit.
Crochet Easter Bunny Amigurumi Pattern — Ears (×2)
Yarn Color: Solid yarn
Starting Method: Ch 11
Row 1: Starting from the 2nd ch from hook, work along the chain: sl st, 3 sc, 3 hdc, 2 dc, 5 dc in the last ch (14)
Row 2: Along the other side of the chain: 2 dc, 3 hdc, 3 sc, sl st (9)
Row 3: Continue in the round: sc in the middle (top), then into each stitch: sl st and ch (border) (23)
Finishing: Fasten off and leave a long tail for sewing. Make two of these — they taper naturally from the shaping in Row 1, which is what gives them that soft, slightly floppy ear shape instead of a stiff point.
Crochet Easter Bunny Amigurumi Pattern — Tail (×1)
Yarn Color: Solid yarn
Starting Method: 6 sc in mr
Row 1: (sc, inc)*3 (9)
Row 2: 9 sc (9)
Finishing: Fasten off and leave a long tail for sewing. This little pom of a tail is barely bigger than a pea — that’s exactly the point.
Boy Bunny Version — Edge Finishing
Yarn Color: Melange yarn
Starting Method: Along the row where you worked in BLO (Row 15 of the Body)
Row 1: Work in the round, sl st in FLO — this creates a soft ridge right along that color-change line (48)
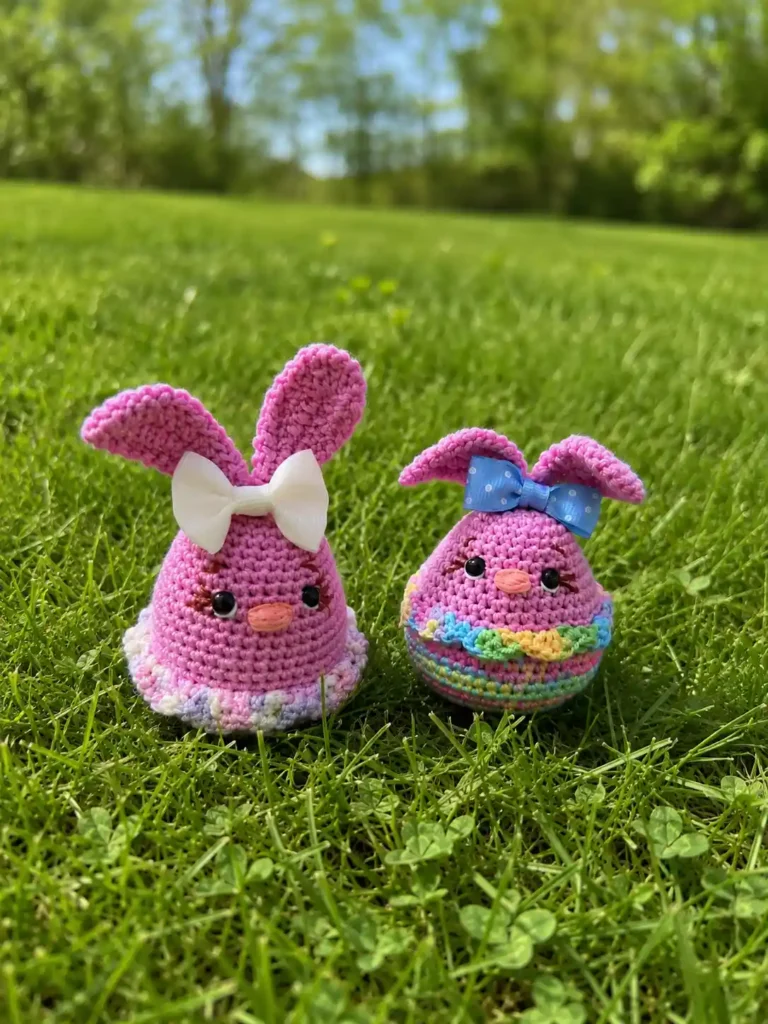
Finishing: Fasten off and weave in ends. This one row is all it takes to give the boy bunny a neat little defined edge where his fur meets his tummy.
Girl Bunny Version — Skirt
Yarn Color: Melange yarn
Starting Method: Along the row where you worked in BLO (Row 15 of the Body)
Row 1: Work in the round: (5 dc in one stitch, skip one stitch and work sc in the next, skip one stitch), repeated around (72)
Row 2: Border: into each stitch, sl st and ch (72)
This is the part where the skirt really blooms — those little dc shells fan out into soft ruffled scallops, and the ch border around the edge gives it a delicate, almost lacy finish.
Finishing: Fasten off and weave in ends.
Girl Bunny Version — Bow
Starting Method: In a magic ring
Row 1: (ch 3, 3 dc in mr, ch 3, sl st in mr) *2 (14)
Finishing: Pull the magic ring tight, fasten off, wrap the yarn tail around the center a few times to cinch it into a bow shape, and leave a long tail for sewing. This tiny bow is what turns a sweet bunny into an unmistakably girl bunny — it’s a small piece, but it does a lot of the personality work.
Assembly
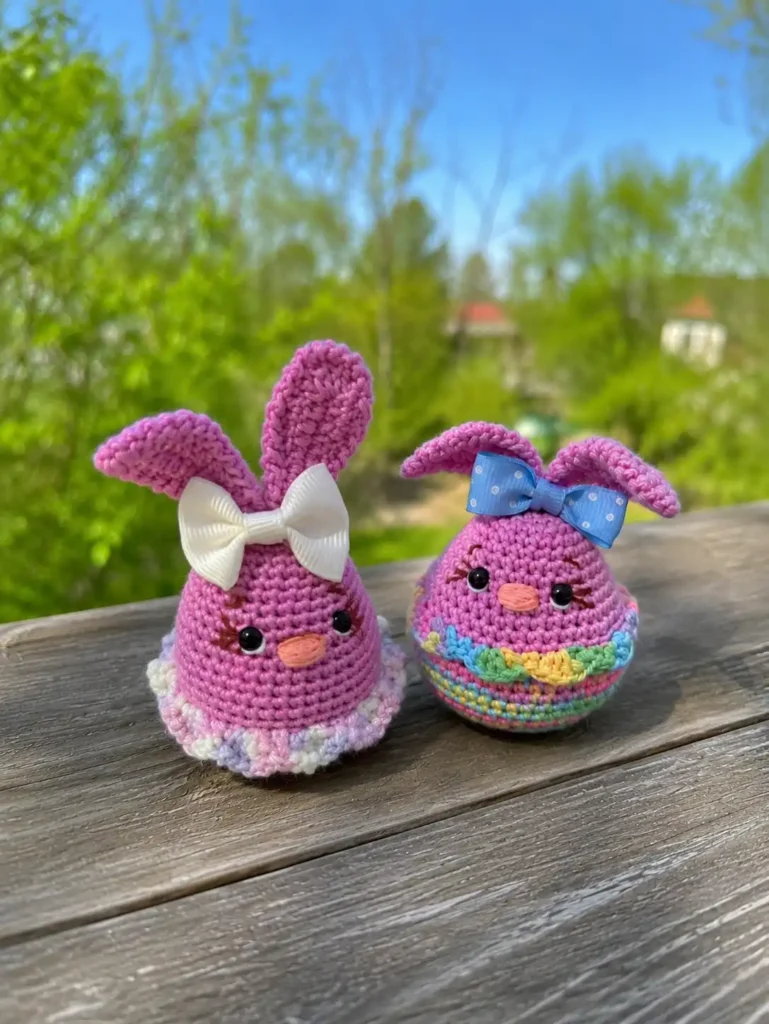
- Sew the ears to the crown of the head, right around Rows 1-3 of the Body (that’s the very top, where your original magic ring is).
- Sew the tail to the lower back of the body, around Rows 22-24 — position it so the bunny sits balanced and doesn’t tip forward.
- For the girl bunny, sew or glue the crocheted bow just in front of one ear.
Making It Extra Cute — Finishing Details
This is where these two little bunnies really come to life, and it’s my favorite part every single time.
🩷 Chloe’s Detail Tip: Since this pattern uses glued half-bead eyes rather than washer-back safety eyes, you get one real advantage — a little more room to adjust before the glue sets. Place both eyes loosely first, right around Rows 9-10 of the Body, and hold the piece at arm’s length under good light before committing. I always step back, tilt the face slightly, and check that both eyes catch the light at the same angle. That’s the real test of symmetry — not just the position, but the shine.
Eyes: Glue the half-bead eyes to the front of the face, positioned approximately between Rows 9 and 10 of the Body. Once you’re happy with the placement, let the glue set fully before moving on.
Eye details: Using white thread, embroider the whites of the eyes around the outer edge of each bead — this is the step that takes the eyes from “plain bead” to genuinely glossy and expressive. Then use embroidery thread to add the tiny eyelashes and eyebrows.
Nose: Bring your pink or coral thread through from a hidden spot to the center point between the eyes, then work several horizontal stitches (about 8-10) to build up a small, soft nose shape.
Cheeks: Gently tint the cheeks with oil pastel, blending in soft circular motions until it’s a whisper of pink rather than a solid patch. This one step is what makes a face go from “finished” to “precious.”
If this is your first time embroidering a face like this, our eye placement guide covers a lot of the same symmetry principles, even though this particular pattern uses glued beads instead of washer eyes.
Chloe’s Final Look
I’ve had this little pair sitting on my desk for two days now and I still glance over every time I walk by. The boy bunny’s clean, ridged edge against his solid fur, the girl bunny’s ruffled melange skirt with that tiny bow tucked by her ear — they’re such a sweet little set side by side. Try making a whole line of them in different pastel melange combinations for a basket display, or tuck a single one into a card for someone who needs something soft this spring. Either way, once those cheeks are blushed in, you’re not putting this one down. 🩷
FAQ
What yarn is best for this crochet Easter bunny amigurumi free pattern?
Because of the fine 1.75mm hook size, you’ll need a lace or fingering weight yarn to keep the tiny details delicate and proportional.
Can a beginner make this Easter bunny amigurumi?
This is considered an intermediate pattern due to the fine yarn, small hook size, and delicate embroidery work, but patient beginners can certainly give it a try.
How long does it take to crochet this amigurumi bunny pair?
It takes approximately 3 to 4 hours to crochet and fully assemble both the boy and girl bunny variants, including the facial embroidery.