Free Unicorn Amigurumi Pattern With Horn & Hooves
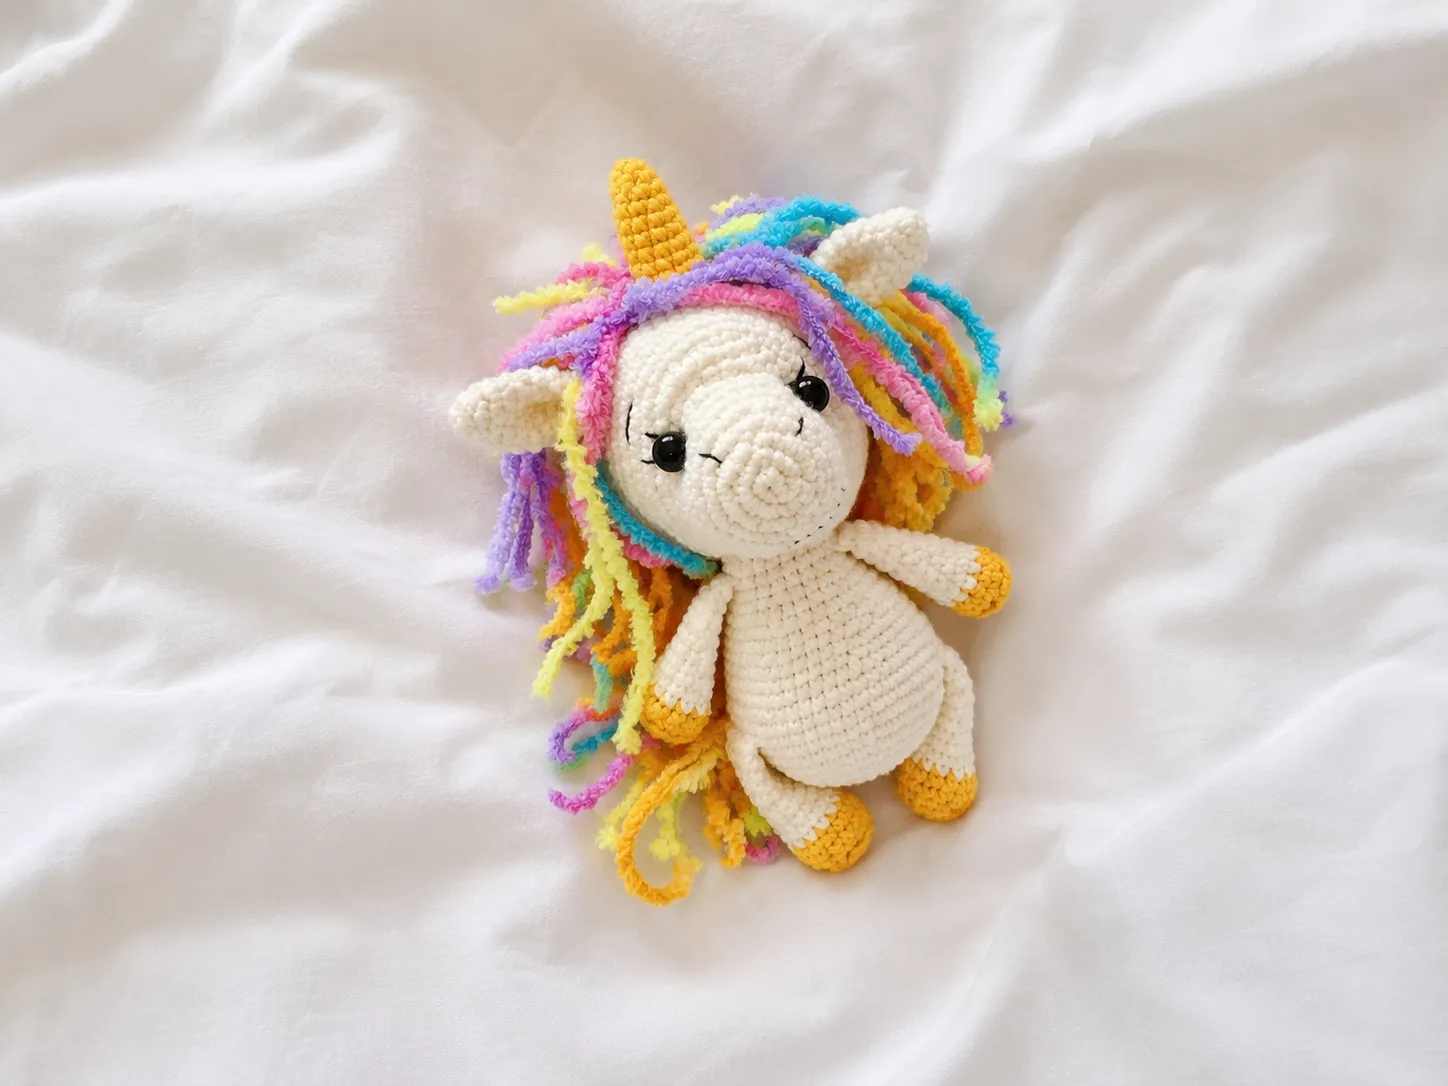
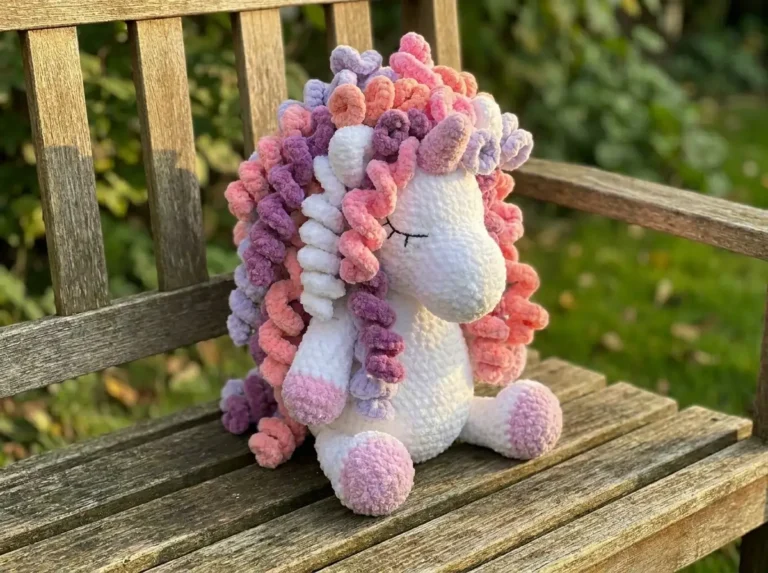
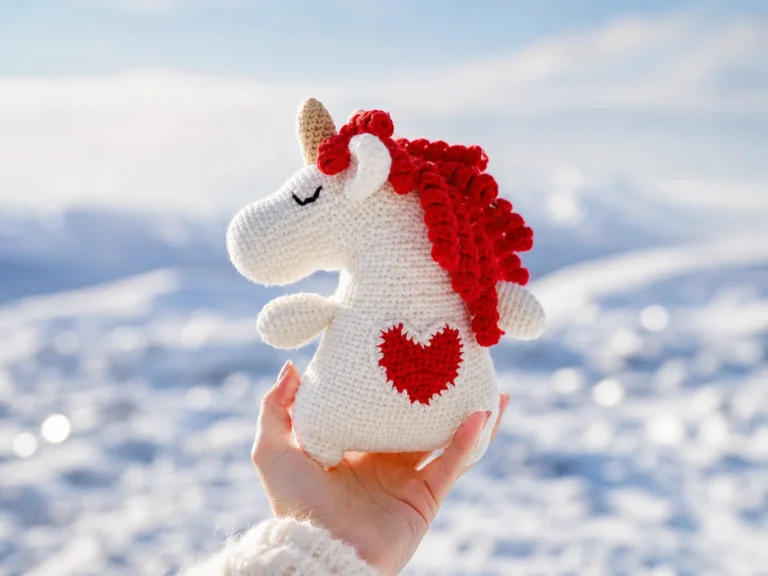
This free unicorn amigurumi pattern started as a way to use up a stray skein of variegated cotton, and it turned into one of my favorite quick sews — that little horn and those sturdy hoof-tipped legs give it so much personality for such a small project. Every round below is counted and checked twice, so you can crochet with confidence from the very first stitch. Grab your hook and let’s get started.
📋 Pattern Quick Stats
- Difficulty: Beginner
- Finished Size: 5.9 in (15 cm)
- Hook Size: Not specified in the original pattern — see the note in Materials below for guidance
- Yarn Weight: DK / Light Worsted (3)
- Techniques: magic ring, invisible decrease, increase, BLO, FLO, hdc increase, color changes
- Estimated Time: 5-7 hours
Materials for This Free Unicorn Amigurumi Pattern
Here’s what you’ll need to make your own unicorn from start to finish:
- A crochet hook sized for DK weight yarn (see note below)
- DK / Light Worsted (3) yarn in your main body color — the original pattern used YarnArt Jeans; Drops Muskat or Paintbox Cotton DK are easy US-accessible substitutes
- DK / Light Worsted (3) yarn in a contrast color for the horn and hooves — again, YarnArt Jeans in the source, with the same Drops Muskat or Paintbox Cotton DK alternatives
- A variegated DK weight yarn for the mane and tail — the source pattern used Alize Baby Softy; check your local craft store for a similar variegated DK option
- Polyester fiberfill stuffing
- Safety eyes, or 6mm beads for sew-on eyes
- A small amount of black embroidery thread for the muzzle and eyelash details
- Tapestry needle, sewing needle, scissors, pins, and a stitch marker
- A knitting needle — you’ll use this to help secure the head evenly during assembly
This yarn falls into the DK / Light Worsted (3) category on the Craft Yarn Council yarn weight system, which is worth checking if you’re substituting a yarn from your own stash.
💡 Emma’s Tip: The original pattern didn’t list a specific hook size, which happens more often than you’d think with translated patterns. For DK weight amigurumi with tight, dense tension, I’d start with something in the 3.25mm-3.5mm range and adjust up or down until your stitches are snug enough that stuffing won’t peek through. Take your time with a quick test round before committing to the full project.
Abbreviations Used in This Pattern
| Abbreviation | Meaning |
|---|---|
| mr | magic ring |
| sc | single crochet |
| inc | increase (2 sc in same stitch) |
| dec | invisible decrease |
| BLO | back loop only |
| FLO | front loop only |
| hdc | half double crochet |
| FO | fasten off |
Special Techniques
This is a beginner-friendly project, but a few techniques are worth reviewing before you start.
You’ll begin nearly every part with a magic ring — if that’s new to you, our step-by-step magic ring tutorial walks through it from the very first loop.
Every decrease in this pattern is worked as an invisible decrease, never a standard sc2tog. It’s a small adjustment that makes a real difference in how clean your shaping looks — no visible gaps, no stray holes at the color-change points. If you haven’t tried it yet, our invisible decrease tutorial covers the technique in detail.
You’ll also work several rows in back loop only (BLO) and front loop only (FLO), which create the subtle ridges you’ll see at the hoof line and partway up the head. And this pattern changes color more than once, so if you want a refresher on keeping your color changes seamless, our color change tutorial is a good one to bookmark.
Finally, once all your pieces are stuffed, you’ll be sewing quite a few of them together. Our guide to sewing amigurumi parts is worth a look if seaming isn’t yet second nature.
Free Unicorn Amigurumi Pattern Instructions
Front (Upper) Legs (make 2)
Yarn: Contrast color
Start: Magic ring
Row 1: 6 sc in mr (6)
Row 2: 6 inc (12)
Row 3: 12 sc in BLO (12)
Row 4: 12 sc (12)
Rows 5-13: 12 sc (9 rows) (12)
💡 Emma’s Tip: Switch to your main color right after Row 4 — this is what creates the little “hoof” band at the base of each leg. Keep your stitch count honest through Rows 5-13; if it drifts, it’ll show later when you fold the leg flat.
Finishing: Stuff only the hoof section lightly — you don’t want it firm all the way up. Fold the top flat and crochet 6 sc through both layers to close it.
Back (Lower) Legs (make 2)
Yarn: Contrast color
Start: Magic ring
Row 1: 7 sc in mr (7)
Row 2: 7 inc (14)
Row 3: 14 sc in BLO (14)
Rows 4-5: 14 sc (2 rows) (14)
Rows 6-13: 14 sc (8 rows) (14)
💡 Emma’s Tip: Same idea as the front legs, just one stitch wider — switch to main color after Row 5 this time. It’s easy to mix these two legs up once they’re off the hook, so I like to keep them in separate stitch-marker-labeled piles as I go.
Finishing: Just like the front legs — stuff the hoof section lightly, fold flat, and crochet 7 sc through both layers to close.
Horn (make 1)
Yarn: Contrast color
Start: Magic ring
Row 1: 6 sc in mr (6)
Row 2: (1 sc, inc)*3 (9)
Row 3: 9 sc (9)
Row 4: (2 sc, inc)*3 (12)
Rows 5-10: 12 sc (6 rows) (12)
Finishing: Stuff lightly and leave a long yarn tail for sewing it to the head later.
Ears (make 2)
Yarn: Main color
Start: Magic ring
Row 1: 6 sc in mr (6)
Row 2: (1 sc, inc)*3 (9)
Row 3: 9 sc (9)
Row 4: (2 sc, inc)*3 (12)
Row 5: 12 sc (12)
Row 6: (3 sc, inc)*3 (15)
Rows 7-8: 15 sc (2 rows) (15)
Row 9: (3 sc, dec)*3 (12)
Row 10: 12 sc (12)
Finishing: Don’t stuff the ears. Fold each one in half, crochet 6 sc across, then fold in half again and take a few small stitches with a needle to hold the folded shape. Fasten off with a secure knot and leave a yarn tail for sewing to the head.
Body
Yarn: Main color
Start: Magic ring
Row 1: 6 sc in mr (6)
Row 2: 6 inc (12)
Row 3: 12 inc (24)
Row 4: (3 sc, inc)*6 (30)
Row 5: (4 sc, inc)*6 (36)
Row 6: (5 sc, inc)*6 (42)
Row 7: 42 sc (42)
Row 8: (6 sc, inc)*6 (48)
Row 9: 48 sc (48)
Row 10: 8 sc, 7 sc joining in the back leg, 17 sc, 7 sc joining in the second back leg, 9 sc (48)
Rows 11-14: 48 sc (4 rows) (48)
Row 15: (6 sc, dec)*6 (42)
Row 16: 42 sc (42)
Row 17: (5 sc, dec)*6 (36)
Row 18: 36 sc (36)
Row 19: (4 sc, dec)*6 (30)
Row 20: 30 sc (30)
Row 21: (3 sc, dec)*6 (24)
Row 22: 24 sc (24)
Row 23: 3 sc, 6 sc joining in the front leg, 6 sc, 6 sc joining in the second front leg, 3 sc (24)
Row 24: 24 sc (24)
💡 Emma’s Tip: Row 10 is where the back legs get joined into the body, and Row 23 is where the front legs get joined. Both rows are written starting from the middle of the back, and in both cases you want the leg color change (where hoof meets main color) sitting toward the back of the finished piece — it just reads cleaner. If your fabric shifts slightly as you join, a stitch or two of wiggle room to keep the legs sitting parallel and evenly spaced is completely normal; don’t panic over a half-stitch adjustment here.
Finishing: Stuff the body firmly and leave a long yarn tail — you’ll use it to sew the head on in the assembly step.
Head
Yarn: Main color
Start: Magic ring
Row 1: 6 sc in mr (6)
Row 2: 6 inc (12)
Row 3: 12 inc (24)
Row 4: (3 sc, inc)*6 (30)
Row 5: (4 sc, inc)*6 (36)
Rows 6-8: 36 sc (3 rows) (36)
Row 9: (4 sc, dec)*6 (30)
Row 10: (4 sc, inc)*6 in FLO (36)
Row 11: (4 sc, inc)*3, then 6 hdc increases (hdc-inc), then (inc, 4 sc)*3 (48)
Row 12: (7 sc, inc)*6 (54)
Rows 13-21: 54 sc (9 rows) (54)
Row 22: (7 sc, dec)*6 (48)
Row 23: (6 sc, dec)*6 (42)
Row 24: (5 sc, dec)*6 (36)
Row 25: (4 sc, dec)*6 (30)
Row 26: (3 sc, dec)*6 (24)
Row 27: (2 sc, dec)*6 (18)
Row 28: (1 sc, dec)*6 (12)
Row 29: 6 dec (6)
💡 Emma’s Tip: Row 11 is the trickiest row in the whole pattern — it’s the one row where you switch mid-round from sc increases to hdc increases and back again. Those 6 hdc-inc stitches are exactly where the muzzle starts to take shape, so take it slow here. I stuff the head after Row 27, once the top of the muzzle is closing in and there’s still enough room to pack it evenly.
Finishing: Close the opening, fasten off, and weave in the end inside the piece.
Assembly
- Sew the horn onto the top of the head, centered above where the muzzle increases sit.
- Sew the two ears on either side of the horn, angled slightly outward.
- To attach the head to the body evenly, pin it in place on a knitting needle first — this keeps it centered while you sew and stops it from tilting to one side.
- As you sew the head on, add a bit of extra stuffing into the neck opening so the head sits tightly against the body and doesn’t wobble once it’s finished.
- Attach the front legs and back legs at the points where they were joined into the body in Rows 10 and 23, reinforcing the seam with a few extra stitches if needed.
Finishing & Decoration Details
For the eyes, safety eyes work well, or you can use 6mm beads sewn on by hand if you’d rather avoid hard plastic pieces — either way, make small indentations in the muzzle first with your needle before placing them, right at the start and end points of the Row 11 hdc increases. If little ones will be playing with this unicorn, it’s worth reviewing the U.S. Consumer Product Safety Commission guidance on toy safety before choosing between safety eyes and sew-on options.
Embroider the eyelashes and muzzle details with a small amount of black thread, keeping the stitches short and close to the surface.
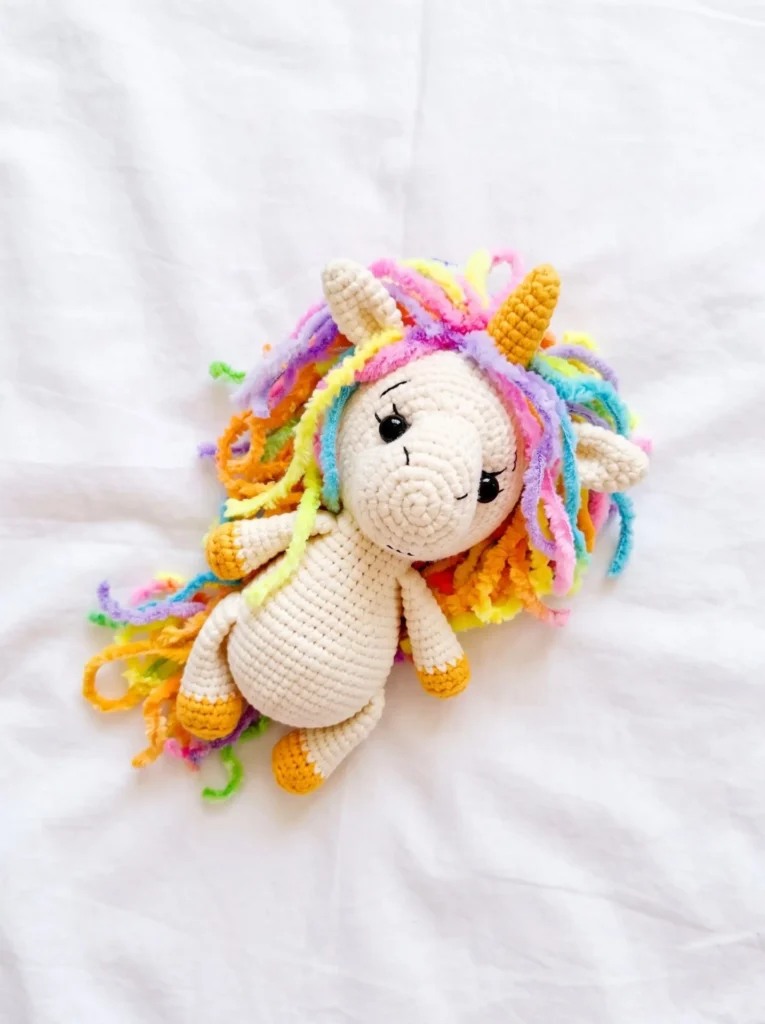
For the mane and tail, cut lengths of your variegated yarn and attach them using the same tassel technique you’d use for fringe on a scarf — loop each piece through a stitch, then pull the ends through the loop and tighten. Vary the lengths slightly as you go down the mane for a softer, more natural look.
Emma’s Note on This Free Unicorn Amigurumi Pattern
The tassel mane is genuinely my favorite part of this one — it’s a small technique, but it changes the whole personality of the finished piece. Take your time joining the legs in Rows 10 and 23; that’s the part most likely to throw your count off if you rush it. If you enjoy the horn-and-hoof combination here, our gnome and dragon patterns use some of the same shaping tricks and are worth a look next. Happy hooking! 🧶
FAQ
What yarn is best for this free unicorn amigurumi pattern?
A DK or Light Worsted (3) weight cotton or cotton-blend yarn, like YarnArt Jeans or Drops Muskat, works best to create tight stitches that hold the stuffing securely.
How long does it take to crochet this unicorn amigurumi?
This project typically takes between 5 to 7 hours to complete, depending on your crochet speed and experience with assembling amigurumi parts.
Is this pattern suitable for beginners?
Yes! While joining the legs and shaping the head requires focus, the pattern uses basic stitches and is fully counted out, making it an excellent project for ambitious beginners.