Free Little Bear in a Sweater Amigurumi Pattern — The Coziest Little Cub You’ll Ever Make
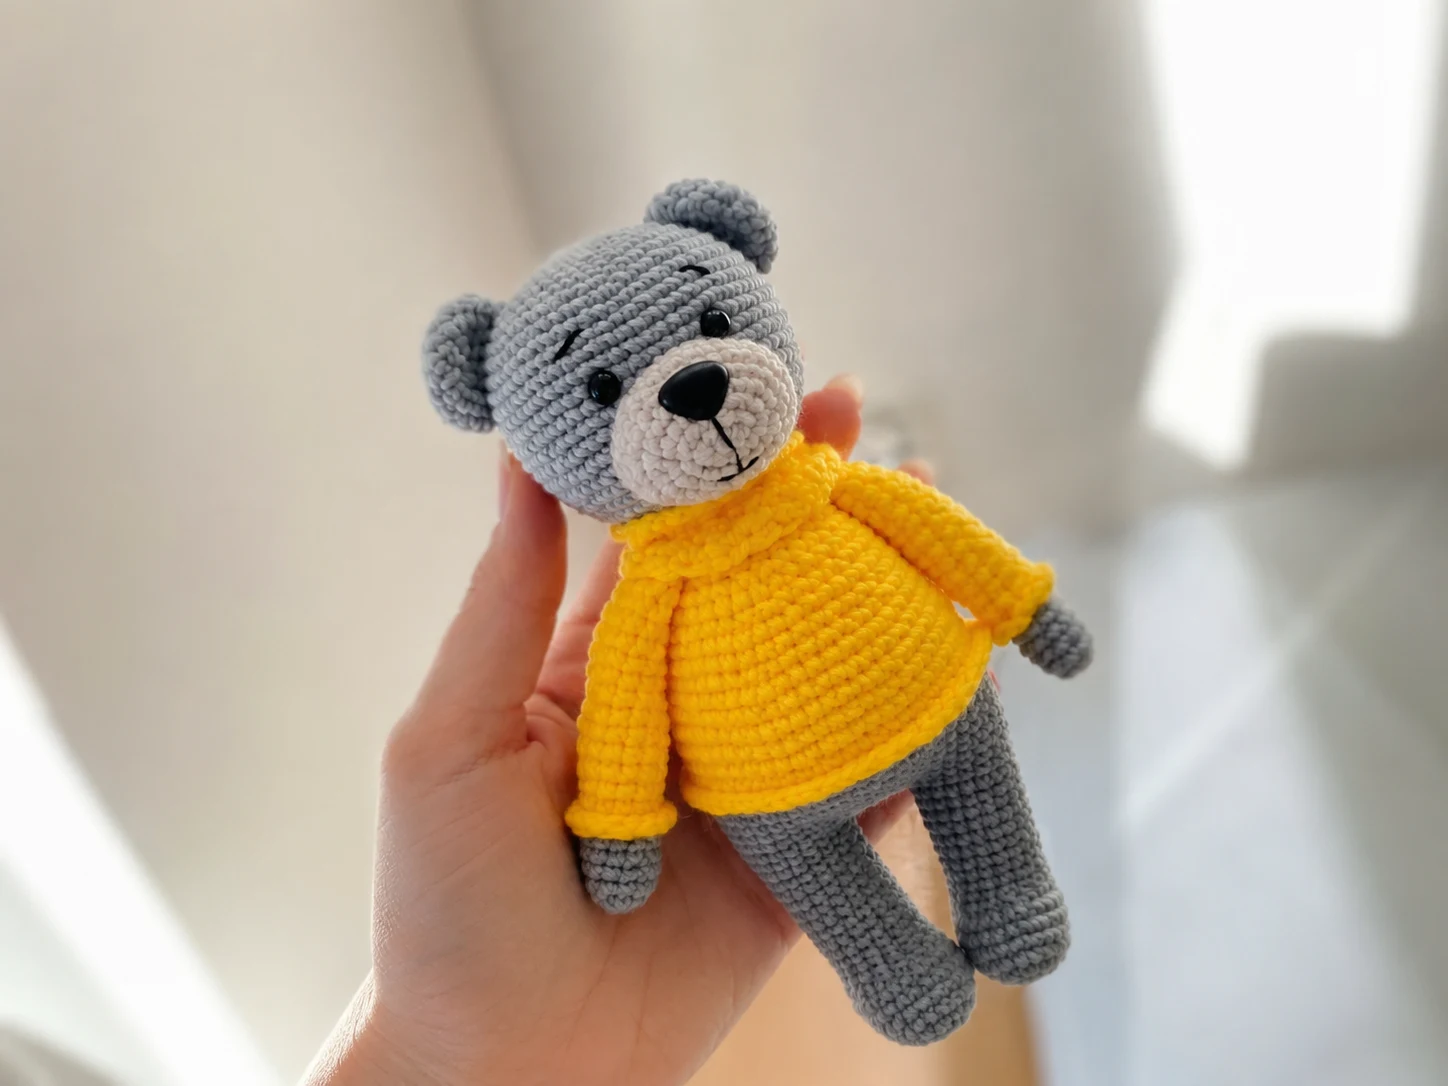
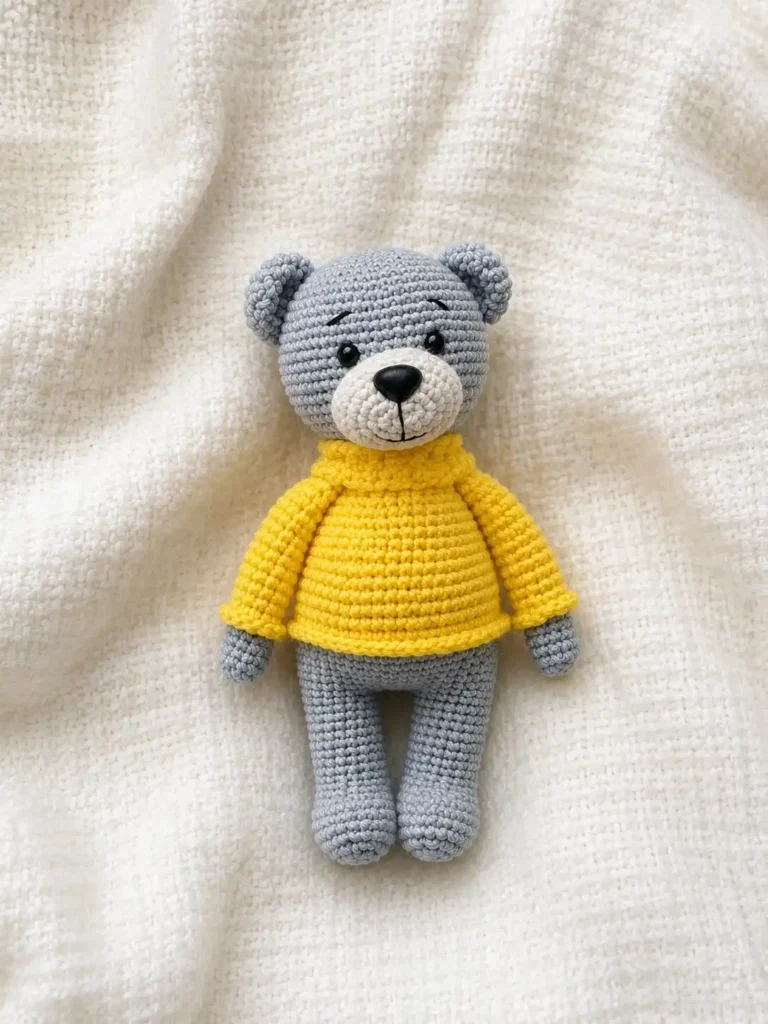
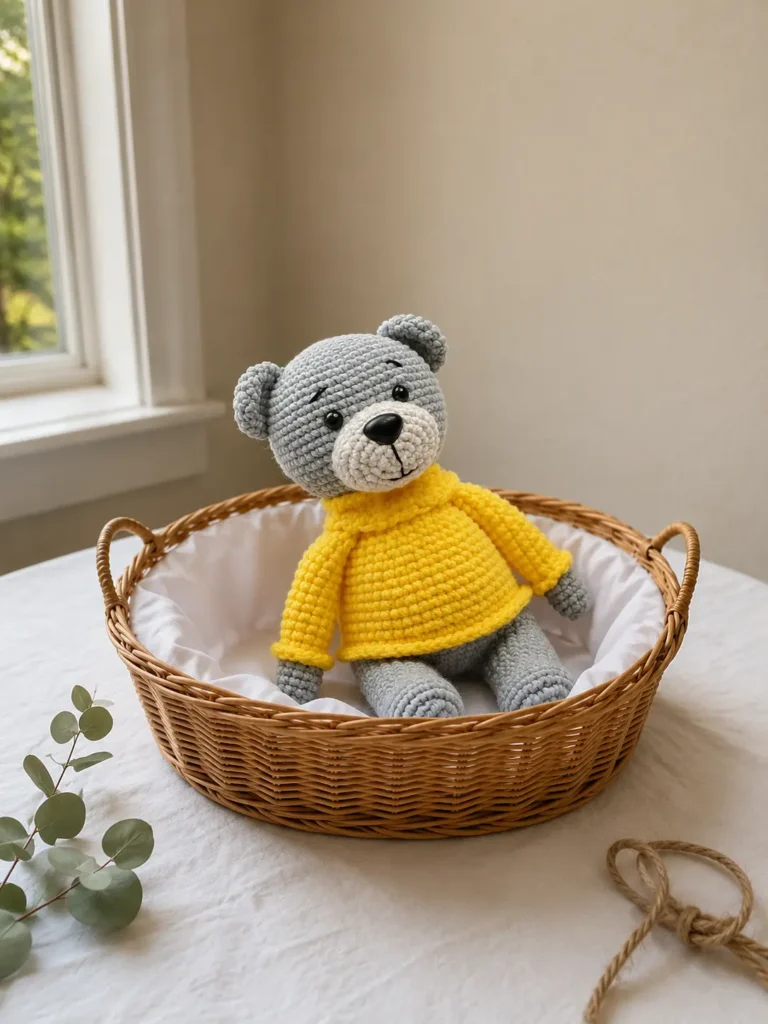
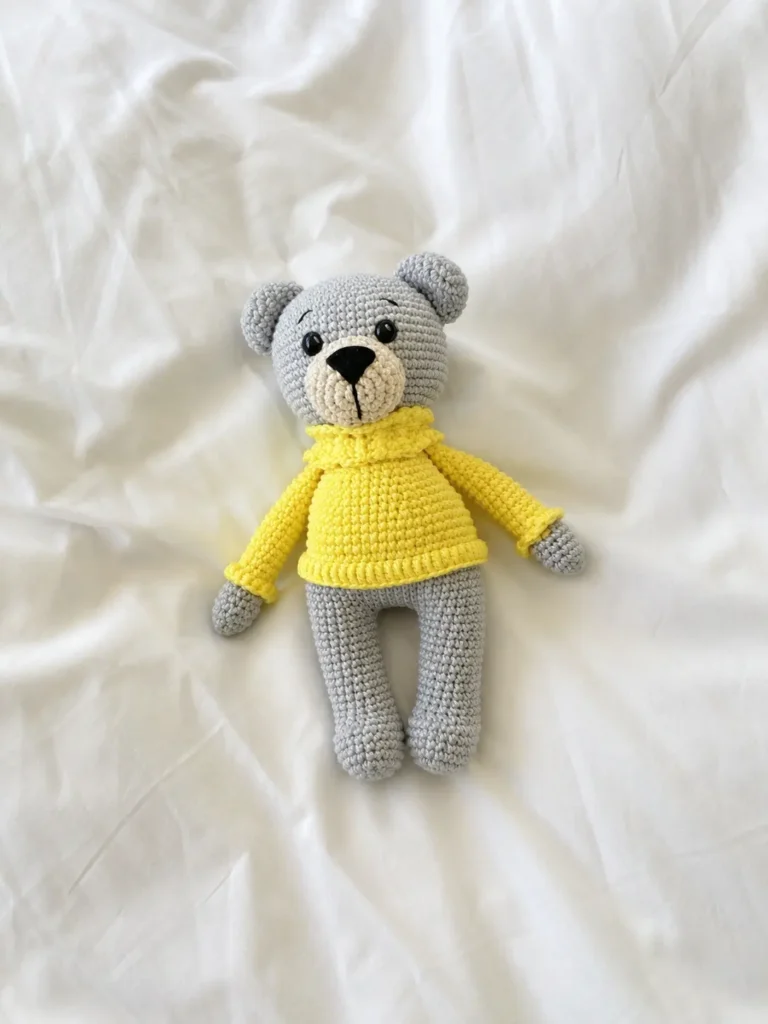
“If you are looking for a little bear in a sweater amigurumi pattern free, this softest, roundest little cub is perfect — featuring soft gray fur, a buttery yellow sweater, and the kind of quiet, sleepy face that makes you want to hold him instead of finishing your to-do list. He’s got a little belly, little paws, little boots for feet, and a sweater that actually looks knitted onto him. Let me show you how every part of this comes together.
🩷 Pattern Highlights
- Cuteness Rating: 🩷🩷🩷🩷🩷
- Finished Size: 8 in (20 cm)
- Difficulty: Intermediate
- Hook Size: steel 4 (2.0 mm)
- Yarn Palette: soft heather gray (fur), buttery pastel yellow (sweater)
- Key Detail: a ribbed sweater edge made with a back-loop color change, plus glossy 8mm safety eyes and a tiny knitted-look collar
- Estimated Time: 6-8 hours
What You’ll Need for This Little Bear in a Sweater
This one leans into cozy, muted tones rather than bright pastels — think the inside of a knitting basket. Here’s what I used:
- Yarn: Gazzal Baby Cotton, or a US-friendly swap like Drops Safran or Paintbox Cotton DK — a DK / Light Worsted (3) weight, in soft heather gray for the fur and buttery pastel yellow for the sweater
- Hook: steel 4 (2.0 mm) — steel hooks run on their own sizing system, so there isn’t a clean US letter match here; just go by the millimeter size
- Stuffing: polyester fiberfill (Poly-Fil or similar), added a little at a time so the roundness stays even
- Safety Eyes: 8mm — this size gives him that soft, slightly sleepy expression instead of a wide-awake stare. A little smaller and he loses that dreamy look, a little bigger and he starts looking startled
- Safety Nose or embroidery floss for the nose — either works beautifully here
- Tapestry needle for sewing and weaving in ends
- Stitch marker to track your rounds
Abbreviations Used in This Little Bear in a Sweater Pattern
| Abbreviation | Meaning |
|---|---|
| sc | single crochet |
| inc | increase (2 sc in same stitch) |
| inv dec | invisible decrease |
| mr | magic ring |
| ch | chain |
| dc | double crochet |
| BLO | back loop only |
| FO | fasten off |
| st(s) | stitch(es) |
Before You Begin — Getting the Cozy Details Right
A few things I always keep in mind with a piece like this one, where the “sweater” is really the whole personality of the design:
🩷 Chloe’s Detail Tip: If this is your first magic ring, our magic ring tutorial walks through it step by step — every single piece in this pattern starts with one, so it’s worth getting comfortable with it early.
The decreases in this pattern are worked as invisible decreases rather than a standard sc2tog, which keeps the shaping smooth with no visible gap — especially important on a face this round. If you haven’t tried it yet, our invisible decrease tutorial shows exactly how it’s done.
🩷 Chloe’s Detail Tip: The sweater effect comes from a simple trick — crocheting one round in the back loop only, then going back and working double crochets into the leftover front loops. It looks so much more complicated than it is. Our color change tutorial is a good companion if you want a refresher on keeping that transition clean.
And of course — before the eyes go in, hold the head up under good light and check them from straight ahead. Our safety eyes tutorial covers placement and spacing if you want the full walkthrough.
Little Bear in a Sweater Pattern
Head
This is where his whole sleepy expression comes together, so take your time here.
Round 1: 6 sc in mr (6)
Round 2: (inc) × 6 (12)
Round 3: (1 sc, inc) × 6 (18)
Round 4: (2 sc, inc) × 6 (24)
Round 5: (3 sc, inc) × 6 (30)
Round 6: (4 sc, inc) × 6 (36)
Round 7: (5 sc, inc) × 6 (42)
Round 8: (6 sc, inc) × 6 (48)
Round 9: (7 sc, inc) × 6 (54)
Round 10: (8 sc, inc) × 6 (60)
Rounds 11-20: sc around (10 rounds even) (60)
🩷 Chloe’s Detail Tip: Insert the 8mm safety eyes between rounds 15 and 16, spaced 7 sc apart. This is the moment the piece really starts looking back at you — I always pause here, hold the head up under a lamp, and check straight-on that both eyes sit level before pressing the washers in. Once they click into place there’s no adjusting, so give it that extra thirty seconds.
Round 21: (8 sc, inv dec) × 6 (54)
Round 22: (7 sc, inv dec) × 6 (48)
Round 23: (6 sc, inv dec) × 6 (42)
Round 24: (5 sc, inv dec) × 6 (36)
Round 25: (4 sc, inv dec) × 6 (30)
Round 26: (3 sc, inv dec) × 6 (24)
Stuff the head firmly before closing, especially around the eye placement, so it keeps its shape once the muzzle and ears go on.
Ears (make 2)
Round 1: 6 sc in mr (6)
Round 2: (inc) × 6 (12)
Round 3: (1 sc, inc) × 6 (18)
Rounds 4-7: sc around (4 rounds even) (18)
Fold the ear flat and crochet across both open edges together to close it, then set aside for assembly. No stuffing needed here — the folded shape gives it just enough body on its own.
Muzzle
Round 1: 6 sc in mr (6)
Round 2: (3 sc in one st) × 2, 1 sc, (3 sc in one st) × 2, 1 sc (14)
Round 3: (1 sc, inc) × 3, 1 sc, (1 sc, inc) × 3, 1 sc (20)
Round 4: (2 sc, inc) × 3, 1 sc, (2 sc, inc) × 3, 1 sc (26)
Rounds 5-7: sc around (3 rounds even) (26)
This oval shaping is what gives him that soft, rounded muzzle instead of a pointed one — so satisfying to watch it take shape. Insert the safety nose (or plan to embroider one later), sew the muzzle to the head, and stuff lightly before closing so it sits nice and plump against his face.
Arms (make 2)
Round 1: 6 sc in mr [gray] (6)
Round 2: (inc) × 6 [gray] (12)
Rounds 3-6: sc around (4 rounds even) [gray] (12)
Round 7: change to yellow, sc around (12)
Round 8: BLO, sc around (12)
Rounds 9-21: sc around (13 rounds even) [yellow] (12)
🩷 Chloe’s Detail Tip: This is the trick that makes the sweater look knitted rather than just a color-blocked arm. In round 7 you switch to yellow, then round 8 is worked in the back loop only — that leaves a row of untouched front loops sitting right there waiting for you.
Finishing: Fold the arm flat and crochet across both open edges to close it. Then go back to those leftover front loops from round 8, attach yellow yarn, chain 2, and work 12 dc around into those front loops. Fasten off and weave in the ends — that little ridge of dc stitches is what reads as a knitted cuff.
Legs (make 2)
Round 1: ch 6, starting from the 2nd ch from hook work 4 sc, 3 sc in the last chain, continue along the other side of the chain with 3 sc, 3 sc in the last chain (13)
Round 2: 4 sc, 3 inc, 3 sc, 3 inc (19)
Round 3: 6 sc, 3 inc, 7 sc, 3 inc (25)
Rounds 4-7: sc around (4 rounds even) (25)
Round 8: 4 sc, 6 inv dec, 9 sc (19)
Rounds 9-20: sc around (12 rounds even) (19)
These little oval feet give him a nice flat base to sit on, which I love — no wobbling. Once both legs are done, don’t fasten off yet: from one leg, chain 5, then join to the second leg. This chain is what bridges the two legs into the start of the body, so keep it snug.
Body
Round 1: 19 sc along the first leg, 5 sc along the chain, 19 sc along the second leg, 5 sc along the other side of the chain [gray] (48)
Round 2: (7 sc, inc) × 6 [gray] (54)
Rounds 3-7: sc around (5 rounds even) [gray] (54)
Round 8: change to yellow, sc around (54)
Round 9: BLO, sc around (54)
Rounds 10-13: sc around (4 rounds even) [yellow] (54)
Round 14: (7 sc, inv dec) × 6 [yellow] (48)
Round 15: sc around [yellow] (48)
Round 16: (6 sc, inv dec) × 6 [yellow] (42)
Round 17: sc around [yellow] (42)
Round 18: (5 sc, inv dec) × 6 [yellow] (36)
Round 19: sc around [yellow] (36)
Round 20: (4 sc, inv dec) × 6 [yellow] (30)
Rounds 21-23: sc around (3 rounds even) [yellow] (30)
Round 24: (3 sc, inv dec) × 6 [yellow] (24)
This is the part where it really starts to look like a little bear sitting in a sweater instead of just a fuzzy round shape — the gray tummy peeking out at the bottom, the yellow sweater rounding up over the top. Stuff the legs and lower body firmly as you go so he can sit up on his own once he’s finished.
Finishing: Just like the arms, go back to the front loops left over from round 9, attach yellow yarn, chain 2, and work 54 dc around into those front loops. Fasten off and weave in ends — this gives the sweater hem that same knitted-ridge detail as the cuffs.
Collar
Row 1: ch 6 (6)
Row 2 onward: crochet in turning rows with sc or ribbing to the desired length, so that the collar can easily be wrapped around the neck.
The source pattern leaves this part a little open-ended on purpose — it’s meant to be sized to fit snugly around your own bear’s neck rather than following a fixed row count, so keep test-wrapping it as you go. Once it’s long enough, sew it to the top of the sweater, join the two short edges together, and let the seam sit at the back where it won’t show.
Tail
Round 1: 6 sc in mr (6)
Round 2: (inc) × 6 (12)
Rounds 3-4: sc around (2 rounds even) (12)
Such a small piece, but it’s the kind of tiny detail that makes the back view just as cute as the front. Stuff lightly and set aside for assembly.
Assembly
- Sew the ears to the head, checking they sit level and evenly spaced on either side of the eyes.
- Sew the muzzle to the head, centered just below and between the eyes.
- Sew the head to the top of the body.
- Sew the arms to either side of the body, right where the sweater begins.
- Sew the collar around the neckline where the sweater meets the head, joining the short edges at the back.
- Sew the tail to the back of the body, just above the legs.
Making It Extra Cute — Finishing Details
This is the part where a good bear becomes an irresistible bear. A few things I always slow down for:
🩷 Eye placement: I’ve said it once already but it’s worth repeating here — the 8mm eyes go between rounds 15 and 16, 7 sc apart. Before the washers click in, I hold the head at arm’s length under bright light and look straight on, not from above. A tiny tilt is much easier to spot that way, and it’s the difference between a bear that looks sweetly sleepy and one that looks a little off-balance.
🩷 The nose: Whether you use a safety nose or embroider one, keep it small and centered low on the muzzle, just under where the eyes line up. A nose that’s slightly too big can overwhelm that soft round face, so when in doubt, go smaller.
🩷 The eyebrows: A couple of short embroidered lines just above each eye is such a small addition, but it’s what gives him that gentle, a-little-bit-sleepy expression instead of a blank stare. Curve them very slightly downward at the outer edge for the softest look.
🩷 Color variations: If gray-and-yellow isn’t your palette, this construction works just as beautifully in dusty rose fur with a cream sweater, or soft caramel fur with a sage green sweater. The BLO color-change trick reads as “knitted” in almost any combination, so don’t be afraid to make him in a whole little wardrobe of sweaters.
Chloe’s Final Look
I keep picking this little guy back up just to look at him — that soft gray tummy under the buttery yellow sweater, the tiny ribbed collar sitting right at his neck, those sleepy eyebrow lines above his eyes. He’s got real weight and presence for something that fits in two hands. If you make more than one, try a whole little shelf of them in different sweater colors — a small knitted family, each one just a little different, all equally impossible not to squeeze. 🩷
FAQ
What yarn is best for this little bear amigurumi?
A DK or Light Worsted (3) weight cotton yarn like Gazzal Baby Cotton or Drops Safran works best for a smooth, cozy finish.
How long does it take to crochet this bear?
This is an intermediate pattern that typically takes about 6 to 8 hours to complete depending on your crochet speed.
What is the finished size of this amigurumi bear?
Using the recommended DK weight yarn and a 2.0 mm hook, the finished bear will be approximately 8 inches (20 cm) tall.
Author

Similar Posts
Mini Cow Crochet Pattern — Free Amigurumi
FacebookPinterestThis mini cow crochet pattern free version delivers a fully-dimensional chenille plush — complete with jointed arms, an embroidered…
Amigurumi Capybara Pattern with Removable Shorts
FacebookPinterestThis amigurumi capybara pattern turns a simple ball of stitches into a round-bodied, dark-nosed character with soft rounded ears…
Zoe the Fox Amigurumi — Free Crochet Fox Pattern
FacebookPinterestThis fox amigurumi has been one of my most technically satisfying projects to put together — Zoe comes with…
A Crochet Bear Amigurumi Free Pattern That Just Might Be the Sweetest Thing You Make All Year
FacebookPinterestThis crochet bear amigurumi free pattern turns out the softest little bear you’ve ever seen — round chenille body,…
A Crochet Baby Elephant Amigurumi Free Pattern That Fits Right in Your Palm
FacebookPinterestThis crochet baby elephant amigurumi free pattern makes the softest little gray elephant you’ve ever seen — round tummy,…
Free Octopus Amigurumi Pattern — Tiny Tentacle Cutie
FacebookPinterestThis free octopus amigurumi pattern makes the softest little sea creature you’ve ever tucked into your palm — a…