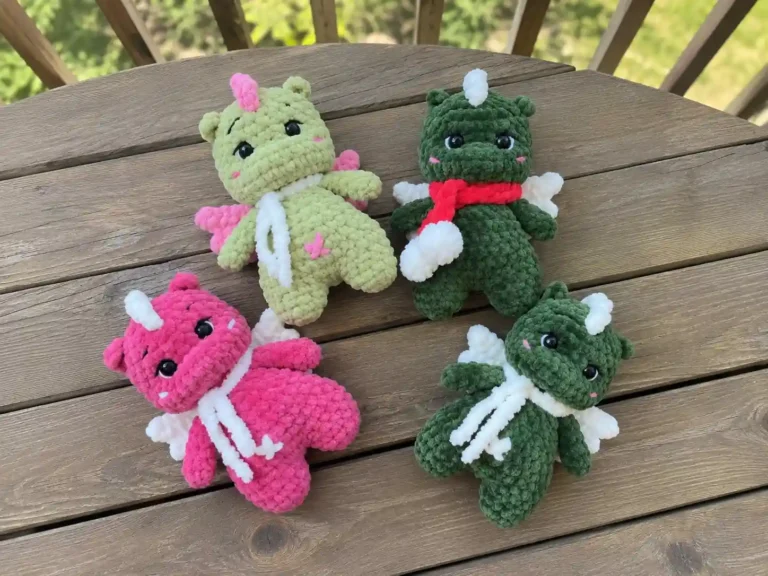
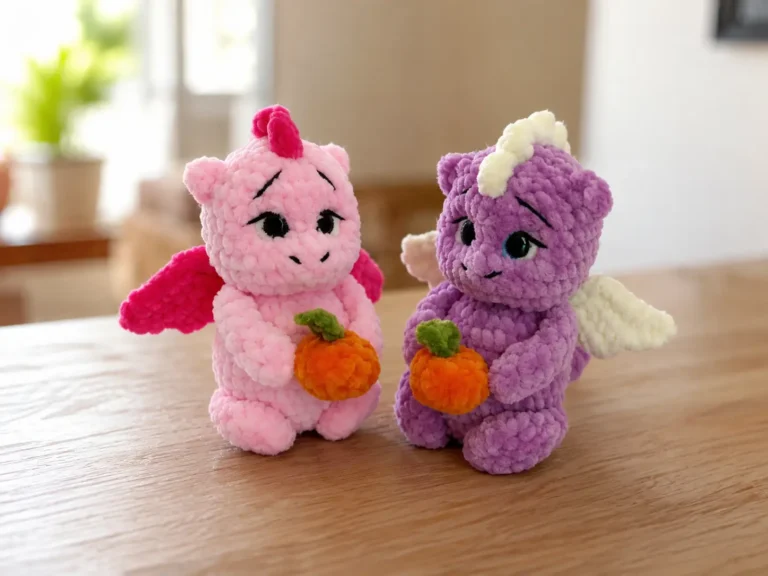
Free Drakoshik Dragon Amigurumi Pattern – Wings & Spikes
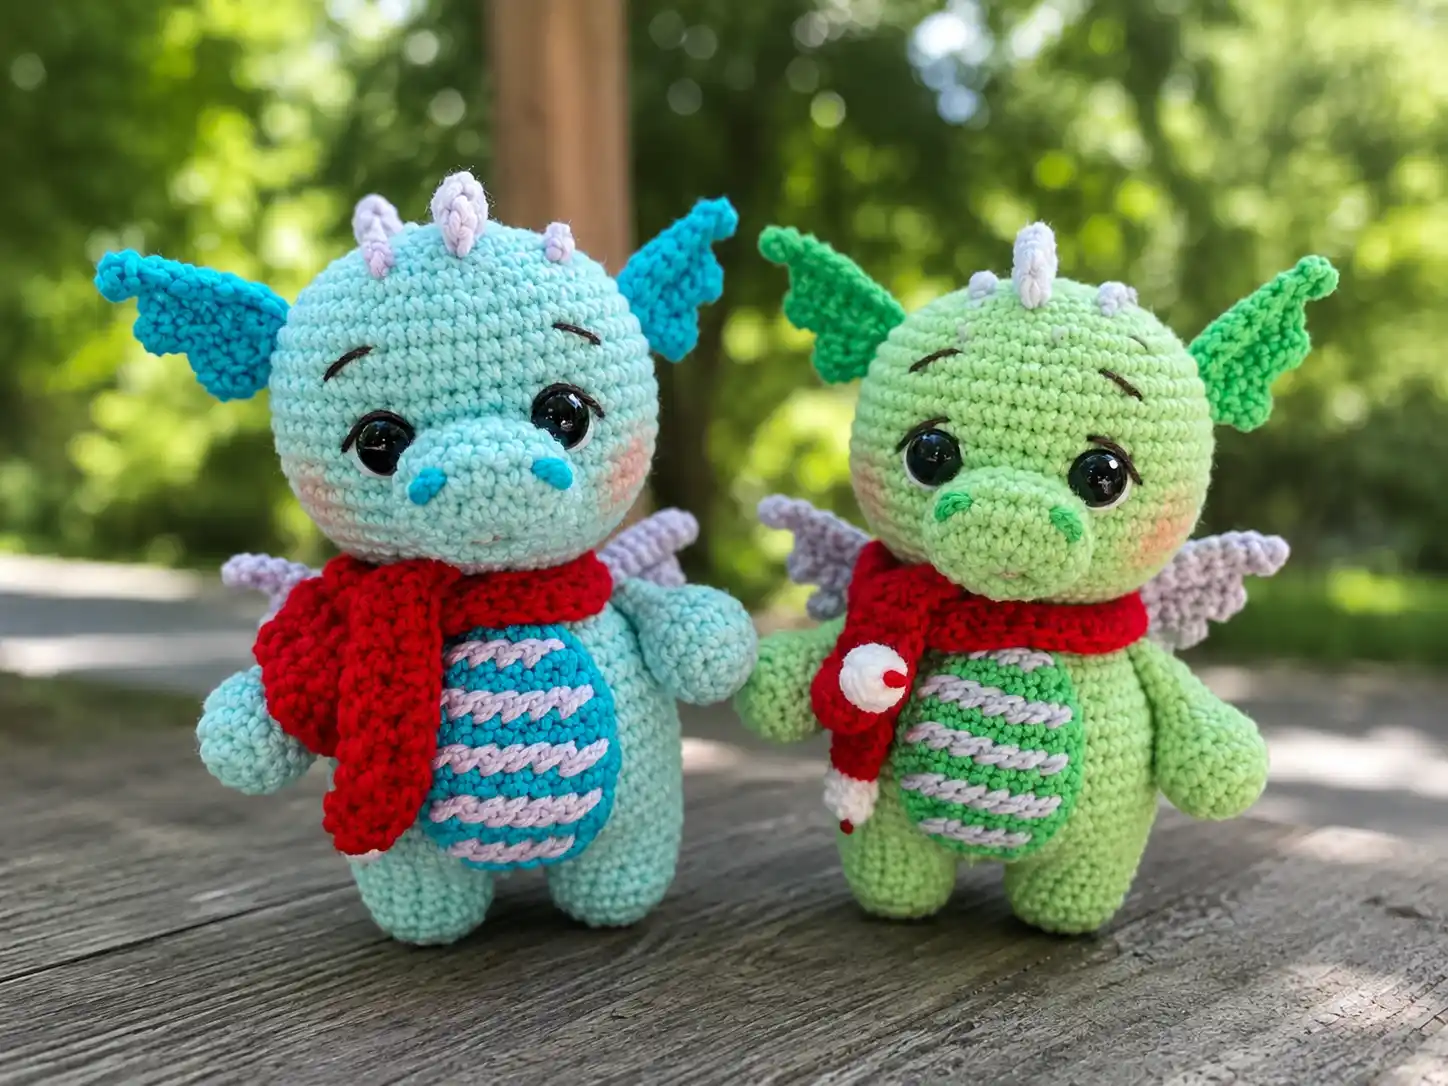
This free Drakoshik dragon amigurumi pattern is one of those projects that looks way more complicated than it actually is — even though I’ll be honest with you upfront, this little guy has more pieces than my usual picks. Spikes, wings, a scarf, the whole thing. But every single part is simple single crochet, and watching him come together piece by piece is genuinely so satisfying. Grab your smallest hook and a cup of tea — this one’s a slow, cozy build.
🧶 Why You’ll Love This Pattern
- ⭐ Difficulty: Intermediate to Intermediate-Advanced
- ⏱️ Time: 6-9 hours, best split across a few sessions
- 🪡 Sewing: Standard — several small pieces to attach (I’ll walk you through it)
- 🧵 Yarn: DK/Light Worsted weight, worked on a tiny hook for crisp detail
- 💰 Yarn needed: Not specified in the original pattern — budget roughly 1-2 skeins of your main color, plus small amounts of your accent colors
Okay, let’s talk honestly for a second. This is NOT a one-evening, zero-sew project — and I’m not going to pretend it is. Between the arms, muzzle, ears, chest patch, six little spikes, tail, and wings, there’s real assembly here. But here’s the thing: every single piece is small and quick to crochet on its own. You’re not fighting one huge complicated piece — you’re just collecting a little pile of cute parts and then giving them a home. Honestly? That part is kind of relaxing once you get into a rhythm.
Materials for This Drakoshik Dragon Amigurumi Pattern
Here’s everything you’ll need. The original pattern used specific Russian yarn brands, so I’ve translated everything into US-friendly yarn weight categories — grab whatever matches in your stash, or pick something up at Joann, Michaels, or Hobby Lobby.
- Main color (light green): DK/Light Worsted (3) weight yarn — for the legs, body, head, arms, muzzle, ears, chest patch, and tail
- White yarn: a small amount, for embroidering the whites of the eyes
- Black embroidery thread: a Lace (0) weight or size 10 cotton thread, for the eyebrows and eye detailing
- Accent color yarn: a Sport (2) or DK (3) weight yarn in a color of your choice, for embroidering the mouth and nostrils (the original pattern used a warm tan/brown-toned yarn here, but this is really up to you)
- Purple yarn: DK/Light Worsted (3) weight, for the wings (and I’d recommend using it for the spikes too, since the original pattern doesn’t specify a color there — more on that below)
- Red yarn: DK/Light Worsted (3) weight, for the scarf
- Hook: 1.9mm — heads up, this is a genuinely tiny hook with no standard US letter equivalent, so shop by the millimeter measurement, not a lettered size
- Fiberfill/stuffing
- Safety eyes
- Pins (for placing pieces before sewing)
- Small pom-poms (for the scarf ends)
- Tapestry needle
Quick note on that hook size: 1.9mm is smaller than most US letter hooks go, so you likely won’t find a lettered equivalent at the store. Our hook size guide can help you figure out the closest substitute if you can’t track down that exact size, or you can compare sizes directly on the Craft Yarn Council’s hook size chart.
Abbreviations Used in This Drakoshik Dragon Pattern
| Abbreviation | What It Means |
|---|---|
| sc | single crochet — the basic stitch you’ll use for almost this entire project |
| inc | increase — work 2 single crochets into the same stitch to add width |
| dec | decrease — combine 2 stitches into 1 to reduce width |
| mr | magic ring — the adjustable loop you start most amigurumi pieces with |
| ch | chain — used to start flat pieces like the muzzle, ears, and wings |
| dc | double crochet — a taller stitch, used just for the scarf |
| BLO | back loop only — work into just the back loop of the stitch, leaving the front loop free (this is what gives the ears and wings their ridged, textured edge) |
Beginner Tips for This Amigurumi Dragon Pattern
Before you dive in, a few things that’ll make this easier:
1. That decrease matters more than you’d think. The pattern just says “dec,” but I’d really recommend working those as invisible decreases rather than a standard sc2tog — it keeps the surface smooth instead of leaving little gaps, which matters a lot on a piece with this much visible shaping. Our invisible decrease tutorial shows you exactly how.
2. This pattern has a LOT of separate pieces, so keep them organized. Between the arms, muzzle, ears, patch, spikes, tail, and wings, it’s easy to lose track of what goes where. I like to lay everything out on a table in roughly the position it’ll be sewn before I start attaching anything.
3. Sewing is the real skill-builder here. If you’ve never attached amigurumi pieces before, don’t panic — our guide to sewing amigurumi parts walks through it step by step. Pin everything in place first and step back to look before you commit to stitching. You can always re-pin. You can’t un-sew nearly as easily.
Drakoshik Dragon Amigurumi Pattern
Legs (Make 2)
Worked in light green, starting with a magic ring.
Row 1: 6 sc in mr (6)
Row 2: 6 inc (12)
Row 3: (3 sc, inc)3 (15)
Rows 4-6: 15 sc (15)
Fasten off and cut the yarn on the first leg. Crochet the second leg exactly the same way, but this time, don’t cut the yarn — you’ll need it to join straight into the body.
🎉 Two legs down! This is the easiest part of the whole pattern, and it’s already behind you. See? Not so scary.
Body
Still light green. This is where the legs get joined and the body grows up into the head — no break in the yarn.
Row 7: Ch 2, 15 sc along the first leg, 2 sc along the ch, 15 sc along the second leg, 2 sc in the ch (34)
Row 8: 15 sc, 2 inc, 17 sc (36)
Row 9: (5 sc, inc)6 (42)
Row 10: 3 sc, inc, (6 sc, inc)5, 3 sc (48)
Rows 11-13: 48 sc (48)
Row 14: (14 sc, dec)3 (45)
Row 15: 45 sc (45)
Row 16: (13 sc, dec)3 (42)
Row 17: 42 sc (42)
Row 18: (12 sc, dec)3 (39)
Row 19: 39 sc (39)
Row 20: 10 sc, dec, (3 sc, dec)4, 7 sc (34)
Row 21: 8 sc, dec, (1 sc, dec)6, 6 sc (27)
Row 22: dec, 3 sc, (2 sc, dec)5, 2 sc (21)
Time to add stuffing here — squeeze it in firmly through this narrowing neck before you keep going, since it gets harder to reach once the head starts.
Row 23: (dec, 1 sc)3, dec, 4 sc, (dec, 1 sc)2 (15)
Row 24: 15 sc (15)
Add a bit more stuffing here, then keep going straight into the head — no fastening off.
Head
Row 25: 15 inc (30)
Row 26: 2 sc, inc, (4 sc, inc)5, 2 sc (36)
Row 27: (5 sc, inc)6 (42)
Row 28: 3 sc, inc, (6 sc, inc)5, 3 sc (48)
Row 29: (7 sc, inc)6 (54)
Rows 30-39: 54 sc (54)
🎉 You’re halfway there! The body and the widest part of the head are done. Everything left from here is small pieces and finishing touches — you’ve got this.
Row 40: (7 sc, dec)6 (48)
Row 41: 3 sc, dec, (6 sc, dec)5, 3 sc (42)
Row 42: (5 sc, dec)6 (36)
Row 43: 2 sc, dec, (4 sc, dec)5, 2 sc (30)
Stuff the head firmly here, before it narrows any further.
Row 44: (3 sc, dec)6 (24)
Row 45: 1 sc, dec, (2 sc, dec)5, 1 sc (18)
Row 46: (1 sc, dec)6 (12)
One more stuffing top-up here — make sure it’s nice and firm since this opening closes for good next.
Row 47: 6 dec (6)
Close the opening, fasten off, and weave in your ends. Your dragon’s whole body — legs, body, and head — is now one complete piece.
Arms (Make 2)
Light green, starting with a magic ring.
Row 1: 6 sc in mr (6)
Row 2: 6 inc (12)
Row 3: (3 sc, inc)3 (15)
Row 4: 15 sc (15)
Row 5: (3 sc, dec)3 (12)
Row 6: (4 sc, dec)2 (10)
Tuck a small pinch of stuffing into the little fist shape here — just enough to give it form.
Rows 7-12: 10 sc (10)
Row 13: 5 dec (5)
Close the opening and cut your yarn, leaving a tail for sewing later.
Muzzle
Light green, starting with a chain.
Row 1: Ch 6, starting from the second ch from hook, 4 sc, 3 sc in the last ch, then 3 sc along the other side, inc (12)
Row 2: inc, 3 sc, 3 inc, 3 sc, 2 inc (18)
Rows 3-4: 18 sc (18)
Leave a long tail for sewing and cut your yarn.
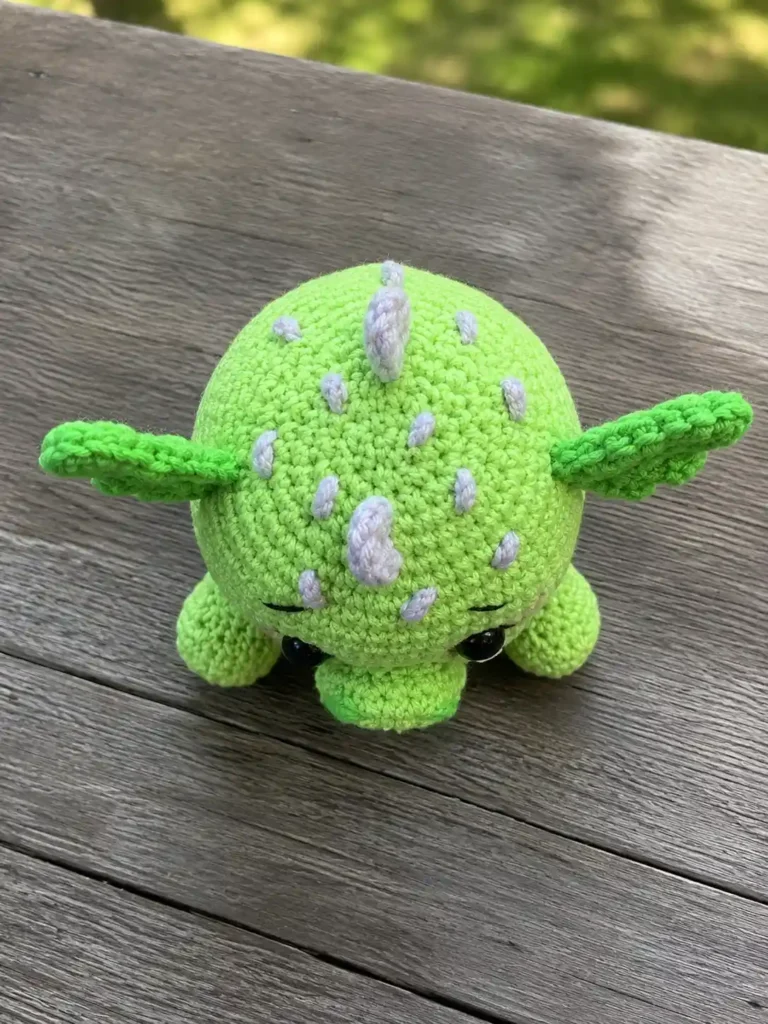
Ears (Make 2)
Light green, starting with a chain. Remember — these are worked in BLO on the turning rows for that nice ridged edge.
Row 1: Ch 8, starting from the second ch from hook, 7 sc, ch 1, turn (7)
Row 2: 5 sc, ch 1, turn (5)
Row 3: 5 sc, ch 1, turn (5)
Row 4: 3 sc, ch 1, turn (3)
Row 5: 3 sc (3)
Leave a long tail for sewing, cut yarn. Then pull the yarn through the first row, pull it tight, and fasten off — this curls the base of the ear into shape.
Chest Patch
Light green, starting with a chain, worked with a ch 1 turning chain each row.
Row 1: Ch 5, starting from the second ch from hook, 4 sc, ch 1, turn (4)
Row 2: inc, 2 sc, inc, ch 1, turn (6)
Row 3: 6 sc, ch 1, turn (6)
Row 4: inc, 4 sc, inc, ch 1, turn (8)
Rows 5-9: 8 sc, ch 1, turn (8)
Row 10: dec, 4 sc, dec, ch 1, turn (6)
Row 11: 6 sc, ch 1, turn (6)
Row 12: dec, 2 sc, dec, ch 1, turn (4)
Leave a long tail for sewing and cut your yarn.
🎉 All the little flat pieces are done! Muzzle, ears, and patch — check, check, check. The finish line is closer than it feels.
Spikes (Make 6)
A quick note before you start: the original pattern doesn’t actually specify a color for the spikes. I’d suggest using the purple you’ve already got out for the wings, so they read as a matching accent color — but this is genuinely your call.
Row 1: 6 sc in mr (6)
Pull the ring tight, but don’t join it into a round — just leave a long tail for sewing and cut your yarn. Repeat this five more times for six spikes total.
Tail
Light green, starting with a magic ring.
Row 1: 6 sc in mr (6)
Row 2: (2 sc, inc)2 (8)
Row 3: 8 sc (8)
Row 4: (3 sc, inc)2 (10)
Row 5: 10 sc (10)
Row 6: (4 sc, inc)2 (12)
Row 7: 12 sc (12)
Row 8: (5 sc, inc)2 (14)
Row 9: 14 sc (14)
Row 10: (6 sc, inc)2 (16)
Row 11: 16 sc (16)
Row 12: (7 sc, inc)2 (18)
Row 13: 18 sc (18)
Row 14: (8 sc, inc)2 (20)
Row 15: 5 sc, (1 sc, inc)*5, 5 sc (25)
Leave a long tail for sewing, cut your yarn, and stuff the tail with fiberfill before setting it aside.
Wings (Make 2)
Purple yarn, starting with a chain. Same BLO technique as the ears on the turning rows.
Row 1: Ch 13, from the second ch from hook, 12 sc, ch 1, turn (12)
Row 2: 9 sc, ch 1, turn (9)
Row 3: 9 sc, ch 1, turn (9)
Row 4: 6 sc, ch 1, turn (6)
Row 5: 6 sc (6)
Leave a long tail for sewing, fasten off, and cut your yarn. Then pull the yarn along the side edge, pull tight, and fasten off — this gives the wing a nice curved shape.
Scarf
Red yarn, starting with a chain, worked in double crochet.
Row 1: Ch 50, starting from the third ch from hook, 48 dc (48)
Sew a small pom-pom to each end of the scarf.
🎉 Every single piece is crocheted! Twelve little parts, all done. Now for the fun part — putting your dragon together.
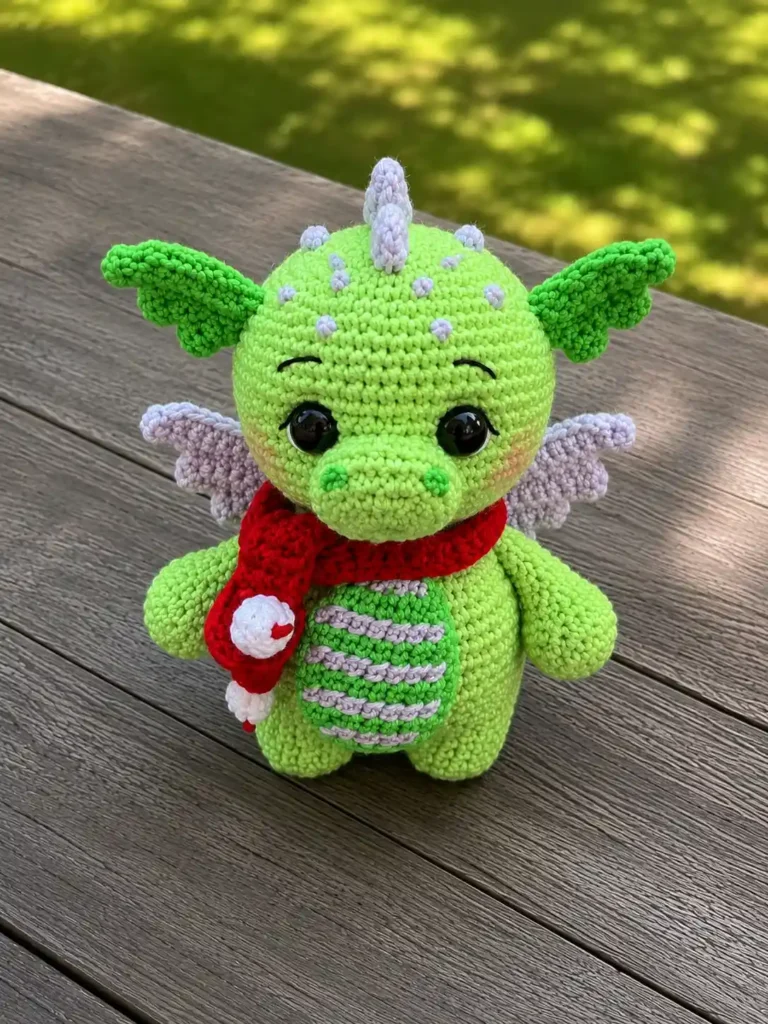
Assembly — Putting Your Dragon Amigurumi Together
This is the part I’ll be honest about: there’s genuine sewing ahead. Pin everything in place first, check it from a few angles, and only then start stitching. Here’s the order that works best:
- Attach the arms using button jointing (sewing through the arm and body with a button or washer on the inside for a bit of movement). If you’ve never button-jointed before, treat it like a regular sewn seam and just add the button as an anchor point.
- Sew on the muzzle, positioned 14 rows down from the top of the head (the closed opening at Row 47). Tuck a little stuffing inside before you close it up completely.
- Insert the safety eyes. Quick heads-up here — the original pattern doesn’t give an exact row range for eye placement, only that the muzzle sits 14 rows down from the top. Based on that spacing, somewhere around rows 33-36 is a reasonable starting point, but I’d genuinely recommend pinning your eyes in place first and stepping back to look before you snap them in — once they’re in, they’re in. The spacing between the two pin marks should be 8 sc, with 5 sc between the eyes themselves.
- Sew on the ears, about 8 sc away from the eyes, positioned at the level of the lower edge of the eyes.
- Sew the chest patch onto the tummy.
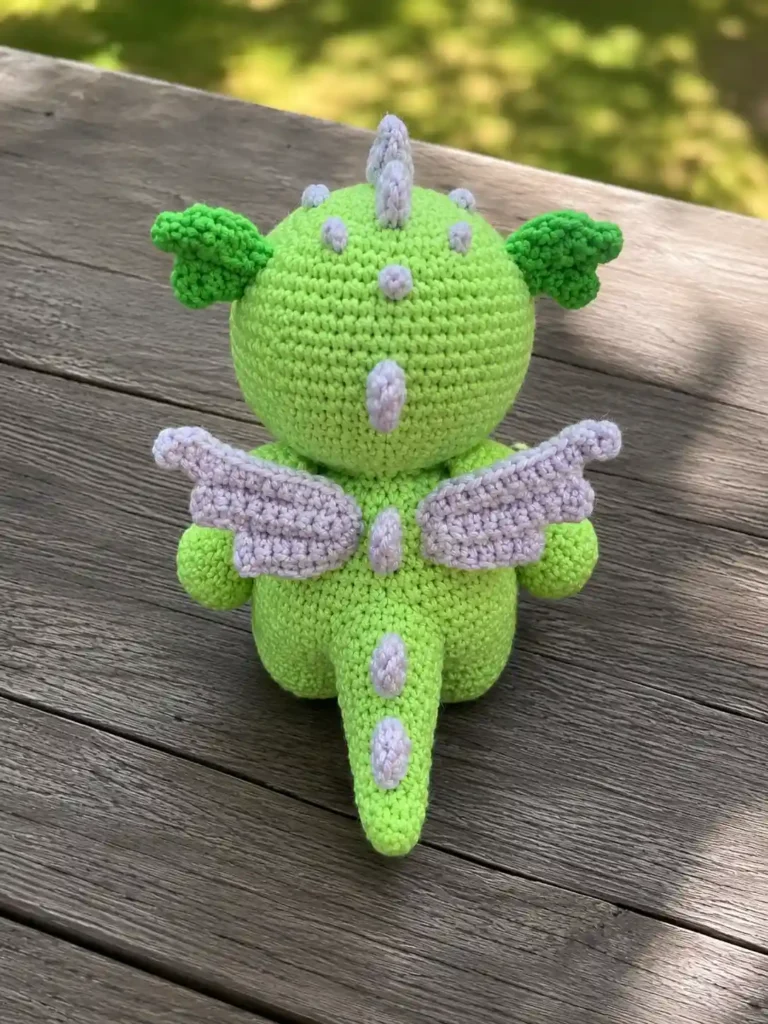
- Sew on the spikes, starting 4 rows back from the eye area (between where the ears sit), then continuing down the head, along the body, and onto the tail.
- Sew the tail to the lower back.
- Sew the wings onto the back.
No assembly step here is technically hard — it’s just a lot of small, patient stitches. Take breaks between pieces if you need to. There’s no rule that says you have to finish him in one sitting.
Decoration — Bringing Your Dragon’s Face to Life
The little embroidered details are what really give this pattern its personality:
- Embroider the whites of the eyes with white yarn
- Add a small arrow shape above each eye, plus the eyebrows, using your black thread
- Embroider the mouth with your accent-color yarn
- Add the nostrils using French knots in the same accent yarn
- With your lighter yarn, stitch slanted lines across the chest patch for a scaled texture
- Scatter a few purple French knots across the head (about 4 wraps each) for a freckled, textured look — or keep it simple with plain straight stitches if French knots aren’t your thing yet
You Did It!
Seriously — look at him. Spikes, wings, a tiny scarf, an honest-to-goodness button-jointed arm situation. If this was your first multi-piece amigurumi, that’s a real accomplishment, not a small one. If you’ve made a dozen of these, I hope this one still gave you that little spark of “wait, I actually made that?” Tag AmiLoops when you share your Drakoshik — I want to see every color combo you tried. 🐉🧶
FAQ
What yarn is best for this dragon amigurumi pattern?
A DK or Light Worsted (weight 3) yarn is recommended for the main body parts to ensure tight stitches and crisp details on the small pieces.
Can beginners make this dragon amigurumi?
This pattern is best suited for intermediate crocheters because it requires working with a tiny 1.9mm hook and assembling many small, detailed pieces.
How long does it take to crochet this dragon?
It typically takes between 6 to 9 hours to complete this dragon amigurumi, making it a great multi-session project to enjoy at a slow pace.