A Crochet Bear Amigurumi Free Pattern That Just Might Be the Sweetest Thing You Make All Year
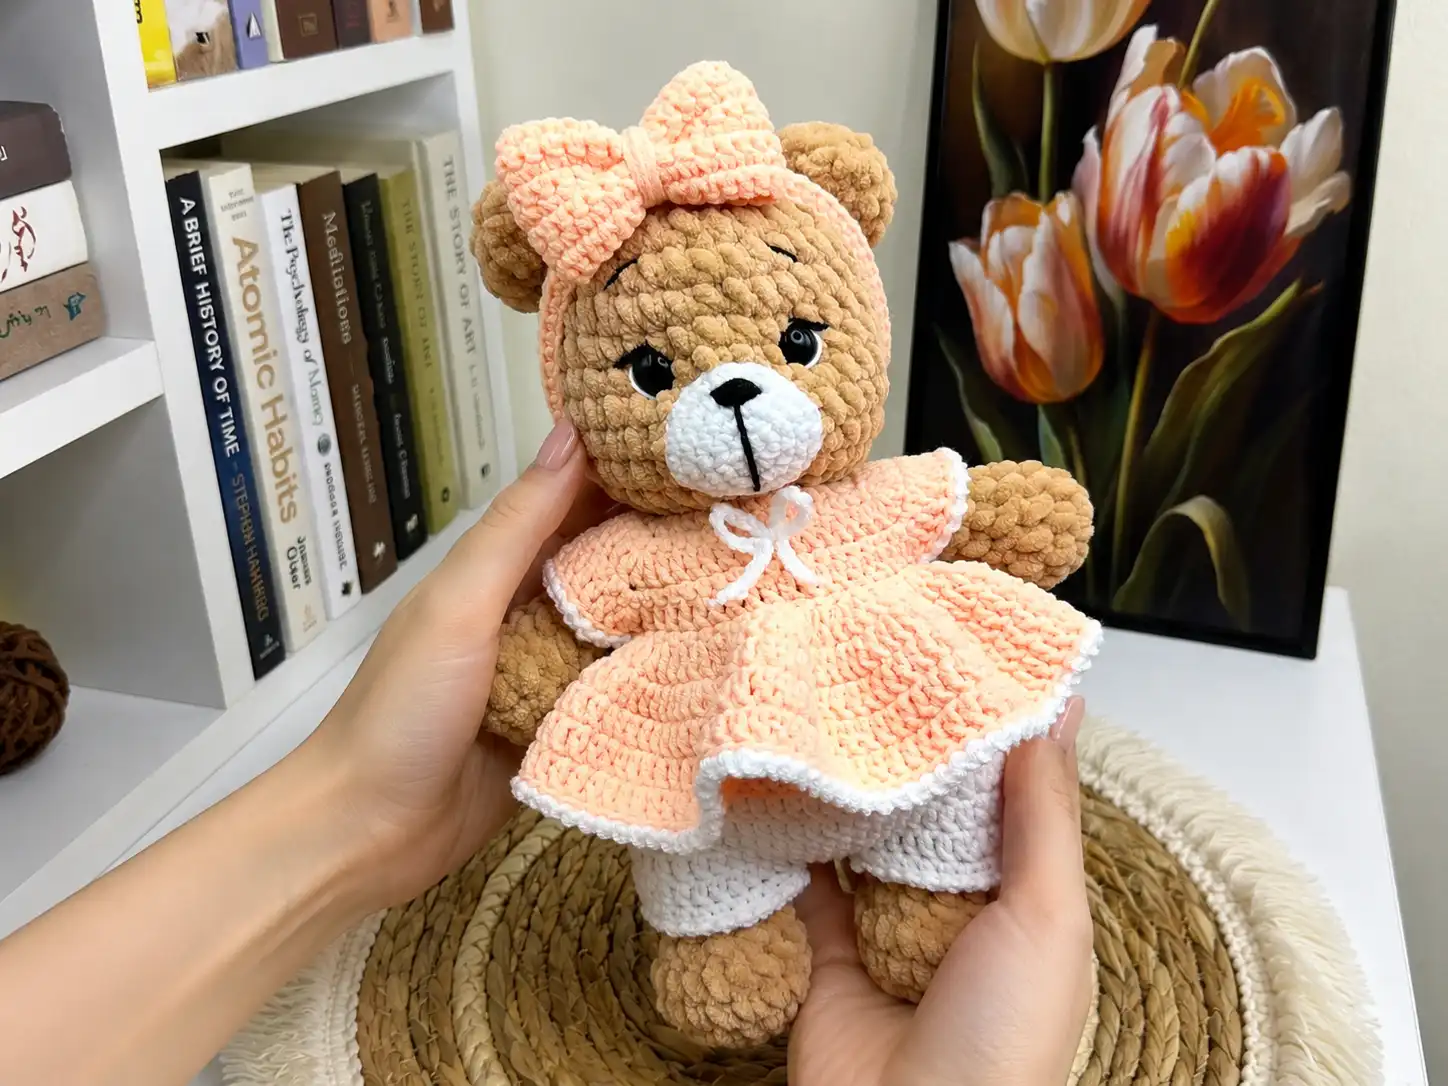
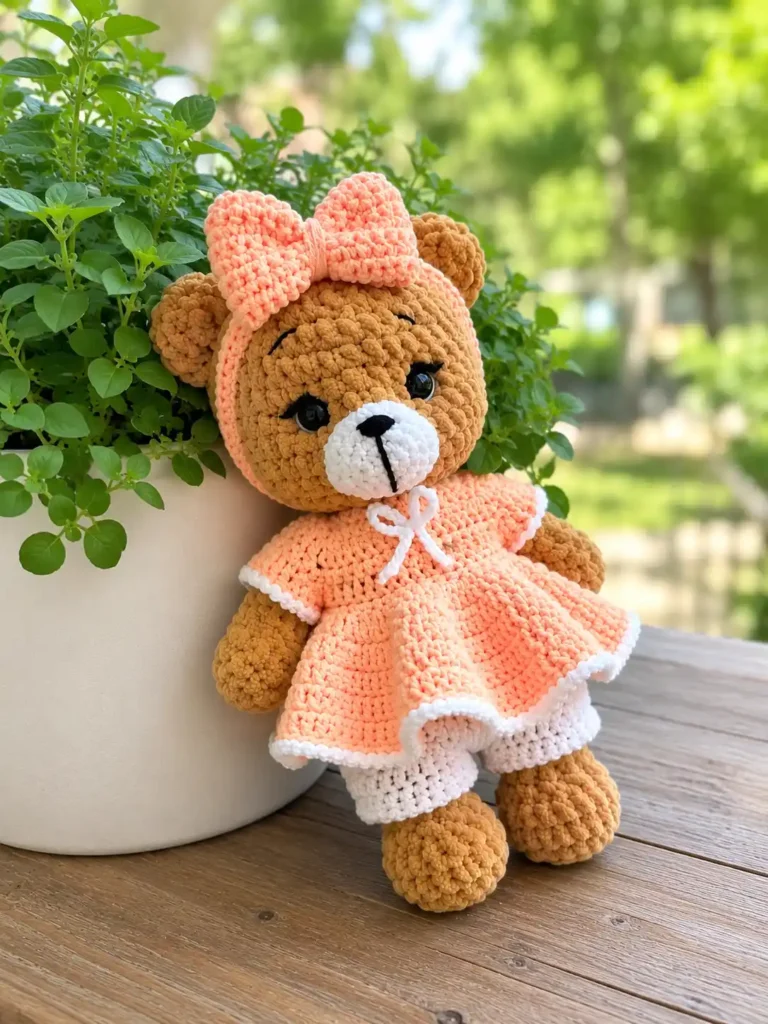
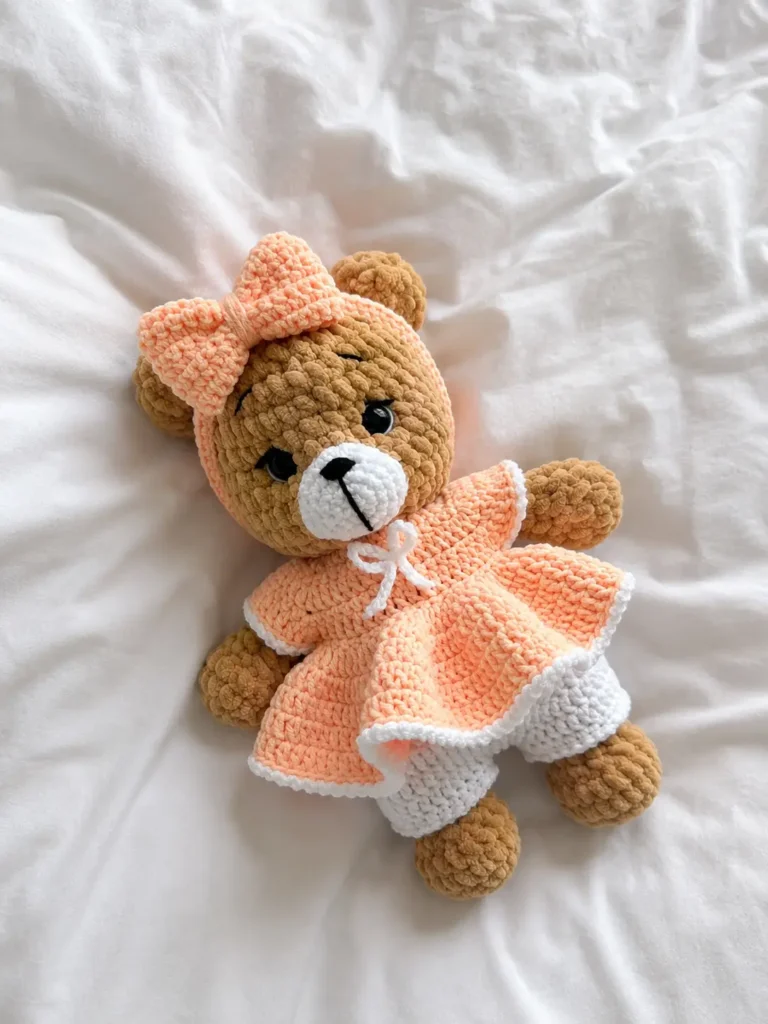
This crochet bear amigurumi free pattern turns out the softest little bear you’ve ever seen — round chenille body, a sweet embroidered nose, and a tiny knit dress with a bow that ties the whole look together. She’s the kind of bear that makes you stop scrolling and go “oh, I NEED to make that.” The dress, the headband, the little bow — every piece adds one more layer of precious. Let me show you how she comes together.
🩷 Pattern Highlights
- Cuteness Rating: 🩷🩷🩷🩷🩷
- Finished Size: 9.4 in tall
- Difficulty: Intermediate
- Hook Size: G/6 (4.0 mm) for the body, plus a 2.0 mm steel hook for the dress and accessories
- Yarn Palette: warm honey-brown chenille for the bear, soft dusty rose for the dress, with crisp white and black accents for the bow, headband, and shorts
- Key Detail: a fitted knit dress with a button loop, a coordinating bow and headband, and glossy safety eyes with an embroidered nose
- Estimated Time: 5-7 hours
What You’ll Need for This Crochet Bear Amigurumi
For the bear herself, you’ll want a bulky chenille yarn in a warm, honey-brown tone — something with a bit of that soft velvety halo, since it’s what gives her that squishable, huggable look. The source pattern calls for YarnArt Dolce; if you’re shopping in the US, Bernat Baby Velvet or Premier Parfait are lovely substitutes with that same soft chenille texture.
For the dress, shorts, bow, and headband, you’ll switch to a much finer DK-weight cotton yarn in a soft dusty rose, plus a little white and black for contrast pieces. YarnArt Jeans is the original call here — Drops Muskat or Paintbox Cotton DK are great US alternatives with a similarly crisp, defined stitch.
- Yarn A (Bulky Chenille): warm honey-brown, approximately 1 skein (YarnArt Dolce or US alternative: Bernat Baby Velvet, Premier Parfait) — this is classified as Bulky (5), which gives the body that soft, rounded chenille finish.
- Yarn B (DK Cotton): soft dusty rose, plus small amounts of white and black (YarnArt Jeans or US alternative: Drops Muskat, Paintbox Cotton DK) — a Light Worsted / DK (3) weight for crisp, defined stitches on the dress pieces.
- Hook: G/6 (4.0 mm) for the chenille body pieces
- Hook: 2.0 mm steel hook for the dress, shorts, bow, and headband
- Safety Eyes: 10-12 mm — a slightly larger pair here really helps her expression feel warm and sweet rather than sleepy
- Stuffing: polyester fiberfill
- Tapestry needle for sewing all the little pieces together
- Black yarn for embroidering the nose
Abbreviations Used in This Crochet Bear Amigurumi Free Pattern
| Abbreviation | Meaning |
|---|---|
| mr | magic ring |
| ch | chain |
| tch | turning chain |
| sc | single crochet |
| dc | double crochet |
| sl st | slip stitch |
| inc | increase (2 sc in same stitch) |
| inv dec | invisible decrease |
| dc2tog | double crochet 2 together (used for shorts shaping only) |
| BLO | back loop only |
| FO | fasten off |
Before You Begin — Getting the Details Just Right
🩷 Chloe’s Detail Tip: If you’re new to the invisible decrease, it’s worth practicing on a scrap first — it’s what keeps the shaping on her body and head looking smooth instead of gappy. Our invisible decrease tutorial walks through it step by step.
This little bear starts every piece from a magic ring, so if that’s new to you, it’s worth getting comfortable with it before you dive in — it’s what keeps her round pieces perfectly closed with no hole at the center.
Because there are so many separate pieces here — legs, arms, ears, muzzle, and then the whole wardrobe on top — I’d really recommend reading through our sewing amigurumi parts tutorial before you start assembling. Getting the arms and legs aligned evenly is what makes her feel balanced and finished rather than lopsided.
🩷 Chloe’s Detail Tip: When you get to inserting the safety eyes, do it before you stuff the head. Hold the piece up under a bright lamp and check it head-on — once those washers click into place, there’s no undoing it, so that extra thirty seconds of checking is always worth it.
The Pattern — Legs (Make 2)
Yarn: honey-brown chenille | Starting Method: magic ring
Row 1: 6 sc in mr (6)
Row 2: 6 inc (12)
Row 3: (1 sc, inc) * 6 (18)
Rows 4-5: 18 sc (18)
Row 6: 3 sc, 6 inv dec, 3 sc (12)
Rows 7-12: 12 sc, 6 rows (12)
🩷 Chloe’s Detail Tip: Stuff each leg about half full, then fold it flat and crochet 6 sc straight through both layers to close it off. This gives her legs that soft, slightly flattened little-bear stance instead of round stumps.
Finishing: Cut the yarn, fasten off, and weave in the ends.
Look at that little rounded foot forming already — this is one of those parts where a few simple rows suddenly look exactly like a tiny leg. So satisfying.
The Pattern — Arms (Make 2)
Yarn: honey-brown chenille | Starting Method: magic ring
Row 1: 6 sc in mr (6)
Row 2: 6 inc (12)
Rows 3-4: 12 sc (12)
Row 5: 3 sc, 3 inv dec, 3 sc (9)
Rows 6-10: 9 sc, 5 rows (9)
🩷 Chloe’s Detail Tip: Crochet one extra sc round before stuffing — it gives the arm just enough length to hang naturally once she’s sewn together. Stuff about half full, then fold flat and crochet 4 sc through both layers to close.
Finishing: Cut the yarn, fasten off, and weave in the ends.
The Pattern — Body
Yarn: honey-brown chenille | Starting Method: magic ring
Row 1: 6 sc in mr (6)
Row 2: 6 inc (12)
Row 3: (1 sc, inc) * 6 (18)
Row 4: (2 sc, inc) * 6 (24)
Row 5: (3 sc, inc) * 6 (30)
Row 6: attach the legs here — 4 sc, 6 sc worked through both the body and one leg together, 9 sc, 6 sc worked through both the body and the second leg together, 5 sc (30)
Rows 7-9: 30 sc, 3 rows (30)
Row 10: (8 sc, inv dec) * 3 (27)
Row 11: (7 sc, inv dec) * 3 (24)
Row 12: (6 sc, inv dec) * 3 (21)
Row 13: (5 sc, inv dec) * 3 (18)
Row 14: 4 sc, 4 sc worked through both the body and one arm together, 5 sc, 4 sc worked through both the body and the second arm together, 1 sc (18)
Row 15: (1 sc, inv dec) * 6 (12)
Row 16: 12 sc (12)
🩷 Chloe’s Detail Tip: Right before Row 14, take a moment to line the arms up against the legs so everything sits evenly around the body — shift a stitch or two if you need to. It only takes a second, and it’s the difference between a bear that stands proud and one that leans.
This is where she really starts rounding out into that classic huggable bear shape — so fun to watch happen.
The Pattern — Head (Continue Directly from the Body)
Row 17: 12 inc (24)
Row 18: (3 sc, inc) * 6 (30)
Row 19: (4 sc, inc) * 6 (36)
Rows 20-26: 36 sc, 7 rows (36)
Row 27: (4 sc, inv dec) * 6 (30)
Row 28: (3 sc, inv dec) * 6 (24)
Row 29: (2 sc, inv dec) * 6 (18)
Row 30: 9 inv dec (9)
🩷 Chloe’s Detail Tip: Insert the safety eyes between rows 23 and 24, spaced 6 sc apart. This is the moment where she really comes to life — the eyes really bring it home, so double-check they’re level before you snap the washers on.
Finishing: Work one more inv dec round to close the opening, fasten off, and weave in the ends.
The Pattern — Ears (Make 2)
Yarn: honey-brown chenille | Starting Method: magic ring
Row 1: 6 sc in mr (6)
Row 2: 6 inc (12)
Row 3: 12 sc (12)
Finishing: Fold each ear in half and crochet 6 sc through both layers to close.
The Pattern — Muzzle
Yarn: soft white cotton | Starting Method: magic ring
Row 1: 6 sc in mr (6)
Row 2: 6 inc (12)
Row 3: (1 sc, inc) * 6 (18)
Row 4: (2 sc, inc) * 6 (24)
Row 5: 24 sc (24)
Finishing: Leave a long yarn tail for sewing this onto her face.
The Pattern — Dress
Yarn: dusty rose DK cotton | Starting Method: chain foundation
Note: this piece is worked flat first, then joined into the round from Row 7. Stitch totals for rows 1-9 were not fully stated in the source pattern — see the editorial note at the top of this file. Instructions below are preserved exactly as written.
Row 1: Chain 36, starting in the 4th chain from the hook: 4 dc, increase of 3 dc, 5 dc, increase of 3 dc, 10 dc, increase of 3 dc, 5 dc, increase of 3 dc, 5 dc (total not stated in source)
Row 2: Turn, tch, 6 sc, increase of 3 sc, 7 sc, increase of 3 sc, 12 sc, increase of 3 sc, 7 sc, increase of 3 sc, 6 sc (total not stated in source)
Row 3: Turn, 3 tch, 6 dc, increase of 3 dc, 9 dc, increase of 3 dc, 14 dc, increase of 3 dc, 9 dc, increase of 3 dc, 7 dc (total not stated in source)
Row 4: Turn, tch, 8 sc, increase of 3 sc, 11 sc, increase of 3 sc, 16 sc, increase of 3 sc, 11 sc, increase of 3 sc, 8 sc (total not stated in source)
Row 5: Turn, 3 tch, 8 dc, increase of 3 dc, 13 dc, increase of 3 dc, 18 dc, increase of 3 dc, 13 dc, increase of 3 dc, 9 dc (total not stated in source)
Row 6: Turn, tch, 10 sc, chain 4 and skip 17 stitches to shape the sleeve opening, 20 sc, chain 4 and skip 17 stitches to shape the second sleeve opening, 10 sc (total not stated in source)
Row 7: 48 dc, increasing as needed (total not stated in source)
Row 8: Join to work in the round, then (1 dc, inc) * 48 (total not stated in source)
Rows 9-11: Continue in the round for 3 rows of dc (total not stated in source)
🩷 Chloe’s Detail Tip: Edge the sleeve openings and the hem of the dress by working into the back loops only (BLO) — alternating (sl st, ch) all the way around. It leaves the sweetest little scalloped-looking edge. On the back of the dress, add a small chain button loop so it can open and close.
The Pattern — Shorts
Yarn: white or black DK cotton | Starting Method: chain foundation
Row 1: Chain 56, starting in the 4th chain from the hook: 7 dc, inc, (8 dc, inc) * 5 (61)
Row 2: Turn, 3 tch, 59 dc (59)
Row 3: Turn, 3 tch, 59 dc (59)
Row 4: Join to work in the round, 3 tch, 59 dc (59)
Rows 5-8: Continue in the round, 3 tch, 59 dc, 4 rows (59)
Row 9: 3 tch, 27 dc, dc2tog, 30 dc (58)
🩷 Chloe’s Detail Tip: Fold the shorts in half and sew through both layers at the center (between the legs), then work 4 dc along that seam on the wrong side. You should have 25 stitches left on each leg opening — crochet 25 sc around each one, then finish the leg edges in back loops only: (sl st, ch) around all 25 stitches for that same sweet scalloped look as the dress.
The Pattern — Bow
Yarn: white or black DK cotton | Starting Method: chain foundation
Row 1: Chain 31, starting in the 2nd chain from the hook: 30 sc (30)
Rows 2-8: Turn, tch, 30 sc, 7 rows (30)
Finishing: Fold the strip in half and sew the edges together, then wrap a length of yarn tightly around the center to pinch it into a classic bow shape.
The Pattern — Headband
Yarn: white or black DK cotton | Starting Method: chain foundation
Row 1: Chain 66, starting in the 2nd chain from the hook: 65 sc (65)
Finishing: Sew the bow onto the headband, right at center front.
The Pattern — Little Bow for the Dress
Yarn: white or black DK cotton | Starting Method: chain foundation
Row 1: Chain 30, shape into a small bow, and sew it onto the front of the dress (total not stated in source)
Assembly
- Do a little needle sculpting on the face if you’d like extra dimension, then sew the muzzle onto the head.
- Insert the safety eyes between rows 23 and 24 of the head, spaced 6 sc apart — check they’re level before pressing the washers in.
- Sew the two ears onto the head, just behind where the eyes sit.
- Sew the headband and bow together, then place it on her head between the ears.
- Sew the little bow onto the front of the dress.
- Add a small chain button loop to the back of the dress so it can be opened and closed.
- For the shorts, fold in half and sew through both layers at the center seam, then work 4 dc on the wrong side to reinforce it.
Making This Crochet Bear Amigurumi Extra Cute — Finishing Details
This is where it goes from “nice little bear” to “I can’t put this down.” Once the body is built and dressed, embroider a small nose onto the muzzle using black yarn — a simple satin-stitch triangle or a few tidy horizontal stitches both work beautifully. Keep it small and centered; it’s such a tiny detail but it’s what gives her that gentle bear expression.
🩷 Chloe’s Detail Tip: For the eyes, I always hold the head up under a lamp and look at it straight-on before committing. Symmetry is everything here — even a millimeter off and you’ll notice it every single time you look at her. Once you’re happy, press the washers on firmly.
The dress, bow, and headband are really what set this one apart from a plain bear amigurumi — that little combination of dusty rose against warm brown chenille is so soft together. If you want to switch it up, try the dress in a pale mint or baby yellow instead, with the bow and headband in a crisp white — both combinations feel just as sweet.
Chloe’s Final Look
I’ve had this little bear sitting on my desk for days now and I keep finding reasons to pick her back up. That dusty rose dress against her honey-brown chenille body, the little bow perched on her headband, the way her eyes catch the light just right — it’s everything I love about this kind of project. Try making her in a few different dress colors and lining them up together on a shelf; a whole little bear family like that is almost too much cuteness to handle. 🩷