Playful Bull Amigurumi — Free Crochet Pattern
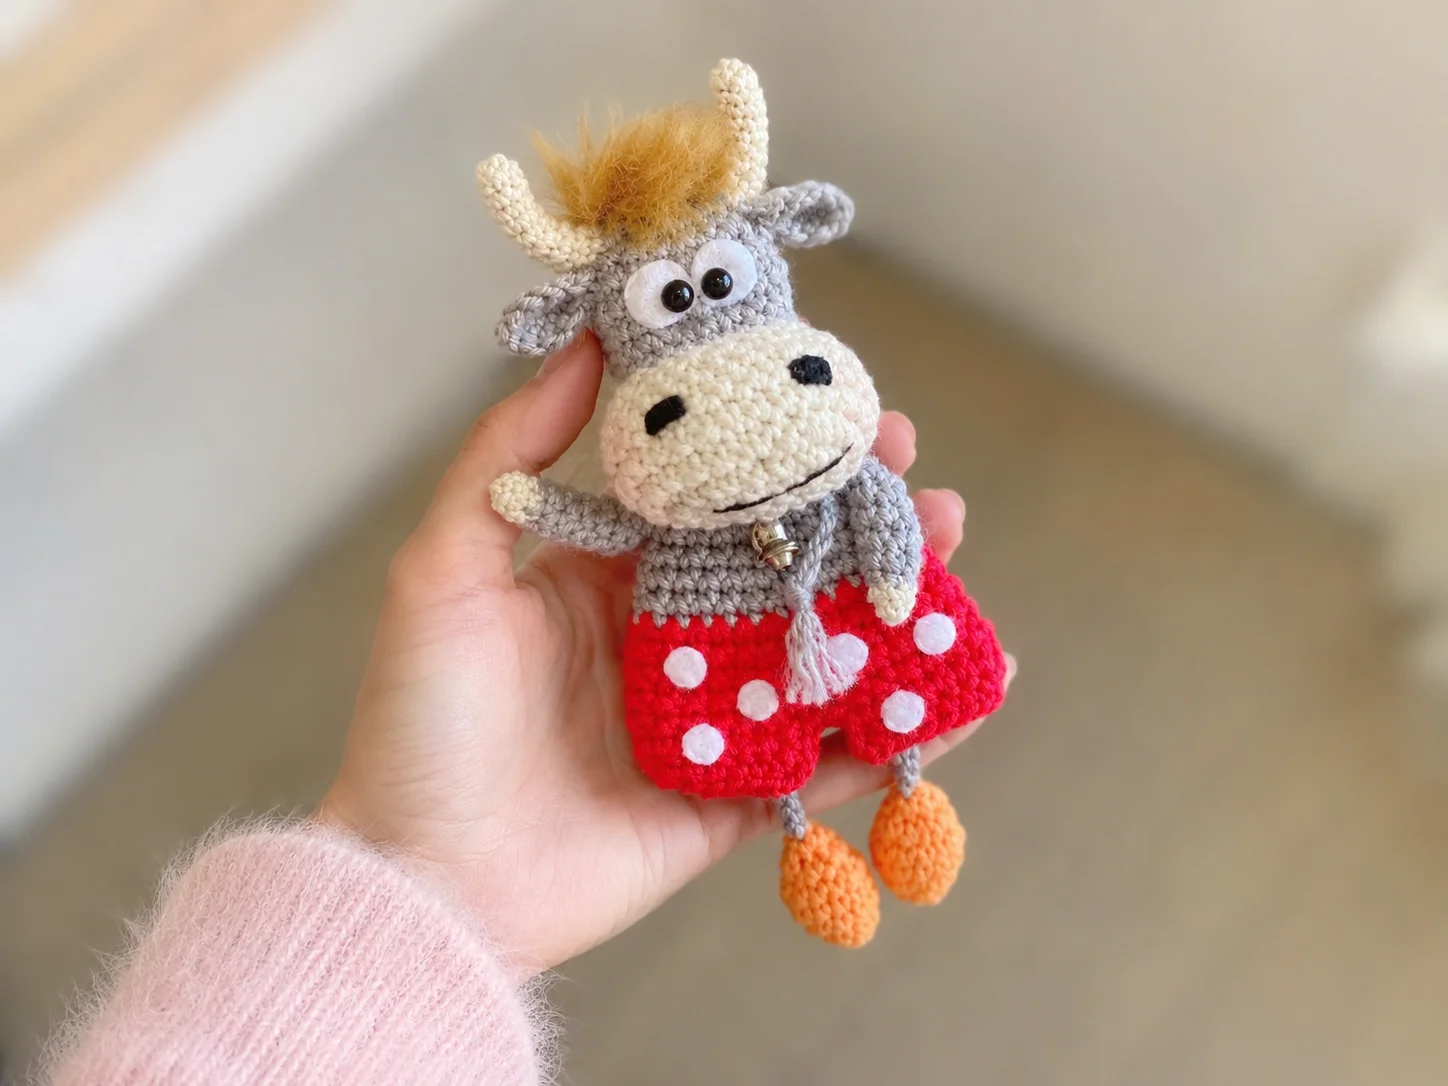
If you are looking for a playful bull amigurumi pattern free tutorial, this design is one I was excited to test, because he manages to be sturdy and expressive at the same time — wired horns that hold their angle, a little bell at his neck, and a stance that actually looks like he’s mid-trot. I kept my tension tight throughout so the color-blocked pants and shoes stay crisp against the body. He’s a project with a lot of small parts, but every count below has been checked twice, and each one adds up exactly as written.
📋 Pattern Quick Stats
- Difficulty: Intermediate
- Finished Size: Not specified in the source pattern — I’d rather leave this blank than guess at a number that isn’t mine to give you.
- Hook Size: 1.5 mm for the body and small parts, 1.25 mm for the horns (both finer than a standard lettered US hook — more on that below)
- Yarn Weight: DK / Light Worsted (3)
- Techniques: magic ring, increase, invisible decrease, color changes, wire-supported horns, multi-piece sewing
- Estimated Time: This one’s built from seven separate pieces plus assembly, so plan on spreading it across a few sessions rather than one sitting.
Materials for This Playful Bull Amigurumi Pattern Free Guide
Here’s everything you’ll need to make your own bull. I’ve included the US yarn alternatives alongside the originals, so pick whichever is easiest for you to find.
- Main Color Yarn (body, ears, shoes, arms): Pekhorka Children’s Series / Detskaya Novinka, or a US alternative like Lion Brand 24/7 Cotton or Paintbox Cotton DK — DK / Light Worsted (3)
- Pants Color Yarn: Pekhorka Children’s Series / Detskaya Novinka — DK / Light Worsted (3)
- Muzzle Yarn (beige and gray): Pekhorka Children’s Series / Detskaya Novinka — DK / Light Worsted (3)
- Horns Yarn: YarnArt Jeans, or a US alternative like Drops Muskat or Paintbox Cotton DK — DK / Light Worsted (3)
- White felt
- Black felt
- Half-beads for the eyes, 0.4 cm (4 mm)
- Wire, 1 mm thick
- A neodymium magnet (the kind used for window blinds)
- A small piece of faux fur
- Fiberfill stuffing — I reach for Poly-Fil by Fairfield, widely available at Joann, Michaels, and Hobby Lobby
- Craft glue
- A small decorative bell
- Hook: 1.5 mm for the body and parts, 1.25 mm for the horns
- Tapestry needle and a ruler
This yarn falls into the DK / Light Worsted (3) category on the Craft Yarn Council yarn weight system, though you’ll notice the hook called for here is much finer than what’s typically paired with this weight — that’s intentional in the original design, and it’s what gives this bull his especially dense, sturdy fabric.
Abbreviations Used in This Bull Amigurumi Pattern
| Abbreviation | Meaning |
|---|---|
| mr | magic ring |
| sc | single crochet |
| inc | increase |
| inv dec | invisible decrease |
| ch | chain |
| sl st | slip stitch |
Special Techniques for This Playful Bull Amigurumi Pattern
A few techniques in this pattern are worth a closer look before you start, especially if this is one of your first multi-piece amigurumi.
Every piece starts with a magic ring, which gives you a fully closed center with no gap — essential for anything you’re going to stuff. If you haven’t worked one before, our step-by-step magic ring tutorial walks through it from the very first loop.
Wherever the original pattern calls for a decrease, I’ve written it as an invisible decrease instead. It’s the method I use in every pattern I publish — it closes cleanly with no visible gap, and it never changes the stitch count the row is written to reach. If it’s new to you, our invisible decrease tutorial covers the exact hand motion.
Because this bull is built from seven separate pieces — body, muzzle and head, two horns, two ears, legs, two shoes, two arms, and a twisted tail — the assembly leans heavily on sewing. Take your time with the placement before you commit any stitches; our guide to sewing amigurumi parts together has tips on pinning pieces in place first so nothing shifts while you sew.
Playful Bull Amigurumi Pattern — Body
The body is worked in one continuous piece, starting in the main color and switching to the pants color partway through, then splitting into two little pant legs at the base.
Row 1: 6 sc in mr (6)
Row 2: (1 sc, inc) × 3 (9)
Row 3: 9 sc (9)
Row 4: (2 sc, inc) × 3 (12)
Row 5: 12 sc (12)
Row 6: (3 sc, inc) × 3 (15)
Rows 7–9: 15 sc (3 rows) (15)
Row 10: (4 sc, inc) × 3 (18)
Row 11: 18 sc (18)
Row 12: (5 sc, inc) × 3 (21)
Row 13: 21 sc (21)
Row 14: (6 sc, inc) × 3 (24)
Row 15: 24 sc (24)
Row 16: 7 sc, inc, 7 sc, inc, 7 sc, inc [change to pants color] (27)
Row 17: 27 sc (27)
Row 18: (8 sc, inc) × 3 (30)
Row 19: 30 sc (30)
💡 Emma’s Tip: Start stuffing the body as you go once you’re a few rows into the pants color — it’s much easier to distribute fiberfill evenly in stages than to try and pack it all in at the very end.
Forming the Pant Legs: Continue working sc stitches around until you reach the side of the pants, then begin shaping the two legs.
First Pant Leg: 5 sc, ch, turn, 6 sc, ch, turn, 6 sc, ch, work 2 sc down the side of the pant leg, sl st in the first stitch of the pant leg.
Second Pant Leg: 2 sl st, 6 sc, ch, turn, 6 sc, ch, turn, 6 sc, ch, work 2 sc down the side of the pant leg, sl st in the first stitch of the pant leg.
Fasten off and cut the yarn.
Bull Amigurumi Pattern — Muzzle and Head
This piece starts flat with a chain, works around it like an oval, and then builds up into a rounded head — beige for the muzzle, gray from Row 9 onward.
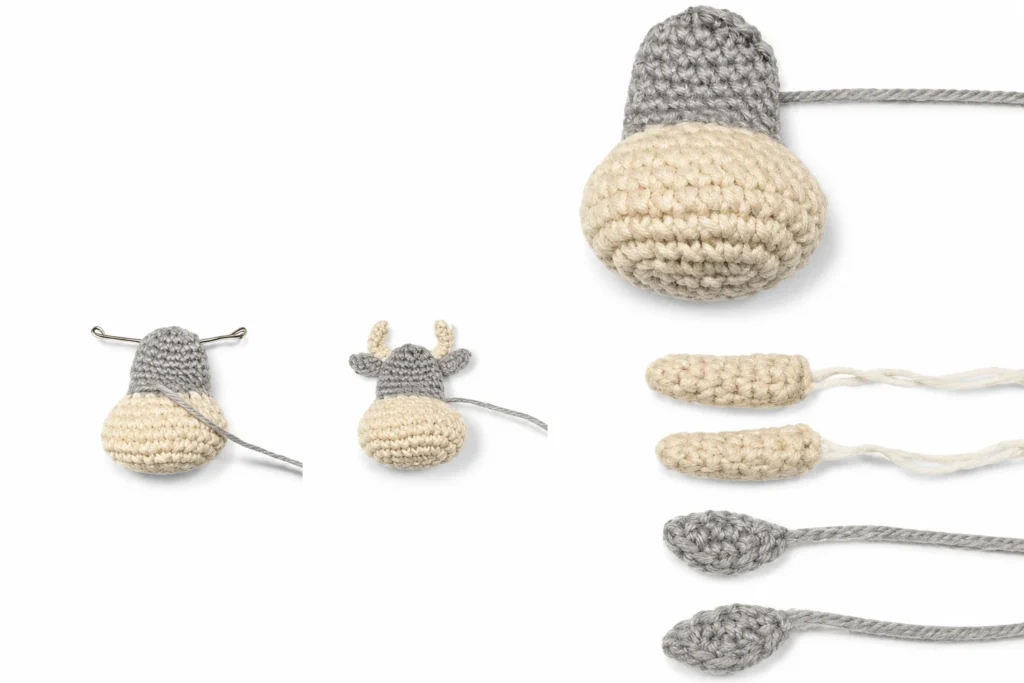
Row 1: Ch 5, starting in the 2nd ch from hook: 3 sc, 4 sc in the same stitch, along the other side of the chain: 3 sc, inc (12)
Row 2: inc, 2 sc, 4 inc, 2 sc, 3 inc (20)
Row 3: (1 sc, inc) × 2, 2 sc, (1 sc, inc) × 4, 2 sc, (1 sc, inc) × 2 (28)
Rows 4–6: 28 sc (3 rows) (28)
Row 7: (5 sc, inv dec) × 4 (24)
Row 8: (1 sc, inv dec) × 8 (16)
Rows 9–15: 16 sc (7 rows) [change to gray yarn before Row 9] (16)
Row 16: (2 sc, inv dec) × 4 (12)
Row 17: (1 sc, inv dec) × 4 (8)
💡 Emma’s Tip: Only stuff the beige muzzle portion firmly before closing — leave the gray head section unstuffed for now, since it gets attached to the body afterward.
Cut the yarn and close the opening with your tapestry needle. Leave the tail threaded out at the point where the beige transitions to gray — you’ll use it for attaching the head.
Horns for This Bull Amigurumi Pattern
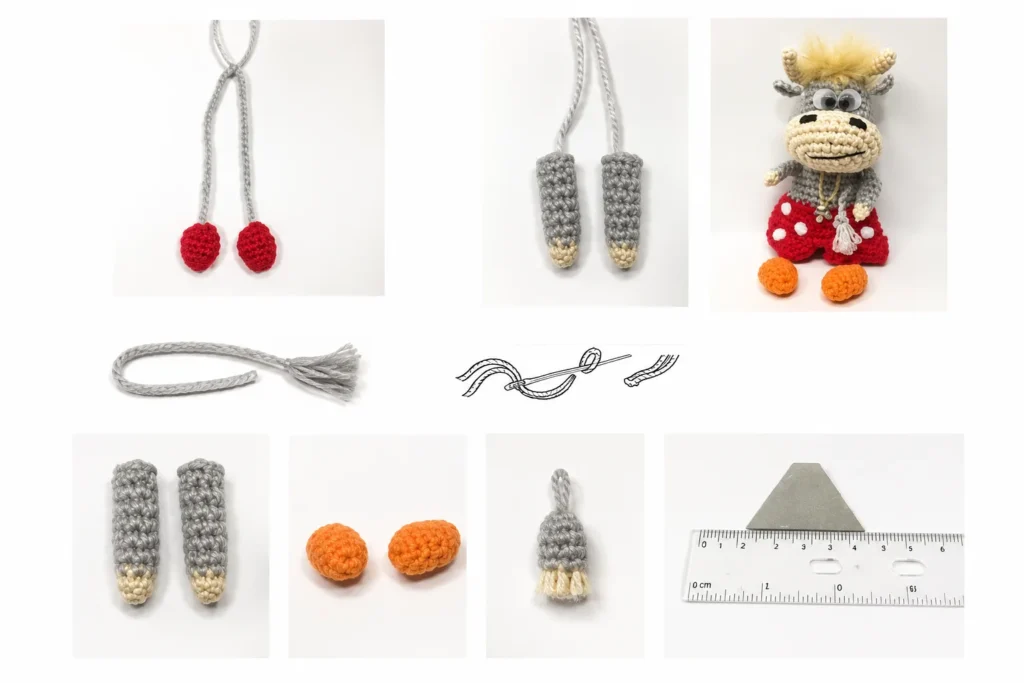
Make two. These are worked at a tighter 1.25 mm hook to keep the fabric dense enough to hold their shape around the wire core.
Row 1: 6 sc in mr (6)
Rows 2–9: 6 sc (8 rows) (6)
Cut the yarn, leaving a tail for sewing.
Ears
Make two.
Row 1: 6 sc in mr (6)
Row 2: 4 inc, 2 sc (10)
Slip stitch into the next stitch, then cut the yarn, leaving a tail for sewing.
Legs
Row 1: Work a chain of 60 (60)
Divide the chain in half using a scrap piece of thread as a marker. You’ll thread each end through the sides of the body’s magic ring during assembly, tie a secure knot on the inside, and bury the ends within the stuffing.
Shoes
Make two.
Row 1: 6 sc in mr (6)
Row 2: 6 sc (6)
Row 3: (1 sc, inc) × 3 (9)
Rows 4–5: 9 sc (2 rows) (9)
Row 6: (1 sc, inv dec) × 3 (6)
💡 Emma’s Tip: Drop a stitch marker into Row 2 as you finish it — with a piece this small, it’s easy to lose track of your round start, and that marker will save you from frogging later.
Insert the chained leg end into the shoe’s opening, cinch the opening closed around it, and secure with the shoe’s yarn tail. Fasten off.
Arms
Make two.
Row 1: 6 sc in mr (6)
Row 2: 6 sc (6)
Rows 3–7: 6 sc (5 rows) (6)
Flatten the top opening and single crochet across both sides together to seal it. Cut the yarn, leaving a tail for sewing.
Tail
Cut a 20 cm (about 7.8 in) length of yarn, fold it in half, and twist each strand individually in a clockwise direction. Let the two twisted strands wrap around each other, then tie a knot at the end to lock the twist in place.
Assembling Your Playful Bull Amigurumi
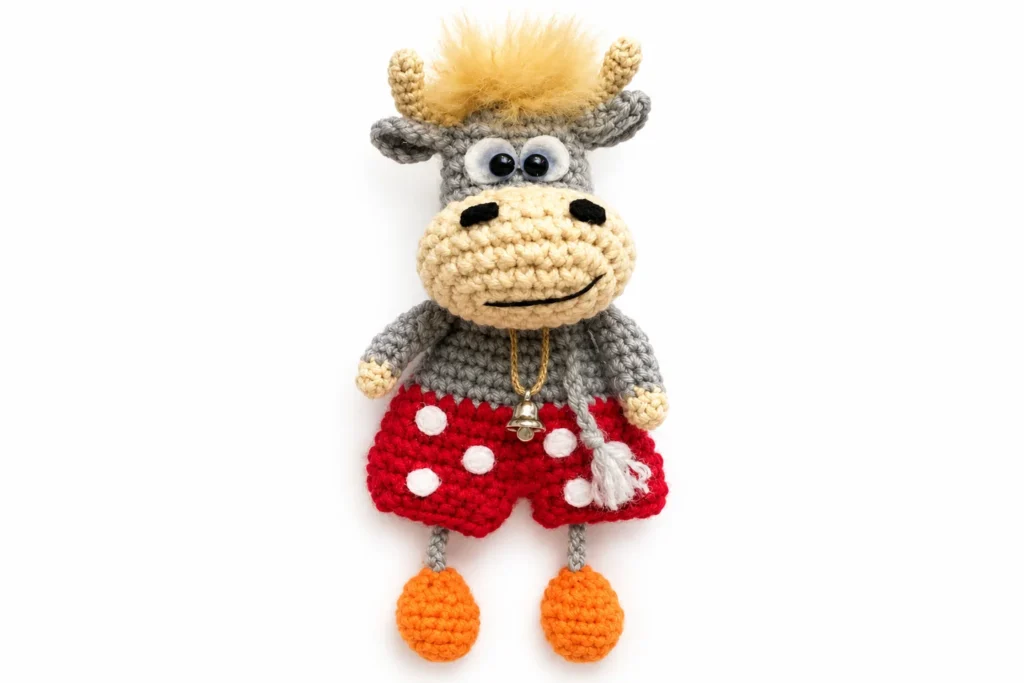
- Magnet placement: Cut a small triangle from white felt. Apply glue around its edges and use it to secure the neodymium magnet against the inner back wall of the body.
- Horns: Cut a 6.5 cm (about 2.5 in) piece of wire and insert it horizontally through the upper section of the head, bending a small loop into each exposed end so it can’t slip back through. Slide the crocheted horn pieces over the wire ends and sew the horn bases down onto the head.
- Ears: Sew the ears directly below the horns on each side of the head.
- Head: Sew the base of the head to Row 3 of the body, working from the top down for a secure, even seam.
- Arms: Sew the arms symmetrically to the upper sides of the body.
- Legs and shoes: With the chained legs already secured into the shoes, thread the middle ends through the body’s base magic ring, tie off securely, and bury the ends inside the body.
- Tail: Secure the twisted tail to the lower back with a loop knot.
- Optional hanging loop: If you’d like to display this piece as an ornament, attach a small loop of yarn to the top of the head before you finish.
Finishing Details
The face is what brings this bull to life, so take your time here.
- Eyes: Cut small ovals from white felt, layer smaller black felt ovals on top, and glue a 4 mm half-bead into the center of each. Glue the finished eyes onto the face.
- Forelock: Glue a small tuft of faux fur to the top of the head, between the horns.
- Muzzle details: Glue tiny black felt ovals in place for nostrils, then embroider a smile with black thread.
- Accessories: Sew or glue the small bell to the neck or chest area for a finishing touch.
💡 Emma’s Tip: Because this design relies on glued felt eyes, a small magnet, and a wire armature rather than locking safety eyes, I’d treat this one as a display piece or a gift for an older crafter rather than a toy for a young child. According to the U.S. Consumer Product Safety Commission, small parts and glued components are a real concern for children who still put toys in their mouths — so keep that in mind when deciding who this little guy is for.
Emma’s Note
This bull was a fun change of pace for me — between the wire-supported horns and that twisted little tail, he’s got more personality packed into small parts than most of my patterns. If your tension runs tight like mine, the pants and shoes will come out crisp and clean against the body. Take it slow through assembly, and don’t be afraid to pin everything in place before you pick up your needle. Happy hooking! 🧶
FAQ
Is this playful bull amigurumi pattern free for beginners?
This is an intermediate-level pattern due to the wire armature, color changes, and assembly of multiple small pieces, but it is well-suited for crafters with some amigurumi experience.
What yarn is best for this bull amigurumi?
We recommend using a DK / Light Worsted (3) weight yarn to achieve the dense, sturdy fabric required to hold the bull’s shape and support the wire horns.