Free Crochet Amigurumi Doll Pattern — Princess with Rosy Cheeks & a Tiny Bunny
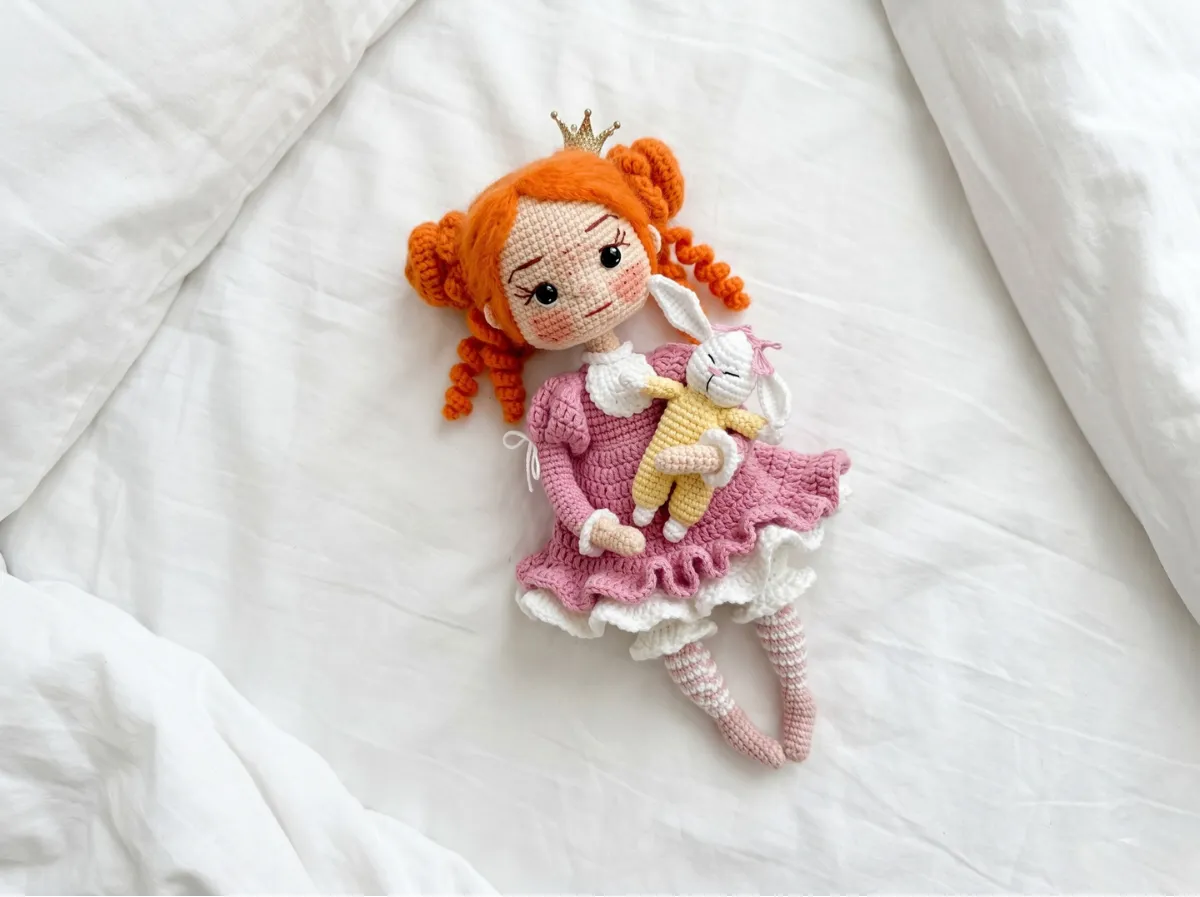
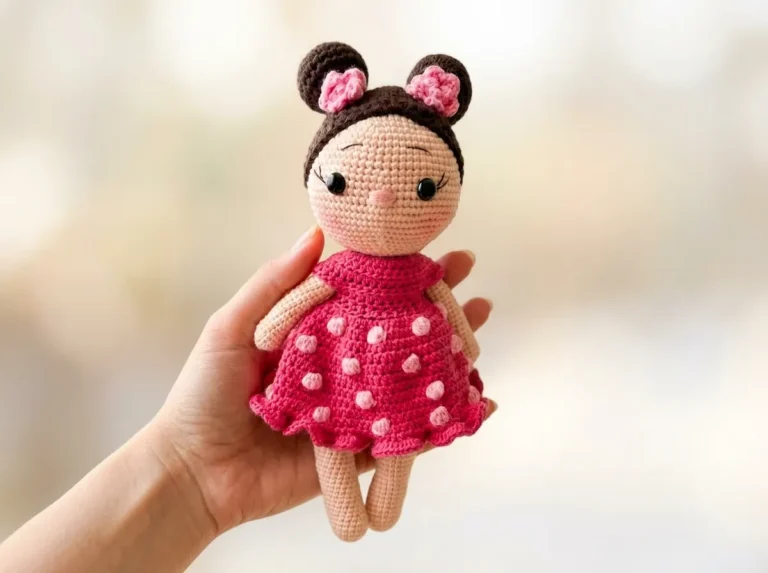
This free amigurumi doll pattern creates the most magical little princess you’ve ever crocheted — she has soft blush cheeks, silky honey-gold hair piled into the sweetest double buns, a ruffled pink dress with white lace trim, and the most adorable striped knee-high socks you’ll ever make. She even comes with her own little bunny companion. I am completely, utterly in love with her. Let’s make her together.
🩷 Pattern Highlights
- Cuteness Rating: 🩷🩷🩷🩷🩷
- Finished Size: Approx. 11–12 in (28–30 cm)
- Difficulty: Intermediate–Advanced
- Hook Size: 1.75mm
- Yarn Palette: soft beige, pure white, blush pink (dress), dusty rose pink (socks), warm golden yellow (hair)
- Key Detail: double hair buns with spiral strand ringlets, striped knee socks, a full ruffled skirt — and a matching tiny bunny
- Estimated Time: 10–15 hours
Materials for Your Amigurumi Doll Pattern
Everything about this doll’s palette is soft and dreamy. The combination of warm beige skin, golden hair, and blush pink dress is just — a lot. In the best way.
- DK / Light Worsted (3) yarn in the following colors:
- Soft beige — for skin (head, ears, arms, neck)
- Pure white — for underdress bodice, upper legs, collar, sock stripes, and bunny body
- Blush pink — for dress and sleeves
- Dusty rose pink — for knee-high sock stripes
- Warm golden yellow — for hair (a DK-weight yarn with good stitch definition — YarnArt Jeans or US alternatives like Drops Muskat or Paintbox Cotton DK work beautifully)
- 9mm safety eyes × 2 — the size that gives her that perfect wide-eyed, sweet expression
- Small safety eyes for the bunny — 6mm recommended
- Polyester fiberfill / polyfill stuffing — stuff gradually to keep shapes smooth
- Craft wire — approx. 11.8 in (30 cm) for the internal arm and neck frame
- Fabric medical tape — to wrap the wire before inserting (keeps it from poking through)
- Two beads, 12–15mm diameter — for the articulated leg joints
- Pliers — for bending the wire frame
- Tapestry needle — for sewing all the parts and weaving in ends
- Stitch markers
- Scissors
- Crown hair clip (on a clamp) — or make one from craft foam for the most adorable finishing touch
🩷 Chloe’s Detail Tip: The wire frame is what gives this doll her poseable arms and elegant neck — it’s what makes her feel like a real heirloom piece rather than a regular stuffed toy. Wrap the wire in fabric medical tape before inserting it; the tape grips the stuffing and prevents the wire from shifting. Take your time with this step — it’s the secret to her poise.
This DK / Light Worsted (3) yarn weight is perfect for this level of detail — it’s fine enough to show off the ruffles and tiny sock stripes, while still being comfortable to work with at 1.75mm.
Abbreviations Used in This Amigurumi Doll Pattern
| Abbreviation | Meaning |
|---|---|
| mr | magic ring |
| ch | chain |
| sc | single crochet |
| hdc | half double crochet |
| hdc-inc | half double crochet increase (2 hdc in same stitch) |
| dc | double crochet |
| dc-inc | double crochet increase (2 dc in same stitch) |
| dc-dec | double crochet decrease (2 dc together) |
| tr | treble crochet |
| tr-inc | treble crochet increase (2 tr in same stitch) |
| inc | increase (2 sc in same stitch) |
| dec | decrease (2 sc together) |
| BLO | back loop only |
| FLO | front loop only |
| sl st | slip stitch |
| FO | fasten off |
Before You Begin — Little Details That Make All the Difference
This is an intermediate-to-advanced amigurumi doll pattern with a lot of parts. She is absolutely worth every stitch. Here are the things I’d want you to know before you cast on.
1. The eyes are everything.
Those 9mm safety eyes are what give her her entire personality — that little glossy glimmer is pure magic. Before you press the washers on, hold the finished head up under a bright lamp and look at it straight-on. They need to be level, the same distance from the nose, and symmetrical. Once those washers click into place they are locked forever, so take an extra minute. If you’ve never worked with safety eyes before, our step-by-step safety eyes tutorial shows you exactly how to position them so they come out perfectly even every time.
2. Use invisible decrease for the neatest closures.
The pattern uses “dec” (2 sc together) throughout. For the smoothest, most beautiful surface — especially on the head and body where it’s most visible — I’d highly recommend substituting the invisible decrease method instead. It eliminates the little gap that standard decreases leave behind and keeps her face perfectly smooth.
3. Work in continuous rounds with a stitch marker.
This doll is crocheted in continuous rounds (no joining). Move your stitch marker to the first stitch of each new round — this is the only way to keep track when you’re working with 60 stitches on the head. A non-negotiable step, and your future self will thank you.
4. Assemble as you go.
The legs, arms, and skirt are all crocheted into the body as you work. Read through the body section once before starting it so you understand where each join happens — it makes the whole process feel satisfying and intentional rather than surprising.
🩷 Chloe’s Detail Tip: Before sewing any parts together, do a dry-run placement. Pin the ears, hold the hair bun near the head, position the collar. Step back. Look at the whole picture. The extra few minutes of fussing at this stage is what makes the finished doll look intentional and polished rather than “assembled.”
The Amigurumi Doll Pattern — All Parts
Head (×1)
Yarn: Soft beige | Start: Magic ring
Row 1: 6 sc in mr (6)
Row 2: 6 inc (12)
Row 3: (1 sc, inc) × 6 (18)
Row 4: (2 sc, inc) × 6 (24)
Row 5: (3 sc, inc) × 6 (30)
Row 6: (4 sc, inc) × 6 (36)
Row 7: (5 sc, inc) × 6 (42)
Row 8: (6 sc, inc) × 6 (48)
Row 9: (7 sc, inc) × 6 (54)
Row 10: (8 sc, inc) × 6 (60)
Rows 11–20: 60 sc (10 rows) (60)
Row 21: 24 sc, 1 ch, skip 1 st, 9 sc, 1 ch, skip 1 st, 25 sc (60)
Rows 22–28: 60 sc (60)
Row 29: (8 sc, dec) × 6 (54)
Row 30: (7 sc, dec) × 6 (48)
Row 31: (4 sc, dec) × 8 (40)
Row 32: (3 sc, dec) × 8 (32)
Row 33: (2 sc, dec) × 8 (24)
Row 34: (1 sc, dec) × 8 (16)
Row 35: (2 sc, dec) × 4 (12)
🩷 Note: Row 21 creates the eye holes — insert your 9mm safety eyes into these openings. Stuff the head gradually as you decrease. FO, cut yarn.
Ears (×2)
Yarn: Soft beige | Start: Chain
Row 1: 4 ch, from 2nd st from hook: sc, 3 dc in one st, sc, turn (–)
Row 2: 5 sl st (5)
FO, cut yarn, leaving a tail for sewing.
Hair (×1)
Yarn: Warm golden yellow | Start: Magic ring
Row 1: 8 sc in mr (8)
Row 2: 8 inc (16)
Row 3: (1 sc, inc) × 8 (24)
Row 4: (2 sc, inc) × 8 (32)
Row 5: (3 sc, inc) × 8 (40)
Strands: (25 ch, from 2nd st from hook 24 sc, sl st into main piece) × 40
🩷 Note: Steam the strands gently once complete — this relaxes any curl and gives them that soft, flowing look. Leave yarn tail for sewing to head.
Buns (×2)
Yarn: Warm golden yellow | Start: Magic ring
Row 1: 6 sc in mr (6)
Row 2: 6 inc BLO (12)
Row 3: (1 sc, inc) × 6 BLO (18)
Row 4: (2 sc, inc) × 6 BLO (24)
Rows 5–6: 24 sc BLO (24)
Row 7: Turn work and crochet FLO: (2 ch, sl st) × to end of piece
Stuff slightly. FO, cut yarn.
🩷 Chloe’s Detail Tip: The BLO rows on the buns create that lovely textured loop edge — it adds just a little extra dimension that makes them look so much more lush than a plain sphere. Don’t skip those back loops!
Spiral Strands (×2)
Yarn: Warm golden yellow | Start: Chain
Row 1: 20 ch, from 2nd st from hook (3 sc in 1 st) × 19
Row 2: 20 ch, from 2nd st from hook (3 sc in 1 st) × 19
Leave yarn tail for sewing. These spiral strands hang beneath the buns and give her that extra-fairy-tale look.
Arms (×2)
Yarn: Soft beige, then white, then blush pink | Start: Magic ring
Row 1: 6 sc in mr — beige (6)
Row 2: (1 sc, inc) × 3 — beige (9)
Rows 3–6: 9 sc — beige (9)
Row 7: 4 sc, 3 dc together, 4 sc — beige (9)
Rows 8–9: 9 sc — beige (9)
Row 10: 9 sc — white (9)
Row 11: 8 sc, inc — white BLO (10)
Row 12: 10 sc — pink (10)
Row 13: inc, 9 sc — pink (11)
Row 14: 11 sc — pink (11)
Row 15: 10 sc, inc — pink (12)
Rows 16–20: 12 sc — pink (12)
Row 21: dec, 3 sc, 2 inc, 3 sc, dec — pink (12)
Rows 22–23: 12 sc — pink (12)
Row 24: 5 sc, 2 inc, 5 sc — pink (14)
Row 25: 14 sc, 2 ch to turn — pink (14)
Row 26: (dc-inc) × 14 FLO, sl st, 2 ch — pink (28)
Rows 27–28: 28 dc, sl st, 2 ch — pink (28)
Row 29: (dc-dec) × 14 — pink (14)
🩷 Note: After Row 10, go back to the FLO of Row 10 and attach white yarn to crochet the wrist ruffle: Row 1: 9 sc; Row 2: 9 inc (18); Row 3: 18 sc; Row 4: (2 ch, sl st) × 18. FO. This little white ruffle at the wrist is so delicate — it’s one of my favorite details on this whole doll.
FO. Make the second arm the same way.
Skirt (×1)
Yarn: Blush pink, then white for ruffle | Start: Chain
Row 1: 42 ch, join in ring (42)
Row 2: 42 sc, 2 ch to turn (42)
Row 3: (6 dc, dc-inc) × 6, sl st, 2 ch (48)
Row 4: (7 dc, dc-inc) × 6, sl st, 2 ch (54)
Row 5: 54 dc, sl st, 2 ch (54)
Row 6: (8 dc, dc-inc) × 6, sl st, 2 ch (60)
Row 7: (9 dc, dc-inc) × 6, sl st, 2 ch (66)
Row 8: (10 dc, dc-inc) × 6, sl st, 2 ch (72)
Row 9: (11 dc, dc-inc) × 6, sl st, 2 ch (78)
Row 10: (12 dc, dc-inc) × 6, sl st, 2 ch (84)
Row 11: 84 dc, sl st, turn (84)
Row 12: sl st, sc, hdc, 50 dc, hdc, sc, sl st, ch, turn
Row 13: 4 sl st, sc, hdc, 44 dc, hdc, sc, 4 sl st, ch, turn
Row 14: 8 sl st, sc, hdc, 36 dc, hdc, sc, 8 sl st, ch, turn
Row 15: 84 sc, 2 ch to turn (work in the round from here) (84)
Row 16: FLO: dc-inc × 84, sl st, 2 ch (168)
Row 17: 168 dc, sl st (168)
🩷 Note: Rows 11–14 are worked in turning rows (this creates the lovely curved hem shape). From Row 15, you’re back in the round. After Row 17, attach white yarn to the BLO of Row 15 and crochet the white ruffle: Row 1: dc-inc × 84, sl st, 2 ch (168); Row 2: 168 dc, sl st; Row 3: (2 ch, sl st) × 168. FO, weave in all ends. That double ruffle at the hem — blush pink over white — is just dreamy.
Lower Leg / Knee-High Sock (×2)
Yarn: Dusty rose pink + white alternating for stripes | Start: Magic ring
Row 1: 6 sc in mr — pink (6)
Row 2: (1 sc, inc) × 3 — pink (9)
Rows 3–6: 9 sc — pink (9)
Row 7: (2 sc, inc) × 3 — pink (12)
Row 8: 12 sc — pink (12)
Row 9: 2 dec, 3 sc, 2 inc, 3 sc — pink (12)
Row 10: 2 dec, 8 sc — pink (10)
Row 11: dec, 6 sc, dec — pink (8)
Row 12: 8 sc — white (8)
Row 13: inc, 7 sc — pink (9)
Row 14: inc, 8 sc — white (10)
Row 15: inc, 9 sc — pink (11)
Row 16: inc, 10 sc — white (12)
Row 17: inc, 11 sc — pink (13)
Row 18: inc, 12 sc — white (14)
Row 19: inc, 13 sc — pink (15)
Row 20: 15 sc — white (15)
Row 21: 15 sc — pink (15)
Row 22: 15 sc — white (15)
Row 23: (3 sc, dec) × 3 — pink (12)
Row 24: 12 sc — pink (12)
Row 25: 6 dec — pink (6)
🩷 Note: From Row 12 onward, alternate one row white, one row pink. After Row 22, cut white yarn and continue in pink only. FO, cut yarn, leave a tail for sewing. Make the second leg the same way.
Upper Leg (×2)
Yarn: White | Start: Magic ring
Row 1: 6 sc in mr (6)
Row 2: 6 inc (12)
Row 3: 12 inc BLO (24)
Rows 4–14: 24 sc (24)
Assembly: Stuff loosely, fold in half and crochet through both sides: 12 sc, ch, turn; 12 sc
🩷 Note: After completing the upper leg, attach yarn to the FLO of Row 2 and crochet the little ruffle at the top: Row 1: 12 sc, 2 ch to turn; Row 2: dc-inc × 12, sl st, 2 ch (24); Row 3: 24 dc, sl st; Row 4: (3 ch, sl st) × 24. This tiny ruffle at the top of the sock — it’s so sweet you’ll squeal.
Body (×1)
Yarn: White (lower body and bodice), blush pink (dress top), soft beige (neck) | Start: Chain
Row 1: 15 ch, from 2nd st from hook: 13 sc, 3 sc in one st, 12 sc, inc — white (30)
Row 2: inc, 12 sc, 3 inc, 12 sc, 2 inc — white (36)
Row 3: sc, inc, 12 sc, (1 sc, inc) × 3, 12 sc, (1 sc, inc) × 2 — white (42)
Row 4: 2 sc, inc, 12 sc, (2 sc, inc) × 3, 12 sc, (2 sc, inc) × 2 — white (48)
Row 5: 3 sc, inc, 12 sc, (3 sc, inc) × 3, 12 sc, (3 sc, inc) × 2 — white (54)
Row 6: 4 sc, inc, 12 sc, (4 sc, inc) × 3, 12 sc, (4 sc, inc) × 2 — white (60)
Rows 7–8: 60 sc — white (60)
Row 9: 12 sc with leg sts, 12 sc with other leg sts, 36 sc — white (60)
Rows 10–13: 60 sc — white (60)
Row 14: (8 sc, dec) × 6 — white (54)
Row 15: 54 sc — white (54)
Row 16: (7 sc, dec) × 6 — white (48)
Row 17: 48 sc — white (48)
Row 18: (6 sc, dec) × 6 — white (42)
Row 19: 42 sc — white (42)
Row 20: (5 sc, dec) × 6 — white (36)
Rows 21–24: 36 sc — white (36)
Row 25: (11 sc, inc) × 3 — white (39)
Row 26: (12 sc, inc) × 3 — white (42)
Row 27: 42 sc together with skirt sts — pink (42)
Rows 28–30: 42 sc — pink (42)
Row 31: Crochet to the middle of the back, move marker — pink
Row 32: 7 sc, 7 sc with arm sts, 14 sc, 7 sc with arm sts, 7 sc — pink (42)
Row 33: 3 sc, dec, 2 sc, 7 sc along the other side of the arm, (dec, 2 sc, dec, 2 sc, dec, 2 sc, dec) along the body, 7 sc along the other side of the arm, 2 sc, dec, 3 sc — pink (36)
Row 34: (4 sc, dec) × 6 — pink (30)
Row 35: (3 sc, dec) × 6 — pink (24)
Row 36: (2 sc, dec) × 6 — pink (18)
Row 37: 18 sc — white (18)
Row 38: (1 sc, dec) × 6 BLO — beige (12)
Rows 39–42: 12 sc — beige (12)
🩷 Notes:
— Stuff gradually throughout; keep the marker along the side.
— Row 9: Join the upper legs into the body (legs should be positioned center-front; adjust with extra sc if needed to align).
— Row 27: Change to pink and crochet together with the skirt stitches — this is the moment she becomes a princess.
— Row 32: Join the arms into the body.
— Row 33: After this row, insert the wire frame through the arms and up through the neck. Wrap the wire in fabric medical tape first. Stuff gradually.
— Row 37: After completing, work into the FLO of Row 37 with white yarn: (2 ch, sl st) × 18 for the neckline trim. FO, cut yarn, weave in ends.
— FO body, leaving a tail for sewing.
Collar (×1)
Yarn: White | Start: Chain (worked in turning rows)
Row 1: 5 ch, from 2nd st from hook: 3 sc, 3 sc in one st, 3 sc, ch, turn
Row 2: 3 sc, 3 inc, 3 sc, ch, turn
Row 3: 3 sc, (1 sc, inc) × 3, 3 sc, turn
Row 4: (2 ch, sl st) × 15
FO, leave a tail for sewing. That little ruffled collar is so proper and sweet — it makes her look like she stepped out of a fairy tale.
The Tiny Bunny Companion
Okay but this might be the most precious part of this whole amigurumi doll pattern. She comes with a tiny little bunny. A miniature bunny with yellow pajamas and white ears. I absolutely cannot.
Bunny: Front Paws (×2)
Yarn: White, then yellow | Start: Magic ring
Row 1: 6 sc in mr — white (6)
Rows 2–3: 6 sc — white (6)
Row 4: (1 sc, inc) × 3 — yellow (9)
Rows 5–8: 9 sc — yellow (9)
FO, cut yarn. Make both paws.
Bunny: Hind Paws (×2)
Yarn: White, then yellow | Start: Magic ring
Row 1: 6 sc in mr — white (6)
Rows 2–3: 6 sc — white (6)
Row 4: 6 inc FLO — yellow (12)
Rows 5–8: 12 sc — yellow (12)
🩷 Note: FO and cut yarn on the first hind paw. Do NOT cut yarn on the second — you’ll use it to connect both paws and start the body.
Bunny: Body (×1)
Yarn: Yellow, then white | Start: Continuation from hind paws
Row 9: 12 sc along one paw, 12 sc along the other paw — yellow (24)
Rows 10–17: 24 sc — yellow (24)
Row 18: 5 sc, 3 sc with paw sts, 8 sc, 3 sc with paw sts, 5 sc — yellow (24)
Row 19: Crochet along body sts and other side of paws: (3 sc, dec) × 6 — yellow (24)
Row 20: (2 sc, dec) × 6 — yellow (18)
Row 21: (1 sc, dec) × 6 — yellow (12)
Row 22: 12 inc FLO — white (24)
Rows 23–27: 24 sc — white (24)
Row 28: (2 sc, dec) × 6 — white (18)
Rows 29–30: 18 sc — white (18)
Row 31: (1 sc, dec) × 6 — white (12)
Row 32: 6 dec — white (6)
🩷 Notes:
— Row 9: Connect the hind paws here.
— Row 18: Align marker at center back (add extra sc if needed). Join front paws here.
— Pull final stitches tight and weave in ends. Stuff gently before closing.
Bunny: Ears (×2)
Yarn: White | Start: Chain
Row 1: 16 ch, from 2nd st from hook: 2 sl st, 2 sc, 3 hdc, 3 dc, 2 hdc, 2 sc, inc, 2 sc, 2 hdc, 3 dc, 3 hdc, 2 sc, 2 sl st
FO, leave a tail for sewing. Those long floppy white ears — precious.
Assembly — Putting Your Amigurumi Doll Together
This is the part where she goes from a pile of sweet little pieces to a real, complete princess. Take it slowly, step by step, and she’ll come together beautifully. Our guide to sewing amigurumi parts together has all the technique details if you’d like a refresher before you begin.
- Sew the ears to the head at eye level, approximately 8 stitches from each eye.
- Sew the hair base to the head, aligning the center of the hair piece with the center top of the head.
- Divide the strands into three sections: 16 strands for the bangs, and 12 strands on each side for the buns.
- Sew the first side section slightly below ear level. Pull the strands together, twist slightly, and stitch firmly to secure.
- Repeat on the second side.
- Sew a bun over each gathered section, covering where the strands are joined.
- Divide the bang strands into 9 and 7. Drape them gently over and around the buns, and sew 2 strands in front of each ear for those soft face-framing pieces.
- Tuck the spiral strands under the buns and sew in place.
- Sew the collar to the neckline of the dress.
- Attach each lower leg to its upper leg using a bead for the articulated joint: first stitch through the bead to the lower leg, then connect to the upper leg.
- Sew the head firmly to the body, centering it over the neck.
- For the bunny: sew the ears to the bunny’s head at the same height as her face stitching.
Making It Extra Cute — The Finishing Details
This is my favorite part of the whole process. This is where the amigurumi doll pattern transforms from “assembled” to “utterly irresistible.” Don’t rush through this. These finishing details are everything.
Face sculpting:
Thread a tapestry needle with the beige yarn and sculpt the face slightly — pulling gently from the eyes down toward the chin. This small tuck creates the softest, most natural face shape. It’s a subtle change that makes a dramatic difference.
Embroidered features:
Embroider the eyebrows, nose, and lash details in dark brown or black embroidery thread. Keep the eyebrows soft and slightly arched — not too sharp or they’ll look surprised rather than sweet. A small curved line for the nose, and the tiniest dots for lash accents. Optional: tint the eyelids with a soft wash of watercolor or blush eyeshadow for depth.
Pink cheeks:
You cannot skip the cheeks. You simply cannot. Use a cotton swab and blush or chalk pastel in the softest dusty rose — dab it in gentle circular motions onto the cheek area, just below and slightly outside each eye. Blend the edges so it fades naturally. When the cheeks catch the light? Pure magic.
Sleeve bows:
Tie small bows from white yarn at the wrist of each sleeve, just above the ruffled trim. They add such a delicate, fairy-tale finishing touch — like she dressed herself for something very special.
Hair texture:
Once the hair is assembled, very gently brush through the strands with a bit of clothing velcro or a soft-bristled brush. This separates the yarn plies just slightly and gives the hair that soft, dreamy, slightly-tousled quality. Don’t overdo it — you want gentle waves, not frizz.
The crown:
Clip the crown hair clip onto the top of one of the buns. If you’re making a foam crown instead, keep it petite and delicate — this is a princess, not a queen. The understated crown is so much sweeter than an oversized one.
The bunny’s face:
Sculpt the bunny’s muzzle slightly with a needle and thread, then embroider a tiny Y-shaped nose in soft pink. Add the tiniest dot eyes in dark thread. She’s meant to look like a well-loved stuffed toy that the princess carries everywhere — soft and slightly rumpled and absolutely beloved.
🩷 Chloe’s Final Detail Check: Before you call her done, hold her up and look at her straight-on. Check that the eyes are level and symmetrical. Check that both buns are the same size. Check that the cheeks are even. Then turn her to the side and check her silhouette — that the skirt hangs evenly, that the legs are at the same angle. These few minutes of final fussing are what make the difference between a doll that looks handmade and a doll that looks like it was made with love.
Chloe’s Final Look
I’ve been holding this little princess for ten minutes and I still can’t put her down. The way the pink and white ruffles layer at the hem of the skirt, the soft golden buns with those little spiral ringlets, the gleam of the 9mm eyes — she is genuinely one of the most beautiful amigurumi dolls I’ve ever held in my hands. And then there’s the tiny bunny. That little bunny in her yellow pajamas tucked beside the princess is the kind of detail that makes people gasp.
Try her in a different palette — a soft lavender dress with ivory hair, or a mint green skirt with warm brown skin tones. Display her on a little shelf with her bunny beside her, and I promise you’ll smile every single time you walk by. She’s that kind of doll. 🩷
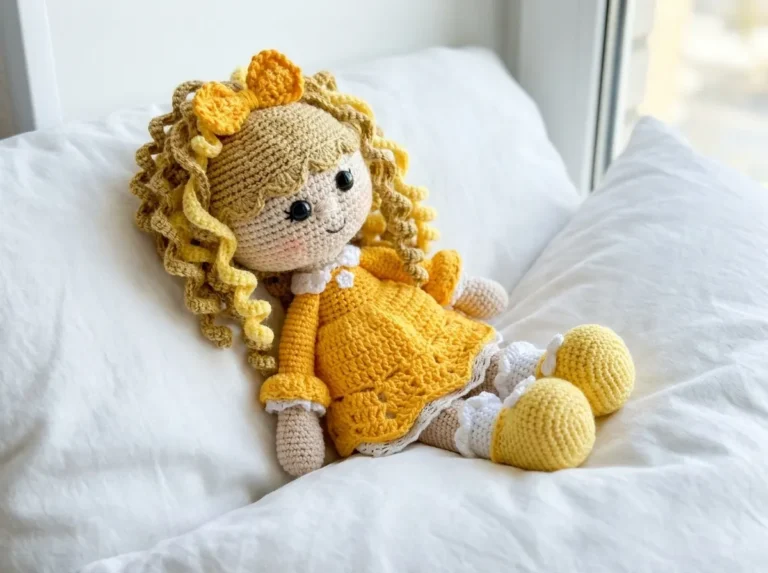
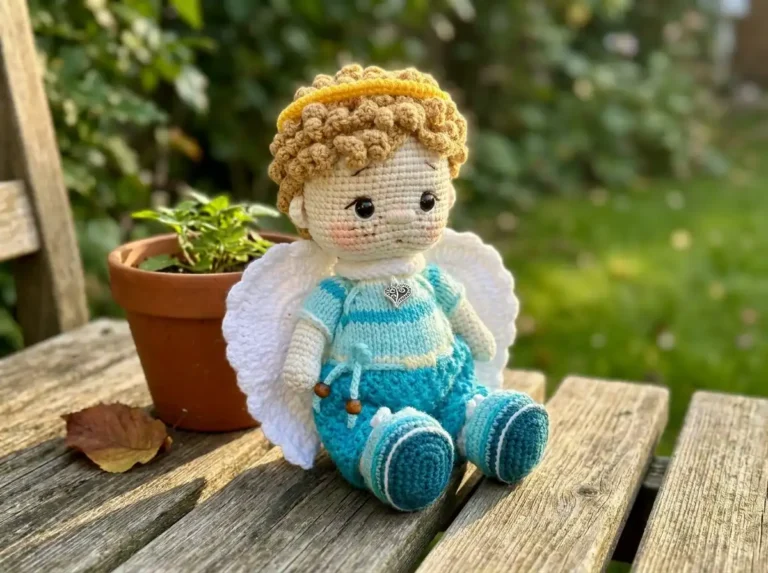
If you loved making this princess, you might also adore our free crochet Angel amigurumi pattern or the sweetest little gnome amigurumi — both have that same handcrafted fairy-tale feeling.
Can beginners make this amigurumi doll pattern?
While AmiLoops provides patterns for all skill levels, this specific doll is an intermediate-to-advanced project due to its articulated joints, internal wire framing, and delicate ruffled clothing details.
What yarn weight is best for this princess doll?
We recommend using DK or Light Worsted (weight 3) yarn. This weight is fine enough to beautifully capture the intricate ruffles and tiny sock stripes while working smoothly with a 1.75mm hook.
How long does it take to crochet this doll?
This is a highly detailed heirloom piece that typically takes between 10 to 15 hours to complete, including the assembly of the tiny bunny and final face sculpting.