Meet Mumuka the Bull — A Free Crochet Pattern With Overalls, Horns, and a Tiny Neck Scarf
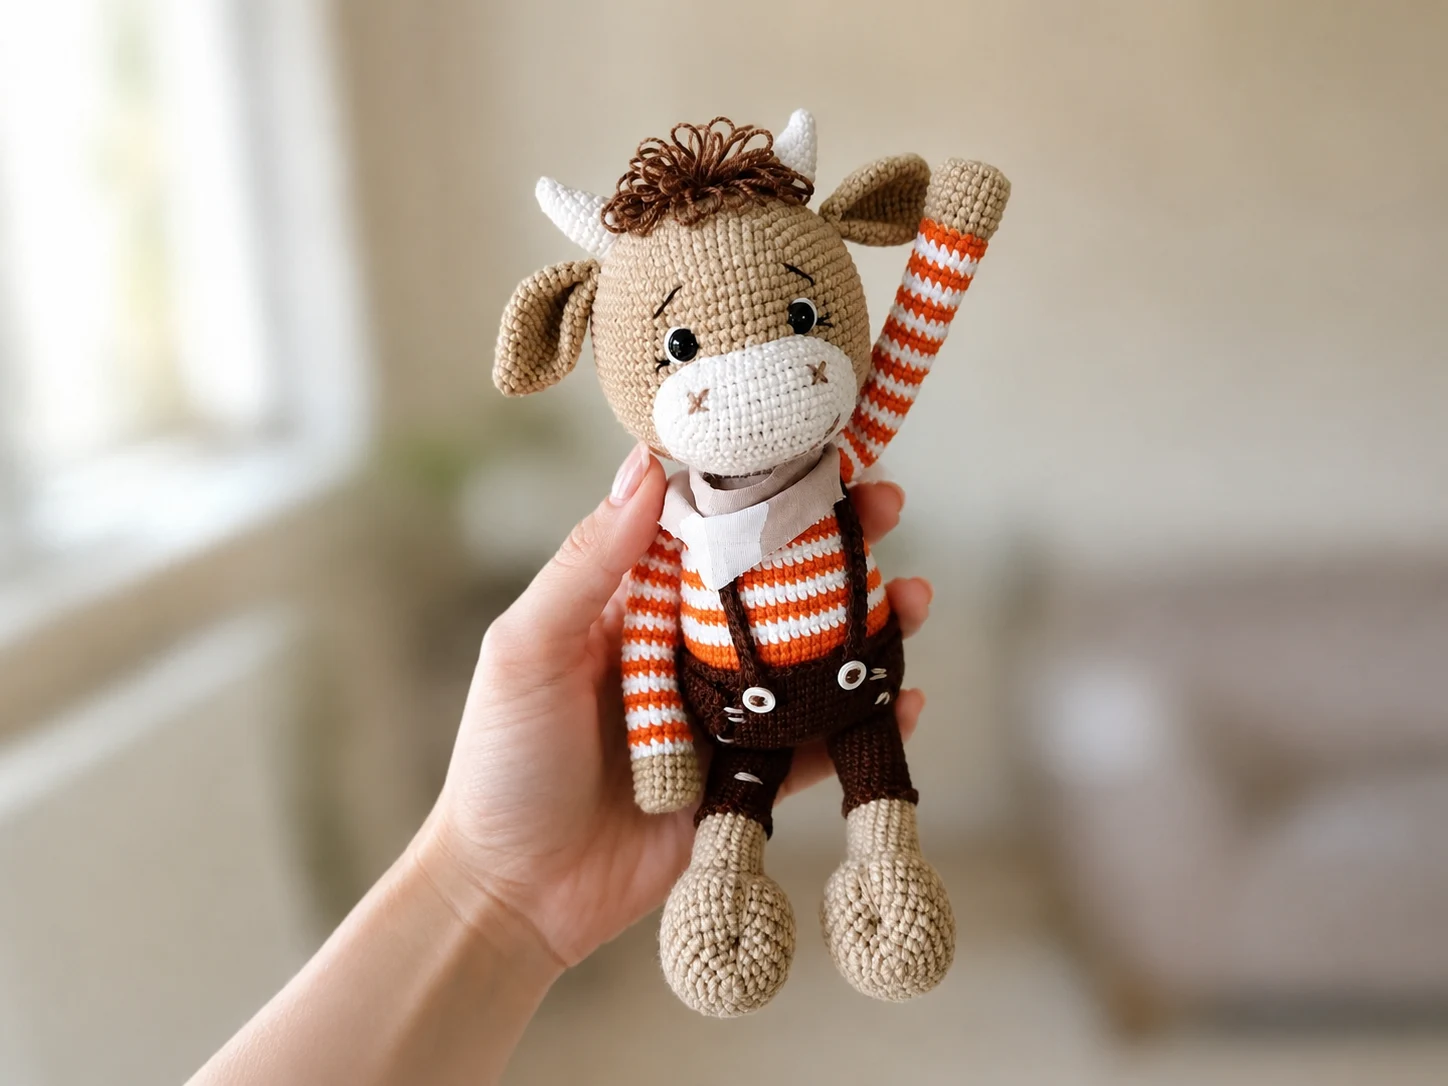
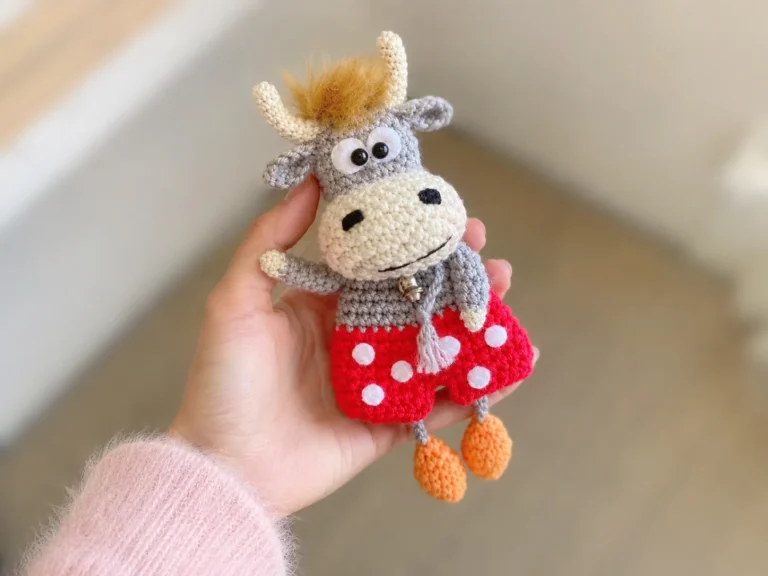
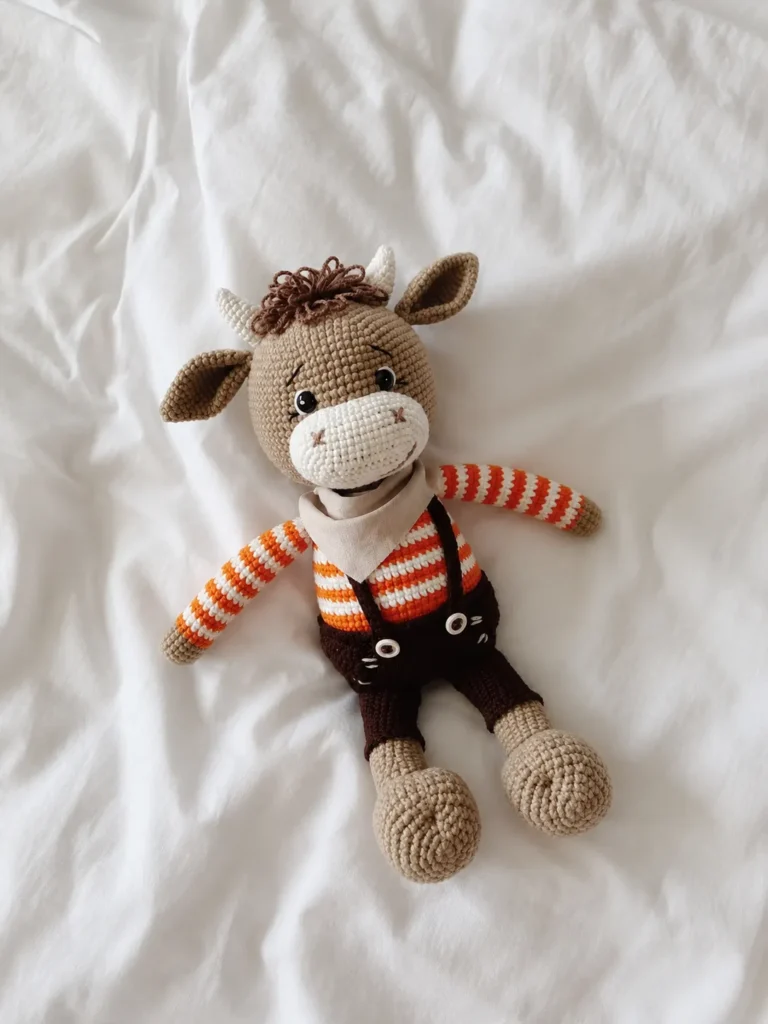
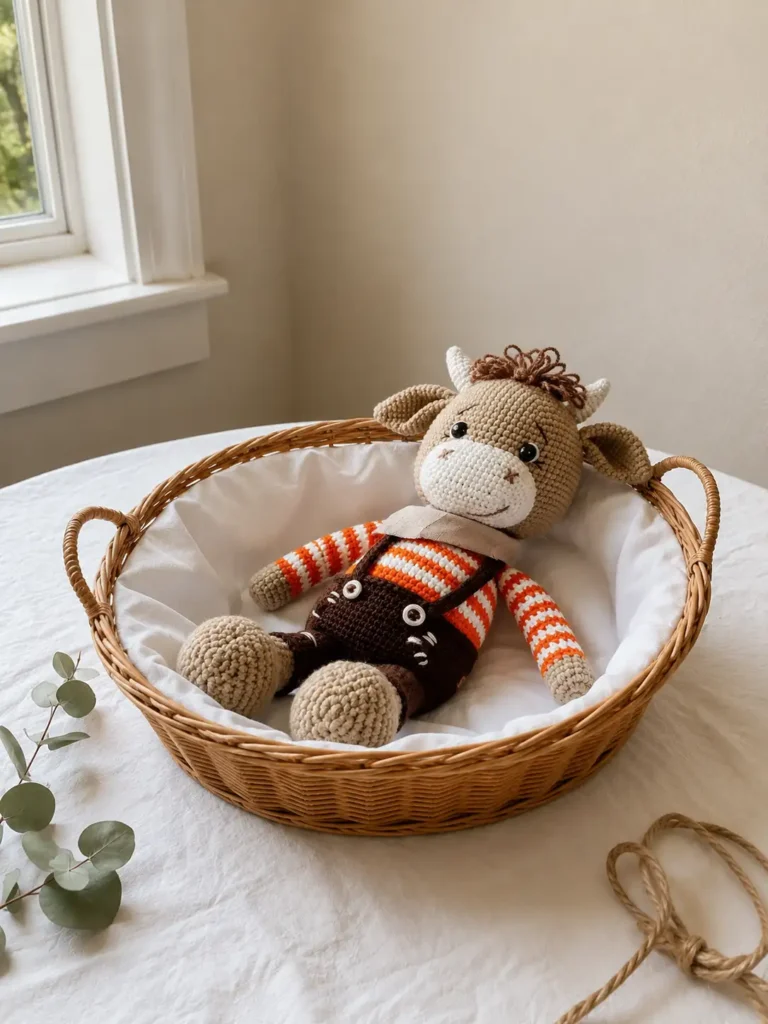
This free crochet Mumuka the Bull pattern brings to life a small, round-cheeked bull who looks like he’s just wandered in from the barnyard and decided to stay. He’s got soft little horns, a denim-blue set of overalls with real pockets, and a hand-tied scarf knotted loosely at his neck — the kind of detail that makes him feel dressed rather than made. I had his name before I’d even finished the muzzle. If you’ve been looking for a project with real character to sink into, this is a good one to start.
📖 Meet Mumuka
- 🌟 Personality: steady, warm, a little stubborn
- 🎨 Color Palette: warm sandy beige, soft cream muzzle, driftwood brown-grey horns, denim blue overalls, rust-orange sweater collar
- 📏 Size: 13 in
- 🪝 Hook: 2.0mm (steel 4 — no direct US letter equivalent; closest standard size is US B/1, 2.25mm)
- ⏱️ Time: 14-18 hours
- ✨ Signature Detail: cross-back denim straps with two buttons, and a fabric scarf knotted at the neck
- 💡 Difficulty: Advanced
Materials for Your Mumuka the Bull Crochet Pattern
The body wants a yarn with a little bit of give and a soft, matte finish — something that will hold its shape through all that shaping around the muzzle and legs, without looking stiff. Here’s what you’ll need:
- Main Body Color (warm sandy beige): YarnArt Jeans (50g / 160m, 55% cotton, 45% acrylic), or a US alternative like Drops Muskat or Paintbox Cotton DK — classified as DK / Light Worsted (3). The cotton-acrylic blend gives Mumuka a slightly matte, storybook quality rather than a shiny one.
- Muzzle Color (soft cream): same yarn, small amount
- Horn Color (driftwood brown-grey): same yarn, small amount
- Sweater Color (rust-orange): same yarn, for the collar and arms
- Pants Color (denim blue): same yarn, for the overalls, straps, and pockets
- Neck scarf fabric: a 13.8×3.1 in piece of woven cotton fabric, cut into a triangle — this one piece isn’t crocheted, it’s tied on at the very end, and it’s part of what makes Mumuka feel finished rather than just stitched
- Hook: 2.0mm (steel 4)
- Safety eyes: 10mm
- Stuffing: polyester fiberfill (Poly-Fil or similar)
- 2 small buttons, for the overall straps
- Yarn needle, stitch marker, scissors
Abbreviations Used in This Mumuka the Bull Pattern
| Abbreviation | Meaning |
|---|---|
| ch | chain |
| sc | single crochet |
| inc | increase (2 sc in one stitch) |
| dec | invisible decrease |
| sl st | slip stitch |
| hdc | half double crochet |
| mr | magic ring |
| BLO | back loop only |
| FLO | front loop only |
| st(s) | stitch(es) |
| (…)×6 | repeat instructions in parentheses 6 times |
Before the Story Begins — Technique Notes for the Mumuka the Bull Crochet Pattern
Every character starts the same quiet way — with a loop that closes completely, leaving no hole behind. If you haven’t made one before, our magic ring tutorial walks through it slowly and clearly, and it’s the foundation for the Head, Ears, Horns, and Legs here.
✨ Sophie’s Note: This pattern’s source instructions called for a standard decrease throughout. I’ve swapped every one of those for an invisible decrease instead — same stitch counts, same shaping, but no visible gap at the point of the decrease. If you’d like to see exactly how it’s worked, our invisible decrease tutorial covers it step by step.
✨ Sophie’s Note: There’s a small inconsistency in the source pattern at Row 1 of the Arms — the listed stitch segments add up to slightly more than the stated total of 18. I’ve kept the total exactly as written, since every following row is built on 18 stitches and works out cleanly. If your count runs a stitch or two high on that very first row, don’t worry — just settle back to 18 before Row 2 and carry on; it won’t affect anything else in the piece.
And a note on pacing: this one takes patience. Nine separate parts, several color changes, a bit of embroidery at the end — Mumuka isn’t a project you rush through in an evening. Let him take the time he needs.
Mumuka the Bull Crochet Pattern — Head
Main Body Color, starting with a magic ring
Row 1: 6 sc in mr (6)
Row 2: (inc)×6 (12)
Row 3: (1 sc, inc)×6 (18)
Row 4: (2 sc, inc)×6 (24)
Row 5: (3 sc, inc)×6 (30)
Row 6: (4 sc, inc)×6 (36)
Row 7: (5 sc, inc)×6 (42)
Row 8: (6 sc, inc)×6 (48)
Row 9: (7 sc, inc)×6 (54)
Row 10: (8 sc, inc)×6 (60)
Row 11: (9 sc, inc)×6 (66)
Row 12: (10 sc, inc)×6 (72)
Rows 13-22: 72 sc, 10 rows (72)
This is where Mumuka’s face starts to take real shape — it’s a lot of even rounds, but that’s what gives him that round, gentle profile rather than a pointed one.
✨ Sophie’s Note: Insert the safety eyes between Rows 17 and 18. Count 23 sc across from the start of the round for the first eye, then 12 sc over for the second. Our safety eyes tutorial has the placement and locking method if you want a closer look before you commit.
Row 23: 11 sc, inc, 36 sc, inc, 23 sc (74)
Row 24: 12 sc, inc, 36 sc, inc, 24 sc (76)
Row 25: 13 sc, inc, 36 sc, inc, 25 sc (78)
Row 26: 78 sc (78)
Row 27: (11 sc, dec)×6 (72)
Row 28: (10 sc, dec)×6 (66)
Row 29: (9 sc, dec)×6 (60)
Row 30: (8 sc, dec)×6 (54)
Row 31: (7 sc, dec)×6 (48)
Row 32: (6 sc, dec)×6 (42)
Row 33: (5 sc, dec)×6 (36)
Row 34: (4 sc, dec)×6 (30)
Row 35: (3 sc, dec)×6 (24)
Stuff the head firmly as you close the last few rows, then set it aside — leave the 24-stitch opening for now, it’s how the head will join the body later.
Muzzle
Muzzle Color, starting with a chain
Row 1: 14 ch + 1 turning ch (15)
Row 2: starting in 2nd ch from hook: 13 sc, 3 sc in one st, 12 sc, inc (30)
Row 3: inc, 12 sc, 3 inc, 12 sc, 2 inc (36)
Row 4: 1 sc, inc, 13 sc, inc, (1 sc, inc)×2, 13 sc, inc, 1 sc, inc (42)
Row 5: 2 sc, inc, 14 sc, inc, (2 sc, inc)×2, 14 sc, inc, 2 sc, inc (48)
Row 6: 3 sc, inc, 15 sc, inc, (3 sc, inc)×2, 15 sc, inc, 3 sc, inc (54)
Rows 7-10: 54 sc, 4 rows (54)
Fasten off, leaving a tail for sewing. There’s something about a muzzle worked flat like this that gives it just the right amount of dimension — it sits slightly forward off the face once it’s sewn on, which is exactly what gives Mumuka that soft, curious expression.
Ears (make 2)
Main Body Color, starting with a magic ring
Row 1: 6 sc in mr (6)
Row 2: (1 sc, inc)×3 (9)
Row 3: 9 sc (9)
Row 4: (2 sc, inc)×3 (12)
Row 5: (3 sc, inc)×3 (15)
Row 6: (4 sc, inc)×3 (18)
Row 7: (5 sc, inc)×3 (21)
Row 8: (6 sc, inc)×3 (24)
Row 9: (7 sc, inc)×3 (27)
Rows 10-13: 27 sc, 4 rows (27)
Row 14: (7 sc, dec)×3 (24)
Row 15: (6 sc, dec)×3 (21)
Row 16: (5 sc, dec)×3 (18)
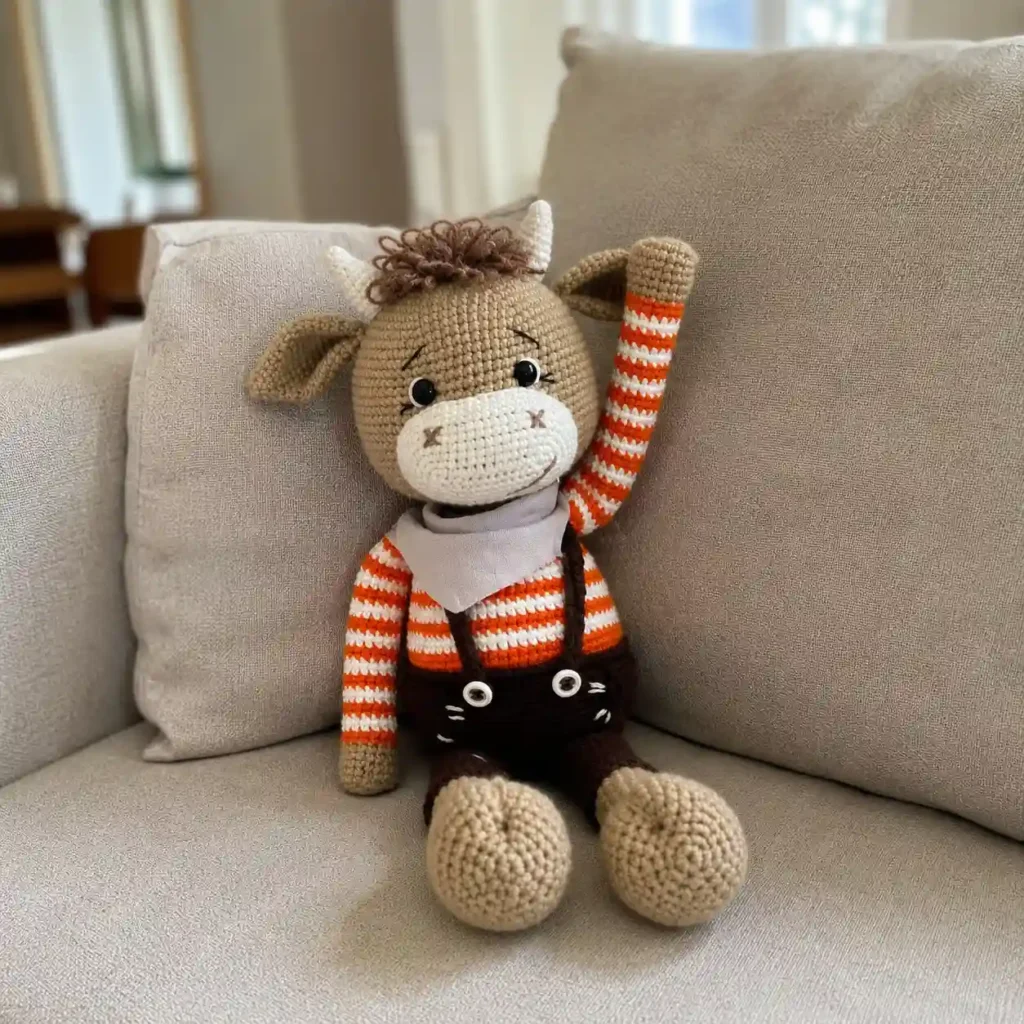
Fold each ear in half and work 9 sc across through both layers to close it. A slightly floppy, folded ear like this is what gives Mumuka that attentive, listening look rather than a stiff, alert one.
Horns (make 2)
Horn Color, starting with a magic ring
Row 1: 6 sc in mr (6)
Row 2: 6 sc (6)
Row 3: (1 sc, inc)×3 (9)
Row 4: 9 sc (9)
Row 5: (2 sc, inc)×3 (12)
Row 6: 12 sc (12)
Row 7: (3 sc, inc)×3 (15)
Row 8: 15 sc (15)
Row 9: (4 sc, inc)×3 (18)
Row 10: 18 sc (18)
Leave these unstuffed, or just barely — a horn with too much fill loses that slightly soft, blunt shape that keeps Mumuka looking gentle rather than fierce.
Arms (make 2)
Main Body Color for Rows 1-8, Sweater Color for Rows 9-40
Row 1: 10 ch, starting in 2nd ch from hook: 8 sc, 3 sc in last ch, along other side of chain: 7 sc, inc (18)
Rows 2-5: 18 sc, 4 rows (18)
Row 6: (4 sc, dec)×3 (15)
Rows 7-8: 15 sc, 2 rows (15)
Rows 9-40: 15 sc, 32 rows (15)
Change to the sweater color right before Row 9 — that color break is what makes it read as a sleeve rather than a solid arm. Stuff lightly, only up to the middle of the arm; the hand end stays soft and a little floppy. Fold the tip in half and work across through both layers to close it, then leave a tail for sewing.
Legs (make 2)
Main Body Color for Rows 1-27, Pants Color for Rows 28-42
Row 1: 6 sc in mr (6)
Row 2: (inc)×6 (12)
Row 3: (1 sc, inc)×6 (18)
Row 4: (2 sc, inc)×6 (24)
Row 5: (3 sc, inc)×6 (30)
Row 6: (4 sc, inc)×6 (36)
Rows 7-11: 36 sc, 5 rows (36)
Row 12: 12 sc, 6 dec, 12 sc (30)
Row 13: 9 sc, 6 dec, 9 sc (24)
Rows 14-15: 24 sc, 2 rows (24)
Row 16: (6 sc, dec)×3 (21)
Rows 17-21: 21 sc, 5 rows (21)
Row 22: (5 sc, dec)×3 (18)
Rows 23-27: 18 sc, 5 rows (18)
This bottom section is the foot — stuff it firmly here, since this is what gives Mumuka a stable base to stand on. Fold and work 9 sc across both edges to close it, then sculpt gently to shape the hoof.
Row 28: change yarn to pants color: 18 sc (18)
Row 29: BLO: 18 sc (18)
Rows 30-42: 18 sc, 13 rows (18)
Stuff lightly from the middle upward, and leave the very top of the leg unstuffed — that’s what lets it sit flat when it’s sewn to the body. Then go back to Row 29 and, working into the front loop only left open there, join yarn and work one more row: FLO, 18 sc, then fasten off and tuck the tail inside. That double-loop trick at Row 29 is what creates the little cuffed edge at the top of each leg.
Body
Pants Color for Rows 1-21, Sweater Color for Rows 22-41, Main Color for Rows 42-45
Row 1: 17 ch + 1 turning ch (18)
Row 2: 3 sc in 2nd ch from hook, 15 sc, 3 sc in last ch, 15 sc along the other side of the chain (36)
Row 3: (inc)×3, 15 sc, (inc)×3, 15 sc (42)
Row 4: (1 sc, inc)×3, 15 sc, (1 sc, inc)×3, 15 sc (48)
Row 5: (2 sc, inc)×3, 15 sc, (2 sc, inc)×3, 15 sc (54)
Row 6: (3 sc, inc)×3, 15 sc, (3 sc, inc)×3, 15 sc (60)
Row 7: (4 sc, inc)×3, 15 sc, (4 sc, inc)×3, 15 sc (66)
Rows 8-9: 66 sc, 2 rows (66)
This oval start, worked flat and then joined into rounds, is what gives Mumuka his sturdy, standing build rather than a tapered, egg-shaped one.
Row 10: attach legs: 13 sc, 9 sc through body and leg, 4 sc, 9 sc through body and leg, 31 sc (66)
Rows 11-20: 66 sc, 10 rows (66)
Row 21: work 10 sc (shift stitch to side of body); change color to sweater color, BLO: 66 sc (66)
✨ Sophie’s Note: Before moving on from Row 21, join the pants color into the front loops left open there and work 66 sc around — this creates the waistband edge of the overalls, sitting right at the transition from denim to sweater.
Row 22: 28 sc, dec, 34 sc, dec (64)
Row 23: 64 sc (64)
Row 24: 28 sc, dec, 32 sc, dec (62)
Row 25: 62 sc (62)
Row 26: dec, 26 sc, dec, 32 sc (60)
Row 27: 60 sc (60)
Row 28: dec, 26 sc, dec, 30 sc (58)
Row 29: 58 sc (58)
Row 30: dec, 25 sc, dec, 29 sc (56)
Row 31: 56 sc (56)
Row 32: 24 sc, dec, 28 sc, dec (54)
Row 33: 54 sc (54)
Row 34: dec, 23 sc, dec, 27 sc (52)
Row 35: 52 sc (52)
Row 36: 22 sc, dec, 26 sc, dec (50)
Row 37: 50 sc (50)
Row 38: dec, 21 sc, dec, 25 sc (48)
Row 39: (6 sc, dec)×6 (42)
Row 40: (5 sc, dec)×6 (36)
Row 41: (4 sc, dec)×6 (30)
Row 42: change color to main head color, BLO: 30 sc (30)
✨ Sophie’s Note: Just like the waistband, join the sweater color into the front loops of Row 42 and work 30 sc around — this is what shapes the little collar at the neckline, the edge that peeks out just under the head.
Row 43: (3 sc, dec)×6 (24)
Rows 44-45: 24 sc, 2 rows (24)
Stuff firmly, especially through the middle, and leave this last opening ready to receive the head.
Pockets (make 2)
Pants Color, worked flat, turning row by row
Row 1: 13 ch + 1 turning ch (14)
Rows 2-6: 13 sc, 5 rows (13)
Straps (make 2)
Pants Color, worked flat
Row 1: 46 ch, starting in 2nd ch: 45 hdc (45)
Assembly — Bringing Mumuka Together
This is the part where he stops being a pile of separate pieces and starts being someone.
- Muzzle: sew to the head with the top edge sitting directly under the eyes, and the bottom edge 4-5 rows up from the neck opening.
- Eyes: gently sculpt or indent through the neck opening around the eye backs — this softens the shape of the eye area and keeps it from looking too flat.
- Ears: count 10 sc sideways from the eyes and 4 rows up, then sew in place. Moving the ears even one row can change how alert or how sleepy he looks — worth testing before you commit to the stitching.
- Horns: sew 1-2 rows above the ears.
- Head to body: match the 24-stitch openings and sew all the way around.
- Arms: attach between Rows 39 and 40 of the body — this lines up with Rows 18-19 of the sweater section.
- Tail: cut a few strands of yarn, braid them together, and sew to the back of the pants.
- Pockets: sew to the sides of the pants section.
- Straps: cross them at the back and sew to the pants at the waistband.
- Buttons: sew one to the front of each strap, where it meets the pants.
- Scarf: cut the fabric into a triangle and tie loosely around the neck.
Final Details for the Mumuka the Bull Crochet Pattern
A few last touches make all the difference. Embroider the nostrils, mouth, eyebrows, and eyelashes by hand — this is genuinely where his expression settles into place, so take your time with the eyebrow angle especially. Sculpt or indent each foot slightly to suggest a hoof. And for the forelock, either crochet 3-4 rows of loop stitch on top of the head, or attach short strands of cut yarn and trim them into a little tuft.
Overalls and Accessories
The denim-blue overalls aren’t an add-on here — they’re built right into the body pattern through the color changes at Rows 21 and 42, so Mumuka comes out of the pattern already dressed. The pockets and cross-back straps are what push it from “wearing something” to “having an outfit,” and the two buttons at the front are a small detail that rewards a closer look. If you want to go one step further, a second scarf in a contrasting color — knotted a little looser, worn a little lower — would give him a completely different, more relaxed mood.
Meet Mumuka
He’s sitting on the shelf across from me right now, straps crossed at the back, scarf just slightly crooked from where I tied it one-handed. There’s a little asymmetry in how the eyebrows landed — one sits just a touch higher than the other — and somehow that’s the thing that makes him look thoughtful instead of blank. That’s usually how it goes with these: the moment stops being about stitch counts and starts being about a face. Name yours, dress him however you like, and give him a spot somewhere he’ll actually get looked at — a bookshelf, a windowsill, right next to a stack of something you’re reading. He’s earned it.
Looking for another animal in overalls-and-personality mode? Our baby bull amigurumi keychain pattern is a smaller, scrap-friendly cousin worth a look.
FAQ
What level of crocheter is the Mumuka the Bull pattern suitable for?
This pattern is best suited for intermediate to advanced crocheters due to multiple color changes, specific stitch counts, and detailed assembly.
How long does it take to complete Mumuka the Bull?
It typically takes between 14 to 18 hours to crochet, stuff, assemble, and add final details to Mumuka.
Can I use standard worsted weight yarn for this bull amigurumi?
Yes, you can use worsted weight yarn, but keep in mind that the finished amigurumi size will be slightly larger than 13 inches and require a larger hook size.