Meet Karkusha — Why This Karkusha Amigurumi Free Pattern Is Worth It
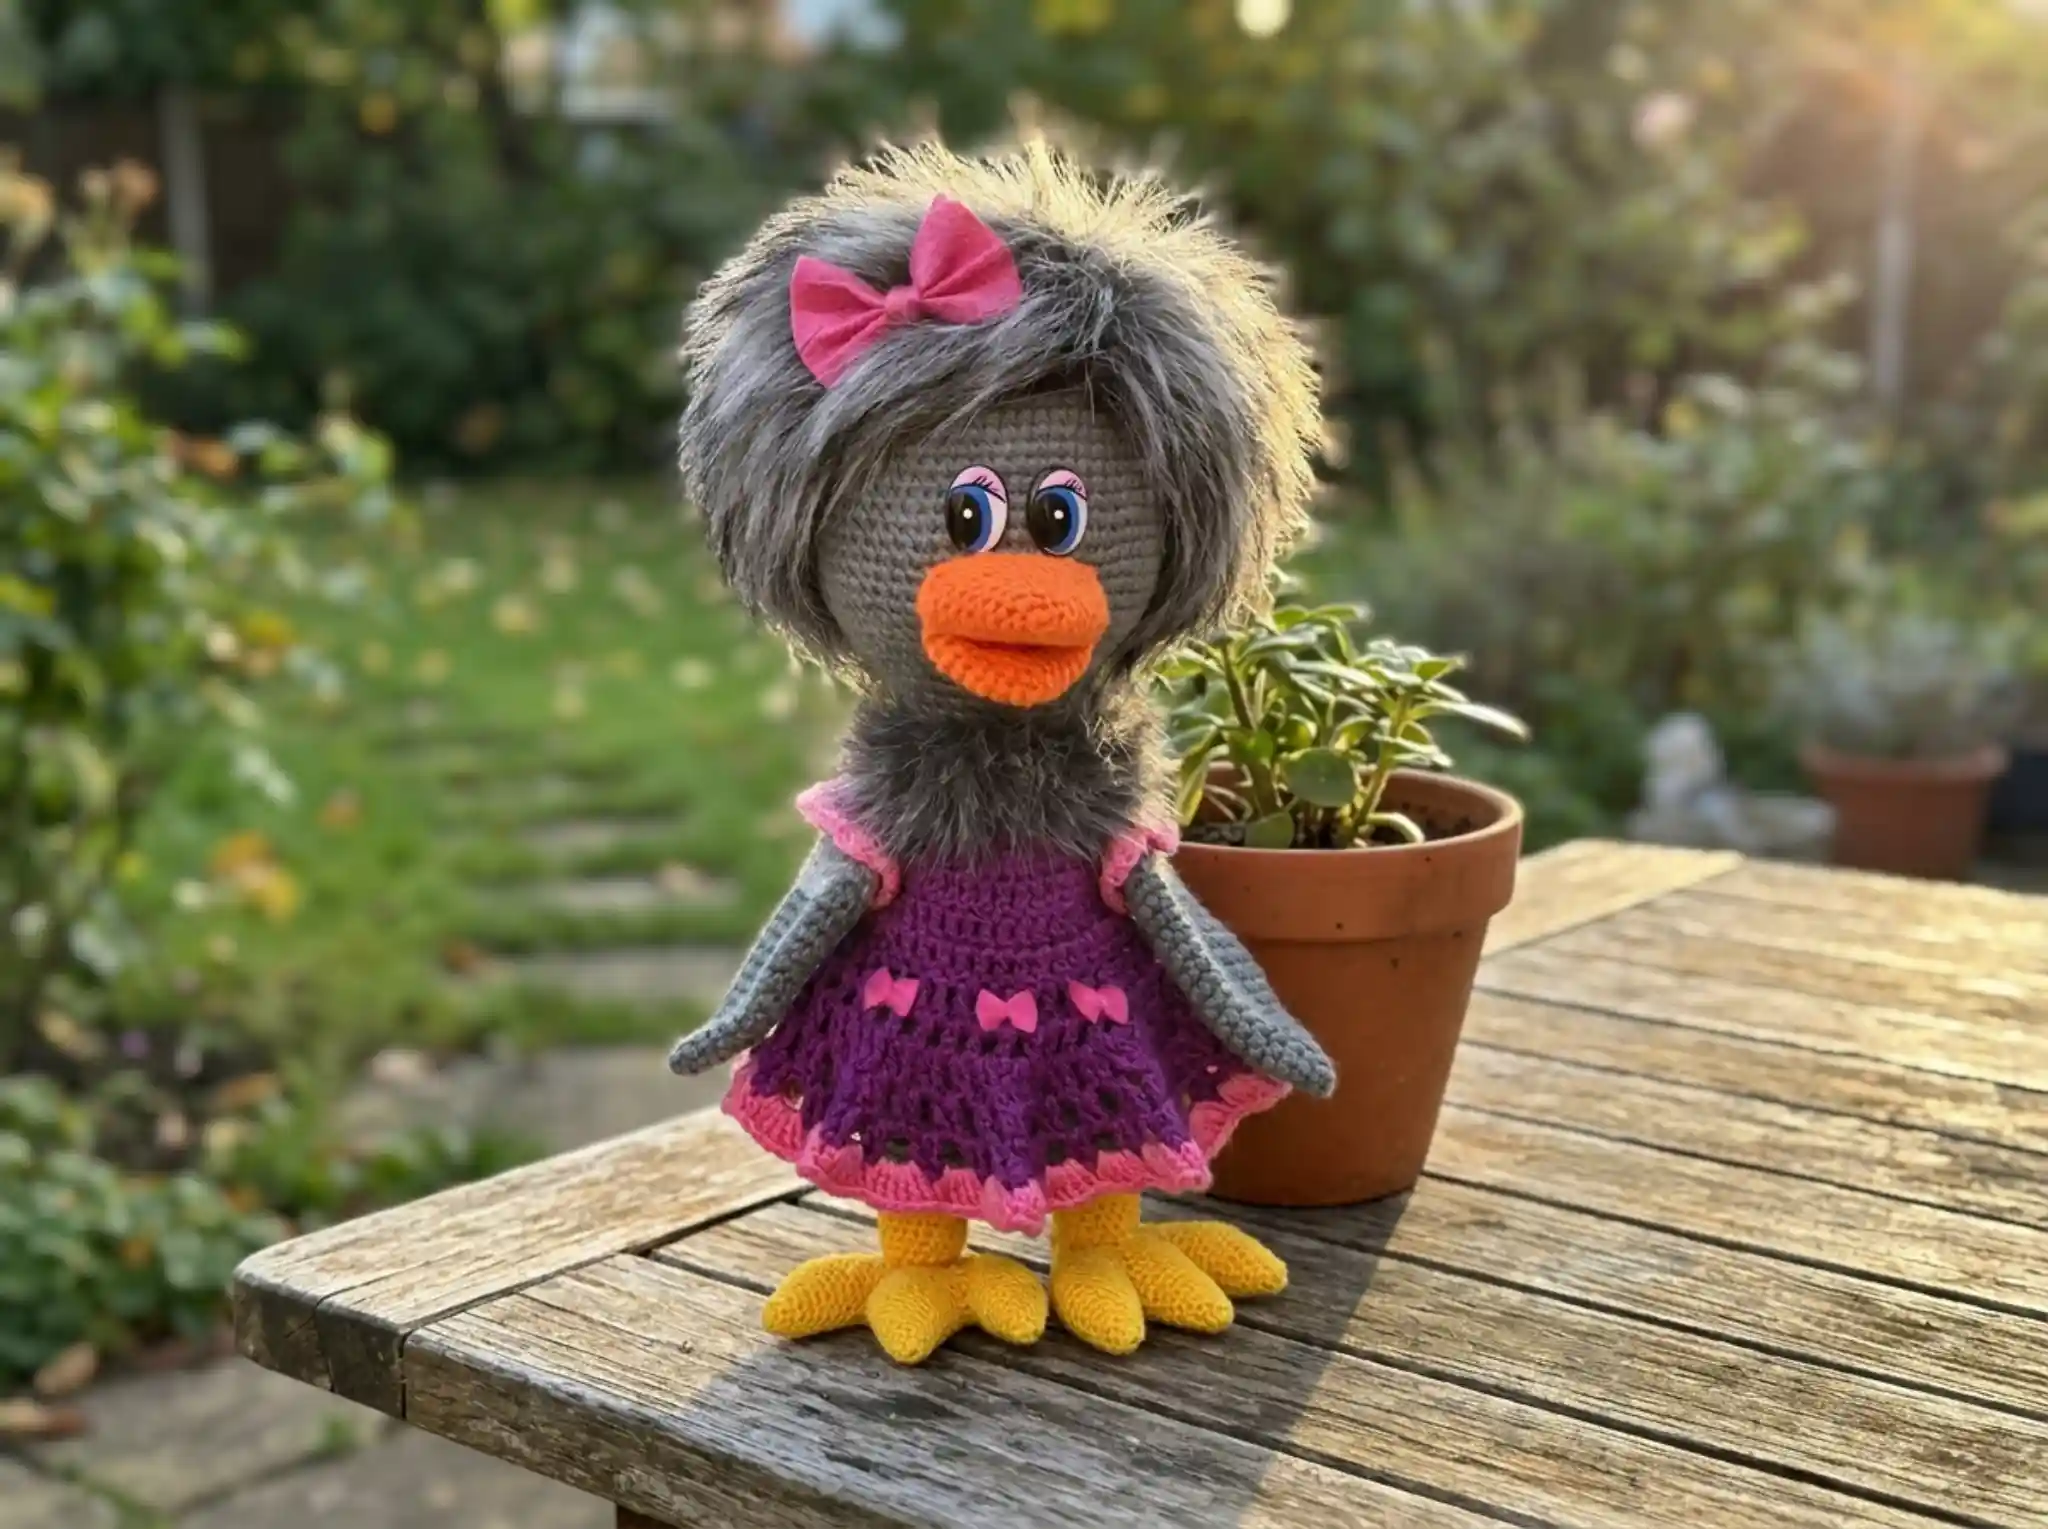
This karkusha amigurumi free pattern turns one skein of gray and a handful of scraps into a big, characterful crow — fluffy eyelash-yarn cap, bright orange beak, and proper three-toed feet. Yes, the karkusha amigurumi free pattern has a lot of parts, but most of them are small enough to come straight out of your scrap bin. It’s an intermediate project with real sewing time, and every stitch earns its keep. Grab your gray. Let’s build a bird.
🧶 What You’ll Need
- 💰 Yarn Needed: about one full skein of gray DK for the head and body; small-to-medium amounts of darker gray, orange, contrast color, and gray eyelash yarn (leftovers work for all four)
- 🎨 Colors: gray, darker gray, orange, one contrast color of your choice (or similar from your stash)
- 🪝 Hook: 3.0 mm (between US C/2 and US D/3)
- ⏱️ Time: a weekend project — roughly 8–12 hours including assembly
- 📏 Finished Size: approximately 10–12 in (25–30 cm) tall in DK, depending on tension
- 💡 Difficulty: Intermediate
- 🎁 Great For: gifts, shelf display, character collections, bird lovers
Materials
- Gray yarn (main color for head and body) — DK/Light Worsted (3) yarn. This is the one part of the project that isn’t scrap-sized: plan on about a full skein.
- Darker shade of gray yarn (for wings and tail) — DK/Light Worsted (3) yarn. A medium leftover ball is plenty.
- Gray “eyelash” or textured yarn (for hair and neck) — Bulky (5) novelty yarn. A small amount — this is exactly the kind of half-used novelty skein most of us have buried somewhere.
- Orange yarn (for beak and legs) — DK/Light Worsted (3) yarn. Small amount.
- Contrast yarn for wing base and tail — DK/Light Worsted (3) yarn. Small amount — any color you like against gray.
- Hook Size: 3.0 mm (between US C/2 and US D/3)
- Other Tools: fiberfill (stuff very firmly), wire for the neck frame (optional), thin plastic sheet (for the beak insert), pins, sewing needle, safety eyes (choose a size that fits the face — pin-test before installing).
If you’re not sure your leftover gray is the right thickness, check it against the Craft Yarn Council yarn weight system — anything in the DK/Light Worsted (3) range works, as long as you use the same weight for head and body.
⚠️ Safety Note: If Karkusha is going to a baby or toddler, skip the safety eyes and wire, and embroider the eyes instead. The U.S. Consumer Product Safety Commission has guidance on small parts in toys for children under three.
Abbreviations (US Terms)
| Abbreviation | US Full Term |
|---|---|
| ch | chain |
| sc | single crochet |
| inc | increase (2 sc in 1 stitch) |
| dec | decrease (work 2 stitches together — the invisible decrease is recommended) |
| sc3tog | work 3 sc together (used in the tail) |
| mr | magic ring |
| BLO | back loop only |
| FO | fasten off |
Work in continuous rounds (spiral) throughout — no joining, no turning. A stitch marker on the first stitch of each round will save you here, especially through those long 66-stitch rounds.
Smart Crafter Tips Before You Start
1. Nail your magic ring first. Almost every piece of this bird starts with one, and a loose ring on a firmly-stuffed toy will pop open. Our magic ring tutorial covers it in under two minutes.
2. Use the invisible decrease everywhere. This pattern has entire walls of decrease rows on the head, body, wings, and feet. The standard decrease leaves little gaps that firm stuffing will happily push through — our invisible decrease guide shows the clean version.
3. Budget your patience for assembly, not your yarn. Karkusha has 14+ pieces to sew. Pin everything before you sew anything — our guide to sewing amigurumi parts walks through the pin-first method that keeps beaks straight and legs even.
If you enjoy bird builds, my squishy goose amigurumi is a gentler warm-up with the same sew-it-together logic.
Karkusha Amigurumi Free Pattern — Full Instructions
Head (make 1)
Yarn: gray | Start: mr
Row 1: 6 sc in mr (6)
Row 2: 6 inc (12)
Row 3: (1 sc, inc) × 6 (18)
Row 4: (2 sc, inc) × 6 (24)
Row 5: (3 sc, inc) × 6 (30)
Row 6: (4 sc, inc) × 6 (36)
Row 7: (5 sc, inc) × 6 (42)
Row 8: (6 sc, inc) × 6 (48)
Row 9: (7 sc, inc) × 6 (54)
Row 10: (8 sc, inc) × 6 (60)
Row 11: (9 sc, inc) × 6 (66)
Rows 12–25: 66 sc (14 rows) (66)
Row 26: (9 sc, dec) × 6 (60)
Row 27: (8 sc, dec) × 6 (54)
Row 28: (7 sc, dec) × 6 (48)
Row 29: (6 sc, dec) × 6 (42)
Row 30: (5 sc, dec) × 6 (36)
Row 31: (4 sc, dec) × 6 (30)
Row 32: (3 sc, dec) × 6 (24)
Row 33: (2 sc, dec) × 6 (18)
Row 34: (1 sc, dec) × 6 (12)
Note: Don’t rush — crochet carefully and very tightly. This piece gets stuffed firmly, and loose stitches will show every bit of fiberfill.
Wire version: If you choose the version with wire, undo the head slightly to the point where there are 24 sc in the round (this corresponds to the end of Row 32 during decreases), and start crocheting the body directly from the head as a single piece (starting from Row 6 of the body). After crocheting a few rows, insert the wire through the entire head and body.
Finishing: Stuff firmly. Leave an opening of 12 stitches (for the version without wire).
Body (make 1)
Yarn: gray | Start: mr
Row 1: 6 sc in mr, pull tight (6)
Row 2: 6 inc (12)
Row 3: (1 sc, inc) × 6 (18)
Row 4: (2 sc, inc) × 6 (24)
Row 5: 24 sc BLO (24)
Rows 6–11: 24 sc (6 rows) (24)
Row 12: (7 sc, inc) × 3 (27)
Rows 13–14: 27 sc (2 rows) (27)
Row 15: (8 sc, inc) × 3 (30)
Row 16: 30 sc (30)
Row 17: (9 sc, inc) × 3 (33)
Row 18: 33 sc (33)
Row 19: (10 sc, inc) × 3 (36)
Row 20: (5 sc, inc) × 6 (42)
Row 21: 42 sc (42)
Row 22: (6 sc, inc) × 6 (48)
Rows 23–24: 48 sc (2 rows) (48)
Row 25: (7 sc, inc) × 6 (54)
Rows 26–27: 54 sc (2 rows) (54)
Row 28: (8 sc, inc) × 6 (60)
Rows 29–31: 60 sc (3 rows) (60)
Row 32: 6 sc, (2 sc, inc) × 6, 36 sc (66)
Rows 33–38: 66 sc (6 rows) (66)
Row 39: (9 sc, dec) × 6 (60)
Row 40: (8 sc, dec) × 6 (54)
Row 41: (7 sc, dec) × 6 (48)
Row 42: (6 sc, dec) × 6 (42)
Row 43: (5 sc, dec) × 6 (36)
Row 44: (4 sc, dec) × 6 (30)
Row 45: (3 sc, dec) × 6 (24)
Row 46: (2 sc, dec) × 6 (18)
Row 47: (1 sc, dec) × 6 (12)
Row 48: 6 dec (6)
Note: Row 5 is crocheted in the back loops only (BLO) — this is the attachment point for sewing to the head. The bird’s bottom is formed in Row 32.
Finishing: FO, cut yarn and weave in ends. Stuff FIRMLY!
🧶 Scrap Check: The head and body are the only yarn-hungry parts of this whole bird. Everything from here on — cap, beak, wings, legs, tail — runs on small amounts, so raid the scrap bin before you buy anything new.
Hair (Cap) (make 1)
Yarn: gray “eyelash” yarn | Start: mr
Row 1+: Crochet in the same way as the head, increasing evenly by 6 stitches in each row, while constantly trying the piece on the head. The cap should be slightly wider than the head and cover about one third of it.
Note: Since everyone’s yarn choice is different, the exact pattern details may vary. After finishing, turn the cap inside out so that it looks fluffier. (Eyelash yarn is hard to see while working — count by feel and check your stitch marker often.)
Finishing: FO, leave a long tail for sewing.
Beak — Upper Part (make 1)
Yarn: orange | Start: mr
Row 1: 6 sc in mr, pull tight (6)
Row 2: (1 sc, inc) × 3 (9)
Row 3: (2 sc, inc) × 3 (12)
Row 4: (3 sc, inc) × 3 (15)
Rows 5–9: Continue to increase in the same manner (adding 3 sc per row) until you have 30 sc (30)
Rows 10–12: 30 sc (3 rows without increases) (30)
Note: Try the beak on the face as you go. If you want it slightly larger or smaller, increase or decrease the number of rows.
Finishing: FO, cut yarn.
Beak — Lower Part (make 1)
Yarn: orange | Start: mr
Row 1: 6 sc in mr, pull tight (6)
Row 2: (1 sc, inc) × 3 (9)
Row 3: (2 sc, inc) × 3 (12)
Row 4: (3 sc, inc) × 3 (15)
Rows 5–7: Continue to increase in the same manner (adding 3 sc per row) until you have 24 sc (24)
Rows 8–9: 24 sc (2 rows without increases) (24)
Finishing: FO, cut yarn.
Wing Feathers (make 6)
Yarn: darker gray | Start: mr
Row 1: 4 sc in mr, pull tight (4)
Row 2: (1 sc, inc) × 2 (6)
Row 3: (2 sc, inc) × 2 (8)
Row 4: (3 sc, inc) × 2 (10)
Row 5: (4 sc, inc) × 2 (12)
Rows 6–12: Continue increasing in each row by 2 stitches in the same manner until you have 26 sc (26)
Rows 13–14: 26 sc (2 rows without increases) (26)
Finishing: FO and cut yarn. Crochet 6 of these pieces (3 per wing).
Wing Base (make 2)
Yarn: contrast yarn | Start: joining three feather pieces
Row 1: Place three feather pieces on top of each other (overlapping for the desired wing width) and crochet around all 3 pieces together in a circle. Work across the edges to get a clean circumference. Ensure your stitch count is exactly 60 sc. (60)
Row 2: Change yarn to contrast color: (8 sc, dec) × 6 (54)
Row 3: (7 sc, dec) × 6 (48)
Row 4: (6 sc, dec) × 6 (42)
Row 5: (5 sc, dec) × 6 (36)
Row 6: (4 sc, dec) × 6 (30)
Row 7: (3 sc, dec) × 6 (24)
Row 8: 24 sc (24)
Row 9: (2 sc, dec) × 6 (18)
Row 10: 18 sc (18)
Row 11: (1 sc, dec) × 6 (12)
Row 12: 6 dec (6)
Finishing: Pull closed. Cut yarn leaving a long tail for sewing the wing to the body.
Toes (make 6)
Yarn: orange | Start: mr
Row 1: 6 sc in mr, pull tight (6)
Row 2: (1 sc, inc) × 3 (9)
Row 3: 9 sc (9)
Row 4: (2 sc, inc) × 3 (12)
Row 5: 12 sc (12)
Row 6: (3 sc, inc) × 3 (15)
Row 7: 15 sc (15)
Row 8: (4 sc, inc) × 3 (18)
Rows 9–10: 18 sc (2 rows) (18)
Finishing: FO and cut yarn. Crochet 6 of these pieces (3 per foot).
Foot (make 2)
Yarn: orange | Start: joining three toes
Row 1: Crochet around three finished toe pieces together in a circle (aligning them side by side, work across their outer stitches) (54)
Rows 2–3: 54 sc (2 rows) (54)
Row 4: (7 sc, dec) × 6 (48)
Row 5: (6 sc, dec) × 6 (42)
Row 6: (5 sc, dec) × 6 (36)
Row 7: 36 sc (36)
Row 8: (4 sc, dec) × 6 (30)
Rows 9–10: 30 sc (2 rows) (30)
Row 11: (3 sc, dec) × 6 (24)
Row 12: (2 sc, dec) × 6 (18)
Row 13: (1 sc, dec) × 6 (12)
Row 14: 6 dec (6)
Finishing: Pull closed, cut yarn and weave in ends.
Leg Shank (make 2)
Yarn: orange | Start: mr
Row 1: 6 sc in mr, pull tight (6)
Row 2: 6 inc (12)
Row 3: (1 sc, inc) × 6 (18)
Row 4: (2 sc, inc) × 6 (24)
Row 5: 24 sc BLO (this forms the rim for sewing to the foot) (24)
Rows 6–10: 24 sc (5 rows) (24)
Note: The height of the leg can be adjusted as desired (5 rows recommended). If the leg shank width looks too large for your feet, you can adjust the base circles to stop at 15 sc or 18 sc instead.
Finishing: Leave a long tail for sewing to the foot.
Tail (make 1)
Yarn: darker gray + contrast yarn | Start: chain (ch)
Row 1: Ch 17. Start in 2nd ch from hook: 15 sc, 3 sc in the last ch stitch. Working down the opposite side of the chain: 14 sc, 2 sc in the first ch stitch. (34)
Rows 2–3: 34 sc (2 rows) (34)
Row 4: Decrease by working 3 sc together twice (once at each end/curve of the piece) (30)
Rows 5–6: 30 sc (2 rows) (30)
Row 7: [Change to contrast yarn] 30 sc (30)
Row 8: 30 sc (30)
Row 9: Decrease by working 3 sc together twice (one at each end/edge of the piece) (26)
Rows 10–11: 26 sc (2 rows) (26)
Row 12: Decrease by working 3 sc together twice (one at each end/edge of the piece) (22)
Row 13: 22 sc (22)
Row 14: Decrease by working 3 sc together twice (one at each end/edge of the piece) (18)
Finishing: FO, leaving a long tail for sewing.
Assembly
- For the version without wire in the neck: Stuff the body FIRMLY with fiberfill, pin it to the head, and sew securely using the gray yarn tail. The neck seam will be covered later by a decorative ruffle.
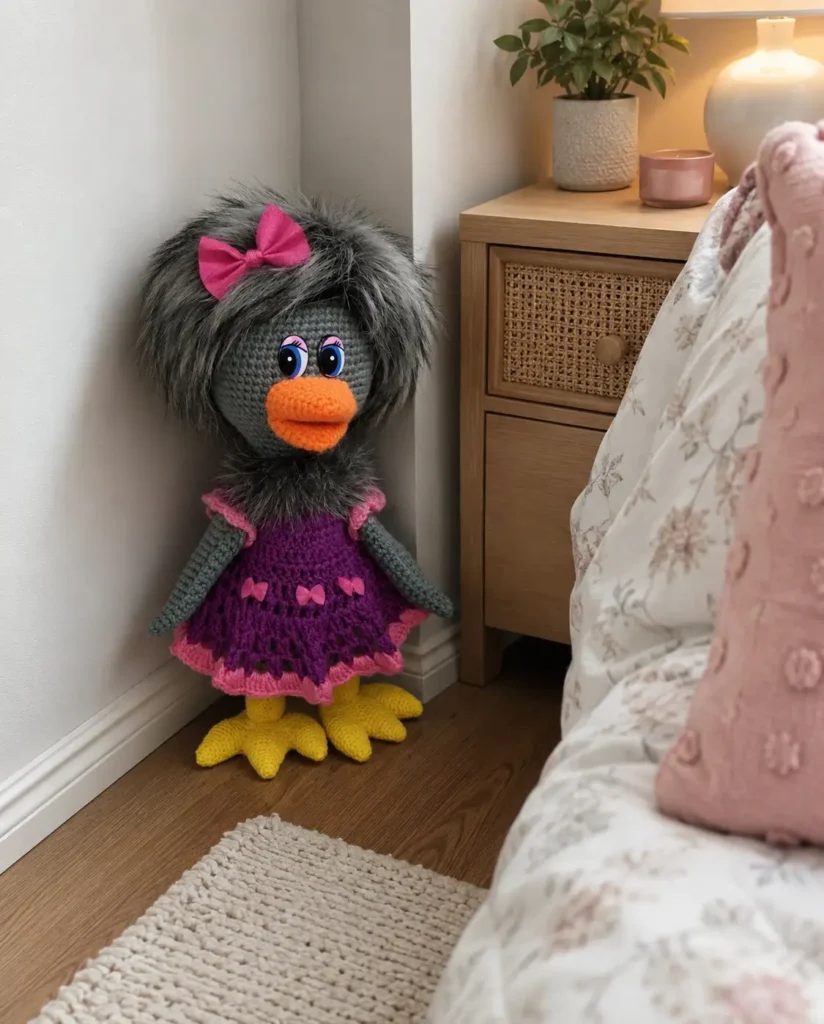
- Sewing the hair: Pin the completed cap made of “eyelash” yarn to the head, shifting it slightly backward to open up the face. Align the “back” of the toy using the bottom (the bulging part on the body around Rows 32–38). Sew the cap around in a circle.
- Beak assembly: Sew the upper and lower halves of the beak together along the inner seam. Cut two triangles from thin plastic corresponding to the shapes of the upper and lower beak parts. Insert this plastic frame inside the beak. Stuff loosely with fiberfill to hold the correct shape.
- Attaching the beak: Pin the assembled beak to the face (leaving enough space for the eyes, not going too far into the hair cap) and sew carefully.
- Leg assembly: Sew the leg shank piece to the foot (aligning it to the back-loop row worked on the foot). Sew the legs securely to the bottom of the body.
- Sewing the wings: Sew the finished wings to the sides of the body using the long yarn tails left from the wing bases.
- Sewing the tail: Sew the tail to the back of the body (to the “bottom” area around Row 32).
Decoration & Face
- Install safety eyes on the face above the beak. Do this carefully, spreading the fibers of the sewn-on cap so as not to cover the eyes with “hair”.
- Crochet or sew decorative clothes (a dress or neck ruff) to dress up Karkusha the Crow as you like. There’s no fixed pattern for the ruffle — a simple gathered strip of contrast yarn around the neck seam does the job and hides the join at the same time.
💡 Stretch It Further: The wing and foot construction here — three small pieces joined into one — is a technique worth keeping. Swap the grays for browns and you’ve got a sparrow; black with a white chest makes a magpie. And if a full-size Karkusha feels like too much bird, work the head and beak only at a tighter gauge, stuff, and hang it as an ornament. One pattern, a whole flock of options — mostly from scraps.
Mia’s Take
One proper skein of gray, four kinds of leftovers, and a weekend of stitching — that’s the whole bill for a crow with more personality than most store-bought plush. The assembly takes patience, I won’t pretend otherwise, but the pin-first method keeps it honest. Make one, then check what other colors are sitting in your bin — this bird has cousins waiting. 🧶
FAQ
What yarn is best for this Karkusha amigurumi pattern?
Any DK or Light Worsted weight yarn works perfectly for the body. For the hair, a Bulky novelty eyelash yarn is recommended to give Karkusha her signature fluffy head look.
Can beginners make this Karkusha crow pattern?
This is an intermediate pattern because of the eyelash yarn, wireframe option, and sewing together of multiple parts like the wings and toes. Dedicated beginners can try it by taking their time during assembly.
How do I keep the crocheted beak from drooping?
Cut a small triangle from a thin plastic sheet (such as an old plastic container lid) and insert it inside the sewn beak parts before adding a light layer of fiberfill stuffing.