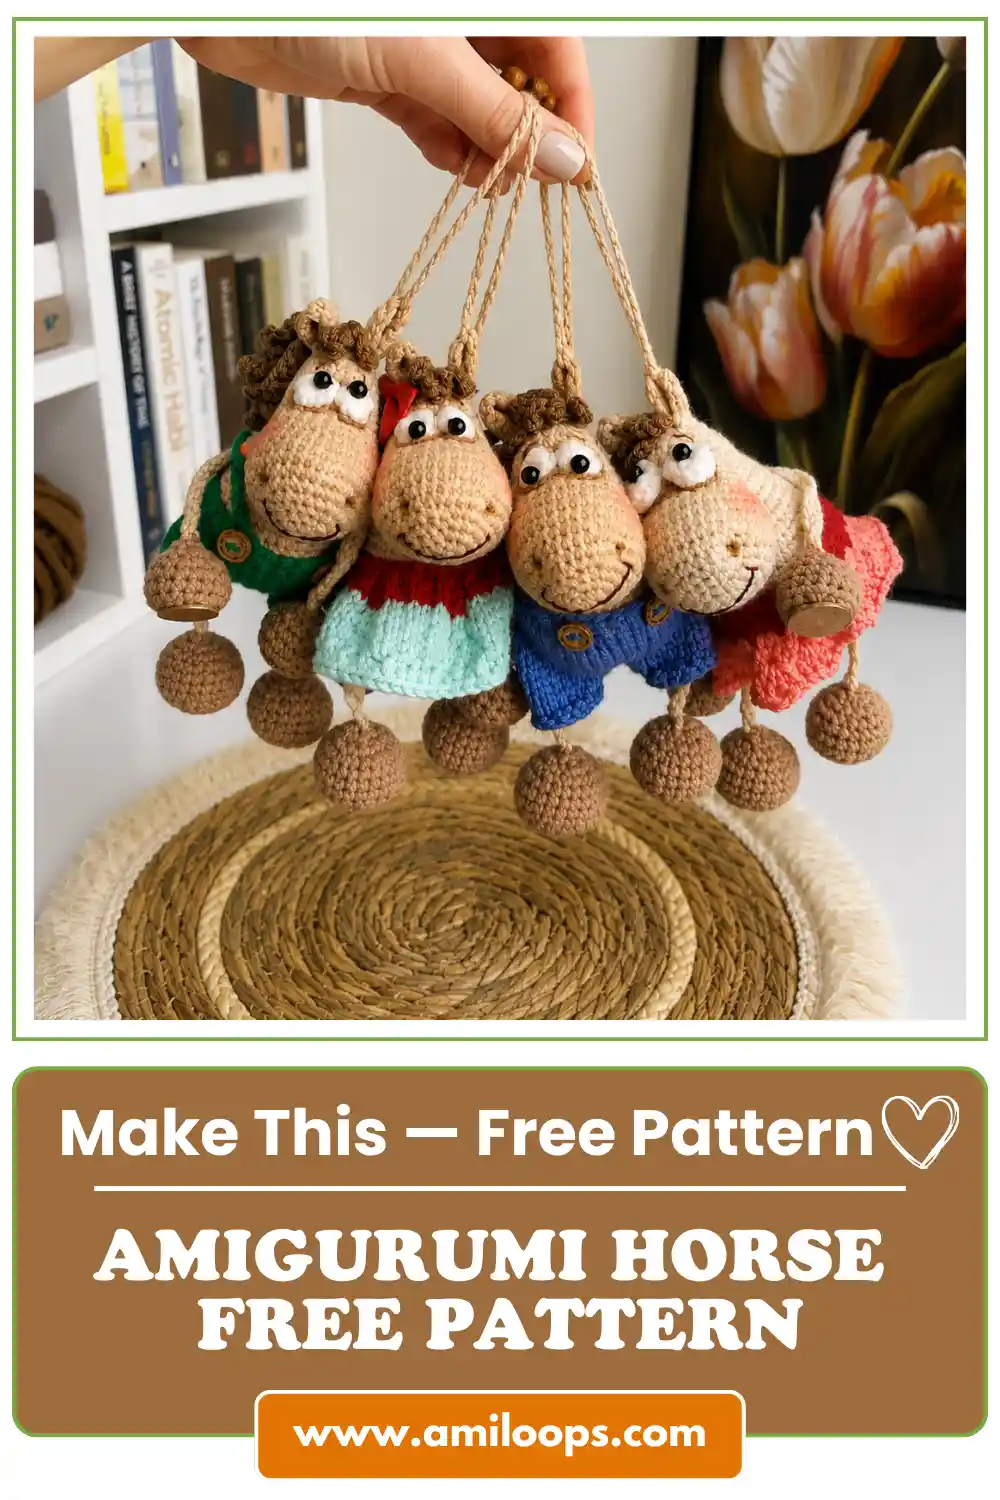
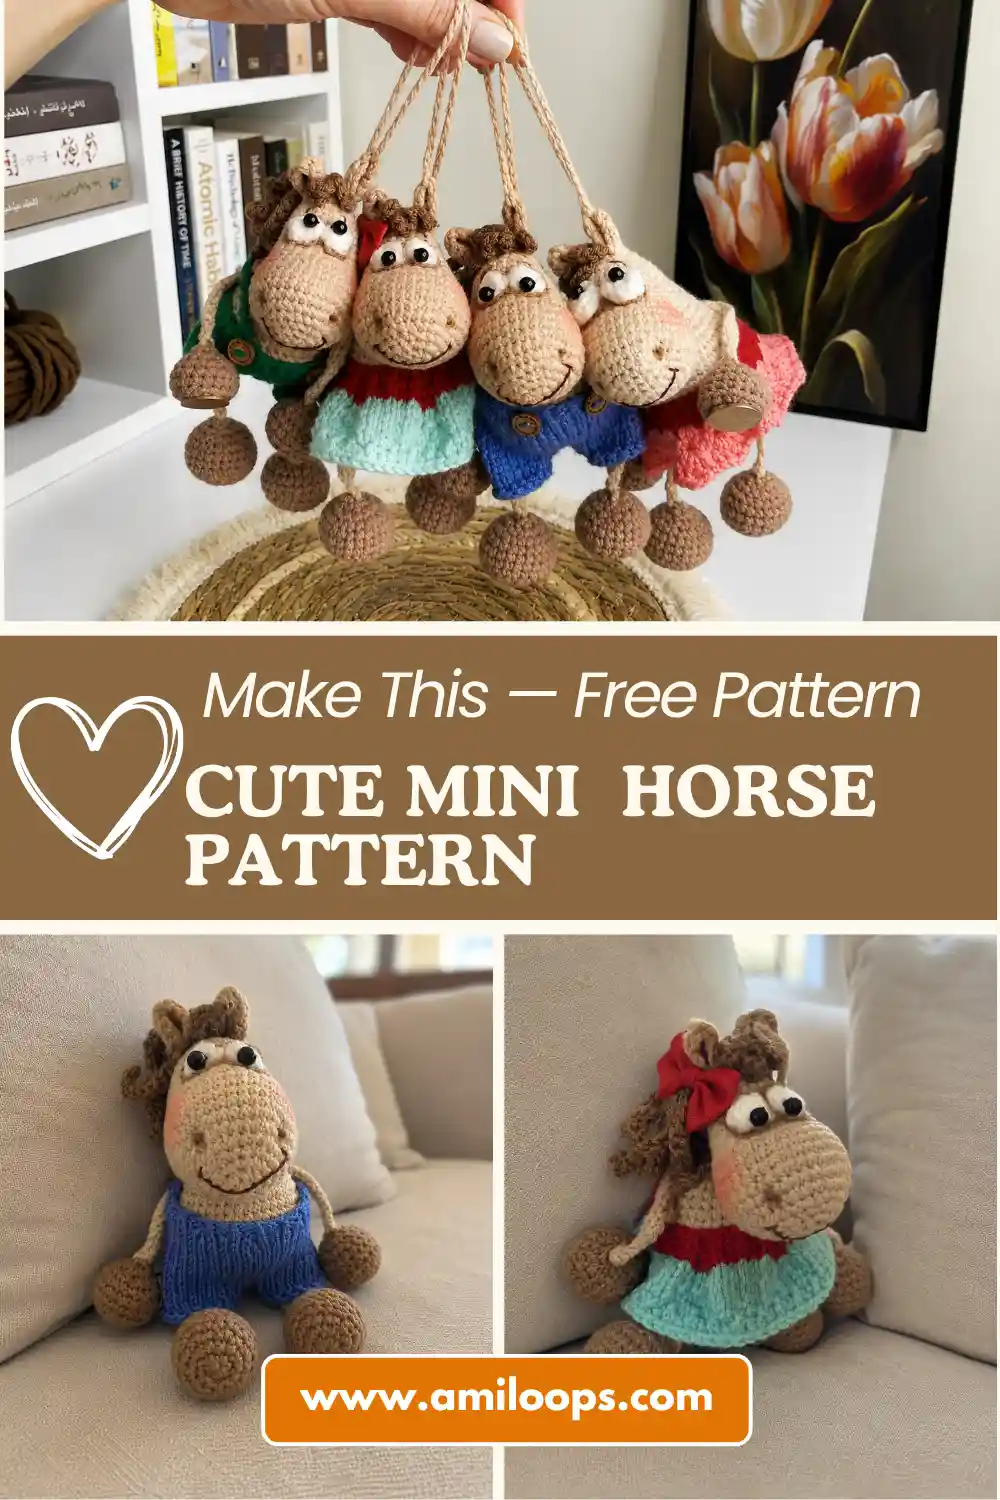
Meet Marzipan: A Gentle Little Amigurumi Horse Pattern
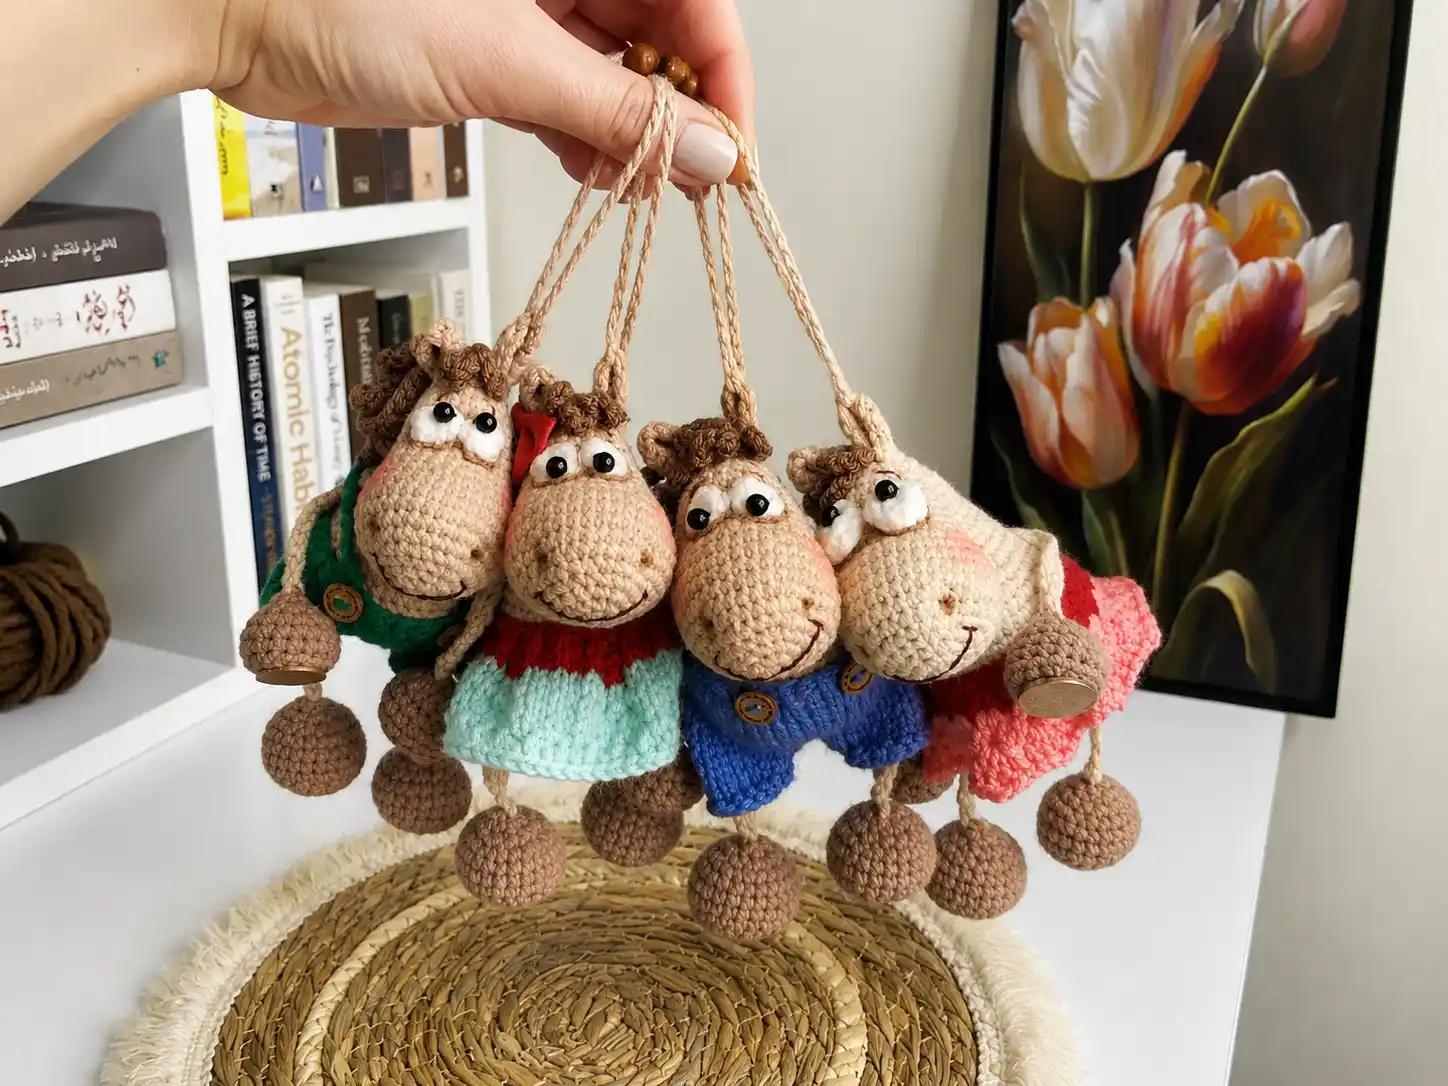
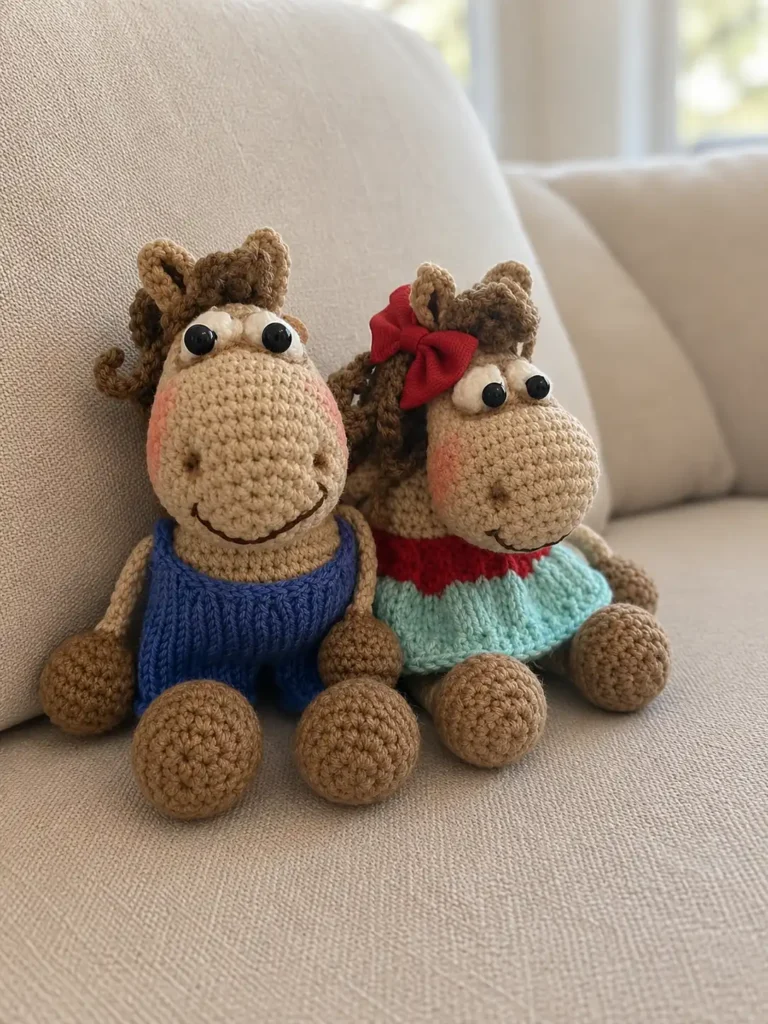
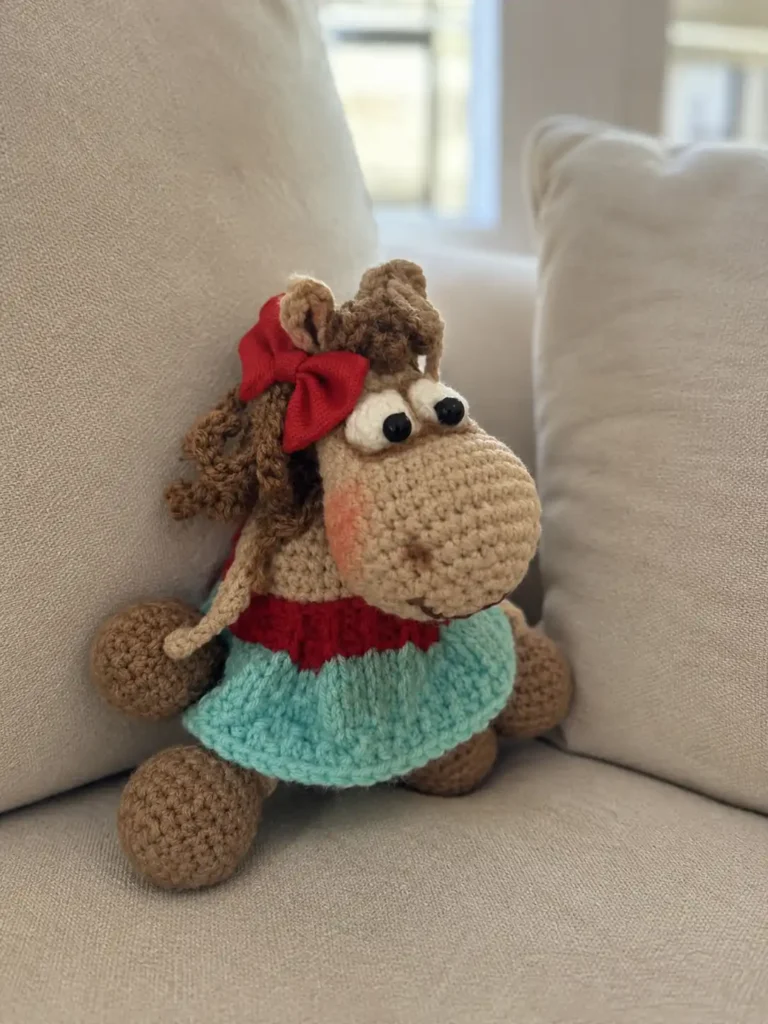
This amigurumi horse free pattern brings to life a small, soft-eyed creature who looks like she’s always mid-thought — ears tilted forward, front hooves tucked neatly beneath her, waiting to see what happens next. I named her Marzipan before her tail was even finished, somewhere between sewing on the second bead eye and realizing she already had an expression. She’s the kind of horse who’d rather watch the room than be the center of it. If you’ve been wanting to make something with a quiet personality of its own, this is a good place to start.
📖 Meet Marzipan
- 🌟 Personality: gentle, watchful, a little shy
- 🎨 Color Palette: soft caramel body, warm cappuccino mane and tail, dusty rose skirt
- 📏 Size: 5.5 in sitting 3.9 in tall
- 🪝 Hook: 1.9 mm and 1.7 mm (no US letter equivalent — these fall below standard US hook sizing)
- ⏱️ Time: 10-14 hours
- ✨ Signature Detail: hand-tied mane loops and a hangable ribbon threaded through one ear
- 💡 Difficulty: Advanced
Materials for This Amigurumi Horse Free Pattern
- DK / Light Worsted (3) yarn in a soft caramel or honey tone for the body and head — the original uses YarnArt Jeans, but Drops Muskat or Paintbox Cotton DK work beautifully as US alternatives. The slightly cottony sheen gives Marzipan a storybook softness.
- DK / Light Worsted (3) yarn in a warm terracotta or rust tone for the hooves
- DK / Light Worsted (3) yarn in white for the eyes
- DK / Light Worsted (3) yarn in a warm cappuccino brown for the mane and tail
- DK / Light Worsted (3) yarn in any soft color of your choosing for the scarf, skirt, and bow — this is where Marzipan’s personality really gets to speak
- 3 mm black beads for the eyes, plus sewing thread to secure them
- Polyester fiberfill for stuffing
- Hook: 1.9 mm and 1.7 mm (no US letter equivalent for either size)
- US 0 (2.0 mm) knitting needles, for the scarf
- Tapestry needle, stitch markers
- Brown pastel or blush for tinting the cheeks, eyebrows, and nostrils; brown embroidery thread for the eyebrows and mouth
This yarn falls into the DK / Light Worsted (3) category — smooth and matte, which is exactly what gives Marzipan’s face and tiny outfit their soft, storybook quality.
Abbreviations
| Abbreviation | Meaning |
|---|---|
| mr | magic ring |
| st(s) | stitch(es) |
| ch | chain |
| sc | single crochet |
| inc | increase (2 sc in one stitch) |
| inv dec | invisible decrease |
| sl st | slip stitch |
| dc | double crochet |
| dc-inc | double crochet increase |
| BLO | back loop only |
| k | knit |
| p | purl |
| yo | yarn over |
| k2tog | knit 2 together |
✨ Sophie’s Note: The original pattern calls for a standard decrease throughout. I’ve substituted the invisible decrease everywhere it appears — same stitch counts, cleaner finish, no visible gap on Marzipan’s rounded little body.
Before the Story Begins: Techniques for This Amigurumi Horse Free Pattern
Every character here begins with a magic ring — Marzipan’s head, muzzle, ears, and even her tiny eyes all start this way. If the magic ring is new to you, our magic ring tutorial walks through it slowly and clearly. It’s simpler than it looks, and it’s the foundation of everything that follows.
You’ll also be shaping quite a lot with decreases, since Marzipan’s head, muzzle, legs, and arms all taper at the ends. Our invisible decrease tutorial is worth a look before you start — it’s what keeps those closing rounds looking neat instead of gapped.
Because Marzipan is built from so many separate pieces — head, ears, legs, arms, mane, tail, and outfit — a good chunk of the process is sewing rather than stitching. Our guide to sewing amigurumi parts together covers the placement and anchoring techniques you’ll lean on most in the assembly section below.
Take your time with this one. The small pieces — the ears, the bead eyes, the tiny bow — are what turn a shape into someone.
Pattern
Head-Body (×1)
Yarn: Caramel body color | Starting method: mr
Row 1: 6 sc in mr (6)
Row 2: 6 inc (12)
Row 3: (1 sc, inc)*6 (18)
Row 4: 1 sc, inc, (2 sc, inc)*5, 1 sc (24)
Row 5: (3 sc, inc)*6 (30)
Row 6: 2 sc, inc, (4 sc, inc)*5, 2 sc (36)
Row 7: 15 sc — incomplete row, only part of the round is worked here (15)
✨ Sophie’s Note: Join in the round here. Remove the loop from your hook, insert it into the last stitch you made, and pull the loop back through. From here you’re building the neck and body — you’ll return to the remaining unworked stitches for the muzzle later.
Rows 8-9: 15 sc (15)
Row 10: (4 sc, inc)*3 (18)
Rows 11-12: 18 sc (18)
Row 13: 1 sc, inc, (2 sc, inc)*5, 1 sc (24)
Row 14: 19 sc — incomplete row; the start of the round shifts here (19)
✨ Sophie’s Note: This row looks like a sudden drop from 24 down to 19 — it isn’t a mistake. It’s another partial round, the same kind of offset you saw back in Row 7. The stitch marker matters here more than usual, since the beginning of the round has genuinely moved.
Row 15: (1 sc, inc)*6, 12 sc (30)
Row 16: 30 sc (30)
Row 17: 2 sc, inc, (4 sc, inc)*5, 2 sc (36)
Row 18: (5 sc, inc)*6 (42)
Rows 19-23: 42 sc (42)
Row 24: (5 sc, inv dec)*6 (36)
Row 25: 2 sc, inv dec, (4 sc, inv dec)*5, 2 sc (30)
Row 26: (3 sc, inv dec)*6 (24)
Row 27: 1 sc, inv dec, (2 sc, inv dec)*5, 1 sc (18)
✨ Sophie’s Note: Add stuffing now, before the opening gets any smaller — it’s much easier to fill her evenly at this stage than after the last round closes.
Row 28: (1 sc, inv dec)*6 (12)
Row 29: (1 sc, inv dec)*4 (8)
Close the opening, fasten off, and weave in the tail. This is where the body finally reads as a body — set it down for a moment and you can already see the posture forming.
Muzzle (×1)
Yarn: Caramel body color | Starting method: Attach yarn to the remaining 21 unworked stitches left over from Row 6 of the Head-Body.
Stuff this piece as you go rather than waiting until the end.
Rows 1-2: 21 sc (21)
Row 3: (6 sc, inc)*3 (24)
Rows 4-5: 24 sc (24)
Row 6: (3 sc, inc)*6 (30)
Row 7: 2 sc, inc, (4 sc, inc)*5, 2 sc (36)
Rows 8-11: 36 sc (36)
Row 12: 2 sc, inv dec, (4 sc, inv dec)*5, 2 sc (30)
Row 13: (3 sc, inv dec)*6 (24)
Row 14: 1 sc, inv dec, (2 sc, inv dec)*5, 1 sc (18)
✨ Sophie’s Note: Add more stuffing here before continuing.
Row 15: (1 sc, inv dec)*6 (12)
Row 16: (1 sc, inv dec)*4 (8)
Close the opening, fasten off, cut the yarn. This is Marzipan’s face taking shape — the muzzle is small, but it’s where her expression will live.
Ears (×2)
Yarn: Caramel body color | Starting method: mr
Row 1: Crochet 6 sc into the magic ring, but don’t close it. Chain 1, then crochet 2 inc, 2 dc-inc, 2 inc (12 sts + 1 ch)
Leave a tail for sewing and cut the yarn. Fold the ear in half and take a couple of stitches to hold that fold — this little crease is what gives the ears their forward tilt, which is a big part of what makes Marzipan look like she’s paying attention.
Eyes (×2)
Yarn: White | Starting method: mr
Row 1: 5 sc in mr (5)
Row 2: 5 inc (10)
Row 3: 10 sc (10)
Row 4: 5 inv dec (5)
Leave a tail for sewing, cut the yarn, and close the opening.
✨ Sophie’s Note: The source pattern also offers a simpler flat eye — just 6 sc worked into a magic ring and pulled closed, no shaping rounds. If you’d rather skip the extra shaping, that version works just as well; it just sits a little flatter against the face.
Legs (×2)
Yarn: Terracotta hoof color | Starting method: mr
Row 1: 6 sc in mr (6)
Row 2: 6 inc (12)
Row 3: (1 sc, inc)*6 (18)
Row 4: 1 sc, inc, (2 sc, inc)*5, 1 sc (24)
Row 5: BLO 24 sc — worked in back loops only (24)
Rows 6-7: 24 sc (24)
Row 8: (2 sc, inv dec)*6 (18)
Row 9: (1 sc, inv dec)*6 (12)
✨ Sophie’s Note: Add a little stuffing here.
Row 10: 6 inv dec (6)
Close the opening, fasten off, cut the yarn. Make two — these tuck neatly beneath the body once she’s sitting.
Arms (×2)
Yarn: Terracotta hoof color | Starting method: mr
Row 1: 6 sc in mr (6)
Row 2: 6 inc (12)
Row 3: (1 sc, inc)*6 (18)
Row 4: BLO 18 sc — worked in back loops only (18)
Rows 5-6: 18 sc (18)
Row 7: (1 sc, inv dec)*6 (12)
✨ Sophie’s Note: Add a little stuffing here.
Row 8: 6 inv dec (6)
Close the opening, fasten off, cut the yarn.
Mane (×1)
Yarn: Cappuccino brown | Starting method: ch
Row 1: Chain 15, then starting from the second chain from the hook, sl st into 14 sts. Chain 15 again and repeat the same sl st row. Make 8 long strands this way. Then chain 10, sl st into the first stitch to form a loop; repeat two more times for 3 loops total (8 long strands, 3 loops)
Leave a tail for sewing, cut the yarn. This is the part I always take longest on — arranging the strands and loops so the mane falls a little unevenly, the way real hair does, is what keeps it from looking stiff.
Tail (×1)
Yarn: Cappuccino brown | Starting method: ch
Row 1: Chain 15, then starting from the second chain from the hook, sl st into 14 sts. Chain 15 again and repeat. Make 5 strands this way (5 strands)
Leave a tail for sewing, cut the yarn. Fold the strands accordion-style and sew them together at the fold.
Scarf (×1)
Yarn: Any soft accent color | Starting method: Cast on 5 sts on knitting needles (3 + 2 edge sts)
✨ Sophie’s Note — Knitting section: This piece is worked on needles, not with a hook. It’s a simple garter-stitch strip — every row is knit, no purling involved.
Row 1: Knit every row in garter stitch, switching to a new color every 2 rows (5 sts)
Bind off, weave in ends, cut the yarn.
Girl’s Skirt — crochet (×1)
Yarn: Any soft accent color | Starting method: ch
Row 1: Chain 35. Starting from the second chain from the hook, work 34 sc, then chain 1 (34)
Row 2: 1 sc, (ch 1, skip 1 sc, 1 sc)*16, 1 sc, ch 3 (18 sc, 19 ch)
Row 3: Working into the chain space of the previous row: (1 dc, ch 1, 1 dc)*16, 1 dc, ch 3 (33 dc, 19 ch)
Row 4: Working into the chain space of the previous row: (1 dc, ch 2, 1 dc)*16, 1 dc (33 dc, 32 ch)
Leave a tail for sewing, cut the yarn. Each row flares out a little more than the last, which is exactly the point — by the last row it’s already starting to twirl before it’s even sewn on.
Bow (×1)
Yarn: Any soft accent color | Starting method: mr
Row 1: Work into the magic ring: (ch 3, 2 dc, ch 3, sl st)*2 (12)
✨ Sophie’s Note: The stitch total listed here in the source is 12, though the elements described (two sets of ch 3 + 2 dc + ch 3 + sl st) come to a bit more than that once you count everything worked. It’s a small decorative piece rather than a shaping round, so it isn’t critical — just work the sequence as written and it’ll form the bow shape regardless.
Cut the yarn and tie it around the middle to cinch it into a bow shape.
Assembling Your Amigurumi Horse
This is the part where all these separate little pieces stop being pieces and start being Marzipan. Our sewing amigurumi parts tutorial covers the anchoring technique used throughout this section.
- Sew the ears to the sides of the head, about 2 rows down from the magic ring at the top.
- Mark the leg placement 6 rows up from the bottom edge of the body. Attach body-colored yarn, chain 13, attach it to the leg, then work 12 sl st back along the chain. Fasten off and hide the yarn tails inside the body.
- Sew the arms on the same way.
- Sew the eyes into the indented eye areas (see the shaping note below).
- Sew a 3 mm bead into the center of each eye using black thread for the iris.
- Sew the mane along the head.
- Sew the tail in place.
- Sew the crochet skirt around the body at an angle, hiding the yarn tails inside.
- Tie the bow onto the mane, or secure it with a touch of fabric glue.
✨ Sophie’s Note — Face shaping: To indent the eye sockets: from the base of the muzzle, count up 14 rows and place pins 6 stitches apart. Insert your needle at the bottom of the muzzle, bring it out at the first pin, go back 1 stitch, bring it out at the bottom again, go back 1 stitch, insert at the first point, bring it out at the second pin, go back 1 stitch, and out at the first point again. Pull snug, knot twice, and hide the tails inside. Nostril indentations use the same method, 6 rows up from the base with pins 10 stitches apart. Finish by embroidering the eyebrows and mouth in brown thread, and tinting the eyebrows, nostrils, eye area, and cheeks with a little brown pastel — this is what softens her whole expression.
Move the eyes even one row higher and Marzipan’s expression shifts from watchful to surprised — small placement choices like this are where her personality really gets decided.
Outfit & Accessories
The scarf, skirt, and bow are what turn Marzipan from “a horse” into “Marzipan specifically” — a soft rose skirt gives her a gentler, more thoughtful air, while a bolder color in the bow can shift the whole mood toward playful.
If you’d like to hang her rather than sit her on a shelf, crochet a chain of 45, thread it through one ear, run the ends through a wooden bead, and knot it twice.
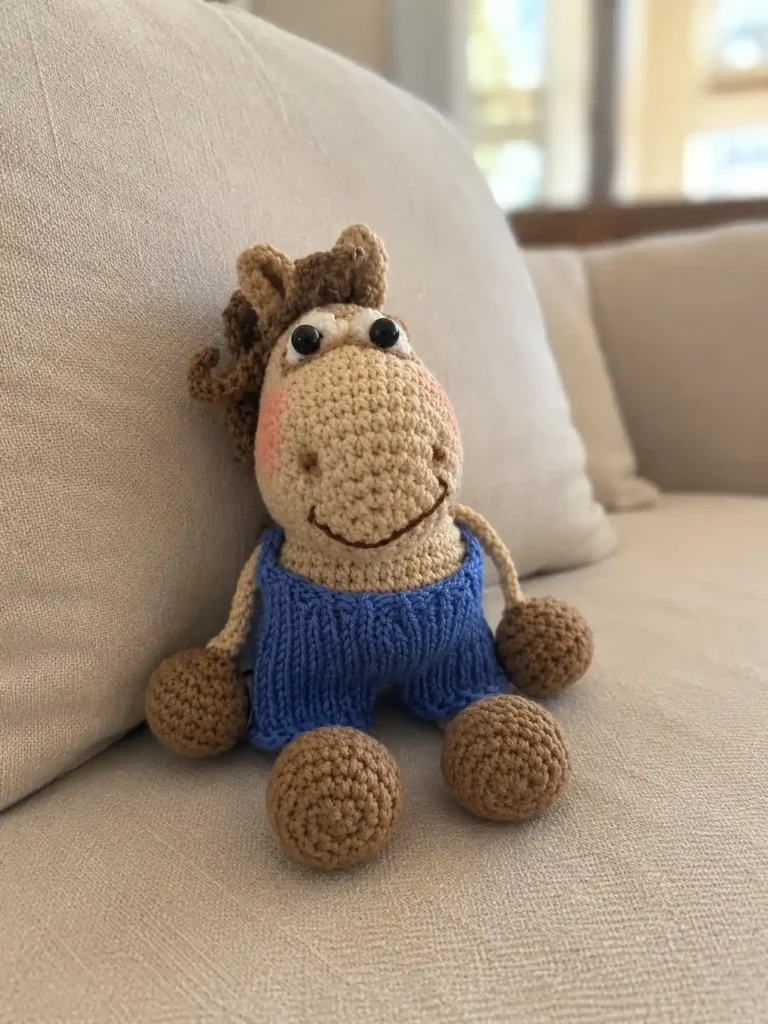
The original pattern also includes a full boy’s outfit — a knitted skirt with a buttonhole and button closure, knitted pants worked in the round with a bind-off/cast-on inseam join, and crocheted suspenders. It’s a substantial amount of additional knitting on its own, enough that it reads as its own project rather than a variation — worth considering as a separate follow-up article rather than folding it into this one.
Meet Marzipan
Meet Marzipan. She’s sitting on the windowsill right now, front hooves tucked under her, ears angled slightly forward like she’s listening for something just out of sight. The bead eyes catch the light in a way that makes her look like she’s about to say something, and never quite does. That’s the thing about these little creatures — once the mane is tied and the skirt is sewn on at just the right angle, they stop being yarn and start being someone. Name yours. Give her a spot on a shelf, or by a window where the light finds her in the afternoon. She deserves a place to be seen. 🧶
FAQ
What yarn is best for this amigurumi horse free pattern?
DK or Light Worsted (3) cotton blend yarn, such as YarnArt Jeans, works best. It provides a smooth, matte finish that gives the horse a soft, storybook quality while maintaining clear stitch definition.
How long does it take to crochet this amigurumi horse?
This is a highly detailed pattern that typically takes between 10 and 14 hours to complete, factoring in the intricate facial shaping and the time needed to sew on all the small accessories.
Can beginners make this amigurumi horse pattern?
This pattern is rated as advanced. It uses hooks smaller than standard US sizes, involves offset rounds to shape the body, and requires detailed needle-sculpting for the face, making it best for experienced crocheters.