Crochet Cat Amigurumi Free Pattern — Pink Two-Tone Chenille Kitty with Bobble Paws
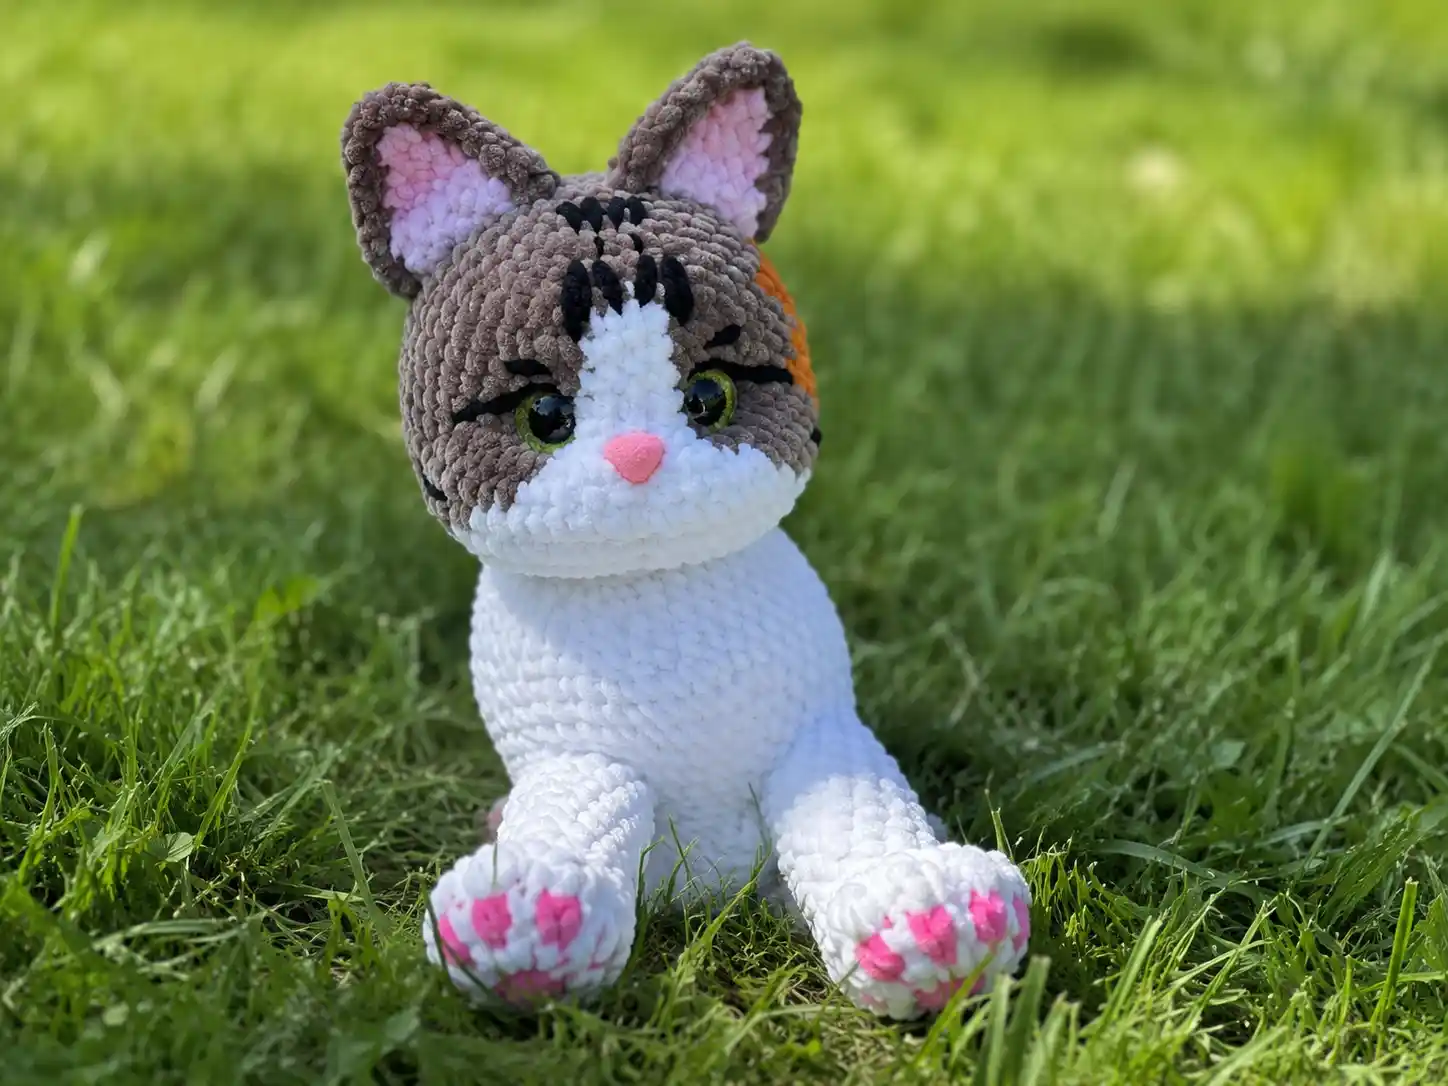
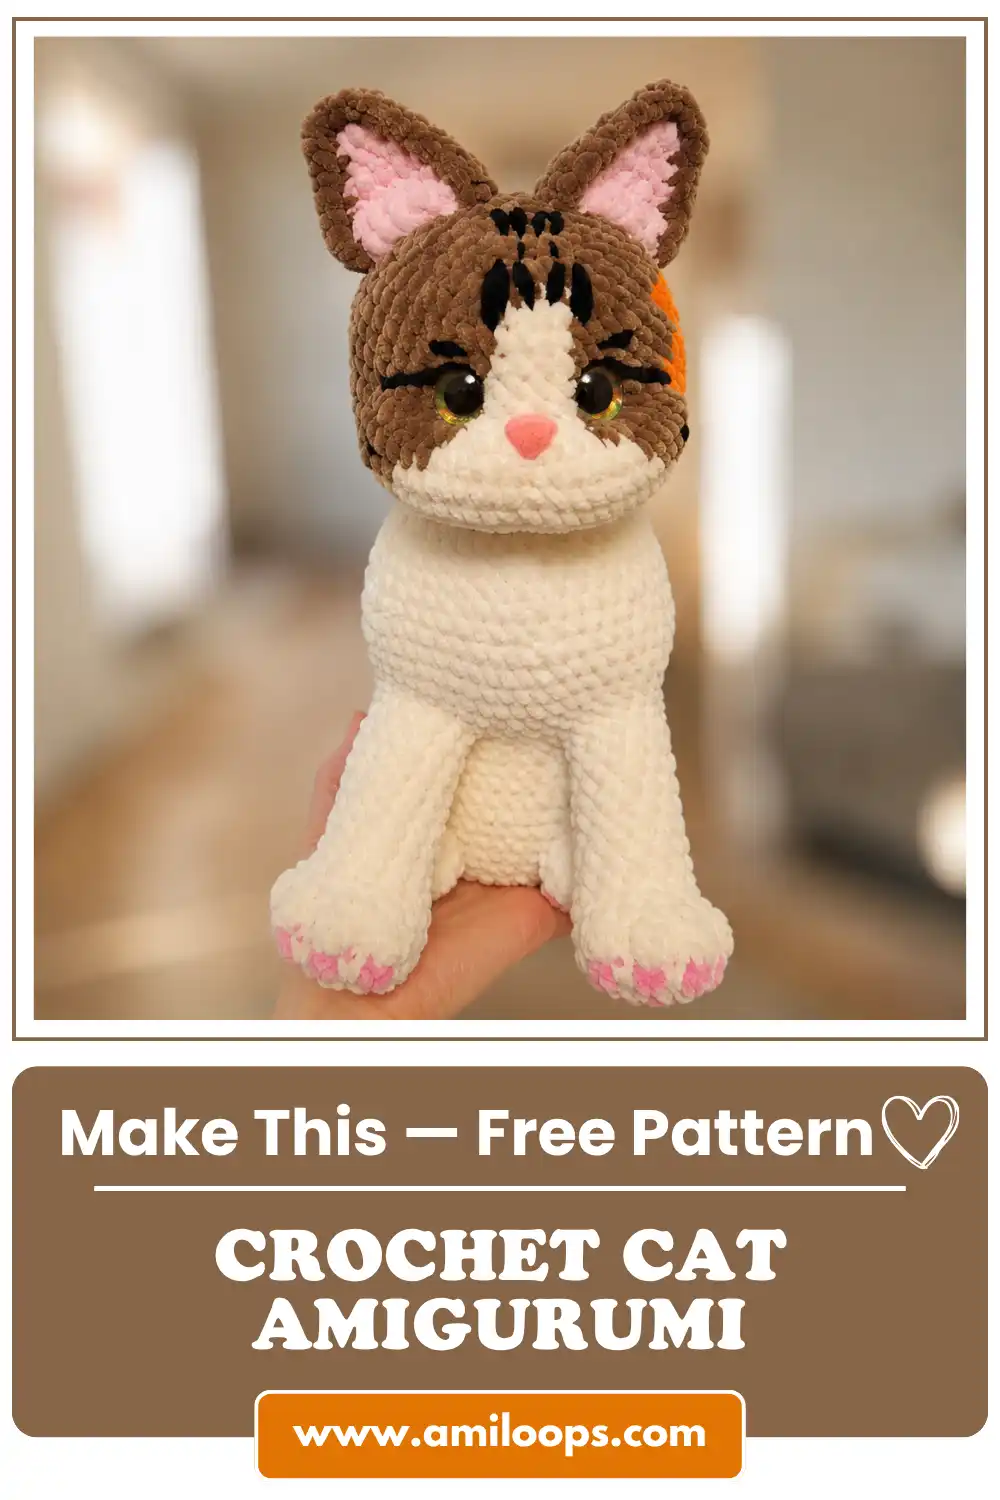
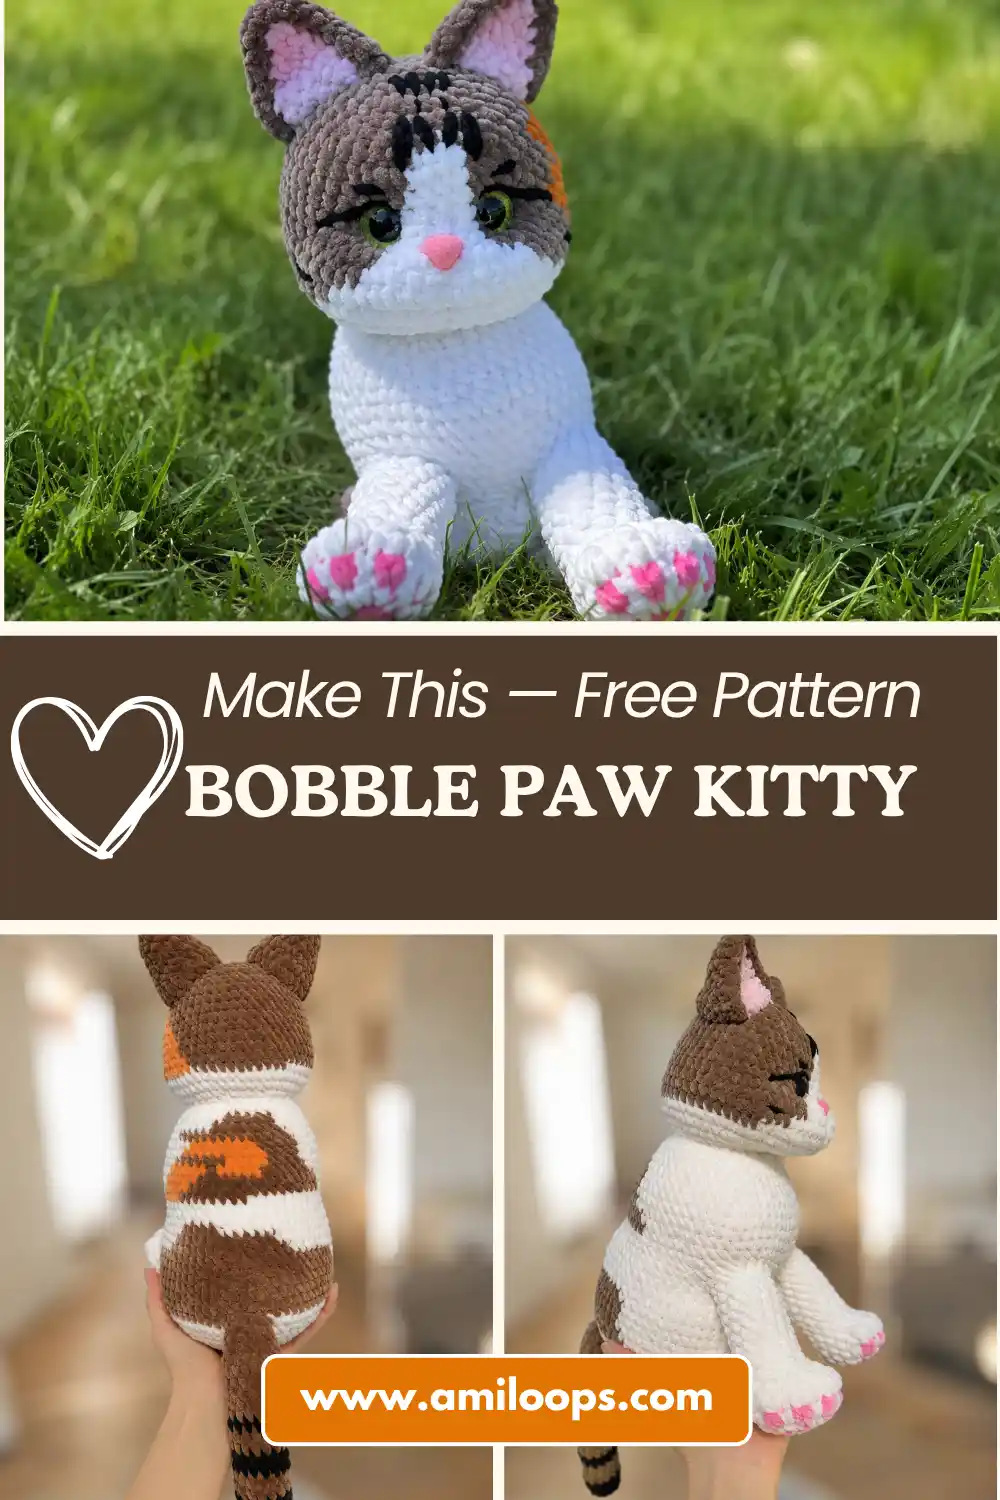
This crochet cat amigurumi free pattern is one of those projects where the details do all the talking. We’re talking pink bobble-stitch toe pads, an optional white highlighted muzzle, and a face you actually needle-sculpt to give her real personality. Okay, full transparency up front — this one’s not a one-evening, zero-sew situation. But if you’re ready for a project that feels like a real accomplishment, let’s do this.
🧶 Why You’ll Love This Pattern
- ⭐ Difficulty: INTERMEDIATE-ADVANCED
- ⏱️ Time: 6-9 hours, best split across a few sessions
- 🪡 Sewing: Standard — legs, ears, and tail are all sewn on
- 🧵 Yarn: Bulky (5) chenille in two colors, plus a touch of black
- 💰 Yarn needed: About 1.5-2 skeins main color, small amounts of pink and black
Here’s the thing — I’m not going to pretend this is a beginner speed-run, because it isn’t. There’s real technique in here: little pink bobble stitches worked right into the toes, a body and head crocheted as one continuous piece, and a face you shape with a needle afterward. It’s more involved than most of what I make, and I want to be straight with you about that. But none of it is actually hard — it’s just a few new skills stacked together, and I’ll walk you through every one. If you’ve made an amigurumi or two before, you’ve got everything you need to make this cat.
What You’ll Need
- Main color yarn: Bulky (5) weight chenille, about 1.5-2 skeins depending on your tension. The original pattern uses YarnArt Dolce — Bernat Baby Velvet or Premier Parfait are easy US substitutes, both widely available at Joann, Michaels, or Hobby Lobby.
- Pink chenille yarn: A small amount, for the paws.
- Black chenille yarn: A small amount, for the eye and eyebrow details.
- Optional white chenille yarn: If you want to highlight the muzzle like the original.
- Hook: 4.0mm (US G/6)
- Polyester fiberfill for stuffing
- Safety eyes: 16mm
- Safety nose: plastic, 10mm x 12mm
- Stitch marker or a scrap of contrasting yarn
- Tapestry needle for sewing and needle sculpting
- Scissors
Don’t stress if you can’t find the exact yarn — this Bulky (5) weight is a category, not a brand, so anything chunky and squishy in that range will work up the same way.
Abbreviations Used in This Crochet Cat Amigurumi Pattern
| Abbreviation | What It Means |
|---|---|
| mr | Magic ring — an adjustable loop you start amigurumi with |
| ch | Chain |
| sl st | Slip stitch — used to close things off |
| sc | Single crochet — your main stitch here |
| inc | Increase — 2 single crochets worked into the same stitch |
| dec | Decrease — 2 single crochets worked together into one stitch |
| dc | Double crochet — used only in the little pink toe bobbles |
Beginner Tips for This Crochet Cat Pattern
Never made a magic ring before? No worries — our magic ring tutorial walks you through it in under two minutes, and you’ll use it to start almost every piece here.
This pattern has a lot of separate pieces — legs, ears, tail — that all get sewn onto the body at the end. Pin everything in place first before you commit to stitching. It genuinely makes the whole process less stressful, and you can adjust before it’s permanent.
You’ll be stuffing as you go on several pieces, not just at the end. Our stuffing guide is worth a quick look if you’ve had lumpy amigurumi before — little bits at a time is the trick.
One more thing: this pattern’s “toe bobbles” are made by working a few double crochets into one stitch in pink, right in the middle of a main-color row, without cutting your yarn. It sounds fussy written out, but it’s really just “make 3 tall stitches in one spot, then keep going.” I’ll flag exactly where it happens.
Crochet Cat Amigurumi Pattern — Front Legs (Make 2)
These start pink at the paw and switch to your main color partway up. They’re worked in continuous rounds with a magic ring start.
Row 1: 6 sc in mr [pink] (6)
Row 2: 6 inc [pink] (12)
🎉 Quick note: partway through this next stitch, without finishing the last stitch of Row 2, switch your yarn to the main color. That’s how you get a clean color change with no visible jump.
Row 3: (1 sc, inc) × 6 [main] (18)
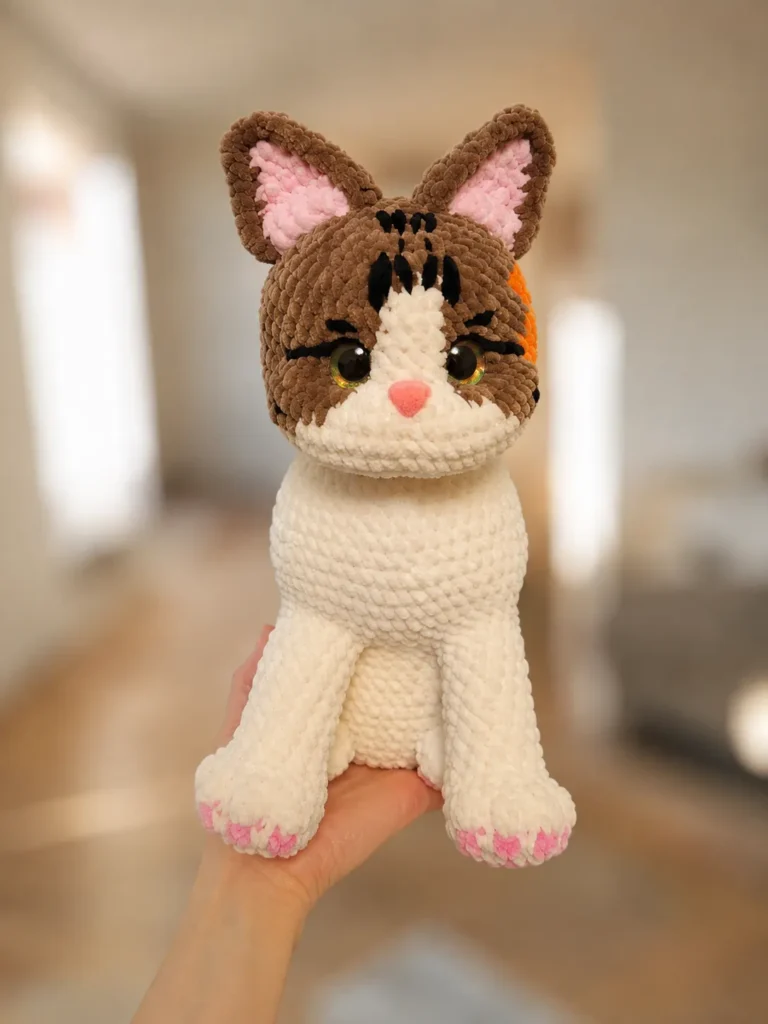
Row 4: main color 5 sc, inc, then pink dc-inc bobble (3 dc worked into one stitch, sharing one top), main inc, pink dc-inc bobble, main inc, pink dc-inc bobble, main inc, pink dc-inc bobble, main inc, then 4 sc in main (23)
🎉 You’re through the fussiest part! Those four little pink bobbles are the toes, and once this row’s done, you’re back to plain main-color rounds for the rest of the leg. From here it’s just crochet-and-stuff.
Row 5: 5 sc, dec, 3-dc-inc bobble (shared top), dec, 3-dc-inc bobble, dec, 3-dc-inc bobble, dec, 3-dc-inc bobble, dec, 4 sc [main] (18)
Row 6: 18 sc [main] (18)
Row 7: 5 sc, 4 dec, 5 sc [main] (14)
Row 8: working in FLO (front loop only), 14 sc [main] (14)
Rows 9-16: 14 sc, worked 8 times in a row [main] (14)
Stuff the leg after Row 8, then finish stuffing as you go through the remaining rows. Slip stitch to close and cut your yarn, leaving the stuffing in.
Crochet Cat Amigurumi Pattern — Hind Legs (Make 2)
These start with a foundation chain instead of a magic ring, and the paw pad is built right into the first row.
Row 1: Chain 8. Starting from the second chain from your hook, in main color work: 3-dc-inc bobble, 1 sc × 3, then a 3-dc-inc bobble plus 2 sc worked into the same stitch (this pushes the bobbles outward). Turn to work along the other side of the chain, and in pink: dc-inc bobble, main inc, pink dc-inc bobble, main inc, pink dc-inc bobble, main inc, pink dc-inc bobble, plus 2 sc worked into the same stitch in main color. (total not specified in source — trust your stitch placement)
Row 2: 10 sc, dec, 1 sc, dec, 1 sc, dec, 3 sc [main] (18)
Row 3: 18 sc [main] (18)
Finish with a slip stitch, but this time leave a long yarn tail — you’ll use it to sew the leg onto the body later.
Crochet Cat Amigurumi Pattern — Body and Head (Make 1)
This is the big one — body and head are worked as a single continuous piece in main color, so no separate sewing for this part. Keep your stitch marker moving with you every round.
Row 1: 6 sc in mr (6)
Row 2: 6 inc (12)
Row 3: (1 sc, inc) × 6 (18)
Row 4: (2 sc, inc) × 6 (24)
Row 5: (3 sc, inc) × 6 (30)
Row 6: (4 sc, inc) × 6 (36)
Row 7: (5 sc, inc) × 6 (42)
Row 8: (2 sc, inc) × 3, 24 sc, (inc, 2 sc) × 3 (48)
Row 9: (7 sc, inc) × 6 (54)
Row 10: (8 sc, inc) × 6 (60)
Rows 11-18: 60 sc, worked 8 times in a row (60)
🎉 Halfway up the body already! Start adding stuffing gradually from here on — a little at a time as you go keeps her nice and round instead of lumpy.
Row 19: 17 sc, 4 dec, 10 sc, 4 dec, 17 sc (52)
Row 20: This is where the front legs attach. 19 sc on the body, then 5 sc worked through both the body and the leg together (line the leg up against the body and crochet through both loops closest to the body to join them), 4 sc on the body, 5 sc joining the second leg the same way, 19 sc on the body (52)
Row 21: (2 sc, dec) × 3, 7 sc, 9 sc worked along the leg, 4 sc along the body, 9 sc along the leg, 7 sc along the body, (dec, 2 sc) × 3 (54)
Rows 22-23: 54 sc, worked 2 times in a row (54)
Row 24: (8 sc, inc) × 6 (60)
Rows 25-27: 60 sc, worked 3 times in a row (60)
Row 28: (8 sc, dec) × 6 (54)
Row 29: (16 sc, dec) × 3 (51)
Row 30: (15 sc, dec) × 3 (48)
Row 31: (14 sc, dec) × 3 (45)
Row 32: (13 sc, dec) × 3 (42)
Row 33: (12 sc, dec) × 3 (39)
Row 34: (11 sc, dec) × 3 (36)
Row 35: (4 sc, dec) × 6 (30)
🎉 That’s the body finished and the neck shaped! Everything from here is the head — you’re in the home stretch.
Row 36: (3 sc, 2 inc) × 6 (42)
Row 37: (6 sc, inc) × 6 (48)
Row 38: 18 sc, 12 inc (this shapes the muzzle), 18 sc (60)
Rows 39-43: 60 sc, worked 5 times in a row (60)
Row 44: 18 sc, 12 dec, 18 sc (48)
Rows 45-48: 48 sc, worked 4 times in a row (48)
Row 49: (6 sc, dec) × 6 (42)
Row 50: (5 sc, dec) × 6 (36)
Row 51: (4 sc, dec) × 6 (30)
Row 52: (3 sc, dec) × 6 (24)
Row 53: 12 dec (12)
Row 54: 6 dec (6)
Finish stuffing firmly, close the last opening, and weave in your end. Look at that — full body and head, one piece, zero seams down the middle.
Optional: Highlighting the Muzzle in White
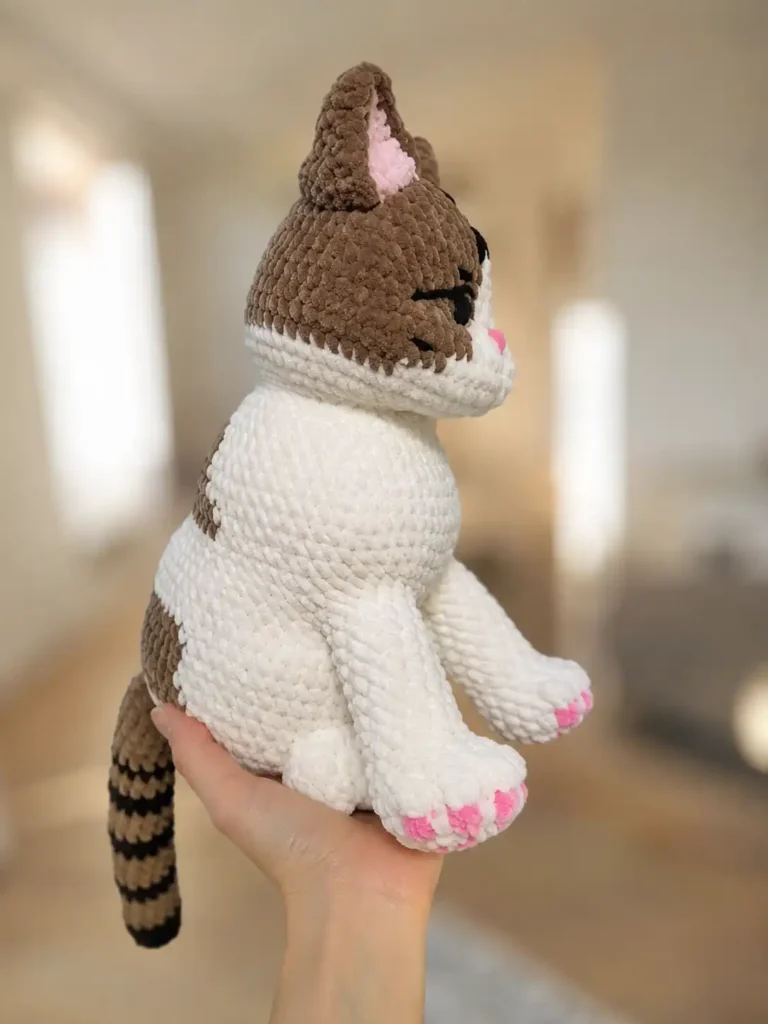
If you want that two-tone muzzle look, swap in white yarn starting at Row 38 and follow this instead of the main pattern’s center stitches for those rows:
Row 38 (white): 12 inc (24)
Rows 39-40 (white): 24 sc (24)
Row 41 (white): 18 sc (18)
Row 42 (white): 14 sc (14)
Row 43 (white): 10 sc (10)
Row 44 (white): 5 sc (5)
Rows 45-49 (white): 4 sc (4)
This one’s totally optional — she’s just as cute in a single color if you’d rather skip the extra color change.
Crochet Cat Amigurumi Pattern — Inner Ears (Make 2)
Worked flat in pink, starting from a foundation chain.
Row 1: Chain 7, starting from the second chain from your hook (total not specified in source)
Row 2: 6 sc, chain 1, turn (6)
Row 3: 6 sc, chain 1, turn (6)
Row 4: skip 1 st, 3 sc, dec (pull up loops from the previous row’s last 2 stitches and crochet them together), chain 1, turn (total not specified in source)
Row 5: 4 sc, chain 1, turn (4)
Row 6: skip 1 st, 1 sc, dec, chain 1, turn (total not specified in source)
Row 7: 2 sc (2)
Pull your yarn through and cut. Set these aside — they’ll join up with the outer ear pieces in a minute.
Crochet Cat Amigurumi Pattern — Outer Ears (Make 2)
Worked flat in main color, starting from a foundation chain.
Row 1: Chain 14, starting from the second chain from your hook (total not specified in source)
Row 2: 13 sc, chain 1, turn (13)
Row 3: skip 1 st, 10 sc, dec, chain 1, turn (11)
Row 4: skip 1 st, 8 sc, dec, chain 1, turn (9)
Row 5: skip 1 st, 6 sc, dec, chain 1, turn (7)
Row 6: skip 1 st, 4 sc, dec, chain 1, turn (5)
Row 7: skip 1 st, 4 sc (4)
Pull your yarn through and cut, but leave a tail. Fold each inner and outer ear piece together and, using main color yarn, edge around both layers to join them — start from the lower right corner. When you reach the top corner, work 2 sc into the same stitch on the inner piece, since the outer piece has 4 stitches there and the inner only has 2. This just evens the two layers out so they fold together neatly.
Crochet Cat Amigurumi Pattern — Tail (Make 1)
Worked in continuous rounds, main color, from a magic ring.
Row 1: 6 sc in mr (6)
Row 2: 6 inc (12)
Row 3: 12 sc (12)
Row 4: (3 sc, inc) × 3 (15)
Rows 5-32: 15 sc, worked 28 times in a row (15)
Stuff lightly as you go — the tail should stay soft and a little floppy, not firm like the body.
Row 33: (3 sc, dec) × 3 (12)
Rows 34-36: 12 sc, worked 3 times in a row (12)
Slip stitch and leave a long tail for sewing.
Assembly — Sewing Your Crochet Cat Amigurumi Together
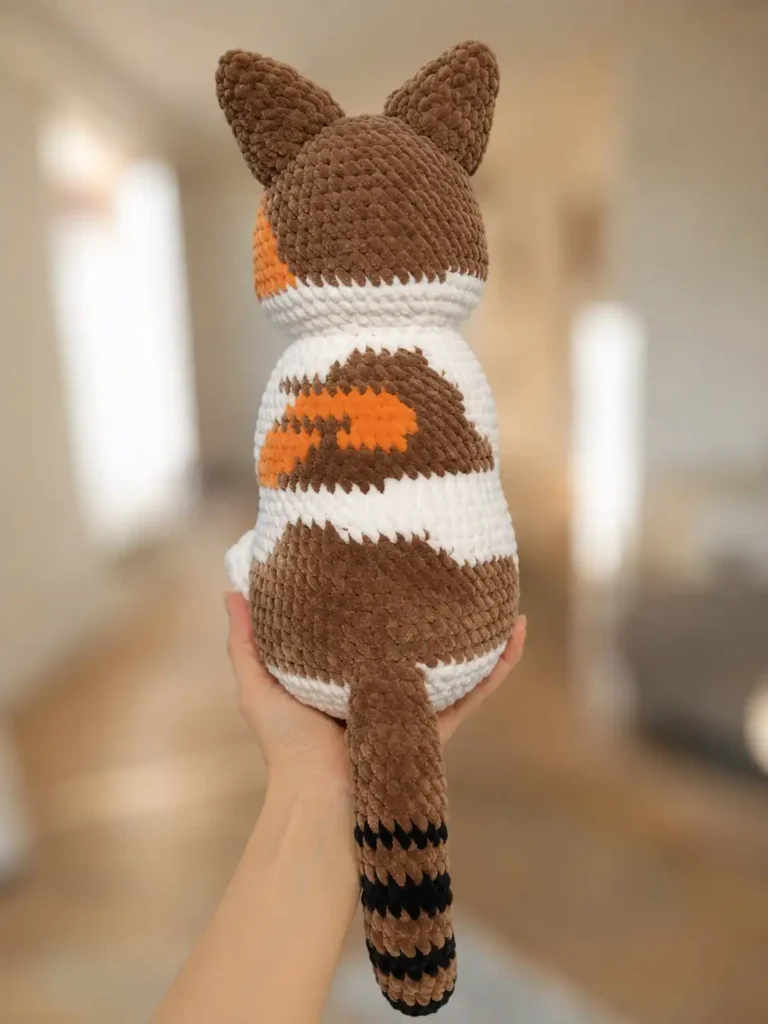
Okay, here’s the honest part: this pattern has real sewing in it. Pin every piece in place first, step back, and check it looks right before you commit any stitches. It genuinely saves you from redoing things.
- Sew the hind legs on between rows 10 and 13 of the body (so each paw spans about 4 rows in height), spaced roughly 5 stitches apart. Add a little extra stuffing as you sew to keep the seam from looking sunken.
- Insert the safety eyes between rows 45 and 46, spacing them about 6-7 stitches apart.
- Insert the safety nose between rows 43 and 44, centered on the muzzle.
- Sew the ears on using a strand of white sewing thread or matching yarn, positioning them however looks best to you — this part is honestly more art than math.
- Sew the tail onto the lower back, across rows 10-12 (about 3 rows high, in an oval shape).
Shaping the Face
This is the step that turns a stuffed shape into a cat face, and it’s simpler than it sounds. Using your tapestry needle, sew from the bottom of the muzzle up through to the inner and outer corners of each eye, pulling gently to create soft indentations — this is what gives her that sculpted, expressive look instead of a flat round face. Then shape the mouth with a couple more anchoring stitches beneath the nose. Take it slow and check her expression as you go; you can always adjust before you weave in the end.
Finish by embroidering the eye and eyebrow details in black yarn — small angled stitches at the outer eye corners, and short stripes above each eye for eyebrows.
You Did It!
Seriously — sit her up and look at those little pink toes. This was not a quick one, and if you made it through the bobble stitches, the leg attachments, and the face sculpting, you should be genuinely proud of yourself. If this was a stretch pattern for you, that’s exactly what it was supposed to be. Tag us if you share her — I want to see every single version, white muzzle or not. 🧶
FAQ
What yarn is best for this crochet cat amigurumi free pattern?
A Bulky (5) weight chenille yarn, such as Bernat Baby Velvet or Premier Parfait, works best to give this kitty a soft, plush finish.
Is this cat pattern suitable for beginners?
This pattern is rated intermediate-advanced. It involves color-changing bobble stitches, seamless head and body construction, and needle-sculpting the face.
How long does it take to crochet this cat amigurumi?
It typically takes about 6 to 9 hours. It is highly recommended to split the project across a few crafting sessions due to the assembly and face-shaping techniques.