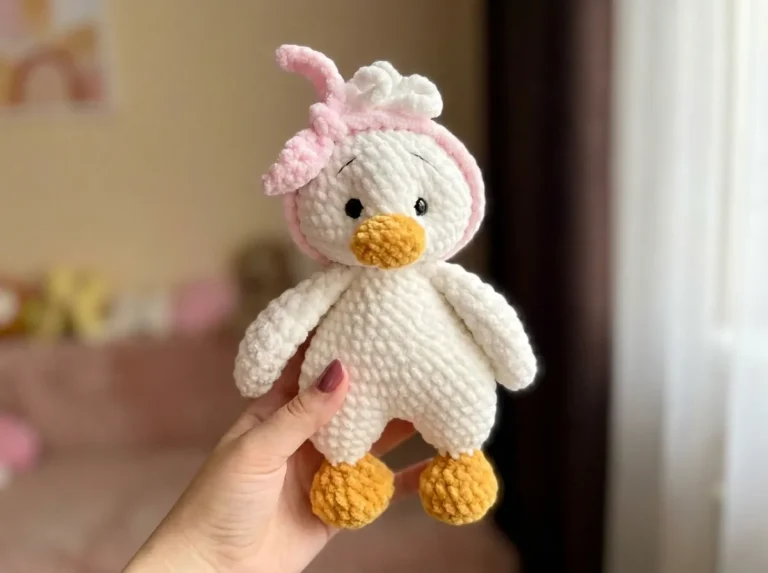
Free Bird Amigurumi Pattern — Squishy Chenille Baby Chick
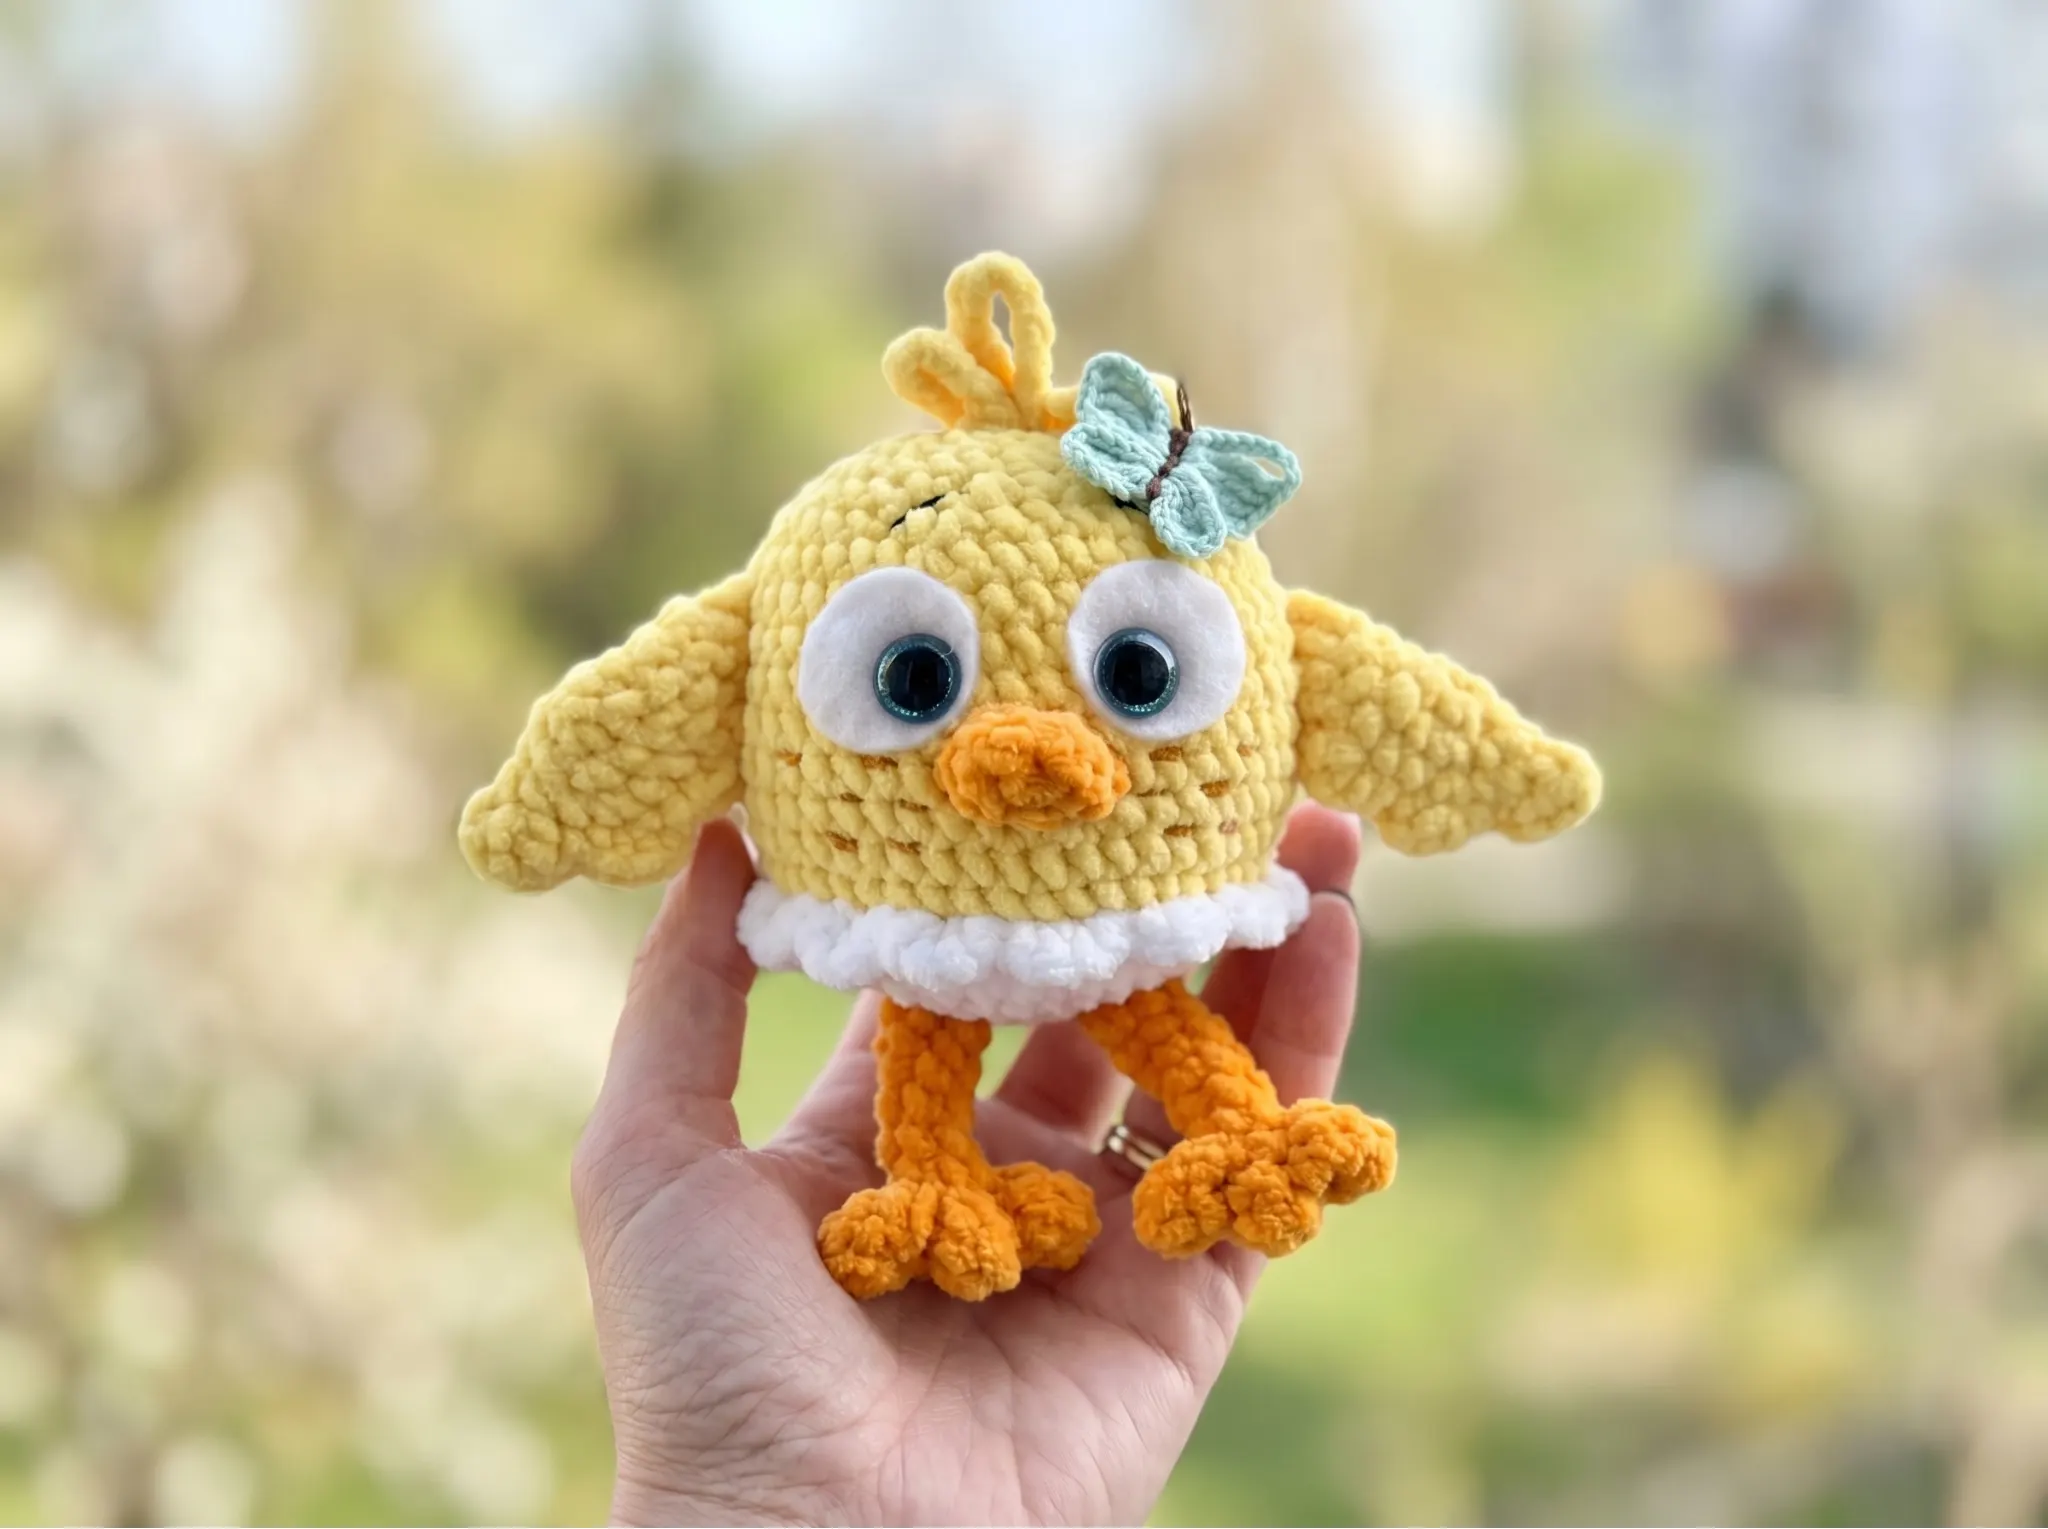
This free bird amigurumi pattern makes the squishiest, most huggable baby chick you’ll ever crochet — once you feel that bulky chenille in your hands, you’ll understand why I keep coming back to it. The bird amigurumi design uses a clever color-change technique to create a white base and yellow body in one seamless piece, with orange details that make it look completely polished. Every stitch count is verified. Grab your hook.
📋 Pattern Quick Stats
- Difficulty: Intermediate
- Finished Size: approx. 4 in (10 cm) tall
- Hook Size: G/6 (4.0 mm); plus 2.5 mm (approx. US C/2) for the butterfly accent
- Yarn Weight: Bulky (5) chenille/velvet for main body; Worsted (4) cotton for face details and butterfly
- Techniques: magic ring, BLO, color change, invisible decrease, sewing parts
- Estimated Time: 4–6 hours
Materials for This Bird Amigurumi
- Yellow chenille/velvet yarn — approx. 1/2 skein, Bulky (5). Recommended US brands: Bernat Baby Velvet or Premier Parfait. This is the main body color.
- White chenille/velvet yarn — small amount, Bulky (5), same yarn family. Used for the base of the head-body and the decorative ruffle.
- Orange chenille/velvet yarn — small amount, Bulky (5), same yarn family. Used for the beak and feet.
- Black cotton yarn — small amount, Worsted (4). Recommended: Lion Brand 24/7 Cotton. Used for embroidering the face.
- Contrasting cotton yarn — small amounts in two colors (e.g., brown and teal) for the decorative butterfly.
- 16 mm safety eyes — 1 pair
- 2 felt circles, 3 cm in diameter, plus craft glue — for the safety eye backing
- Polyester fiberfill stuffing — Poly-Fil or similar
- Stitch marker
- Tapestry needle and thin long needle for assembly
- Scissors
The chenille yarn used throughout this bird amigurumi falls under Bulky (5) on the Craft Yarn Council yarn weight system. Bernat Baby Velvet and Premier Parfait are both widely available at Joann, Michaels, and Hobby Lobby across the US.
💡 Emma’s Note on Chenille: Chenille does not frog cleanly. If you pull it back, the fibers distort and you lose stitch definition. Work slowly on the first few rounds, use your stitch marker religiously, and try not to need to frog at all. I know — easier said than done.
Abbreviations Used in This Bird Amigurumi Pattern
| Abbreviation | Meaning |
|---|---|
| mr | magic ring |
| ch | chain |
| sc | single crochet |
| sl st | slip stitch |
| inc | increase (2 sc in same stitch) |
| inv dec | invisible decrease (insert hook through front loops only of next 2 stitches simultaneously) |
| hdc | half double crochet |
| dc | double crochet |
| dtr | double treble crochet |
| trtr | triple treble crochet |
| BLO | back loop only |
| FO | fasten off |
Special Techniques for This Bird Amigurumi
This pattern uses a handful of techniques that are worth reviewing before you start, especially if chenille is new to you.
- Magic Ring: Every round part in this bird amigurumi starts with a magic ring. It closes completely so no hole shows at the center — essential on chenille, where a gap would be very visible. If you need a walkthrough, our step-by-step magic ring tutorial has you covered.
- Back Loop Only (BLO): Row 9 of the head-body is worked entirely in BLO. This creates a raised ridge that cleanly marks the boundary between white and yellow — it’s one of those details that makes all the difference. Take it slowly; BLO on chunky chenille is tight.
- Color Change: The head-body switches from white to yellow at the end of Row 8. The white yarn is carried forward — not cut — because it’s used later to crochet the decorative ruffle along the color boundary.
- Invisible Decrease: All decreases in this pattern use the invisible decrease method. Insert the hook through the front loops only of the next two stitches simultaneously, then complete the stitch as normal. It eliminates the visible gap that a standard decrease creates. Our complete invisible decrease tutorial explains exactly how to work it.
- Safety Eyes with Felt Backing: This pattern uses 16 mm safety eyes mounted on 3 cm felt circles for a clean, professional look against the plush chenille. Eyes must be installed before the opening closes — don’t skip ahead. Our safety eye attachment tutorial walks through the felt-backing method in detail.
⚠️ Safety Note: If this bird amigurumi is intended for a child under 3, replace the safety eyes with embroidered eyes. For US toy safety standards, see the U.S. Consumer Product Safety Commission.
Bird Amigurumi Pattern Instructions
This bird amigurumi is worked in continuous rounds throughout — no joining at the end of each round. Move your stitch marker up at the start of every round. With chenille, it is genuinely easy to lose your place, and a miscount here will cost you rows of work.
Part 1: Head-Body (×1)
Yarn: White (Rows 1–8), then Yellow (Rows 9–23)
Start: Magic ring
Row 1: 6 sc in mr (6)
Row 2: 6 inc (12)
Row 3: (1 sc, 1 inc) × 6 (18)
Row 4: (2 sc, 1 inc) × 6 (24)
Row 5: (3 sc, 1 inc) × 6 (30)
Row 6: (4 sc, 1 inc) × 6 (36)
Row 7: (5 sc, 1 inc) × 6 (42)
Row 8: (6 sc, 1 inc) × 6 (48)
🎨 Color Change at Row 8: Before completing the final stitch of Row 8, switch to yellow yarn on the last pull-through. Carry the white yarn to the front of the work — do not cut it. You will use it again later for the ruffle at the color boundary.
Row 9: 48 sc BLO [yellow] (48)
Rows 10–16: 48 sc (7 rows) (48)
Row 17: (6 sc, 1 inv dec) × 6 (42)
Row 18: (5 sc, 1 inv dec) × 6 (36)
Row 19: (4 sc, 1 inv dec) × 6 (30)
👁️ Eye Placement — Do This Now: Before continuing, install the safety eyes. Cut 2 felt circles 3 cm in diameter. Push each safety eye post through the center of a felt circle, then insert the eyes into the head between Rows 14 and 15, with 5 stitches of space between them. Lock the washers firmly from inside. This is the last comfortable moment to do it — do not wait until Row 22.
Row 20: (3 sc, 1 inv dec) × 6 (24)
🪡 Stuff Now: Begin adding fiberfill. Fill firmly — chenille hides a lot, but under-stuffed pieces go lumpy and lose their shape. Our guide to stuffing amigurumi covers how to get an even, bump-free result.
Row 21: (2 sc, 1 inv dec) × 6 (18)
Row 22: (1 sc, 1 inv dec) × 6 (12)
🪡 Stuff Again: Add more fiberfill before closing. The head-body should feel firm and round all the way through — no soft spots at the top.
Row 23: 6 inv dec (6)
Finishing: Work a few more decreases as needed to close the opening fully. Weave the yarn tail inside the head. Leave the white yarn accessible at the color boundary — you’ll use it for the ruffle in the finishing section.
Part 2: Wings (×2)
Yarn: Yellow
Start: Magic ring
Row 1: 6 sc in mr (6)
Row 2: 6 inc (12)
Row 3: (1 sc, 1 inc) × 6 (18)
Row 4: (2 sc, 1 inc) × 6 (24)
Row 5: Fold the wing in half and crochet through both layers: 3 dc in one stitch, 1 sl st, 1 sc, 3 hdc in one stitch, 1 sl st, 1 sc, 3 sc in one stitch, 1 sl st, 4 sc to end of row. (18)
Finishing: Leave a long tail for sewing. Do not stuff. Make 2.
💡 Emma’s Tip: Make both wings before moving on. Hold them side by side and check that the scalloped edges are symmetrical. A small difference in tension can make one look noticeably larger once they’re sewn on — and at that point, you’ll wish you’d checked earlier. Trust me on this one.
Part 3: Feet — Side Toes (×4, 2 per foot)
Yarn: Orange
Start: Magic ring
Row 1: 6 sc in mr (6)
Rows 2–3: 6 sc (2 rows) (6)
Finishing: 1 sl st. Leave a long tail for sewing. Make 4 total.
Part 4: Feet — Main Foot (×2)
Yarn: Orange
Start: Magic ring
Row 1: 6 sc in mr (6)
Rows 2–10: 6 sc (9 rows) (6)
Finishing: 1 sl st. Leave a long tail for sewing. Do not stuff. Make 2.
Part 5: Beak (×1)
Yarn: Orange
Start: Magic ring
Row 1: 6 sc in mr (6)
Row 2: (1 sc, 1 inc) × 3 (9)
Row 3: 9 sc (9)
Finishing: 1 sl st. Leave a long tail for sewing. Do not stuff.
Part 6: Butterfly Body (×1)
Yarn: Cotton yarn, your choice of color (e.g., brown)
Hook: 2.5 mm (approx. US C/2)
Start: Chain
Row 1: Leave a short tail. Ch 7. Working from the 2nd ch from hook: 2 sl st, 4 sc. (6)
Finishing: FO. Leave a short tail. Trim both tails to your desired antenna length — these yarn tails are the butterfly’s antennae.
Part 7: Butterfly Wings (×1)
Yarn: Contrasting cotton yarn (e.g., teal)
Hook: 2.5 mm (approx. US C/2)
Start: Worked directly into the butterfly body chain stitches
💡 Note: The butterfly wings use advanced tall stitches (dtr and trtr). The butterfly is a decorative accent for the top of the head — it can be simplified or omitted if you prefer a cleaner finish. Work slowly and count your chains carefully.
Row 1: Begin from the 2nd stitch from the antenna end. Work all into that one stitch: 9 ch, 1 trtr, 3 dtr, 5 ch, 1 sl st. (19)
Row 2: 1 sl st in next stitch, then into that same stitch: 5 ch, 3 dtr, 5 ch, 1 sl st. (15)
Row 3: 2 ch and 1 sl st in the 3rd stitch from the antenna end. (The 2 ch passes under the body.) Into that same stitch: 5 ch, 3 dtr, 5 ch, 1 sl st. (17)
Row 4: 1 sl st in next stitch, then into that same stitch: 5 ch, 3 dtr, 1 trtr, 9 ch, 1 sl st. (20)
Finishing: FO and cut yarn. The butterfly is complete.
Assembly
Take your time with assembly — this is where the bird amigurumi really comes to life, and placement makes all the difference. I pin every single piece before I sew a single stitch. For clean, invisible joins, our guide to sewing amigurumi parts together covers the exact method I use.
- Feet: Sew 2 side toes onto each main foot piece, positioning them so they fan out naturally at the base. Sew both assembled feet to the underside of the body.
- Wings: Sew a wing to each side of the body. Pin them in place and step back to check symmetry before committing.
- Beak: Sew the beak to the center front of the face, positioned between the safety eyes and angled slightly downward. Do not stuff it — it should sit flat against the body.
- Butterfly: Sew the completed butterfly to the top of the head.
Finishing Details for Your Bird Amigurumi
Face embroidery: Using black cotton yarn (Worsted/4) and a thin needle, embroider eyebrows above the safety eyes. Add freckles using any contrasting cotton yarn — a few small French knots across the face work beautifully here. This is one of those details that makes all the difference.
Ruffle/skirt: The white yarn you carried forward at Row 8 is used here. It works into the front loops that were left exposed when you worked Row 9 in BLO — that raised ridge at the color boundary. Work a simple ruffling round (2 sc into each front loop around) for a clean, even frill. The white yarn gives it a natural contrast against the yellow body.
Top knot: Cut 4–6 short lengths of yellow yarn, fold each in half, and attach them with a lark’s head knot through a stitch at the very top of the head. Fluff them out and trim to your preferred length.
If you enjoyed making this bird amigurumi, you might also love our free penguin amigurumi pattern — another compact, round bird with a lot of personality. And if the butterfly accent caught your attention, we have a dedicated butterfly amigurumi pattern that takes the same idea much further.
Emma’s Note
What I love most about this little bird amigurumi is the BLO color change at Row 9 — it creates such a clean, crisp line between white and yellow, no muddy transition anywhere. The felt-backed safety eyes are a detail I’d never skip on a chenille project; they sit perfectly against the plush texture and look completely intentional. Don’t rush the ruffle. It’s a small thing, but it’s what makes this chick look finished rather than assembled. Happy hooking. 🧶
What yarn is best for this bird amigurumi?
A Bulky (5) weight chenille or velvet yarn, like Bernat Baby Velvet or Premier Parfait, is highly recommended to give this baby chick its signature squishy texture.
How long does it take to crochet this bird amigurumi?
This pattern typically takes between 4 to 6 hours to complete, depending on your crochet speed and experience with handling chenille yarn.
Can beginners make this bird amigurumi pattern?
This pattern is rated as intermediate. While ambitious beginners can try it, working with fluffy chenille yarn and executing the advanced tall stitches for the butterfly require some prior experience.