Flower Fairy Amigurumi Free Pattern — Advanced Doll & Garden Cart Set
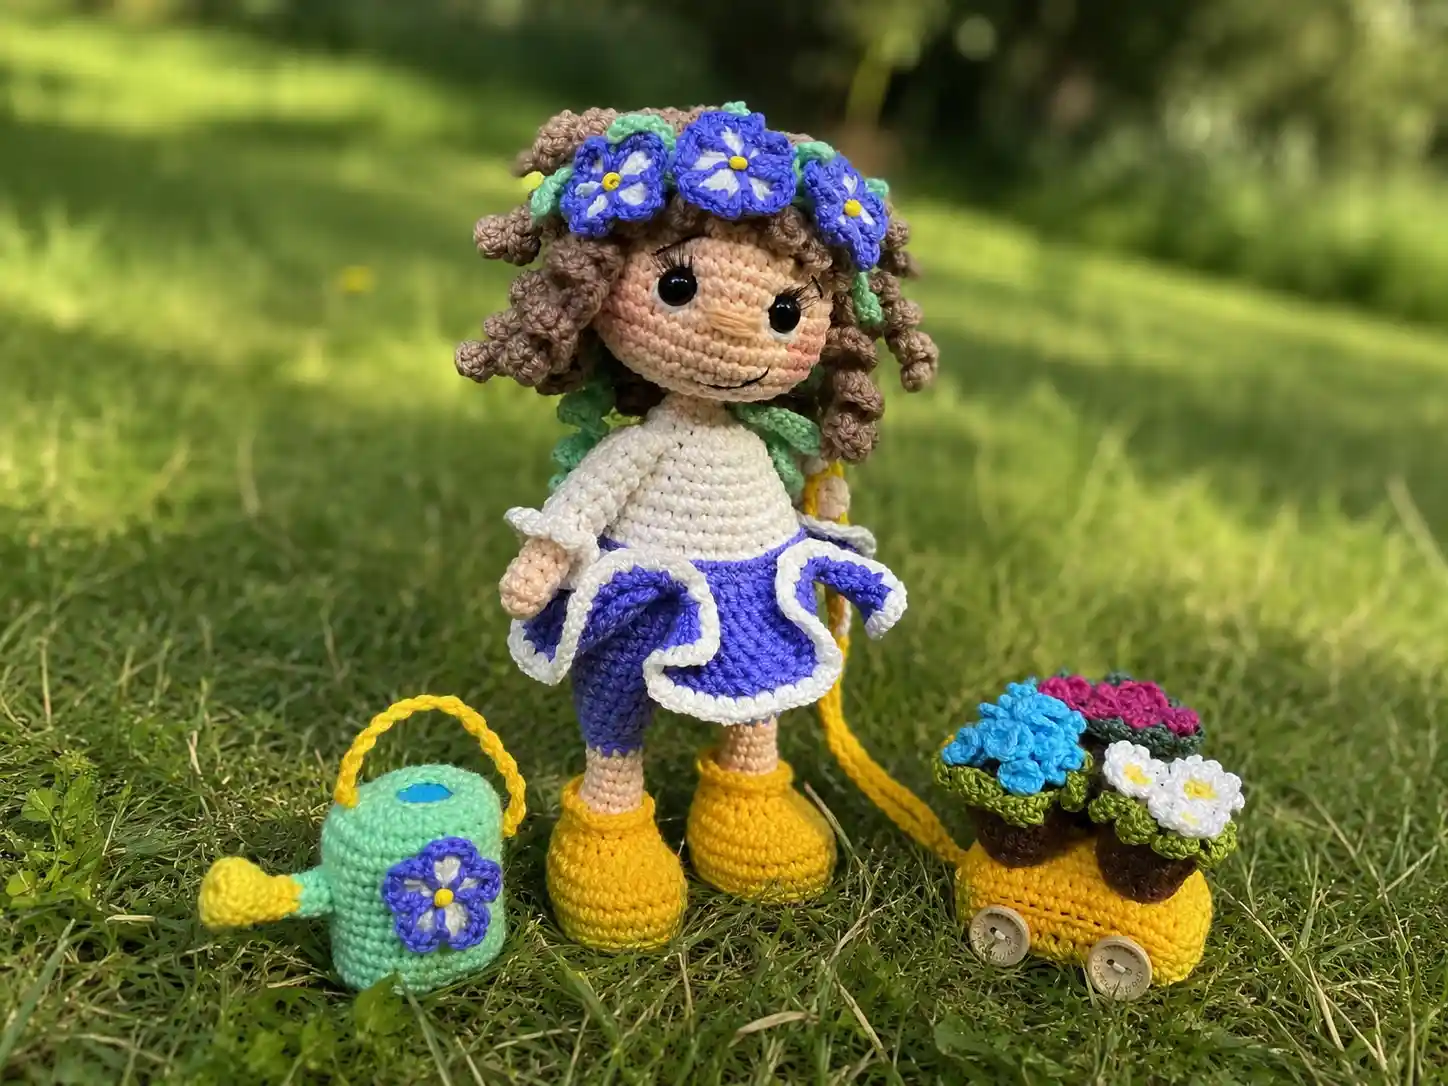
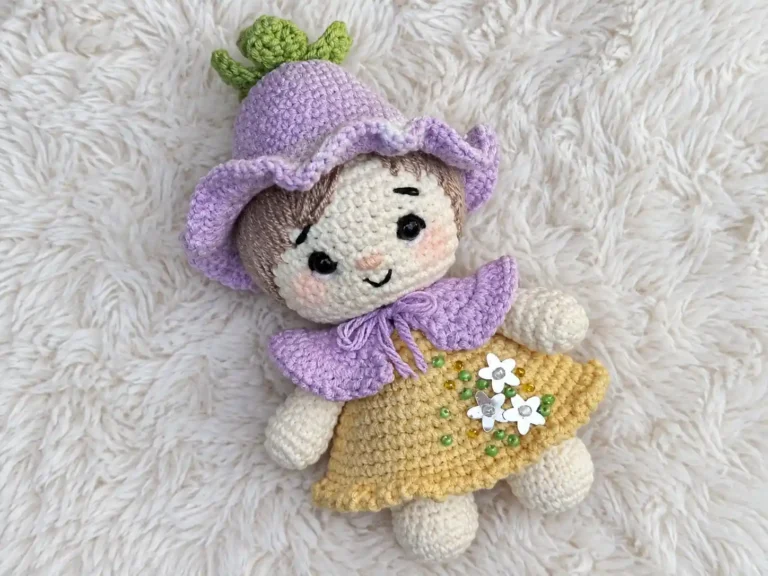
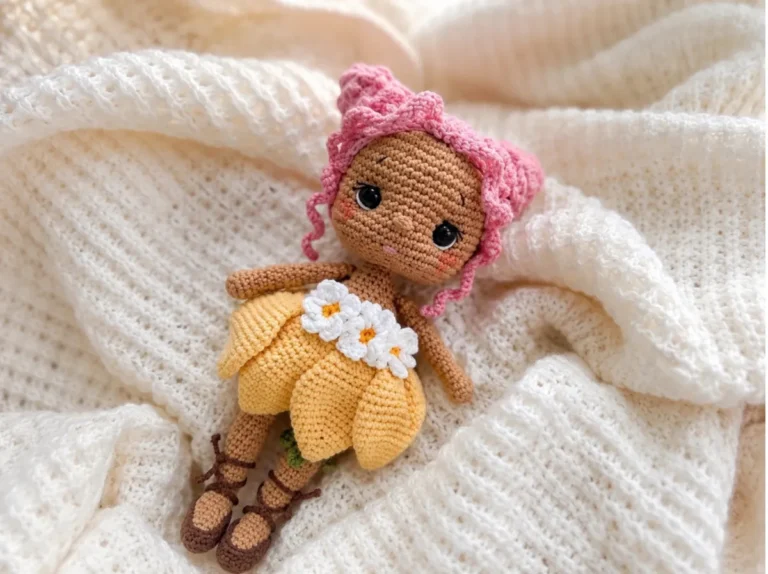
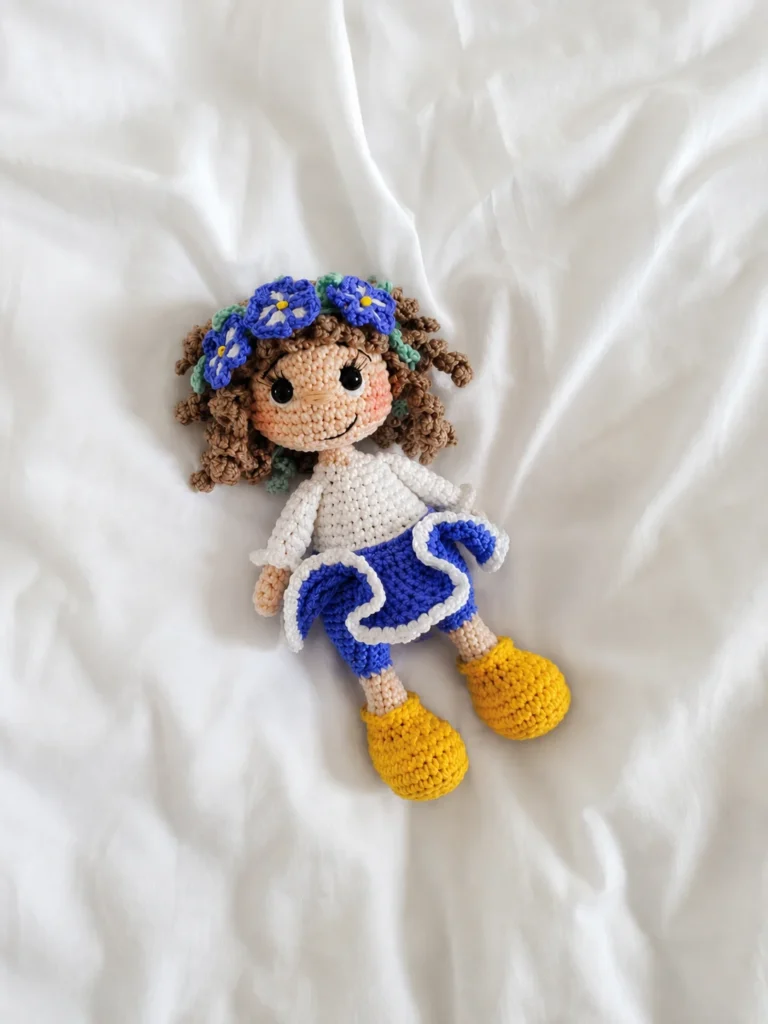
This free flower fairy amigurumi pattern is honestly one of the biggest projects I’ve ever tackled — and I want to be upfront with you about that from the very first sentence. She’s got wire armature legs, a glued face, a wig, a full petal skirt, and — if you want to go all in — her own garden cart full of tiny crocheted flowers. Grab some coffee and settle in, because this one’s a proud, patient labor of love.
🧶 Why You’ll Love This Pattern
- ⭐ Difficulty: INTERMEDIATE-ADVANCED — not a beginner’s first project, and I’m not going to pretend otherwise
- ⏱️ Time: Multiple sessions over several days — this is not a one-evening project
- 🪡 Sewing: Standard — arms, head, and wig all get sewn or glued on
- 🧵 Yarn: DK/Light Worsted (3) weight cotton-acrylic, plus embroidery floss for the garden pieces
- 💰 Yarn needed: The original pattern didn’t specify exact yardage, so here’s my honest estimate — plan on one full skein each of your body, sweater, and skirt colors, plus a small amount of embroidery floss per flower color
What You’ll Need for This Flower Fairy Amigurumi Free Pattern
Here’s everything the original pattern calls for, with beginner-friendly notes so nothing catches you off guard:
- Yarn (body, shoes, sweater): peach for the skin, yellow for the shoes, and white for the sweater — all a DK / Light Worsted (weight 3) cotton-acrylic blend. Any smooth DK-weight cotton blend from Joann, Michaels, or Hobby Lobby will work.
- Yarn (skirt, flowers, headband, hair): purple for the skirt and headband, cappuccino/tan for the hair — same DK weight.
- Embroidery floss: for the tiny flowers and flower pots — brown, white, yellow, green, light blue, and purple. One skein of each goes a long way.
- Fiberfill: Poly-Fil or any polyester stuffing works great here.
- Wire, 1mm thick: floral or armature wire — this gives her legs and arms their pose-ability.
- Thick cardboard or plastic: a cereal box or an old plastic document folder is perfect for the shoe soles and cart base.
- Half-beads (0.8cm) for eyes, false eyelashes, white felt, yellow beads, black thread, buttons: for her face and the cart wheels.
- Masking tape or medical tape, plus glue: for securing the wire and gluing the face details.
- Hooks: a fine 1.25mm and 1.5mm steel hook — much smaller than my usual chunky-yarn hooks, but they give the tiny flowers their delicate detail.
A quick safety note: because this fairy uses glued beads, wire, and small loose parts instead of standard locking safety eyes, she’s best kept as a display piece rather than a hands-on toy for very young children. The U.S. Consumer Product Safety Commission has good general guidance on small parts and choking hazards if you want to double-check.
Abbreviations Used in This Pattern
| Abbreviation | What It Means |
|---|---|
| mr | magic ring — an adjustable loop that closes tight with no hole |
| sc | single crochet — your basic amigurumi stitch |
| inc | increase — 2 single crochets in the same stitch |
| dec | decrease — worked as an invisible decrease for a smooth, gap-free finish |
| ch | chain — your starting foundation stitch |
| sl st | slip stitch — a quick joining stitch |
| hdc | half double crochet — a little taller than sc |
| dc | double crochet — taller still, used for petals and leaves |
| tr | treble crochet — the tallest stitch here, used in the leaves |
| BLO | back loop only — working into just the back loop for texture or a seam line |
| FLO | front loop only — working into just the front loop |
Beginner Tips for This Flower Fairy Amigurumi Pattern
- Never done a magic ring? No worries — our magic ring tutorial walks you through it in under two minutes, and you’ll use it constantly here.
- This pattern uses a LOT of invisible decreases. If you haven’t tried one, our invisible decrease guide makes it click fast.
- Between the wire, the beads, and the sewing, this is not a “finish tonight” project. Do the head and body one session, the arms and wig another, the face and garden pieces whenever you’re feeling patient. Our stuffing guide and sewing guide will help with the hands-on parts.
The Pattern
Head (make 1)
Peach yarn, starting in a magic ring.
Row 1: 6 sc in mr (6)
Row 2: 6 inc (12)
Row 3: (1 sc, inc) x 6 (18)
Row 4: (2 sc, inc) x 6 (24)
Row 5: (3 sc, inc) x 6 (30)
Row 6: (4 sc, inc) x 6 (36)
Row 7: (5 sc, inc) x 6 (42)
Rows 8-13: 42 sc (6 rows) (42)
Row 14: (5 sc, dec) x 6 (36)
Row 15: (4 sc, dec) x 6 (30)
Row 16: (3 sc, dec) x 6 (24)
Row 17: (2 sc, dec) x 6 (18)
Row 18: (1 sc, dec) x 6 (12)
Row 19: 6 dec (6)
Pop a stitch marker in after Row 2 so you never lose your place. Stuff after Row 19, cut the yarn, and close up that last little opening with your yarn needle.
Shoes + Body (make 1)
This piece changes color four times (yellow, peach, purple, white) and includes the wire legs, so take it slow.
Row 1: Ch 6. From 2nd ch: 4 sc, 3 sc in one stitch, then along opposite side: 3 sc, 2 sc in one stitch (12)
Row 2: inc, 3 sc, 3 inc, 3 sc, 2 inc (18)
Row 3: sc, inc, 3 sc, (1 sc, inc) x 3, 3 sc, (1 sc, inc) x 2 (24)
Row 4: 24 sc in BLO (24)
Rows 5-7: 24 sc (3 rows) (24)
Row 8: 5 sc, 7 dec, 5 sc (17)
Row 9: 4 sc, 5 dec, 3 sc (12)
Row 10: (1 sc, dec) x 4 in BLO [peach] (8)
Rows 11-15: 8 sc (5 rows) (8)
Row 16: 8 sc [purple] (8)
Row 17: (3 sc, inc) x 2 (10)
Row 18: 10 sc (10)
Row 19: (4 sc, inc) x 2 (12)
Row 20: 12 sc (12)
Row 21: (5 sc, inc) x 2 (14)
Row 22: (6 sc, inc) x 2 (16)
Row 23: 16 sc along one leg, 3 sc along chain, 16 sc along second leg, 3 sc in remaining chain loops (38)
Rows 24-28: 38 sc (5 rows) (38)
Row 29: (3 sc, dec) x 6, 8 sc (32)
Row 30: 32 sc [white] (32)
Row 31: 32 sc in BLO (32)
Row 32: (2 sc, dec) x 8 (24)
Rows 33-34: 24 sc (2 rows) (24)
Row 35: (2 sc, dec) x 6 (18)
Rows 36-37: 18 sc (2 rows) (18)
Row 38: (1 sc, dec) x 6 (12)
Row 39: 12 sc (12)
Row 40: 6 dec (6)
Rows 41-43: 6 sc (3 rows) [peach] (6)
Shoe 1: After Row 3, cut an insole from cardboard. After Row 9, insert it. Cut a 25cm wire, loop one end to match the insole length, wrap the ends together with masking tape, insert into the shoe, and stuff. Don’t cut the yellow yarn at the Row 10 color change — use it to crochet around the remaining front loops: (1 sc, inc) x 4, then fasten off.
Shoe 2: Cut the peach yarn at Row 16. Cut the working yarn after Row 22 on the first leg; on the second leg, keep it live. Attach yellow yarn and sl st around the bottom using the remaining front loops of Row 4 (wire facing you). Stuff.
Joining the legs (Row 23): Sc to the middle of the leg’s side, ch 3, and sl st into the second leg so the shoe toes point straight ahead. Stuff gradually as you go, and wrap both wire ends together with tape. Cut purple after Row 30 and white after Row 41.
🎉 Okay, you just built a whole body with wire legs inside it — that’s genuinely impressive. Everything from here is smaller pieces. Take a breather!
Petal Skirt (make 1)
Attach purple yarn at the back and sc all the way around the front loops of Row 31 — 32 sc, wire facing you, yarn left uncut. Then work 4 petals across the body stitches:
- Ch 5, from the 2nd ch, pull up a loop through 4 chain stitches (unworked), then pull up 5 more loops from that same body stitch — 6 loops on the hook. Draw yarn through 2 loops at a time, 5 times.
- Ch 1, from the 2nd loop, pull up a loop through each stitch 5 times, then a 6th loop from the next body stitch. Draw through 2 loops at a time, 6 times.
- From the 2nd loop, pull up a loop through each stitch 6 times, then a 7th from the next body stitch. Draw through 2 at a time, 7 times.
- Repeat step 3, but pull the 7th loop from the same body stitch. Repeat steps 3-4 two more times.
- Repeat step 3 once, pulling from the next body stitch, then repeat this step once more.
- From the 2nd loop, work 6 sc, sl st into the stitch the previous row started from, then sl st into the next body stitch. Repeat all of steps 1-6 three more times for 4 total petals.
Attach purple between the white/purple color line and sl st all the way around. For the edging, split white yarn into two strands and work 3 sc into each petal stitch with your 1.25mm hook.
Arms (make 2)
Peach then white yarn, starting in a magic ring.
Row 1: 6 sc in mr (6)
Rows 2-4: 6 sc (3 rows) (6)
Row 5: (1 sc, inc) x 3 [white] (9)
Row 6: Sleeve ruffle: ch 3, turn, sl st BLO into starting stitch, (sl st next front loop, ch 3, sl st same stitch) x 8 (9)
Row 7: 9 sc into remaining unworked front loops of Row 5 (9)
Rows 8-13: 9 sc (6 rows) (9)
Cut peach at Row 5. Cut a 6cm wire, loop and tape one end, insert into the arm, and stuff. Fold the arm in half and sc both sides together.
Wig (make 1)
Cappuccino yarn, magic ring, all base rows in BLO.
Row 1: 6 sc in mr (6)
Row 2: 6 inc (12)
Row 3: (1 sc, inc) x 6 (18)
Row 4: (2 sc, inc) x 6 (24)
Row 5: (3 sc, inc) x 6 (30)
Row 6: (4 sc, inc) x 6 (36)
Row 7: (5 sc, inc) x 6 (42)
Rows 8-9: 42 sc (2 rows), ch 1, turn (42)
Row 10 — the curls (fiddly, but it’s just one little chain-and-shell combo repeated over and over):
- Main curls: ch 15, from 2nd ch: (2 sc in one st) x 14, sl st into the starting stitch, 2 sl st. Repeat once more.
- Bangs: ch 4, from 2nd ch: 3 sc, sl st into starting stitch, 2 sl st. Repeat 6 times.
- Second tier: attach yarn opposite the bangs, skip one row, then work the main-curl combo 10 times.
- Third tier: move up two rows (to Row 5) and work the combo 6 times.
- Fourth tier: move down 2 rows and work the combo 5 times.
Cut yarn, leaving a long tail in case you’d rather sew the wig on instead of gluing it.
Headband (make 1)
Purple yarn, ch 101.
Row 1: From the 2nd ch, 2 sc in each stitch 40 times, sl st. Then crochet leaves: ch 6, from 2nd ch: (sl st, sc, hdc, dc, tr, sl st into next foundation chain stitch, 3 sl st) x 4. Then 2 sc in each stitch to the end. (132)
Flowers for Headband
White (split into 2 strands) then purple, magic ring.
Row 1 [white]: into mr: (ch 2, 3 dc, ch 2, sl st) x 5. Pull the ring slightly. (25)
Row 2 [purple]: insert hook into the center of the mr: (ch 2, 3 sc along the petal, ch 2, sl st through the magic ring) x 5. (40)
Cut yarn and pull the mr fully tight.
🎉 Look at that — you’re building her a whole outfit and hairstyle from scratch. The garden set below is optional, so if you’d rather stop here and move straight to assembly, that’s a totally valid choice.
Watering Can (make 1) — optional garden accessory
Purple yarn, ch 5.
Row 1: From 2nd ch: 3 sc, 3 sc in one st, along opposite side: 3 sc, 3 sc in one st (12)
Row 2: 3 sc, 3 inc, 3 sc, 3 inc (18)
Row 3: 3 sc, (1 sc, inc) x 3, 3 sc, (1 sc, inc) x 3 (24)
Row 4: 24 sc in BLO (24)
Rows 5-15: 24 sc (11 rows) (24)
Row 16: 6 sc, 6 dec, 6 sc (18)
Cut a cardboard bottom after Row 4 and insert it. Stuff when finished, then glue a felt circle over the top opening. For the handle, twist three strands of yarn into a cord and attach it to the can.
Watering Can Spout (make 1)
Yellow then purple, magic ring.
Row 1: 6 sc in mr (6)
Row 2: (1 sc, inc) x 3 (9)
Row 3: 9 sc in BLO (9)
Row 4: 9 sc (9)
Row 5: (1 sc, dec) x 3 (6)
Rows 6-8: 6 sc (3 rows) (6)
Rows 9-11: 6 sc (3 rows) [purple] (6)
Row 12: 3 sc (3)
Flower Pot (optional accessory)
Brown embroidery floss (6 strands), magic ring.
Row 1: 6 sc in mr (6)
Row 2: 6 inc (12)
Row 3: (1 sc, inc) x 6 (18)
Row 4: 18 sc in BLO (18)
Rows 5-7: 18 sc (3 rows) — for purple daisies, work 4 rows instead (18)
Row 8: (2 sc, inc) x 6 (24)
Rows 9-12: 24 sc (4 rows) — for purple daisies, work 5 rows instead (24)
White Daisy
Yellow center, white 6-strand floss petals, magic ring.
Row 1 [yellow]: 9 sc in mr (9)
Row 2 [white]: (sl st, ch 5, sl st into the same starting stitch) x 9 (63)
Daisy Leaves
Green floss, magic ring.
Row 1: 6 sc in mr (6)
Row 2: 6 inc (12)
Row 3: (1 sc, inc) x 6 (18)
Row 4: (2 sc, inc) x 6 (24)
Row 5: 24 sc (24)
Row 6: (sl st, ch 6, from 2nd ch: sl st, sc, hdc, 2 dc, sl st into circle) x 9 (63)
Glue into the pot, right side facing out.
Hydrangea
Light blue/purple floss, ch 10.
Row 1: from 2nd ch: (sl st, ch 8, from 2nd ch: 3 sc in one stitch x 7, sl st into starting stitch) x 10, then sl st into the first curl. (230)
Hydrangea Leaves
Green floss, magic ring.
Row 1: 6 sc in mr (6)
Row 2: 6 inc (12)
Row 3: (1 sc, inc) x 6 (18)
Row 4: (2 sc, inc) x 6 (24)
Row 5: 24 sc (24)
Row 6: into one stitch: (sl st, ch 3, 3 tr, ch 3, sl st), then 2 sl st. Repeat 8 times total. (72)
Insert the hydrangea bloom into the center of the mr and secure.
Purple Daisies
Brown center, purple floss petals, magic ring. Leaves are worked exactly like the White Daisy leaves above.
Row 1 [brown]: 9 sc in mr (9)
Row 2 [purple]: (sl st, ch 6, sl st into starting stitch) x 9 (72)
Cart (make 1)
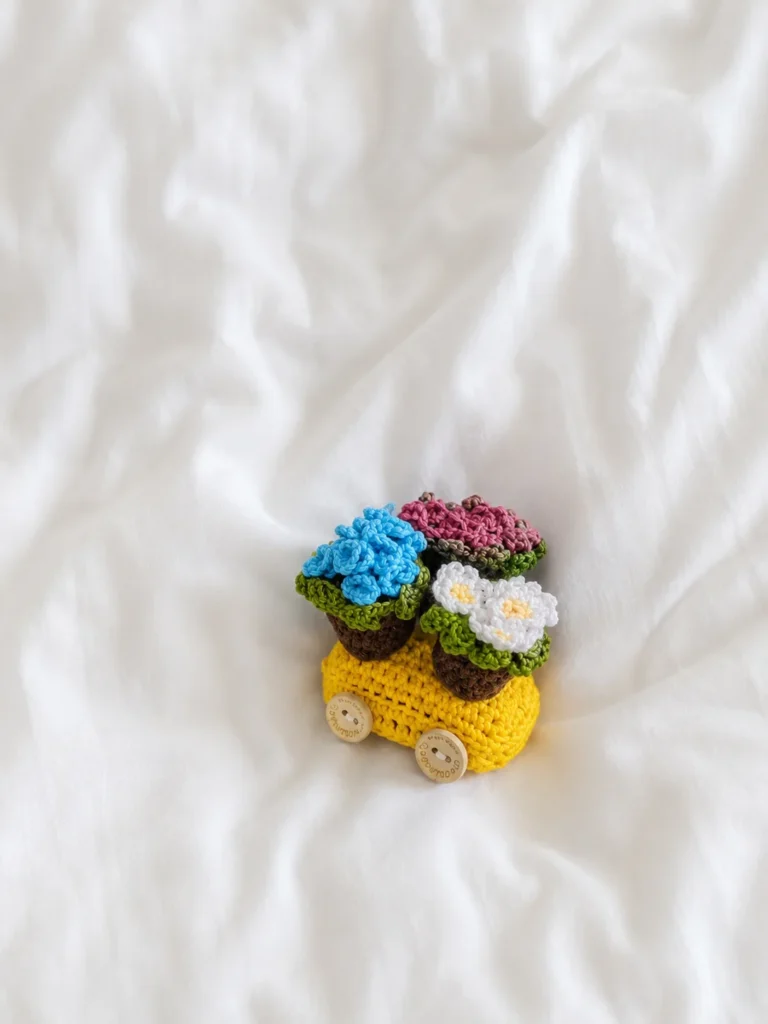
Yellow yarn, ch 13. The base works in turned rows first, then transitions to rounds for the walls.
Row 1: From 2nd ch: 12 sc (12)
Rows 2-11: ch 1, turn, 12 sc (10 rows) (12)
Row 12: 44 sc around all 4 sides of the base (12+10+12+10) (44)
Row 13: 44 sc in BLO (44)
Row 14: 44 sc (44)
Row 15: 12 sc in BLO (back wall only) (12)
Rows 16-25: ch 1, turn, 12 sc (10 rows) (12)
Cut a rounded plastic bottom to insert into the base. Stuff lightly while sewing the top closed. Make the handle from a ch 70, tying it on with a knot.
Assembling Your Flower Fairy Together
- Face sculpting: Thread a needle in from the bottom of the head, out at Row 10, skip 1 sc, back in, skip 6 sc, out again, skip 1 sc once more, back in, and out at the bottom. Tie both ends to create the eye-socket indent.
- Nose: from the bottom of the head, bring a thread out one row below the eye line, dead center, and stitch a tiny nose across 3 sc.
- Eyes: glue felt backings on, then glue the half-beads and eyelashes onto the felt.
- Attach the head: loop the neck wire, slide the head on, and sew it around the neck.
- Headband flowers: sew a yellow bead into the center of each two-tone flower, then glue or sew the flowers onto the headband.
- Arms: sew to the body around Rows 36-37 (the white section).
- Hair: glue or sew the wig onto the head.
- Headband: tie around the head at the back — or use it as a skirt belt instead, if you’d rather.
- Cart and garden: glue or sew the pots inside the cart, and sew on the button wheels.
Finish with thin embroidered eyebrows and a mouth in black thread, and a little blush on the cheeks with cosmetic blush or pastel chalk.
You Did It!
Seriously — look at her. A whole articulated fairy with a wig, a petal skirt, and her own tiny garden cart. This was not an easy pattern, and if you finished it, you should feel genuinely proud, not just cute-project proud. Tag AmiLoops when you share her — I want to see every single flower and every single stubborn wire leg. 🧶
FAQ
Is this flower fairy amigurumi pattern suitable for beginners?
No, this pattern is rated as intermediate to advanced because it requires working with wire armatures, small steel hooks, complex color changes, and delicate embroidery floss details.
What size crochet hook is required for this pattern?
This pattern uses fine 1.25mm and 1.5mm steel crochet hooks to achieve tight stitches and precise details on the fairy’s accessories and flowers.
Can this amigurumi fairy be used as a toy for young children?
It is highly recommended to use this fairy as a display piece only, because it contains small parts like glued-on beads, false eyelashes, and internal structural wire which pose a choking hazard.