Pikachu Amigurumi Pattern Free — Easy Crochet Plush
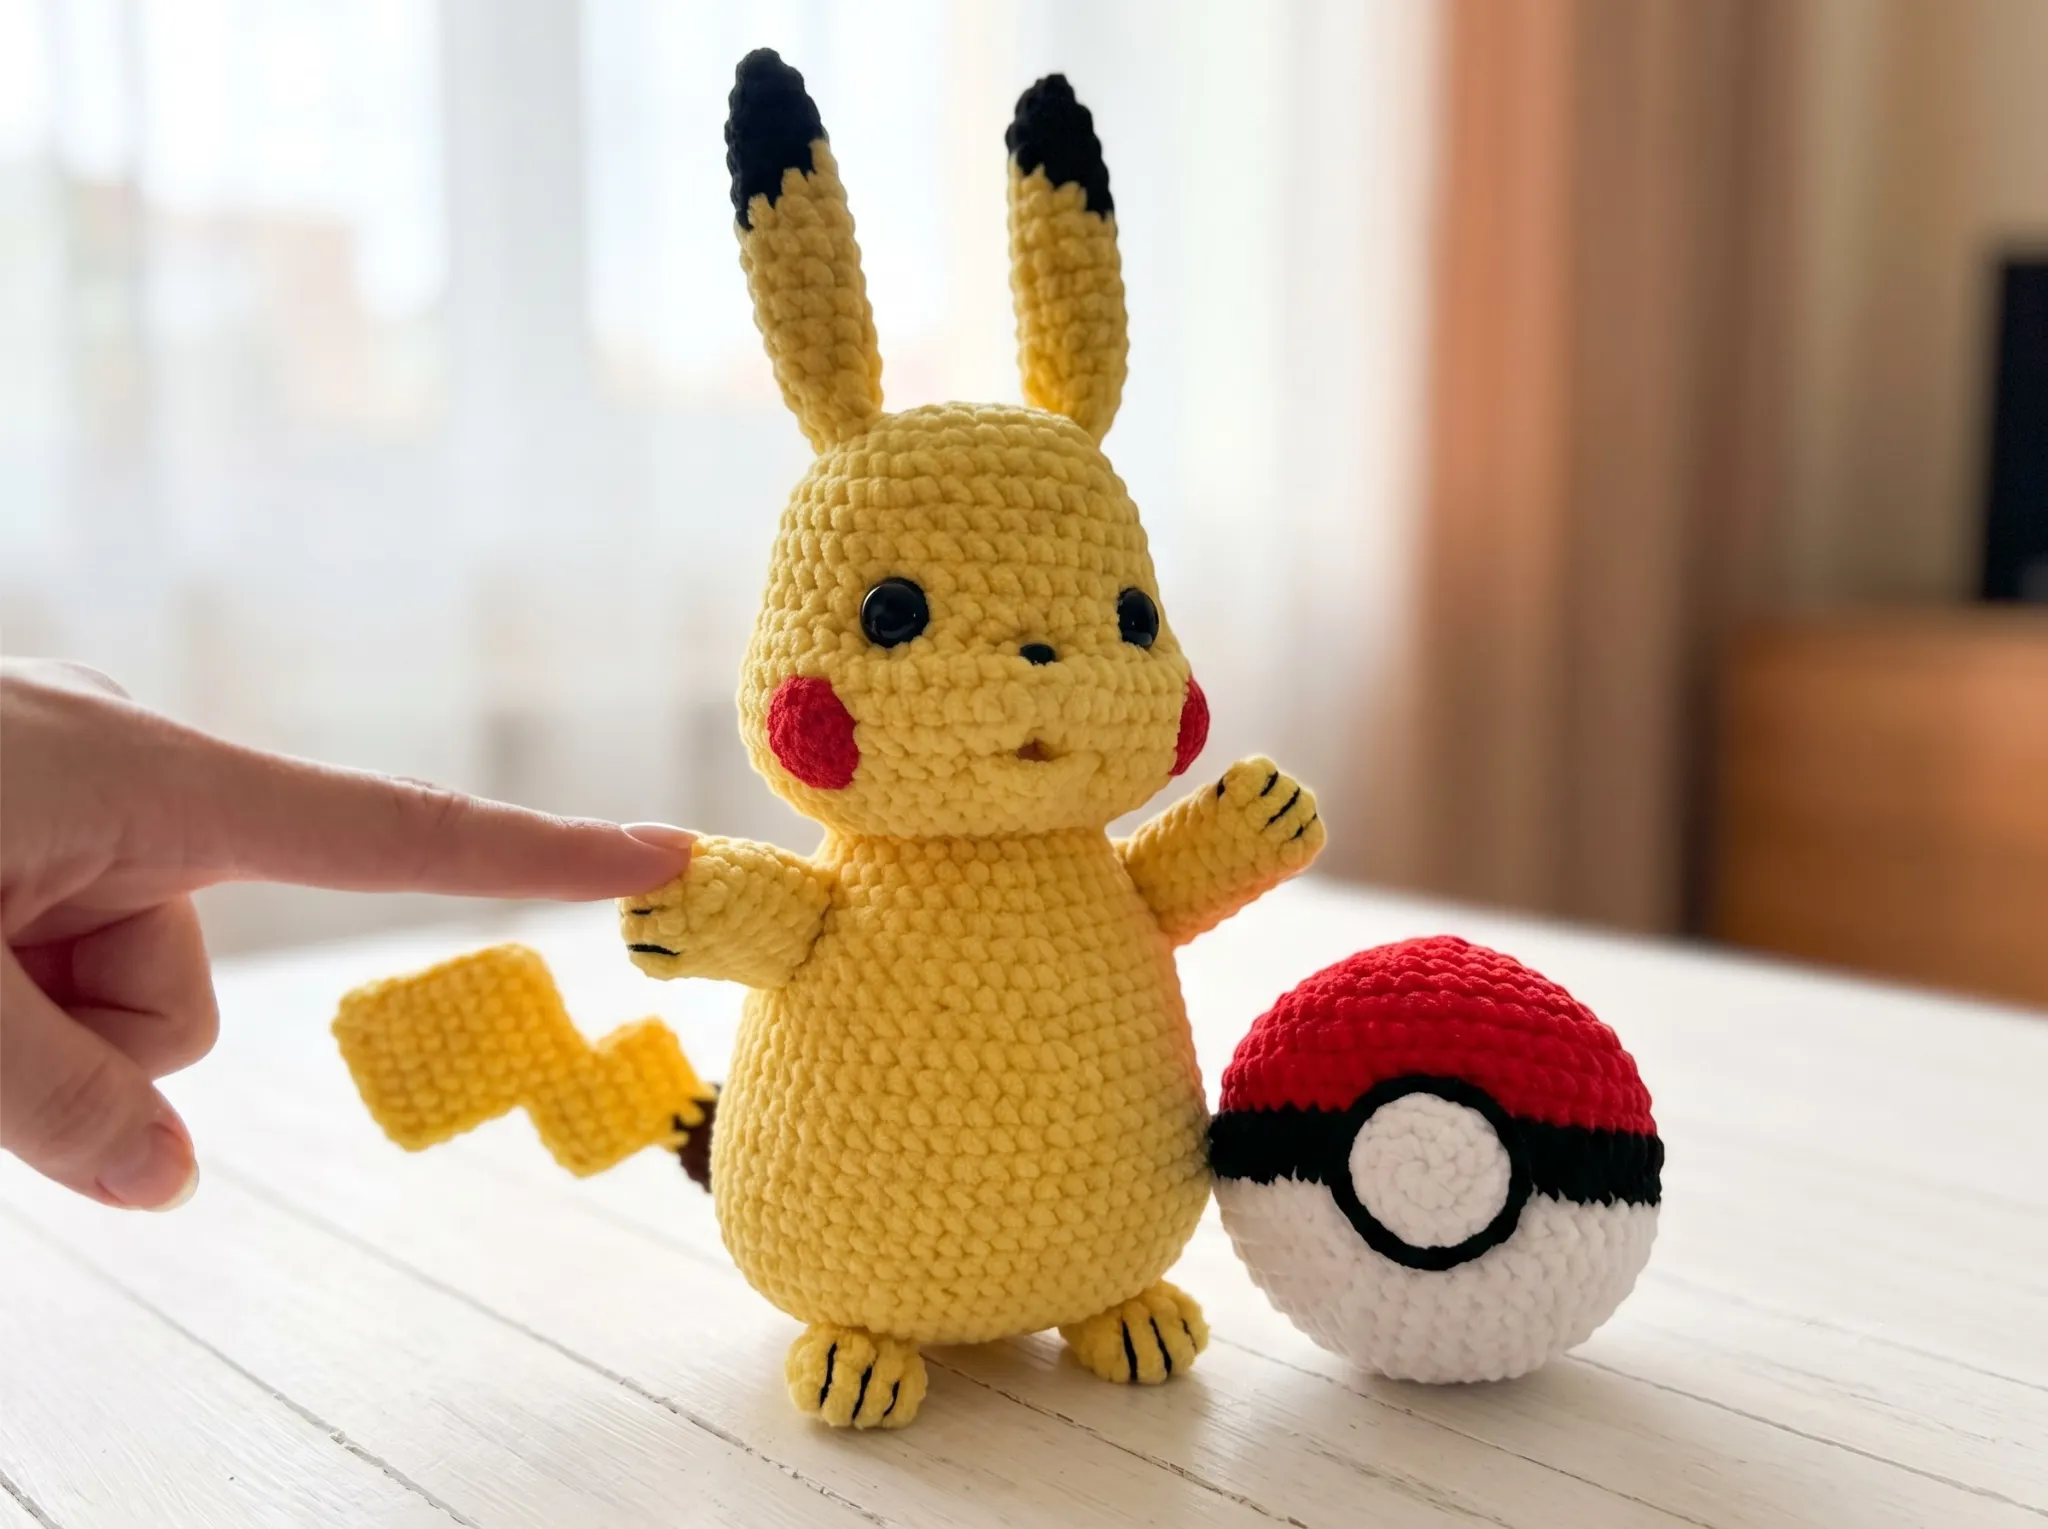
Looking for a Pikachu amigurumi pattern free of charge and actually doable? You just found it. This free Pikachu amigurumi pattern makes a 10.2 in plush — with his own crocheted Pokeball — using mostly simple single crochet. Honestly? The color changes sound scarier than they are. If I can do it, you definitely can. Grab your yellow yarn and let’s make the most famous Pokemon of all time.
🧶 Why You’ll Love This Pattern
- ⭐ Difficulty: EASY-INTERMEDIATE — mostly single crochet, with a few color changes (I’ll walk you through them)
- ⏱️ Time: 6-10 hours — a cozy weekend buddy, not a one-evening sprint. I’m being honest with you here.
- 🪡 Sewing: Standard — ears, paws, cheeks, and tail. Yes, I know. Pikachu is worth it.
- 🧵 Yarn: Worsted acrylic — yellow, black, red, and white
- 💰 Yarn needed: About 2 skeins of yellow, plus scraps of the rest
Pikachu Amigurumi Pattern Free: Materials You’ll Need
Here’s the thing — you probably have most of this already. And if you don’t, one quick trip to Joann, Michaels, or Hobby Lobby covers everything.
- Yarn: Worsted (4) weight acrylic in yellow (the star of the show), plus smaller amounts of black, red, and white. Any smooth acrylic works — don’t overthink it.
- Hook: 4.0mm (approx. US G/6), or whatever size gives you a nice tight fabric with no stuffing peeking through
- Safety eyes: around 12mm, with backings
- A small glue-on nose (or embroider one with black yarn)
- Polyfill stuffing — one bag is plenty
- Stitch marker — non-negotiable for working in continuous rounds
- Tapestry needle and sewing pins
- A thin piece of plastic for the tail — an old gift card or a food container lid works perfectly
- Craft glue for the nose
One quick safety note: if this Pikachu is headed to a child under three, skip the plastic eyes and nose and embroider them with yarn instead. The U.S. Consumer Product Safety Commission has toy safety guidance worth knowing if you make toys for little ones.
Abbreviations — In Plain English, I Promise
This pattern uses US crochet terms. If you’re brand new, here’s every abbreviation you’ll meet:
| Abbreviation | What It Means |
|---|---|
| mr | magic ring — an adjustable loop start that closes up tight with no hole in the middle |
| ch | chain — yarn over, pull through. The most basic move there is. |
| sc | single crochet — the foundation stitch of all amigurumi |
| inc | increase — work 2 single crochets into the same stitch |
| dec | invisible decrease — combine 2 stitches into 1 using the front loops only, so there’s no gap |
| sl st | slip stitch — used to finish pieces neatly |
| × | repeat the instructions that many times |
Beginner Tips Before You Start
1. The color changes are the “hardest” part — and they’re not hard. Pikachu’s back stripes are made by switching between yellow and black mid-round. The trick is to switch colors on the last pull-through of the stitch before the new color starts. Our guide to changing colors seamlessly shows exactly how, with photos. Read it once and you’re set.
2. Use the invisible decrease everywhere this pattern says “dec.” It keeps the fabric smooth with zero gaps for stuffing to peek through. Never done one? Our invisible decrease tutorial takes about two minutes to learn.
3. Pin before you sew. Always. There are a few parts to attach at the end, and pinning them in place first is the difference between “wow” and “why is one ear higher than the other.” Our guide to sewing amigurumi parts makes it painless — I promise.
Pikachu Amigurumi Pattern Free: Full Instructions
Work in continuous rounds unless a part says otherwise. Keep that stitch marker moving. You’ve got this.
Head-Body (make 1)
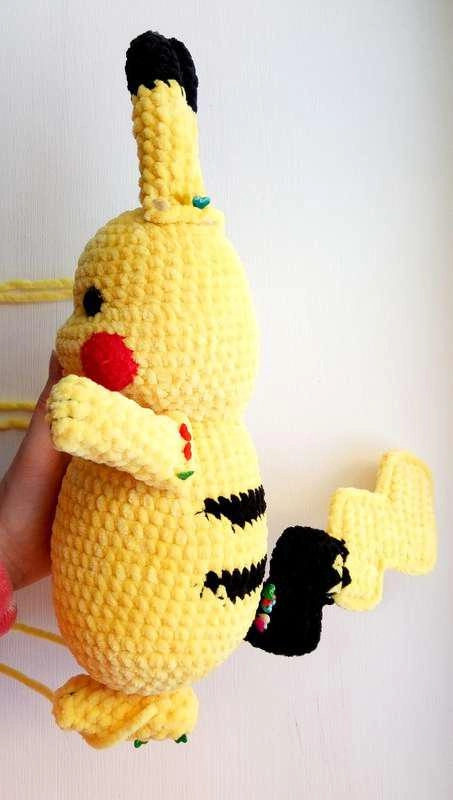
Yarn: yellow, black
Start: chain of 7 ch
The head and body are worked as one continuous piece — which means less sewing later. You’re welcome.
Row 1: From the 2nd ch from the hook: 5 sc, 3 sc in the last ch. Along the other side of the chain: 4 sc, inc. Place a marker at the end of the row (14)
Row 2: inc, 4 sc, inc × 3, 4 sc, inc × 2 (20)
Row 3: 1 sc, inc, 4 sc, (1 sc, inc) × 3, 4 sc, (1 sc, inc) × 2 (26)
Row 4: 2 sc, inc, 4 sc, (2 sc, inc) × 3, 6 sc, (inc, 1 sc) × 2 (32)
Row 5: 2 sc, inc, 7 sc, inc, (3 sc, inc) × 2, 7 sc, inc, 3 sc, inc, 1 sc (38)
Rows 6-10: 38 sc – 5 rows (38)
Row 11: 18 sc, inc × 4, 2 sc, inc, 2 sc, inc × 2, 2 sc, inc, 2 sc, inc × 4 (50)
Rows 12-14: 50 sc – 3 rows (50)
Row 15: (dec, 17 sc, dec, 4 sc) × 2 (46)
Row 16: 1 sc, dec, 14 sc, dec, 5 sc, dec, 14 sc, dec, 4 sc (42)
Row 17: 2 sc, dec, 9 sc, dec, 7 sc, dec, 11 sc, dec, 5 sc (38)
Row 18: 3 sc, dec, 6 sc, dec, (8 sc, dec) × 2, 5 sc (34)
Row 19: 18 sc, dec, (1 sc, dec) × 3, 5 sc (30)
Row 20: 13 sc, dec, (1 sc, dec) × 5 (24)
🎉 That’s the whole head done! Time to add some stuffing — squeeze it in there before the neck gets narrow. The eyes go in between rows 9 and 10 later, so don’t close anything up too tight yet. Now, on to the body — it’s the same simple stitches, just bigger.
Row 21: 15 sc, inc × 8, 1 sc (32)
Row 22: 32 sc (32)
Row 23: (7 sc, inc) × 4 (36)
Row 24: (8 sc, inc) × 4 (40)
Row 25: 40 sc (40)
Row 26: (9 sc, inc) × 4 (44)
Row 27: 44 sc (44)
Row 28: 2 sc [yellow]. Change color. Insert hook into the next st, pull up a loop – two yellow loops on the hook. Pick up black yarn and pull through two yellow loops. This is the 3rd sc [black]. Work 7 more sc, inc, 6 sc [yellow]. Cut the yellow yarn, leaving 2-2.3 in. Change color. Insert hook into the next st and pull up a black loop – two black loops on the hook. Pull yellow yarn through them. You got the 7th sc [black]. Work 3 more sc, inc. Then according to the pattern: (10 sc, inc) × 2 [yellow] (48)
Row 29: 2 sc [yellow]. Change to black in the 2nd sc. Cut the yellow. 18 sc [black], 28 sc [yellow]. Change to yellow in the 18th sc. Cut the black (48)
Okay, deep breath — rows 28 and 29 are the trickiest part of the entire pattern, and you just did them. Everything from here is easier. See? Not so scary, right?
Row 30: (11 sc, inc) × 4 (52)
Row 31: 52 sc (52)
Row 32: (25 sc, inc) × 2 (54)
Row 33: 4 sc [yellow], 17 sc [black]. Change to black in the 4th sc. 33 sc [yellow]. Change to yellow in the 17th sc (54)
Row 34: 3 sc [yellow], 19 sc [black]. Change to black in the 3rd sc. 32 sc [yellow]. Change to yellow in the 19th black sc (54)
Rows 35-38: 54 sc – 4 rows (54)
Row 40: dec, 24 sc, dec, 26 sc (52)
Row 41: 1 sc, dec, 20 sc, dec, 2 sc, dec, 20 sc, dec, 1 sc (48)
Row 42: 1 sc, dec, 18 sc, dec, 2 sc, dec, 18 sc, dec, 1 sc (44)
Row 43: 1 sc, dec, 17 sc, dec, 1 sc, dec, 17 sc, dec (40)
Row 44: 1 sc, dec, 15 sc, dec, 1 sc, dec, 15 sc, dec (36)
Row 45: 1 sc, dec, 13 sc, dec, 1 sc, dec, 13 sc, dec (32)
Row 46: 1 sc, dec, 11 sc, dec, 1 sc, dec, 11 sc, dec. Finish with sl st (28)
Stuff the body firmly as you go — squishy is the goal, lumpy is not.
🎉 You’re through the biggest piece! Everything from here is small, quick parts — most take 15 minutes or less. Put on a movie and cruise through them.
Cheeks (make 2)
Yarn: red
Start: 6 sc in mr or ch 2, into the 2nd ch from hook: 6 sc
Row 1: 6 sc in mr or ch 2, into the 2nd ch from hook: 6 sc (6)
Row 2: inc × 6 (12)
Row 3: (1 sc, inc) × 6. Finish with sl st (18)
Row 4: (2 sc, inc) × 6 (24)
Row 5: (3 sc, inc) × 6. Finish with sl st (30)
Mouth (make 1)
Start: ch 2
Row 1: 2 ch. In the 2nd ch from hook: 4 sc. ch 1 to turn (4)
Row 2: Turn work, crochet along the other side of stitches: 4 sc. ch 1, pull loop through (4)
Two rows. Done. Okay, this part is so satisfying.
Ears — Option One (make 2)
Yarn: black, yellow
Start: 3 sc in mr or ch 2, into the 2nd ch from hook: 3 sc
There are two ear versions — this one uses a clean, straight color change. Pick whichever sounds more fun.
Row 1: 3 sc in mr or ch 2, into the 2nd ch from hook: 3 sc [black] (3)
Row 2: inc × 3 [black] (6)
Row 3: (1 sc, inc) × 3 [black] (9)
Rows 4-6: 9 sc – 3 rows [black] (9)
Row 7: 9 sc [yellow] (9)
Row 8: 3 sc, inc, 4 sc, inc [yellow] (11)
Rows 9-15: 11 sc – 7 rows [yellow] (11)
Ears — Option Two (make 2)
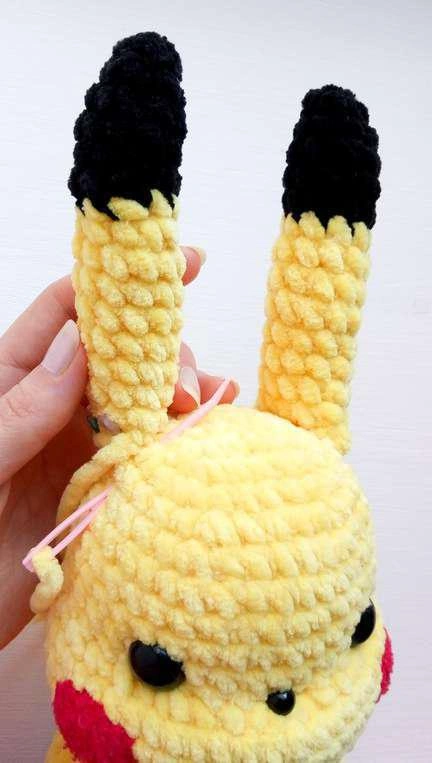
Yarn: black, yellow
Start: 3 sc in mr or ch 2, into the 2nd ch from hook: 3 sc
This version gives the black tip a diagonal edge — a little more color-change practice, a little more Pikachu-accurate.
Row 1: 3 sc in mr [black] (3)
Row 2: inc × 3 [black] (6)
Row 3: (1 sc, inc) × 3 [black] (9)
Row 4: 4 sc [yellow], 5 sc [black] (9)
Row 5: 5 sc [yellow], 3 sc [black], 1 sc [yellow] (9)
Row 6: 6 sc [yellow], 1 sc [black], 1 sc, inc [yellow] (10)
Row 7: 4 sc, inc, 5 sc [yellow] (11)
Row 8: 11 sc [yellow] (11)
Row 9: 4 sc, dec, 5 sc [yellow] (10)
Rows 10-14: 10 sc – 5 rows [yellow] (10)
Row 15: 1 sc. Do not finish the row [yellow] (1)
Upper Paws (make 2)
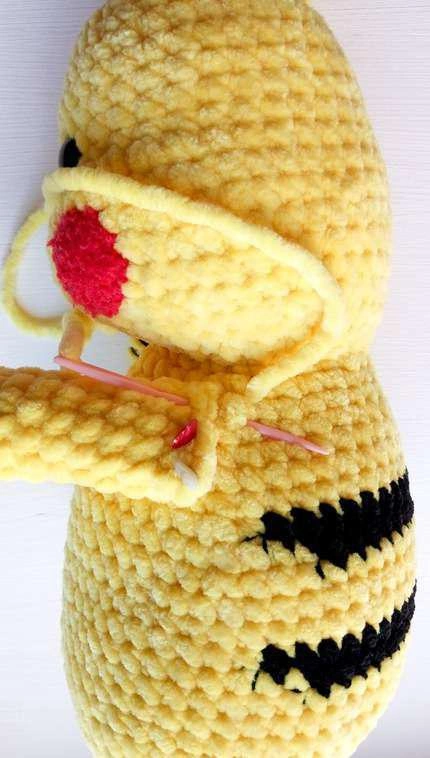
Yarn: yellow
Start: 5 ch
Row 1: From the 2nd ch from the hook: 3 sc, 3 sc in the last ch, 2 sc, inc. Place marker (10)
Rows 2-3: 10 sc – 2 rows (10)
Row 4: 2 sc, inc, 7 sc (11)
Rows 5-9: 11 sc – 5 rows (11)
Row 10: 2 sc. Do not finish the row (2)
Lower Paws (make 2)
Yarn: yellow
Start: 5 ch
Row 1: From the 2nd ch from the hook: 3 sc, 3 sc in the last ch, 2 sc, inc. Place marker (10)
Rows 2-9: 10 sc – 8 rows (10)
Row 10: (1 sc, dec) × 3, 1 sc. Finish with sl st (7)
Tail (make 2 halves)
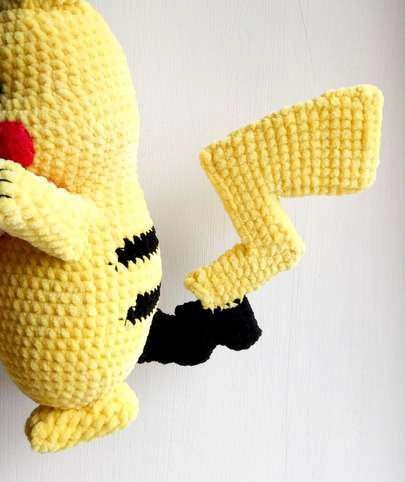
Yarn: yellow, black
Start: 12 ch
The famous lightning bolt! This one is worked flat in turned rows — you’ll make two identical halves and join them around a plastic insert later so the tail actually holds its zigzag shape.
Row 1: From the 2nd ch from the hook: 11 sc. ch 1 to turn (11)
Rows 2-5: 11 sc – 4 rows. ch 1 to turn at end of each row (11)
Row 6: 5 sc. ch 1 to turn (5)
Rows 7-11: 5 sc – 5 rows. ch 1 to turn at end of each row (5)
Row 12: 6 ch. From the 2nd ch from the hook: 6 sc. In the 6th sc change color to yellow. Do not cut the black. Then work straight along the side: 4 sc. ch 1 to turn (10)
Row 13: 10 sc. In the 5th sc change color to black. ch 1 to turn (10)
Row 14: 10 sc. In the 6th sc change to yellow. ch 1 to turn (10)
Row 15: 10 sc. In the 5th sc change to black. ch 1 to turn (10)
Row 16: 2 ch. From the 2nd ch from the hook: 2 sc. Then 3 sc straight along the side. ch 1 to turn (5)
Rows 17-18: 5 sc. ch 1 to turn at end of each row (5)
Pokeball (make 1)
Yarn: red, black, white
Start: 2 ch

The best part? Pikachu comes with his own Pokeball. This piece is worked in joined rounds — finish each round with a slip stitch and chain to join.
Row 1: 2 ch, into the 2nd ch from hook: 6 sc [red]. sl st, ch to join (6)
Row 2: inc × 6 [red]. sl st, ch to join (12)
Row 3: (1 sc, inc) × 6 [red]. sl st, ch to join (18)
Row 4: (2 sc, inc) × 6 [red]. sl st, ch to join (24)
Row 5: (3 sc, inc) × 6 [red]. sl st, ch to join (30)
Row 6: (4 sc, inc) × 6 [red]. sl st, ch to join (36)
Row 7: (5 sc, inc) × 6 [red]. sl st, ch to join (42)
Row 8: (6 sc, inc) × 6 [red]. sl st, ch to join (48)
Row 9: 48 sc [red]. sl st, ch to join (48)
Rows 10-11: 48 sc [black]. sl st, ch to join – 2 rows (48)
Rows 12-14: 48 sc [white]. sl st, ch to join – 3 rows (48)
Row 15: (6 sc, dec) × 6 [white]. sl st, ch to join (42)
Row 16: (5 sc, dec) × 6 [white]. sl st, ch to join (36)
Row 17: (4 sc, dec) × 6 [white]. sl st, ch to join (30)
Row 18: (3 sc, dec) × 6 [white]. sl st, ch to join (24)
Row 19: (2 sc, dec) × 6 [white]. sl st, ch to join (18)
Row 20: (1 sc, dec) × 6 [white]. sl st, ch to join (12)
Row 21: 6 dec [white] (6)
Don’t forget to stuff the Pokeball before you close it up!
Pokeball Button — Black Circle (make 1)
Row 1: 2 ch, into the second from hook: 6 sc (6)
Row 2: inc × 6 (12)
Row 3: (1 sc, inc) × 6 (18)
Row 4: (2 sc, inc) × 6. Finish with sl st (24)
Pokeball Button — White Circle (make 1)
Row 1: 2 ch, into the second from hook: 6 sc (6)
Row 2: inc × 6 (12)
Row 3: (1 sc, inc) × 6. Finish with sl st (18)
Layer the white circle on the black circle, sew both to the center of the Pokeball, and it instantly looks official.
Assembly
Honestly? This part takes patience. Pin everything first, step back, check it from a few angles, and only then start sewing. Here’s the order that works:
- Tail first:
- Cut the plastic to the shape of the tail (slightly smaller than the tail at the edges).
- Make holes in the plastic so that a sewing needle can pass through them.
- Fold the two tail pieces together and crochet around them: where yellow — with yellow yarn, where black — with black. Insert the plastic inside before completely crocheting around.
- Now Pikachu himself:
- Stuff the head, insert the eyes between rows 9 and 10, above the two increases of the 11th row. Put on the backings, melt the posts and press down (adults only for this step, please!).
- Glue the nose in the 11th row between the two increases.
- Sew the ears on in a circle between rows 2 and 6 of the head.
- Sew on the upper paws, leaving one or two rows from the neck.
- Position the lower paws so that Pikachu stands and does not fall. Sew securely.
- Leave one row from the black stripe on the body and secure the tail with pins.
- Sew the tail on in a circle, passing through the holes in the plastic.
Finishing Touches — Bringing That Face to Life
This is where a yellow blob officially becomes Pikachu. Take your time here — the face makes the whole toy.
- Indentation under the eyes: The bottom points are between rows 20 and 21; the top points are on the left and right near the eyes. Guide the yarn between these points, pull slightly, and tie the ends. This little bit of face shaping makes a huge difference.
- Mouth — two options:
- Option 1: Pin the crocheted mouth in place and sew, picking up the stitches of the head and the mouth from corner to corner. With red yarn, make a double stitch for the tongue.
- Option 2: Sew on the crocheted mouth, then make an indentation at the corners with a long piece of yellow yarn.
- Cheeks: Sew the red circles onto the cheeks. Instant Pikachu energy.
- Claws: Embroider 2-3 little claws with black yarn on each of the upper and lower paws.
You Did It!
You did it! Seriously — look at that face. You just crocheted a 10.2 in Pikachu with a lightning-bolt tail that actually stands up AND his own Pokeball. If this was your first big amigurumi, you should be ridiculously proud of yourself. Tag us if you share it — I want to see every single squishy version. 🧶
Ready for your next character? Our free Minion Dave pattern is another crowd-pleaser that looks way harder than it is.
FAQ
What yarn is best for this Pikachu amigurumi?
Worsted weight (4) acrylic yarn is perfect for this Pikachu amigurumi pattern free. It holds its shape well, is affordable, and makes the plush very durable.
How long does it take to crochet this Pikachu?
This project generally takes between 6 to 10 hours, depending on your crochet speed. It’s a fantastic weekend project!
Can beginners make this pattern?
Yes! The pattern uses mostly basic single crochet stitches. The trickiest part is the color change for the back stripes, which is fully explained.