Free Halloween Pumpkin Crochet Pattern — Easy Amigurumi Plush
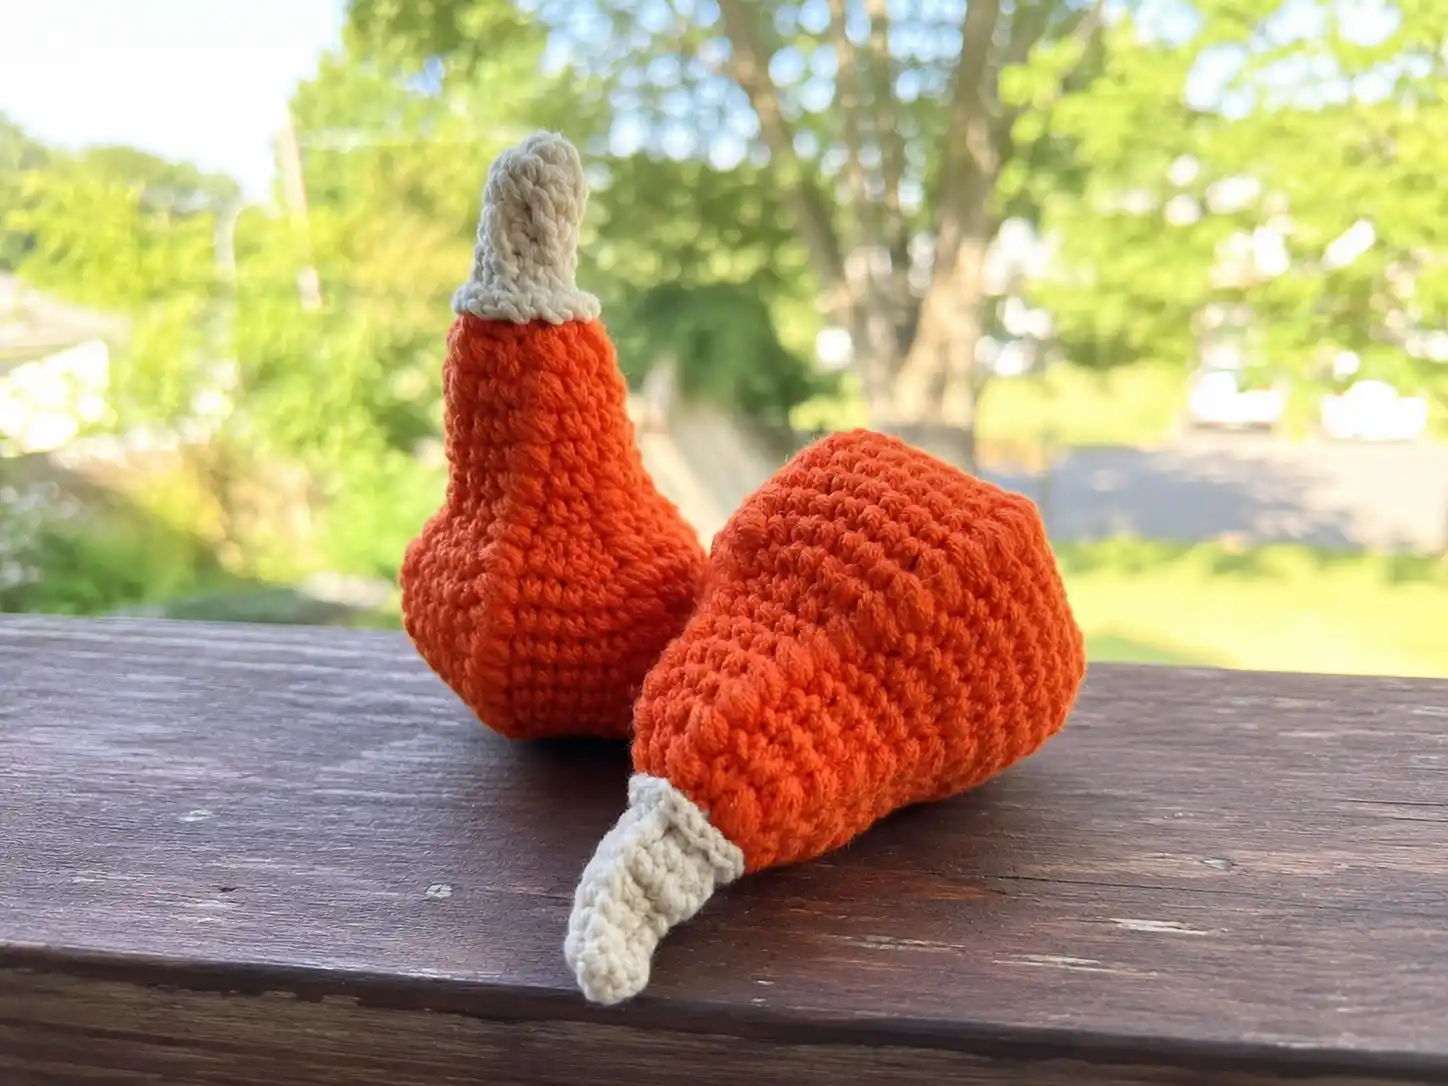
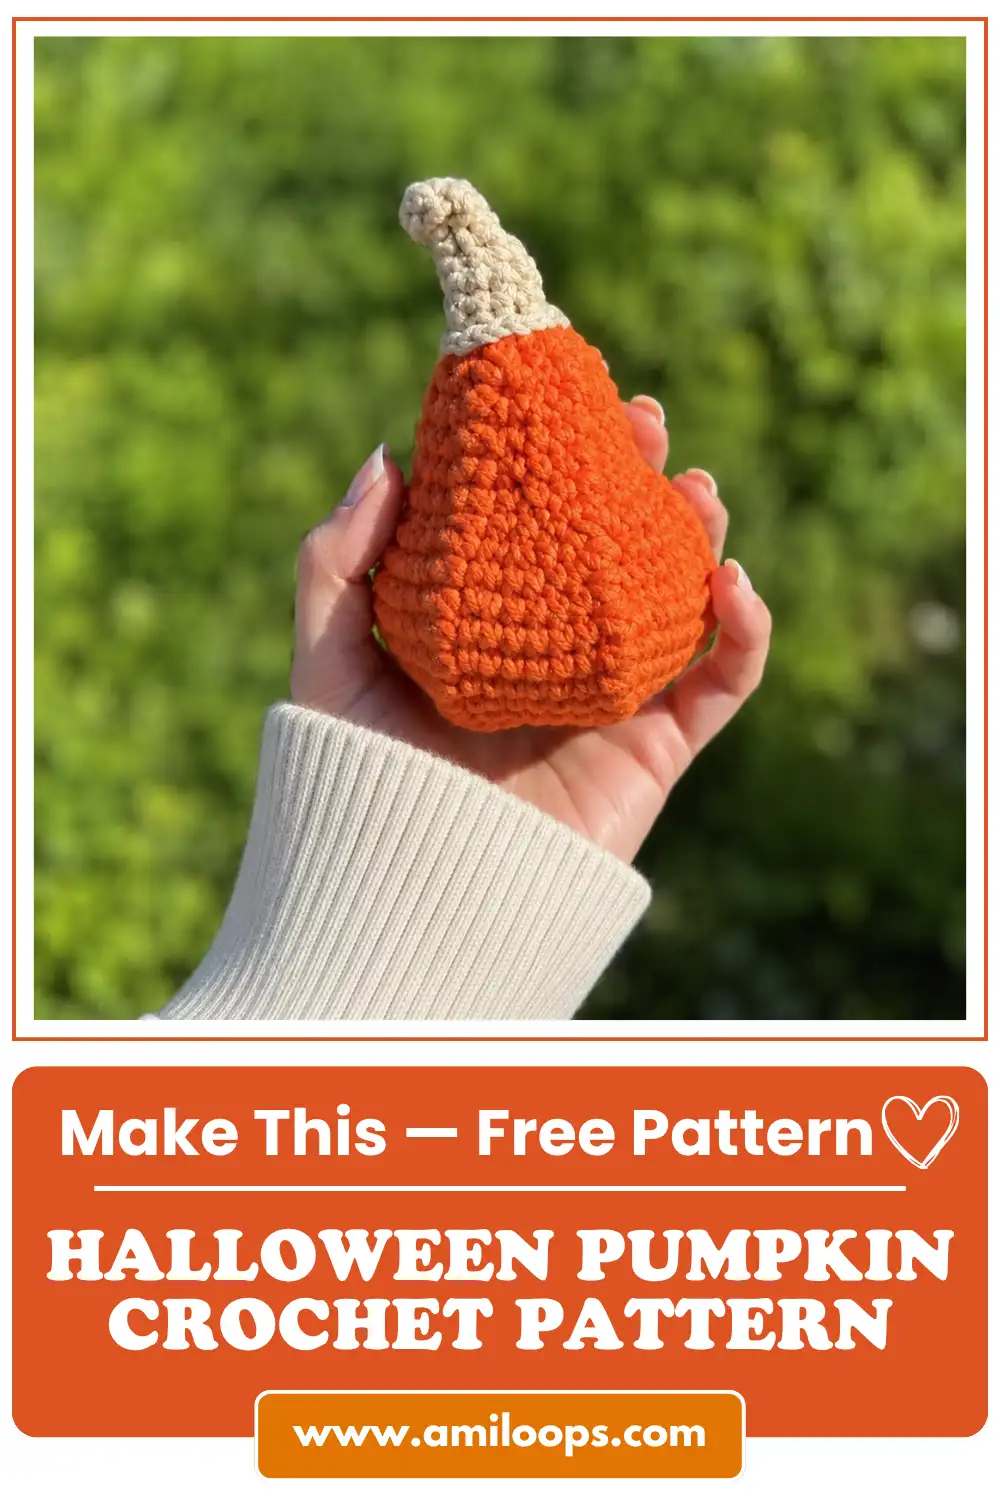
This halloween pumpkin crochet pattern is the perfect project once the leaves start turning — a squishy little gourd with its own curly stem, no big scary techniques required. There’s one stitch that takes a beat to get used to (more on that below), but once it clicks, the rest just flies by. Grab your hook and a cozy blanket. Let’s make a pumpkin.
Why You’ll Love This Halloween Pumpkin Crochet Pattern
🧶 Why You’ll Love This Pattern
- ⭐ Difficulty: Easy overall — just one new stitch (the puff stitch) that takes a round or two to feel natural
- ⏱️ Time: About 3-4 hours total. Maybe split it into two cozy sittings instead of one
- 🪡 Sewing: Minimal — just two seams, the bottom and the stem. No fussy limbs to line up here, I promise
- 🧵 Yarn: DK-weight cotton-look yarn on a smaller hook than I usually reach for — it makes for a really nicely defined little pumpkin
- 💰 Yarn needed: Less than 1 skein of each color, most likely
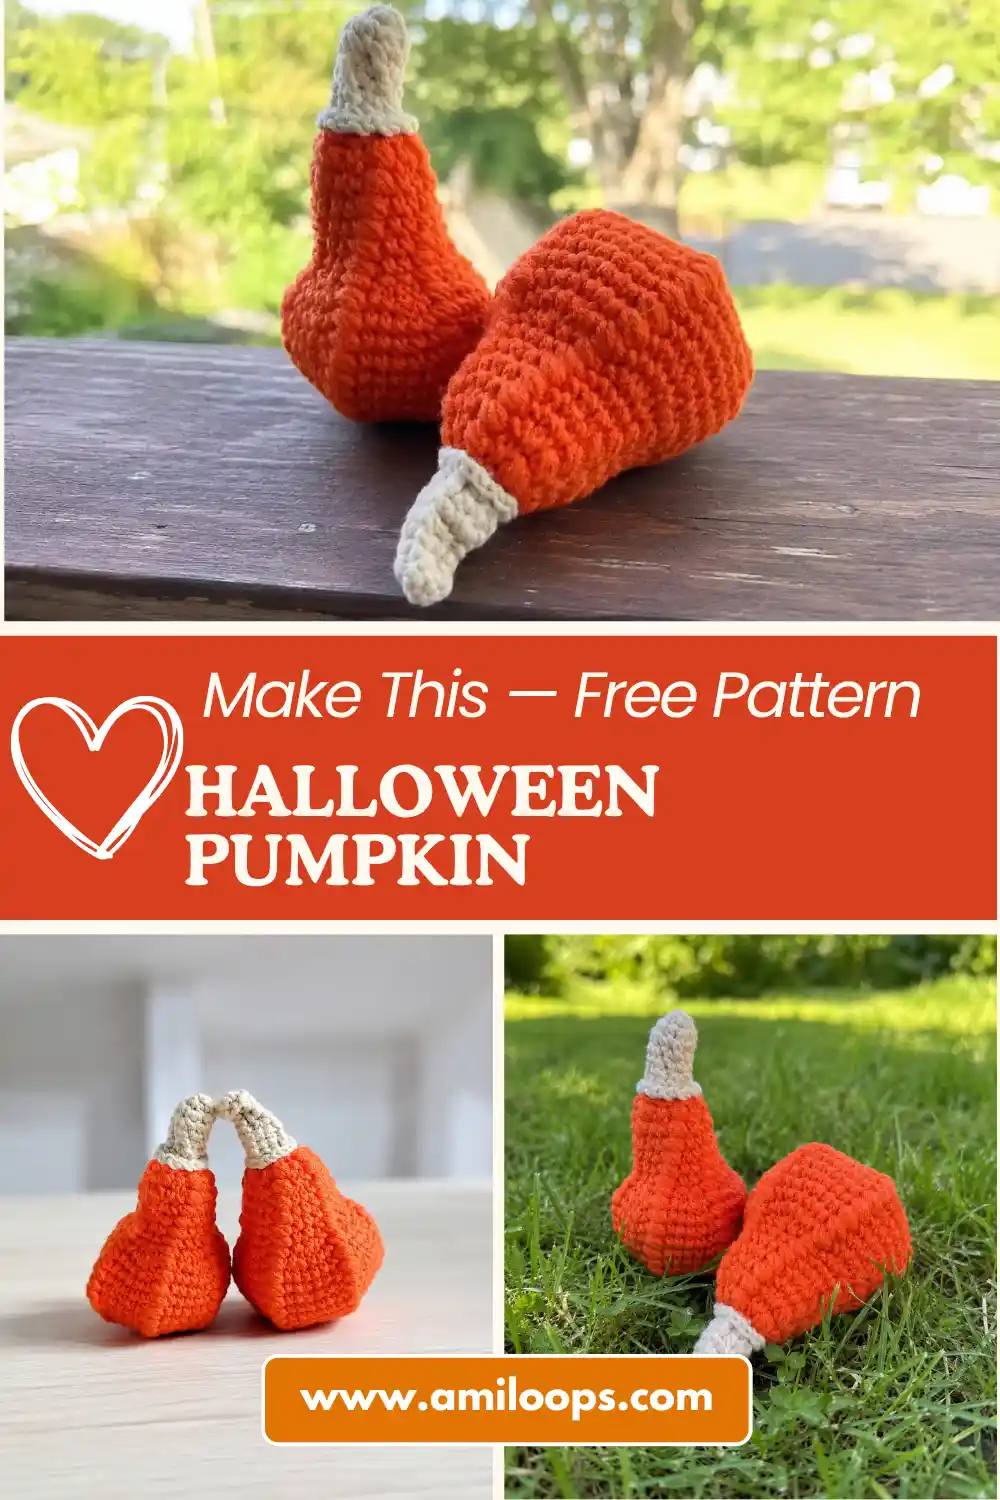
Quick heads-up before you dive in: this little guy is a plain stemmed pumpkin, not a jack-o’-lantern with a face. He’s the kind of piece that looks great in a fall garland, a bowl on the coffee table, or lined up on a shelf for the season — cute and cozy, not spooky.
What You Need for This Halloween Pumpkin Crochet Pattern
- Main color yarn (orange): A DK / Light Worsted (3) weight yarn with a smooth, cotton-like feel. The pattern used YarnArt Jeans in bright orange — Drops Muskat or Paintbox Yarns Cotton DK in a pumpkin-orange shade are easy US swaps.
- Contrast color yarn (linen/off-white): Same weight, for the stem and the little bottom piece. Any DK-weight cotton-blend in a warm off-white or linen shade works.
- Hook: 2.2mm. Fair warning — this one doesn’t line up neatly with a US letter size. The closest match is a US B/1 (2.25mm), just a hair bigger, so grab that one if it’s what’s in your set. If you want the full breakdown, here’s the Craft Yarn Council’s hook size chart.
- Stuffing: Polyester fiberfill — Poly-Fil is an easy find at Joann, Michaels, or Hobby Lobby.
- Yarn/tapestry needle for sewing and weaving in ends.
- Scissors.
- Stitch marker (optional, but genuinely makes life easier when you’re working in a spiral).
Finished size: about 3.1 in x 1.6 in (8 cm x 4 cm) for the smaller version, or 3.3 in x 2.0 in (8.5 cm x 5 cm) for the larger one. Both use the exact same stem and bottom, so you’re just choosing a body size below.
Don’t stress about matching the exact yarn brand — as long as it’s a DK-weight, cotton-feel yarn, you’re good.
Abbreviations You’ll See in This Pattern
| Abbreviation | What It Means |
|---|---|
| ch | chain — your basic starting stitch |
| sc | single crochet — the main stitch, the backbone of amigurumi |
| inc | increase — 2 single crochets in the same stitch, which grows the round |
| dec | decrease — 2 stitches worked together into 1, which shrinks the round |
| puff st | puff stitch — a fluffy, raised stitch made by pulling up a few loops before closing them all together (full walkthrough below) |
| fpsc | front post single crochet — a single crochet worked around the post of the stitch below instead of into the top, which creates a raised rib. Used for the stem. |
| sl st | slip stitch — a low, flat stitch used to join or move along without adding height |
| FLO | front loop only — working into just the front loop of a stitch, leaving a little ridge. Used for the picot edge on the stem. |
Beginner Tips for This Halloween Pumpkin Crochet Pattern
Never made a magic ring before? No worries — our magic ring tutorial walks you through it in under two minutes, and every single piece in this pattern starts with one.
Here’s the thing about the puff stitch — it looks intimidating written down, but it’s really just “yarn over, pull up a loop” done a few times in a row before you close it all at once. I’ve broken it down step-by-step right before you need it, so don’t skip ahead and panic. By round three you won’t even think about it.
The only sewing in this whole project is attaching two small pieces — no limbs, no fiddly matching. If you want a refresher on neat seams, our guide to sewing amigurumi parts together has you covered.
🧵 Quick note on the “dec” stitch: If you already know the invisible decrease, feel free to use it here for an extra-clean finish. If not, a standard decrease works completely fine too — either way, your stitch counts will match.
Let’s Crochet the Pumpkin
Okay, this part is so satisfying. You’ve got two size options below — the smaller pumpkin and the larger pumpkin. They’re built the exact same way, just with a couple extra rounds on the bigger one. Pick your size and crochet that section only; the stem and bottom pieces are shared between both.
Quick play-by-play on the puff stitch, since you’ll be using it constantly: yarn over, pull up a loop in the stitch (3 loops on your hook). Yarn over again, pull up another loop in the same stitch (5 loops on your hook). One more time — yarn over, pull up a loop in the same stitch (7 loops on your hook). Now yarn over one last time and pull through all 7 loops at once. That’s it — one puff stitch done, and it’ll leave a little raised bump. That bump is what gives your pumpkin its classic ridged look.
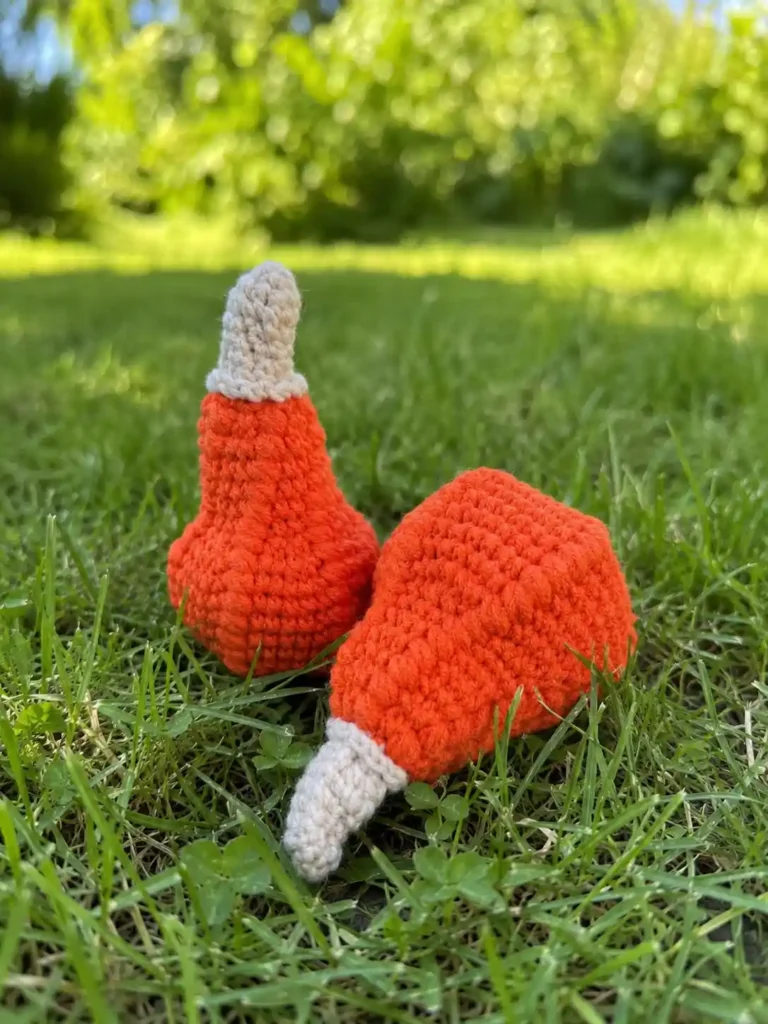
Small Pumpkin Body (3.1 in x 1.6 in)
Yarn: orange. Start with a magic ring.
Row 1: 8 sc in mr (8)
Row 2: inc in each st around (16)
Row 3: (1 sc, inc) x 8 (24)
Row 4: (puff st, 2 sc, inc) x 6 (30)
Row 5: (puff st, 3 sc, inc) x 6 (36)
🎉 Look at that — you’re already through the trickiest shaping. Every round from here for a while is just repeats. Smooth sailing.
Row 6: (puff st, 5 sc) x 6 (36)
Row 7: (puff st, 5 sc) x 6 (36)
Row 8: (puff st, 5 sc) x 6 (36)
Row 9: (puff st, 5 sc) x 6 (36)
Row 10: (puff st, 5 sc) x 6 (36)
Row 11: (puff st, 5 sc) x 6 (36)
Row 12: (puff st, 1 sc, dec, 2 sc) x 6 (30)
Row 13: (puff st, dec, dec) x 6 (18)
Row 14: (puff st, 2 sc) x 6 (18)
Row 15: (puff st, 2 sc) x 6 (18)
Row 16: (puff st, 2 sc) x 6 (18)
Row 17: (puff st, 2 sc) x 6 (18)
Row 18: (puff st, 2 sc) x 6 (18)
Row 19: (puff st, dec) x 6 (12)
Row 20: 1 sc (1) — this last little stitch just closes up the top. Cut your yarn, leaving a long tail for joining the stem later, and pull it snug.
Stuff your pumpkin with fiberfill before you fully close it up — squeeze it in there so it holds its shape.
🎉 That’s the body done! Everything left is small and quick. You’ve got this.
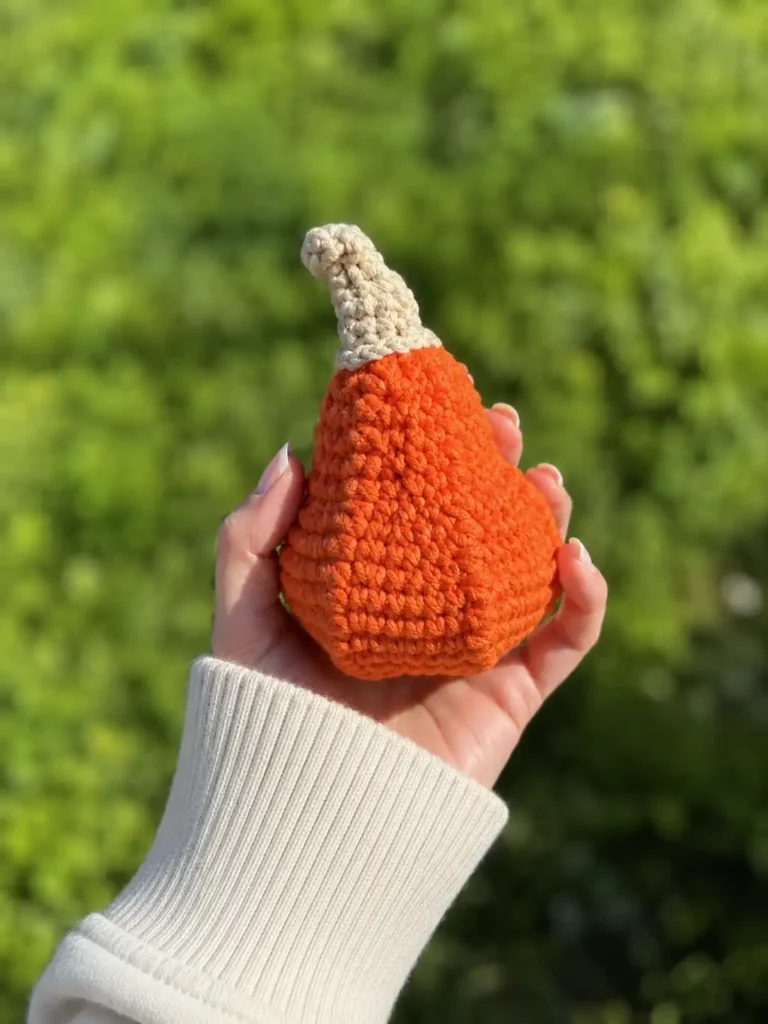
Larger Pumpkin Body (3.3 in x 2.0 in) — Optional Second Size
Same idea, same yarn, just a couple extra rounds for a slightly bigger pumpkin. If you already made the small one above, skip this section — you only need one body.
Row 1: 8 sc in mr (8)
Row 2: inc in each st around (16)
Row 3: (1 sc, inc) x 8 (24)
Row 4: (puff st, 2 sc, inc) x 6 (30)
Row 5: (puff st, 3 sc, inc) x 6 (36)
Row 6: (puff st, 4 sc, inc) x 6 (42)
Row 7: (puff st, 6 sc) x 6 (42)
Row 8: (puff st, 6 sc) x 6 (42)
Row 9: (puff st, 6 sc) x 6 (42)
Row 10: (puff st, 6 sc) x 6 (42)
Row 11: (puff st, 6 sc) x 6 (42)
Row 12: (puff st, 6 sc) x 6 (42)
Row 13: (puff st, 2 sc, dec, 2 sc) x 6 (36)
Row 14: (puff st, dec, 1 sc, dec) x 6 (24)
Row 15: (puff st, 3 sc) x 6 (24)
Row 16: (puff st, 3 sc) x 6 (24)
Row 17: (puff st, 3 sc) x 6 (24)
Row 18: (puff st, 3 sc) x 6 (24)
Row 19: (puff st, 1 sc, dec) x 6 (18)
Row 20: (puff st, dec) x 6 (12)
Stuff firmly, then cut your yarn, leaving a long tail for joining the stem later.
Pumpkin Stem (Both Sizes)
Yarn: linen / off-white. Start with a magic ring.
Row 1: 5 sc in mr (5)
Row 2: inc in each st around (10)
Row 3: (sc, fpsc) x 5 (10)
Row 4: (sc, fpsc) x 5 (10)
Row 5: (sc, fpsc) x 5 (10)
Row 6: (sc, fpsc), (inc, fpsc), (sc, fpsc), (inc, fpsc), (sc, fpsc) (12)
Row 7: (sc, fpsc), (sc, sc, fpsc), (sc, fpsc), (sc, sc, fpsc), (sc, fpsc) (12)
Row 8: Working in the front loops only (FLO), alternate sl st, ch all the way around your 12 stitches from Row 7. ( just repeat sl st, ch until you’re back where you started.)
A quick word on fpsc since it’s new here: instead of inserting your hook into the top of the next stitch like usual, you insert it around the post (the “body”) of the stitch from the row below. It feels a little different at first, but it’s what gives the stem that nice ribbed texture.
Cut your yarn and fasten off. Stuff lightly with fiberfill — you’ll hide the tail inside once it’s sewn on.
Pumpkin Bottom (Both Sizes)
Yarn: linen / off-white. Start with a magic ring.
Row 1: In the magic ring, work: 1 sc, ch, 1 sc, ch, 1 sc, ch, 1 sc, ch, 1 sc, ch, then sl st to close. This makes a little 5-point flower shape — you’re working exactly 5 single crochets with a chain between each one.
Cut your yarn, leaving a tail long enough for sewing. When you attach this piece later, you’ll only be sewing through the 5 single crochet points — skip right over the chain stitches between them.
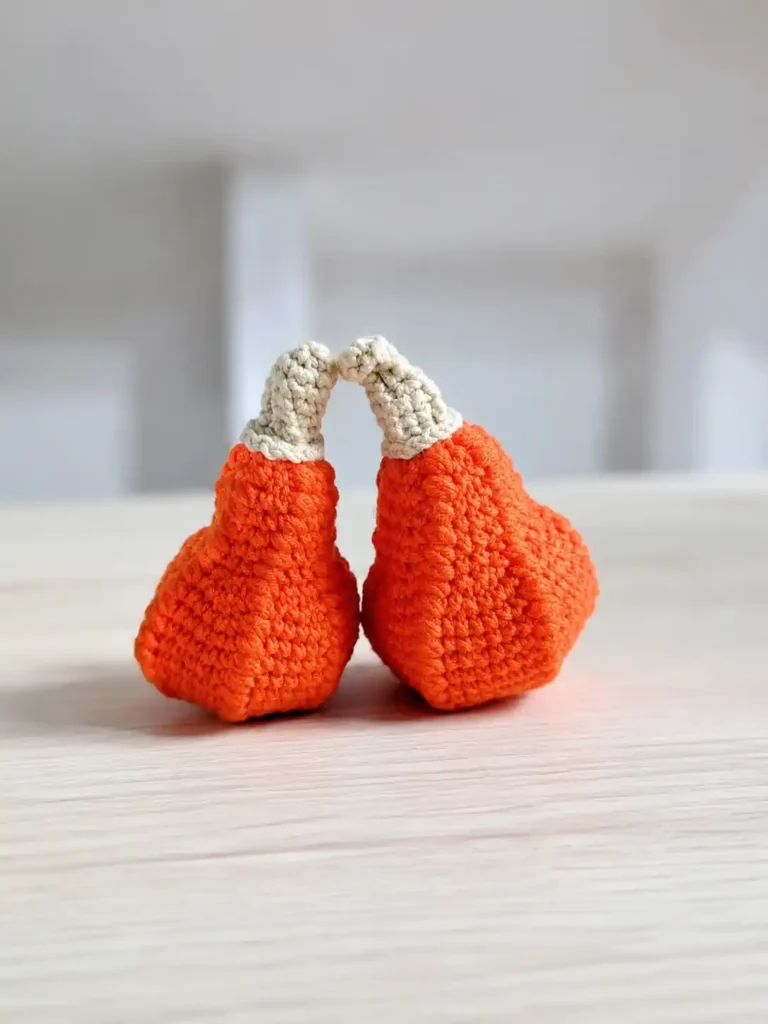
Assembly: Putting Your Pumpkin Together
🎉 This is the only sewing in the whole project — two quick seams and you’re finished. You’ve got this.
- Make sure both your pumpkin body and your stem are stuffed firmly with fiberfill.
- Sew the Pumpkin Bottom piece onto the base of your pumpkin body, using its tail. Remember: only stitch through the 5 sc points, and skip the chain stitches between them. If seams aren’t your favorite thing, our sewing amigurumi parts guide breaks it down nice and slow.
- For that classic ridged pumpkin look, thread a long needle with matching yarn and stitch down through the very center of the pumpkin, from the top opening to the bottom, pulling gently as you go. This snugs the puff-stitch columns in and really makes the ridges pop.
- Using the long tail left on your pumpkin body, sew the stem onto the top.
- Weave in and hide any remaining yarn tails inside the pieces, and you’re done!
You Did It!
You did it! Seriously — look at that little pumpkin sitting there with its curly stem, like it just wandered out of a fall market. If the puff stitch had you nervous at the start, I hope you can see now it was never as scary as it looked. Tag us if you share it — I want to see every single squishy version out there. 🧶
FAQ
What yarn is best for this halloween pumpkin crochet pattern?
A DK (Light Worsted) weight yarn with a smooth, cotton-like feel works best. Brands like YarnArt Jeans, Drops Muskat, or Paintbox Yarns Cotton DK give the pumpkin excellent stitch definition and structure.
How long does it take to crochet this amigurumi pumpkin?
It typically takes about 3 to 4 hours to complete. Because it works up relatively fast, you can easily finish it in one or two cozy sittings.
Is this pumpkin pattern suitable for beginners?
Yes! While the puff stitch might take a round or two to get used to, the overall construction is very simple and requires only minimal sewing (just the bottom piece and the stem).