Free Crochet Raccoon Amigurumi Pattern (Plush Chenille)
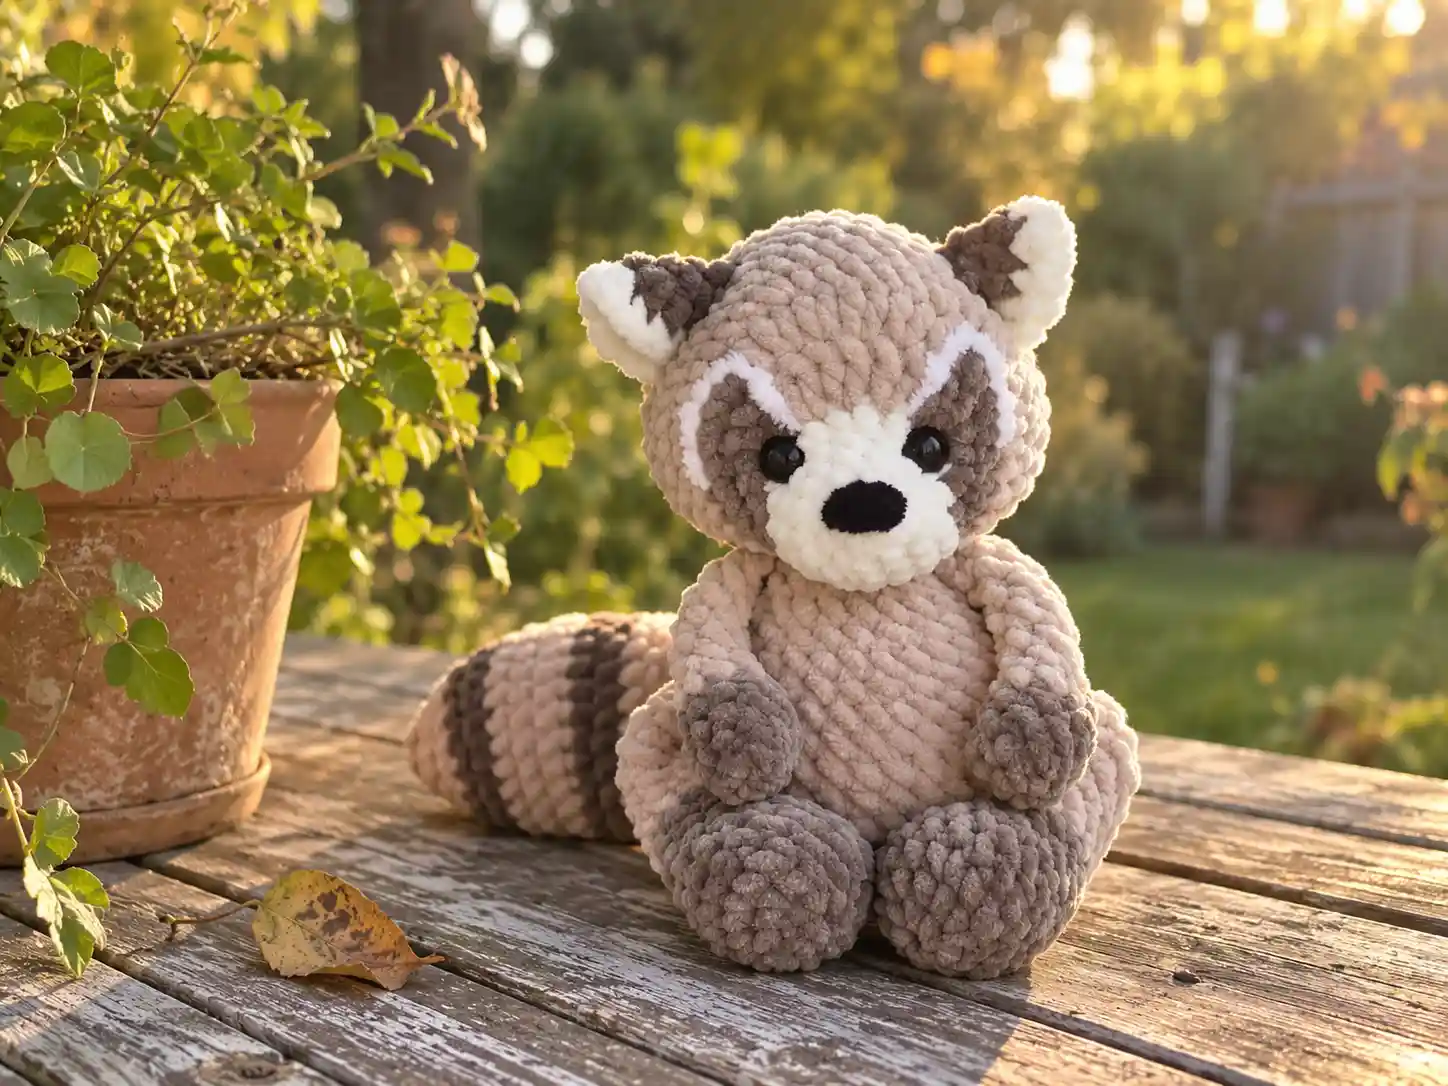
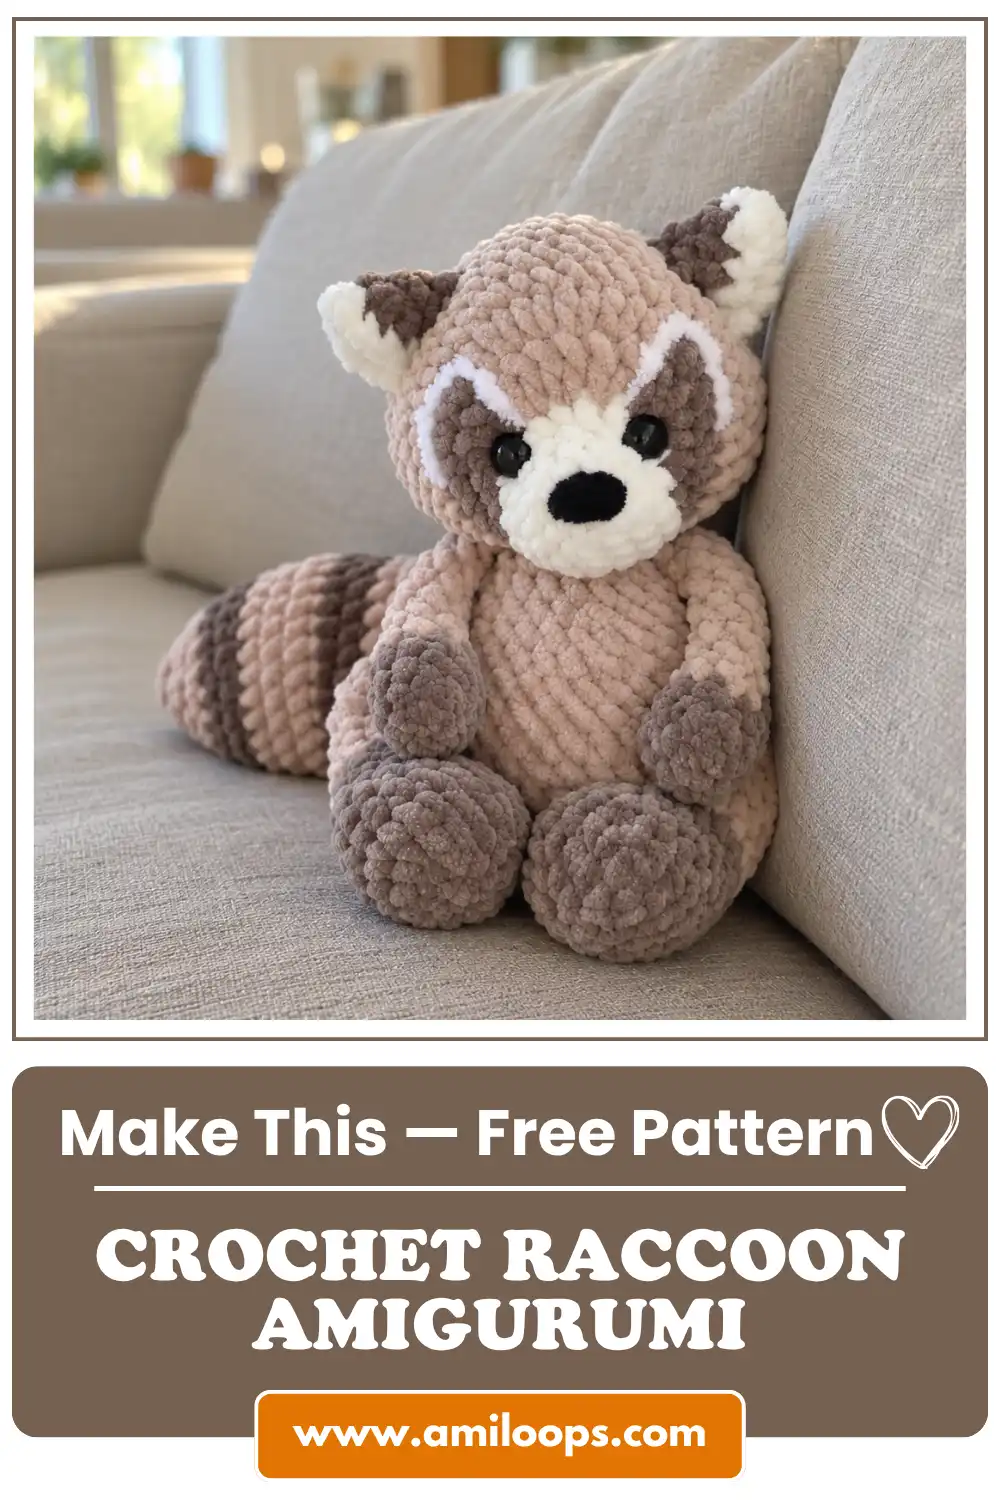
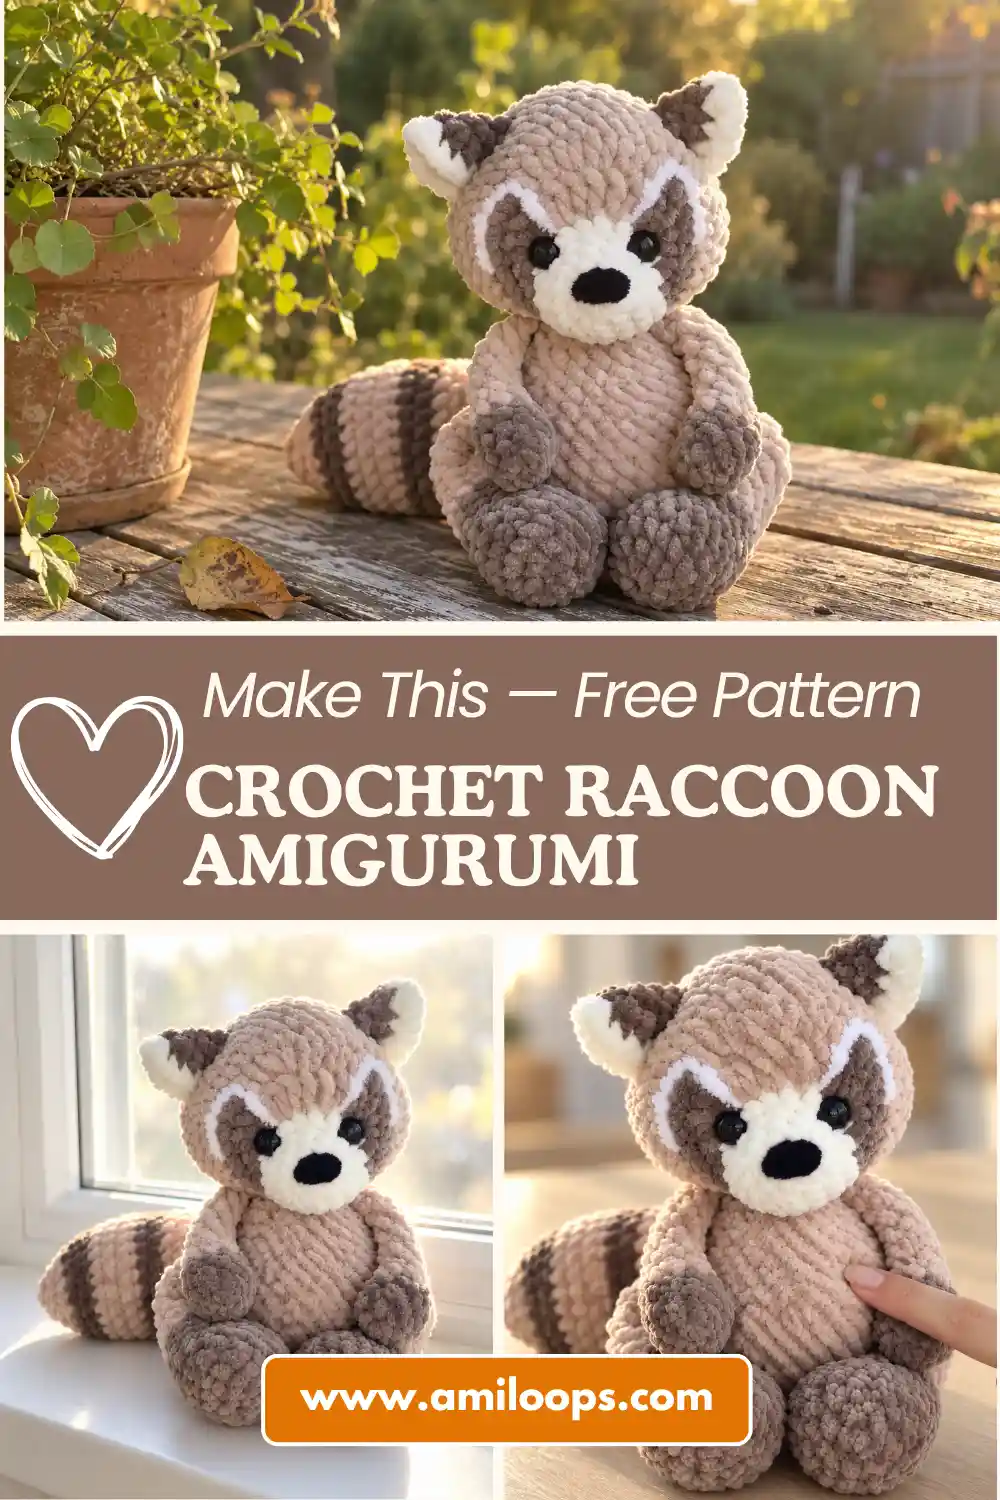
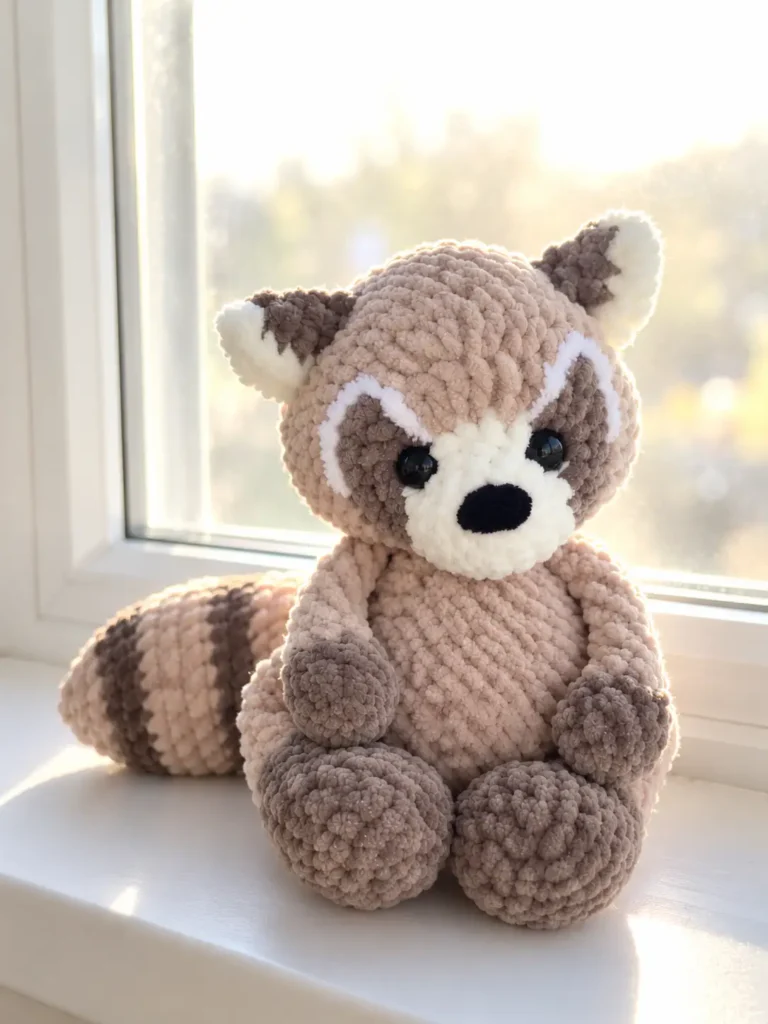
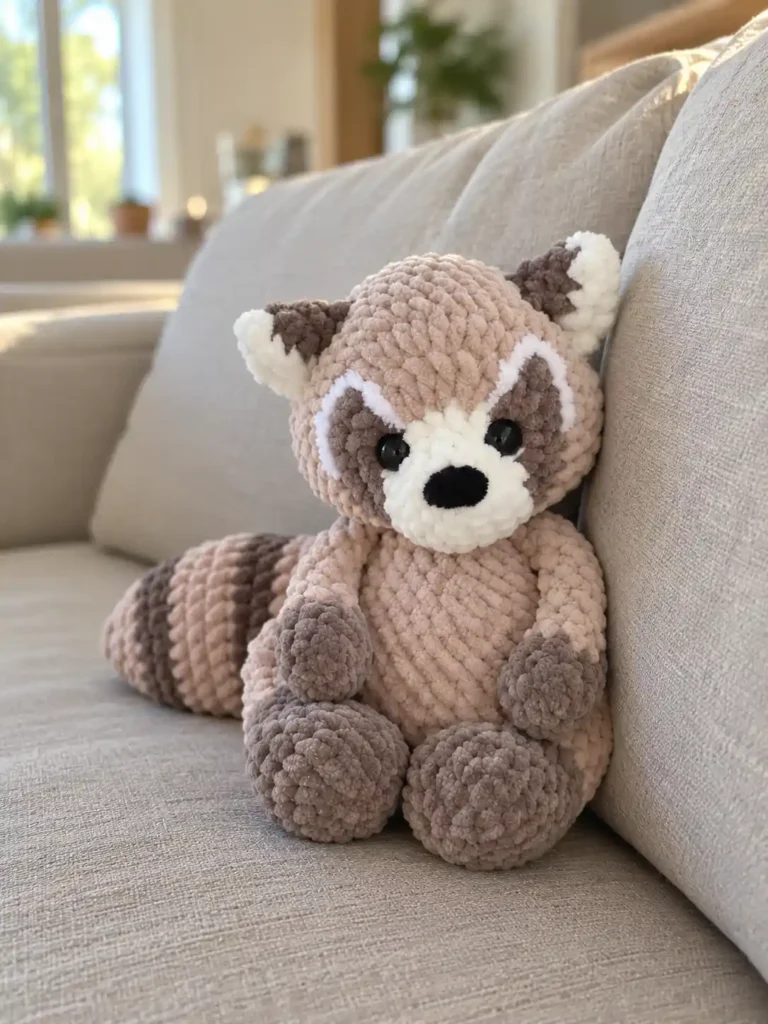
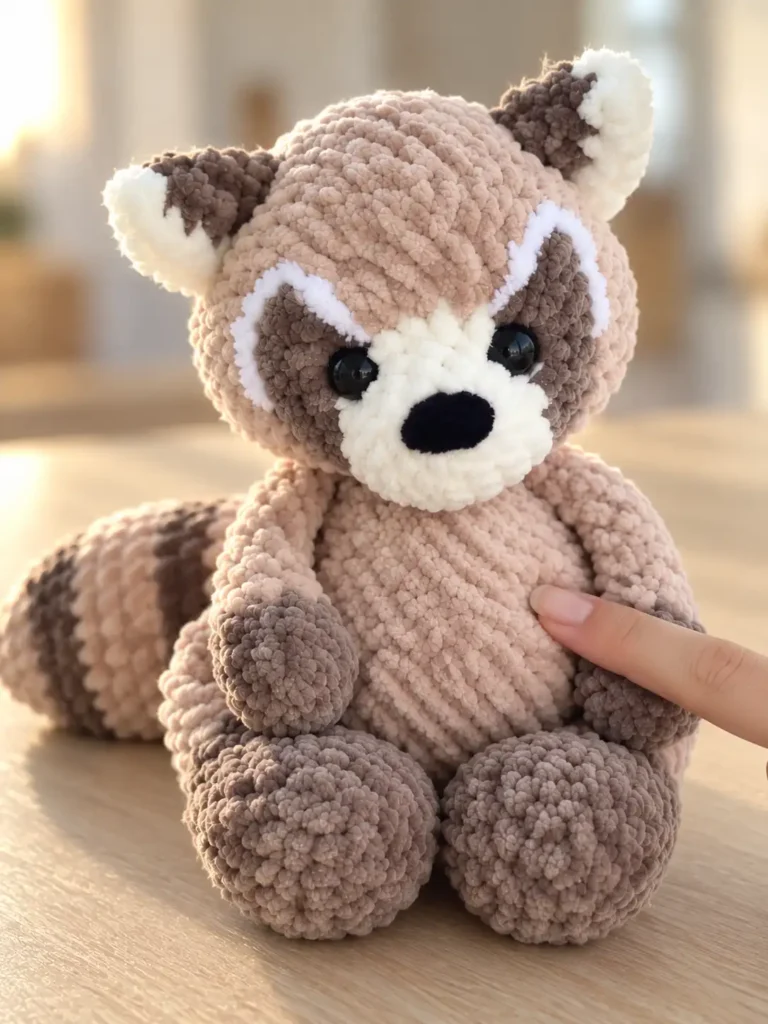
This crochet raccoon amigurumi pattern captures a small, big-eyed forest critter in soft chenille yarn, finished at roughly 21 cm tall once it’s stuffed and seated on its own two feet. Every marking — the dark beige paw and foot tips, the striped tail, and the pale muzzle — comes directly from careful color changes worked into the stitches themselves, so there’s no painting, felting, or fabric appliqué involved anywhere in the build.
The project relies on two different yarns working together: a plush chenille for the body, limbs, tail, and head, and a much finer thread reserved for the embroidered nose and the surface-crocheted eyebrow lines on the face. That contrast in yarn is part of what gives the finished raccoon its texture — a soft, rounded chenille body with crisp, detailed facial features sitting on top. The two materials are used for very different jobs, and neither substitutes for the other anywhere in the pattern.
About This Raccoon Crochet Pattern
Working the limbs, tail, and ears before the body is what makes this raccoon come together so cleanly. Each small piece is finished and set aside, then crocheted directly into the appropriate body round as you go, so there is no separate sewing step for the arms, legs, or tail. The body, limbs, tail, and head are all worked in continuous spiral rounds without joining slip stitches, which keeps the surface smooth and seamless everywhere except the ears.
The head is where the pattern shifts from simple shaping to genuine color-block construction. Rounds six through eight combine single crochet, half double crochet, and double crochet stitches inside four separate color sections per round to build the raccoon’s raised eye patches and milk-colored muzzle. Working slowly through these rounds and keeping track of which color and stitch height belongs where is the single most important skill this pattern asks of an amigurumi crocheter.
Materials and Tools
This raccoon is built almost entirely from YarnArt Dolce chenille yarn, which comes in 100 g, 120 m skeins; the pattern uses less than one full skein each of beige, dark beige, and milk. A small amount of black and white Alize Softy thread creates the embroidered nose and the surface-crocheted eyebrow lines, so neither color needs to be purchased in a full skein. A size 4 crochet hook is used throughout with the chenille yarn, along with fiberfill, a yarn needle, and a stitch marker for tracking the body’s spiral rounds.
- YarnArt Dolce (or equivalent; 100 g / 120 m) in Beige (771), Dark Beige (754), and Milk (745) — less than 1 skein each
- Alize Softy thread in Black and White (small amounts for snout, nose, and eyebrows)
- Crochet hook, size 4
- 12 mm safety screw eyes (one pair)
- Polyester fiberfill stuffing
- Strong, thin thread for securing inner foot placement
- Strong sculpting yarn or thread for ear tensioning and assembly
- Tapestry / yarn needle
- Stitch marker
- Scissors
Crochet Abbreviations
This pattern is written in standard US crochet terminology throughout, so a stitch marked sc always means single crochet and never the UK double crochet. Reviewing a standardized crochet abbreviations chart before starting is useful if any of these shorthand terms are unfamiliar, especially the increase and decrease abbreviations, which appear constantly once the color-block rounds of the head begin.
- ch — chain
- sc — single crochet
- inc — single crochet increase (2 sc in same st)
- dec — single crochet decrease (sc2tog)
- hdc — half double crochet
- inc-hdc — half double crochet increase (2 hdc in same st)
- dc — double crochet
- inc-dc — double crochet increase (2 dc in same st)
- sl st — slip stitch
- st(s) — stitch(es)
- rnd(s) — round(s)
Construction Overview
Most of this raccoon is worked in continuous spiral rounds, meaning you crochet around and around without joining or chaining between rounds, which is what keeps the body, limbs, tail, and head free of a visible seam line. The ears are the one exception: they are worked back and forth in flat turning rows with a turning chain at the end of each row, then folded in half and joined with a slip stitch once both layers are complete.
Assembly happens inside the body rounds rather than afterward. Round 11 crochets both legs and the first three stitches of the tail directly into the body stitches, Round 12 finishes attaching the tail’s remaining two stitches, and Round 18 joins both arms into the upper torso. Because the tail and head both rely on changing yarn colors mid-round to build their stripes and facial markings, it helps to have all three chenille colors within easy reach before you begin those sections, rather than searching for a skein mid-round.
Before You Start
Crochet both arms, both legs, the tail, and the ears before starting the body. Having all five smaller pieces finished and ready means you can join each one directly into its body round the moment you reach it, instead of stopping mid-body to make a limb. Lay the pieces out in the order the body calls for them: legs and tail at Round 11 and 12, then arms at Round 18, so nothing gets joined out of sequence.
Pay attention to Round 17 of the body, where shift stitches are added so the round’s starting point lines up vertically above the start of Round 11; skipping this adjustment is the most common reason an arm ends up twisted relative to the legs. It also helps to think ahead about stuffing amigurumi parts evenly, since the arms in this pattern are left completely unstuffed while the legs, tail, and body each call for a different stuffing approach described in their own instructions.
Raccoon Crochet Pattern
The pattern below follows the exact construction order: arms, legs, tail, body, ears, and head. Each part lists its complete row-by-row instructions with stitch counts in parentheses. The arms are worked over eleven rounds and left unstuffed, then flattened and sealed with three single crochet stitches before being set aside to join into the body later.
Arms
Round 1: In Dark Beige yarn, starting in the 2nd ch from hook, work 6 sc. (6 sts)
Round 2: (1 sc, inc) * 3. (9 sts)
Rounds 3–4: 9 sc around. On the final stitch of Round 4, change to Beige yarn. (9 sts)
Round 5: 9 sc around. (9 sts)
Round 6: (1 sc, dec) * 3. (6 sts)
Rounds 7–11: 6 sc around. Do not stuff. Flatten the top opening and work 3 sc through both layers to close. (6 sts)
Legs
Round 1: In Dark Beige yarn, starting in the 2nd ch from hook, work 6 sc. (6 sts)
Round 2: 6 inc. (12 sts)
Round 3: (1 sc, inc) * 6. (18 sts)
Rounds 4–5: 18 sc around. (18 sts)
Round 6: (1 sc, dec) * 6. (12 sts)
Rounds 7–8: 12 sc around. On the final stitch of Round 8, change to Beige yarn. (12 sts)
Rounds 9–15: 12 sc around. Stuff the lower foot section only; leave upper leg flat. Flatten opening and work 6 sc through both layers to close. (12 sts)
Tail
Round 1: In Beige yarn, starting in the 2nd ch from hook, work 5 sc. (5 sts)
Round 2: 5 inc. (10 sts)
Round 3: (1 sc, inc) * 5. On the final stitch, change to Dark Beige yarn. (15 sts)
Round 4: (2 sc, inc) * 5. (20 sts)
Round 5: (3 sc, inc) * 5. On the final stitch, change to Beige yarn. (25 sts)
Rounds 6–8: 25 sc around. On the final stitch of Round 8, change to Dark Beige yarn. (25 sts)
Round 9: 25 sc around. (25 sts)
Round 10: (3 sc, dec) * 5. On the final stitch, change to Beige yarn. (20 sts)
Rounds 11–12: 20 sc around. Stuff lightly up to Round 13. (20 sts)
Round 13: (2 sc, dec) * 5. On the final stitch, change to Dark Beige yarn. (15 sts)
Rounds 14–15: 15 sc around. On the final stitch of Round 15, change to Beige yarn. (15 sts)
Round 16: 15 sc around. (15 sts)
Round 17: (1 sc, dec) * 5. (10 sts)
Rounds 18–19: 10 sc around. Flatten the top opening and work 5 sc through both layers to close. (10 sts)
Body
Round 1: In Beige yarn, starting in the 2nd ch from hook, work 6 sc. (6 sts)
Round 2: 6 inc. (12 sts)
Round 3: (1 sc, inc) * 6. (18 sts)
Round 4: (2 sc, inc) * 6. (24 sts)
Round 5: (3 sc, inc) * 6. (30 sts)
Round 6: (4 sc, inc) * 6. (36 sts)
Rounds 7–10: 36 sc around. Place marker at the center back line. (36 sts)
Round 11: 5 sc, 6 sc joined together through both body and 1st leg, 14 sc, 6 sc joined together through both body and 2nd leg, 2 sc, 3 sc joined together through both body and the first 3 sts of tail. (36 sts)
Round 12: 2 sc joined together through both body and remaining 2 sts of tail, 34 sc around. (36 sts)
Round 13: (4 sc, dec) * 6. (30 sts)
Round 14: 30 sc around. (30 sts)
Round 15: (3 sc, dec) * 6. (24 sts)
Round 16: 24 sc around. (24 sts)
Round 17: (2 sc, dec) * 6. Work shift stitches as needed so that the round beginning aligns vertically above the beginning of Round 11. (18 sts)
Round 18: 3 sc, 3 sc joined together through both body and 1st arm, 6 sc, 3 sc joined together through both body and 2nd arm, 3 sc, sl st in next st. (18 sts)
Ears
Row 1: Worked in flat rows. In Dark Beige yarn, starting in 2nd ch from hook, work 3 sc, turn, ch 1. (3 sts)
Row 2: 3 inc, turn, ch 1. (6 sts)
Row 3: (1 sc, inc) * 3, turn, ch 1. On final st, change to Milk yarn. (9 sts)
Row 4: (2 sc, inc) * 3. Fold ear in half; join Row 4 to Row 3 with a slip stitch along the lower edge (mirrored on each ear with right side facing out). (12 sts)
Head
Round 1: In Milk yarn, starting in the 2nd ch from hook, work 5 sc. (5 sts)
Round 2: 5 inc. (10 sts)
Round 3: (1 sc, inc) * 5. (15 sts)
Round 4: 15 sc around. (15 sts)
Round 5: 2 sc, 3 inc, 10 sc. On the final stitch, change to Dark Beige yarn. (18 sts)
Round 6: In Dark Beige: 1 sc, 1 inc, 1 inc-hdc, 1 inc-dc. Change to Beige: 3 inc-dc. Change to Dark Beige: 1 inc-dc, 1 inc-hdc, 1 inc-sc, 1 sc. Change to Milk: 7 sc. (27 sts)
Round 7: In Dark Beige: 5 sc, 2 inc, 1 hdc. Change to Beige: 1 hdc in same st as previous hdc, 4 inc-hdc, 1 hdc. Change to Dark Beige: 1 hdc in same st as previous hdc, 2 inc, 5 sc. Change to Milk: 7 sc. (37 sts)
Round 8: Change to Beige: (5 sc, inc) * 5. Change to Milk: 7 sc. (42 sts)
Round 9: In Beige: 42 sc around. Insert 12 mm eyes between Rounds 5 and 6 under hdc increases. Surface-crochet white eyebrow lines. (42 sts)
Rounds 10–14: 42 sc around. (42 sts)
Round 15: (5 sc, dec) * 6. (36 sts)
Round 16: (4 sc, dec) * 6. (30 sts)
Round 17: (3 sc, dec) * 6. Begin stuffing firmly with fiberfill. (24 sts)
Round 18: (2 sc, dec) * 6. (18 sts)
Round 19: (1 sc, dec) * 6. (12 sts)
Round 20: 6 dec. Cinch opening closed and conceal yarn tail inside. (6 sts)
Assembly and Finishing
Once the head reaches Round 6, pause before continuing to plan the eye placement: the 12 mm safety screw eyes are inserted between Rounds 5 and 6, positioned directly under the half double crochet increases worked in Round 6. attaching safety eyes securely at this exact point, rather than after the head is closed, is what gives the raccoon its slightly furrowed, alert expression, since the increases create a small ridge that the eye backing sits just beneath.
The ears are sewn onto the head across Rounds 11 and 12, spaced about eight stitches apart across the forehead, and then pulled into shape with a two-stage sculpting stitch that runs from the base of the head around each ear root. sewing amigurumi parts together this way, with the ear sculpting thread passing both behind and in front of the ear base, is what gives the ears their forward-cupped, alert set rather than leaving them flat against the head. Tie each sculpting thread off firmly at the neck and bury the tail inside before moving on.
Beneath the body, a strong thin thread pulls the inner sides of both feet together and ties off securely, which stabilizes the raccoon’s sitting pose so it doesn’t tip forward. Because this project uses small hardware like screw eyes, general guidance on small parts hazards is worth reviewing before gifting any amigurumi to a young child, since small attached pieces can present a choking risk regardless of how securely they are installed.
- Flatten arm openings and crochet shut with 3 sc; join directly into body Round 18.
- Flatten leg openings and crochet shut with 6 sc; join directly into body Round 11.
- Flatten tail opening and crochet shut with 5 sc; join directly into body across Rounds 11 and 12.
- Fold ears in half, slip stitch edges together, and sew across Rounds 11 and 12 of the head spaced 8 stitches apart.
- Execute two-stage needle sculpting through base of head to cup and sink the ears.
- Insert 12 mm safety screw eyes between Rounds 5 and 6 under the hdc increases of Round 6.
- Work surface crochet eyebrow arches in white Alize Softy thread starting 4 stitches from the milk snout edge.
- Embroider 6 to 7 horizontal nose stitches between Rounds 1 and 2 in black Alize Softy thread.
- Sew head firmly onto body neck opening (Round 18), stuffing neck firmly to prevent wobbling.
- Tether inner foot arches together beneath body with strong thin thread to stabilize the sitting pose.
Pattern Notes and Troubleshooting
If an Arm or the Tail Sits Off-Center
If an arm looks like it’s leaning toward the front or back of the body rather than sitting squarely on the side, the most likely cause is a missed or miscounted shift stitch in Round 17. Go back and confirm that the beginning of that round lines up directly above the beginning of Round 11 before you continue joining the arms in Round 18.
If the Chenille Frays During Facial Sculpting
Chenille yarn is soft but not especially strong under repeated tension, so it can fray or snap while you’re working the ear sculpting stitches or pulling the inner feet together. If you notice the working thread thinning or splitting during either step, switch to a smooth nylon or polyester sewing thread instead, which slides through the stitches without adding extra friction.
Keeping Round Counts Accurate Through the Shaping Rounds
Because the body, legs, and tail all move through several increase and decrease rounds before anything gets joined, it’s worth counting stitches at the end of each shaping round rather than waiting until Round 11 or Round 17 to check your work. Catching a missed increase or decrease early is much easier than unpicking a round that already has a leg or arm crocheted into it.
Finishing Checklist
Before setting the finished raccoon aside, run through a last check of every joint and closure. Learning how to fasten off amigurumi cleanly at each part’s closing round, then weaving the tail deep into the stuffing, keeps every seam from working loose over time. The neck is worth a final firm press to make sure it’s packed solidly before you call the head attachment finished.
- All limbs and tail are securely anchored into body rounds without gaps.
- Safety eye backings are firmly seated and locked inside the head.
- White surface-crocheted eyebrow arcs are symmetrical over both eye patches.
- Black embroidered nose is compact, solid, and centered between Rounds 1 and 2.
- Ear sculpting threads are tied securely at neck base and buried invisibly.
- Inner feet are tied securely, enabling the toy to sit upright stably on a flat surface.
- Neck area is firmly stuffed to prevent head tilting.