Labubu Amigurumi Pattern: A Yellow Hooded Crochet Plush
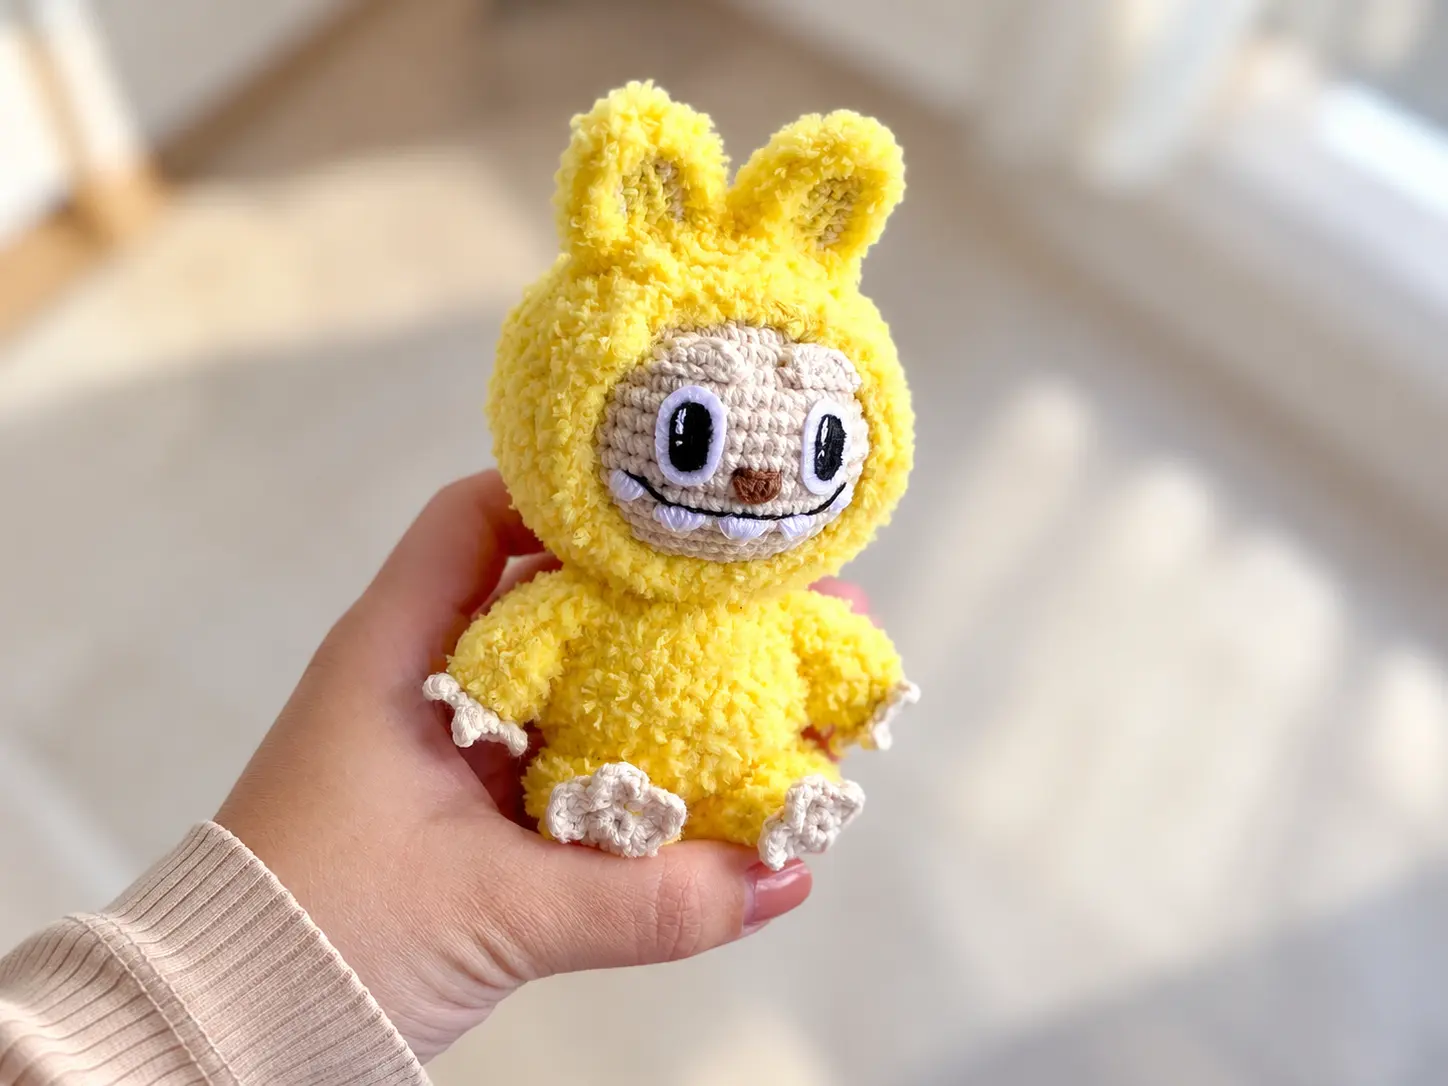
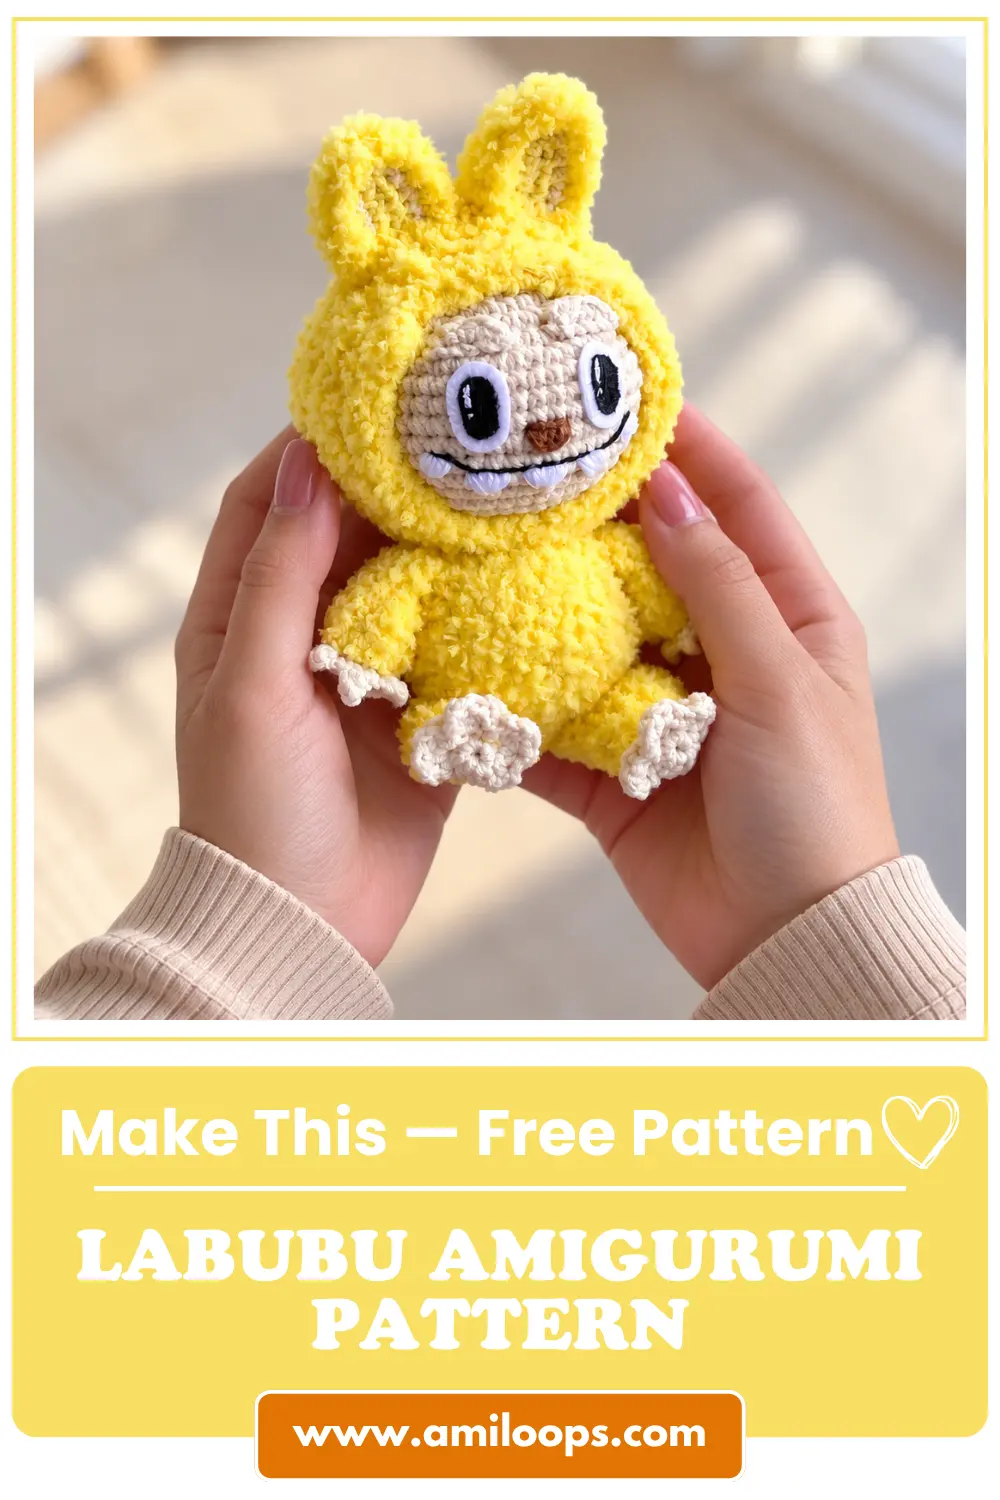
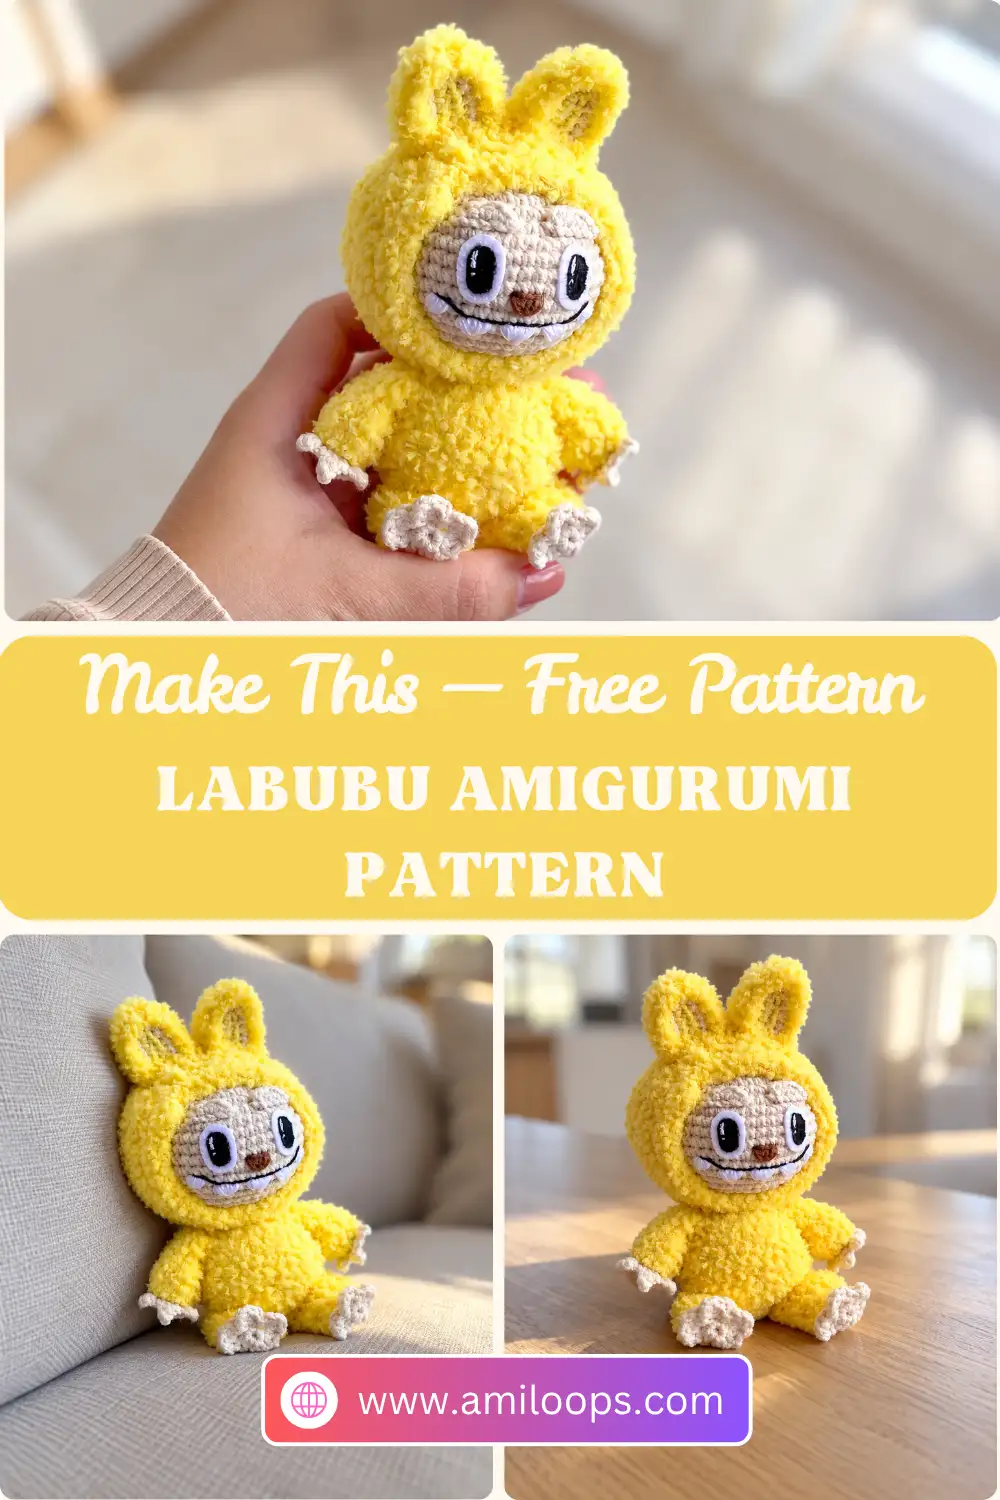
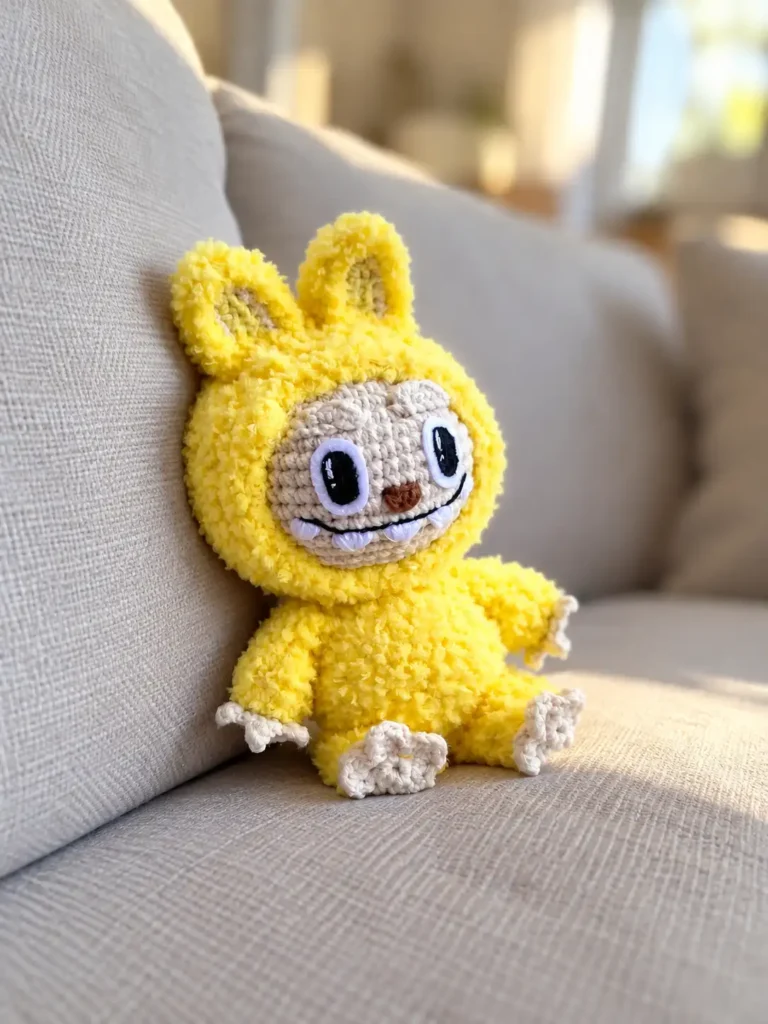
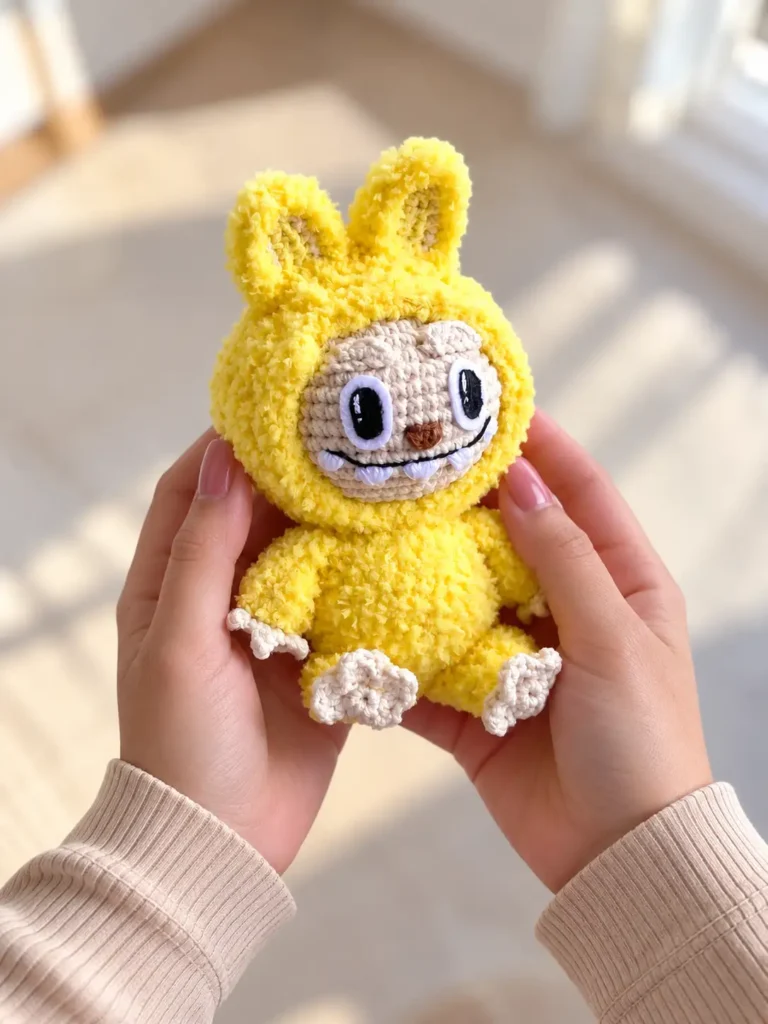
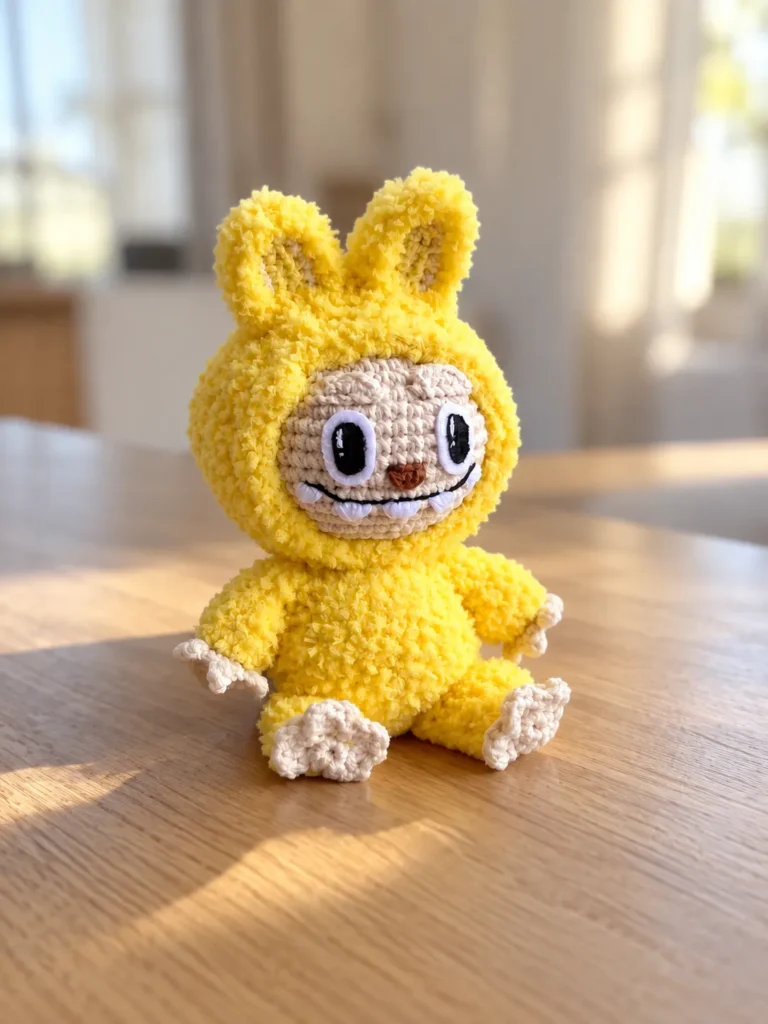
This Labubu amigurumi pattern makes a small 12 cm (about 4.7-inch) plush with a lot of personality packed into it: a fuzzy yellow head cover over a smooth beige head, two-tone ears with a lemon center, tiny crocheted fingers and toes, and a face finished with embroidery, felt and a little acrylic paint.
What makes the construction fun is the head cover. It starts exactly like the head, but it is worked in plush Alize Softy on a larger hook and with extra plain rounds, so it slips over the finished head. You work its last two decrease rounds with the head already inside, then sew it in place. The arms and legs stay unstuffed and are closed flat with single crochet through both layers, ready to sew on.
Before your first stitch: Match each yarn to its hook. YarnArt Jeans (beige 05 and lemon 67) goes with the 1.75 hook for the head, inner ears, hands, feet and eyebrows. Alize Softy 187 (yellow) goes with the 2.0 hook for the head cover, body, outer ears and the upper part of each arm and leg.
Plan your order: Finish, stuff and close the head before you take the head cover past Rnd 20, because Rnds 21–22 of the cover are worked with the cover already on the head.
Materials Abbreviations Head Head Cover Body Ears Arms Legs Eyebrows Finishing FAQ
Materials and finished size
The finished toy measures 12 cm (about 4.7 inches).
- YarnArt Jeans yarn: 05 (beige), 67 (lemon)
- Alize Softy yarn: 187 (yellow)
- Clover crochet hooks: 1.75 and 2.0
- Stuffing
- Thin white, black and brown threads for the face details
- Needle for sewing the parts together
- Soft white felt
- White and black acrylic paint
- Moment Crystal glue
Abbreviations (US terms)
This pattern uses standard US crochet terms. If you usually work from UK patterns, the Craft Yarn Council crochet abbreviations list is a handy side-by-side reference.
| Abbreviation | Meaning |
|---|---|
| MR | magic ring |
| ch | chain |
| sc | single crochet |
| sl st | slip stitch |
| dc | double crochet |
| inc | increase (2 sc in the same stitch) |
| dec | decrease (work the next 2 stitches together as 1) |
| FLO | front loop only |
| st(s) | stitch(es) |
Reading the rounds: A sequence in square brackets is repeated the number of times shown, so “[1 sc, inc] 6 times” means work 1 sc, then an increase, six times around. The number in parentheses at the end of each round or row is the total stitch count. For more on repeats and notation, see the Craft Yarn Council guide to reading crochet patterns.
Head
Use YarnArt Jeans 05 (beige) and the 1.75 hook.
Rnd 1: 6 sc in MR (6). Place a marker.
Rnd 2: 6 inc (12).
Rnd 3: [1 sc, inc] 6 times (18).
Rnd 4: [2 sc, inc] 6 times (24).
Rnd 5: [3 sc, inc] 6 times (30).
Rnd 6: [4 sc, inc] 6 times (36).
Rnd 7: [5 sc, inc] 6 times (42).
Rnd 8: [6 sc, inc] 6 times (48).
Rnd 9: [7 sc, inc] 6 times (54).
Rnds 10–17: Sc in each st around (54). That makes 8 rounds.
Rnd 18: [7 sc, dec] 6 times (48).
Rnd 19: [6 sc, dec] 6 times (42).
Rnd 20: [5 sc, dec] 6 times (36).
Rnd 21: [4 sc, dec] 6 times (30).
Rnd 22: [3 sc, dec] 6 times (24).
Rnd 23: [2 sc, dec] 6 times (18).
Rnd 24: [1 sc, dec] 6 times (12). Stuff.
Rnd 25: 6 dec (6).
Cinch the opening closed, fasten off and weave in the end.
Head Cover
Use Alize Softy 187 (yellow) and the 2.0 hook.
How the cover fits: Rnds 1–9 follow the same increases as the head, up to 54 stitches. The plush yarn, the larger hook and three more plain rounds than the head (11 instead of 8) give the cover the room it needs to slip over the finished head.
Rnd 1: 6 sc in MR (6). Place a marker.
Rnd 2: 6 inc (12).
Rnd 3: [1 sc, inc] 6 times (18).
Rnd 4: [2 sc, inc] 6 times (24).
Rnd 5: [3 sc, inc] 6 times (30).
Rnd 6: [4 sc, inc] 6 times (36).
Rnd 7: [5 sc, inc] 6 times (42).
Rnd 8: [6 sc, inc] 6 times (48).
Rnd 9: [7 sc, inc] 6 times (54).
Rnds 10–20: Sc in each st around (54). That makes 11 rounds.
Put the cover on the head, then work the decreases:
Rnd 21: [7 sc, dec] 6 times (48).
Rnd 22: [6 sc, dec] 6 times (42).
Leave a long yarn tail for sewing and sew the cover to the head. If you’d like a refresher on joining pieces neatly, this guide on sewing amigurumi parts together walks through the basics.
Body
Use Alize Softy 187 (yellow) and the 2.0 hook.
Rnd 1: 6 sc in MR (6). Place a marker.
Rnd 2: 6 inc (12).
Rnd 3: [1 sc, inc] 6 times (18).
Rnd 4: [2 sc, inc] 6 times (24).
Rnd 5: [3 sc, inc] 6 times (30).
Rnd 6: [4 sc, inc] 6 times (36).
Rnds 7–11: Sc in each st around (36). That makes 5 rounds.
Rnd 12: [4 sc, dec] 6 times (30).
Rnd 13: Sc in each st around (30). Stuff.
Rnd 14: [3 sc, dec] 6 times (24).
Rnd 15: Sc in each st around (24).
Rnd 16: [2 sc, dec] 6 times (18). Stuff.
Leave a long yarn tail for sewing and sew the body to the head. As you finish the seam, stuff the neck firmly so the head doesn’t wobble. These tips on stuffing amigurumi without lumps can help you get a firm, even fill.
Ears (make 2)
Each ear has two pieces: a small lemon-and-beige inner piece and a yellow outer piece. The edging row of the outer piece is worked through both pieces held together, which joins them.
First Piece (Inner Ear)
Use YarnArt Jeans 05 (beige) and 67 (lemon) with the 1.75 hook. Start with lemon.
Ch 5. Starting in the 2nd ch from the hook:
Row 1: 3 sc, 3 sc in the last ch, then work 3 sc along the other side of the chain (9).
Working around the chain: Row 1 travels up one side of the foundation chain, turns the tip with 3 sc in the last chain, and comes back down the other side, which gives you a small oval of 9 stitches.
Color change: Change to beige. Ch 1 and turn. For a clean switch, see how to change colors in amigurumi.
Row 2: 3 sc, 3 inc, 3 sc (12).
Fasten off.
Second Piece (Outer Ear)
Use Alize Softy 187 (yellow) and the 2.0 hook.
Ch 5. Starting in the 2nd ch from the hook:
Row 1: 3 sc, 3 sc in the last ch, then work 3 sc along the other side of the chain. Ch 1 and turn (9).
Row 2: 3 sc, 3 inc, 3 sc. Ch 1 and turn (12).
Hold the first piece against the second piece, wrong sides together, and work the edging through both pieces to join them:
Row 3 (edging): 5 sc, 2 inc, 5 sc, ch 1, then 5 sc along the bottom edge and a sl st (19).
Leave a yarn tail for sewing. Sew the ears to the head.
Arms (make 2)
Do not stuff. Start with YarnArt Jeans 05 (beige) and the 1.75 hook.
Rnd 1: 6 sc in MR (6). Place a marker.
The fingers are made in the next round.
How the fingers form: Each finger is a ch 3 worked back with 2 sl sts. The sc after each finger goes into the front loop only of the next stitch, so three back loops are left free. Rnd 3 works into those back loops, keeping the round at 6 stitches while the fingers stand out in front.
Rnd 2: 1 sc, [ch 3; starting in the 2nd ch from the hook, sl st in the next 2 ch; 1 sc in FLO of the next st] 3 times, then 2 sc through both loops (6).
Rnd 3: 1 sc, 3 sc in the remaining back loops, 2 sc (6).
Color and hook change: Change to Alize Softy 187 (yellow) and the 2.0 hook.
Rnd 4: 6 inc (12).
Rnds 5–9: Sc in each st around (12). That makes 5 rounds.
Flatten the piece and work 6 sc through both layers. Leave a long yarn tail for sewing. Sew the arms to the body at a slight angle.
Legs (make 2)
Do not stuff. Start with YarnArt Jeans 05 (beige) and the 1.75 hook.
Rnd 1: 6 sc in MR (6). Place a marker.
The toes are made in the next round.
How the toes form: Each toe is a little cluster worked entirely in the front loop of one stitch: 3 dc, ch 2, then a sl st back into that same stitch. Just like the hands, Rnd 3 picks up the back loops left behind under the toes.
Rnd 2: 1 sc, [in FLO of the next st: 3 dc, ch 2, sl st in the same st] 3 times, 2 sc (6).
Rnd 3: 1 sc, 3 sc in the remaining back loops, 2 sc (6).
Color and hook change: Change to Alize Softy 187 (yellow) and the 2.0 hook.
Rnd 4: 6 inc (12).
Rnd 5: [1 sc, inc] 6 times (18).
Rnds 6–7: Sc in each st around (18). That makes 2 rounds.
Rnd 8: [1 sc, dec] 6 times (12).
Flatten the piece and work 6 sc through both layers. Leave a long yarn tail for sewing. Sew the legs to the bottom of the body, then tack each leg lightly to the tummy.
Eyebrows (make 2)
Use YarnArt Jeans 05 (beige) and the 1.75 hook.
Each eyebrow: Ch 5. Starting in the 2nd ch from the hook, work 4 sc. Leave a long yarn tail for sewing.
Face and Finishing
Take your time with drying: The felt eyes are glued first and painted afterward, so let the glue dry completely before you paint, and let the paint dry completely before you sew on the eyebrows.
- Use pins to mark where the nose and mouth will go.
- Embroider the mouth with black thread.
- Embroider the teeth with white thread.
- Embroider a triangle nose with brown thread.
- Cut two ovals from the soft white felt for the eyes. Glue them to the head with Moment Crystal glue and let them dry completely.
- Paint the pupils on the felt with black acrylic paint, then add highlights with white acrylic. Let the paint dry completely.
- Sew the eyebrows above the eyes.
More character plushies to try
Questions about this Labubu pattern
Why is the head cover finished while it’s on the head?
Rnds 1–20 make a deep yellow cup that is roomy enough to slip over the finished head. Rnds 21–22 then decrease from 54 to 42 stitches with the head inside, drawing the edge in around the head before you sew the cover in place with the long tail.
Should I stuff the arms and legs?
No. The pattern says not to stuff them. Each one is flattened at the end and closed with 6 sc worked through both layers, then sewn on: the arms to the body at a slight angle, and the legs to the bottom of the body with each leg tacked lightly to the tummy.
How are the tiny fingers and toes made?
They are worked in Rnd 2 of each arm and leg. A finger is a ch 3 worked back with 2 sl sts, followed by a sc in the front loop only of the next stitch. A toe is 3 dc, ch 2 and a sl st, all in the front loop of one stitch. In both cases, Rnd 3 works into the back loops left free.
Where do the arms and legs change yarn and hook?
The beige hands and feet (Rnds 1–3) are worked in YarnArt Jeans with the 1.75 hook. At Rnd 4 you change to yellow Alize Softy and the 2.0 hook, the same yarn-and-hook pairing used for the body, head cover and outer ears.
How are the eyes made?
Cut two ovals of soft white felt and glue them to the head with Moment Crystal glue, then let them dry completely. Paint black acrylic pupils, add white acrylic highlights and let the paint dry completely before sewing the eyebrows above the eyes.