Free Mini Dragon Amigurumi Pattern (Step-by-Step)
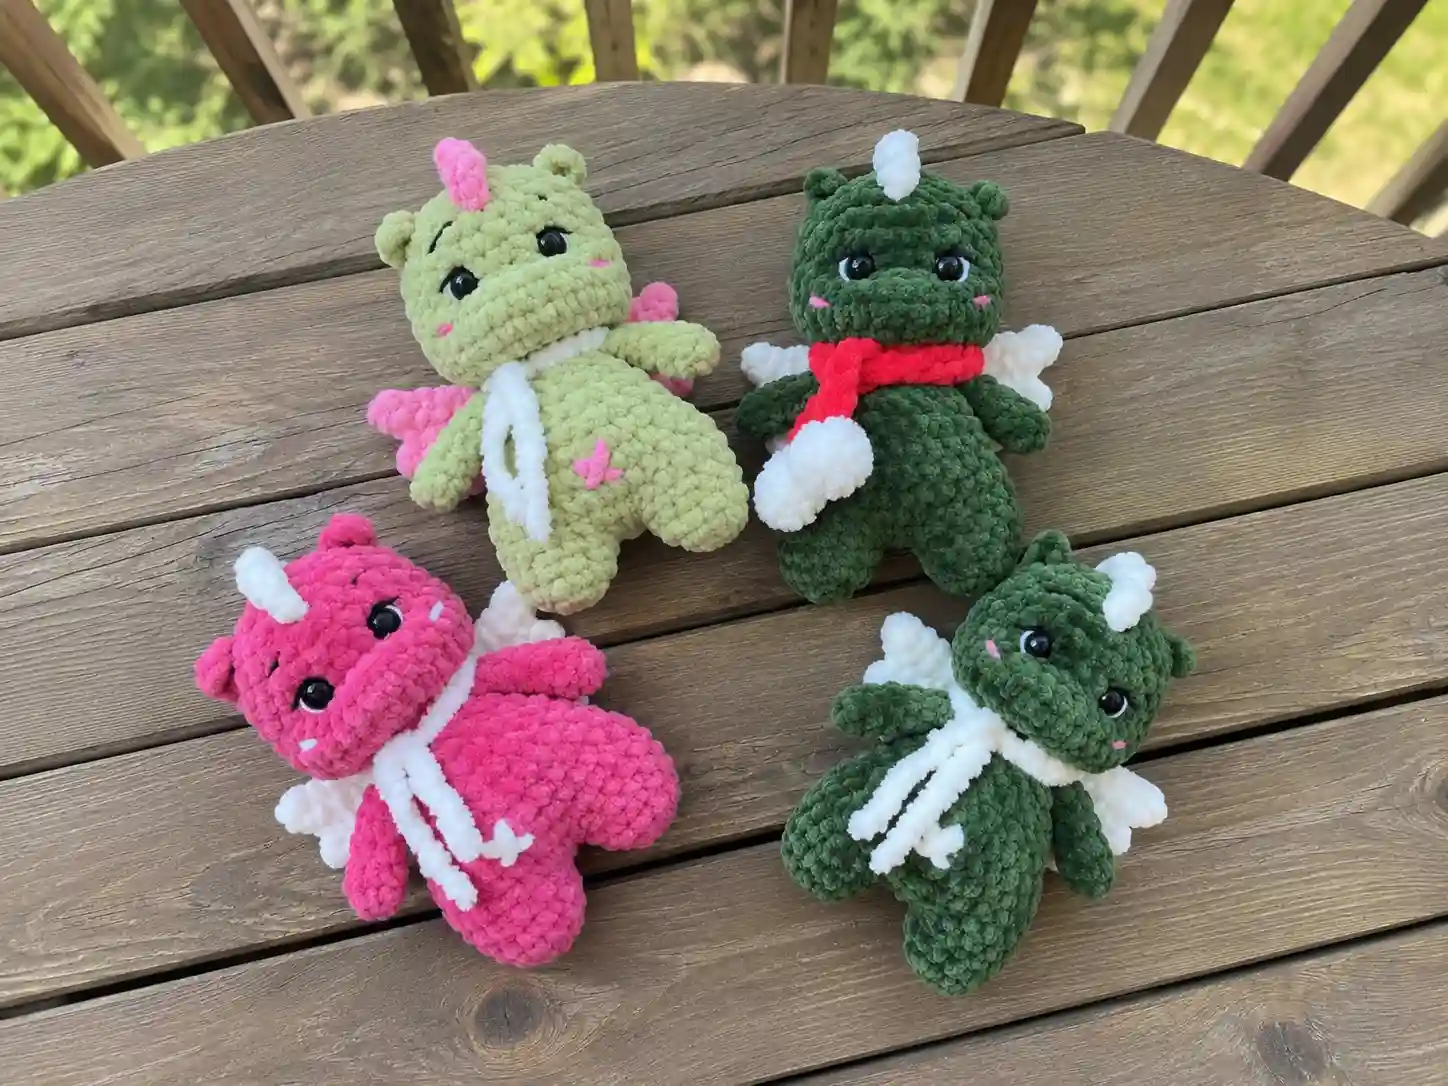
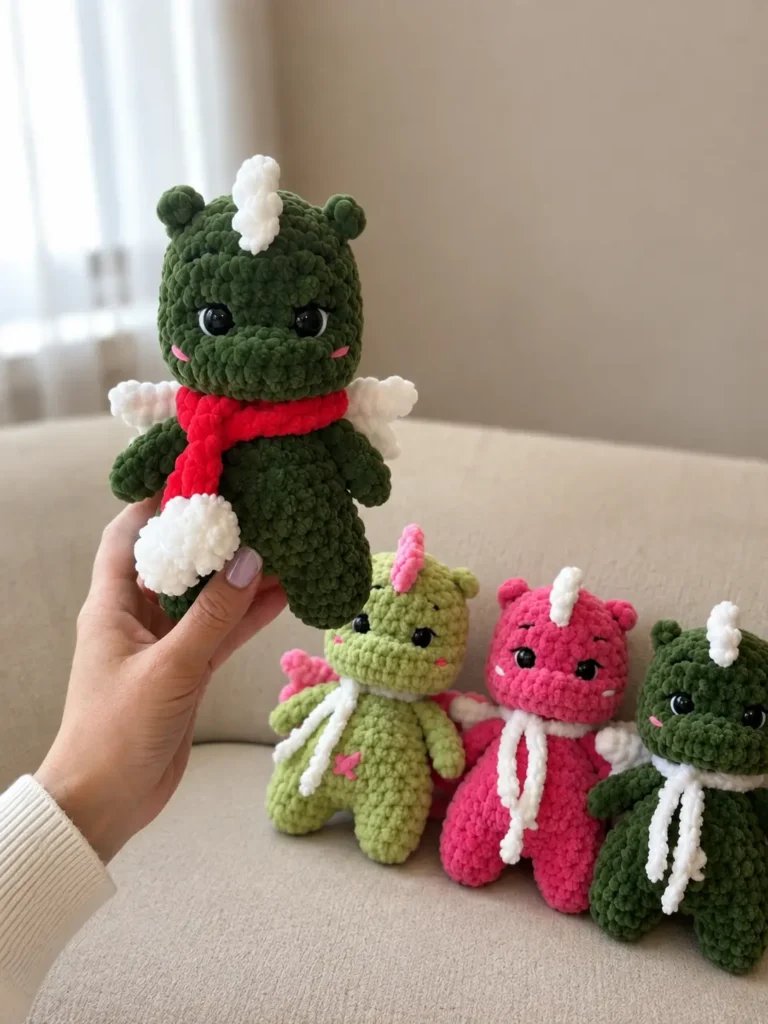
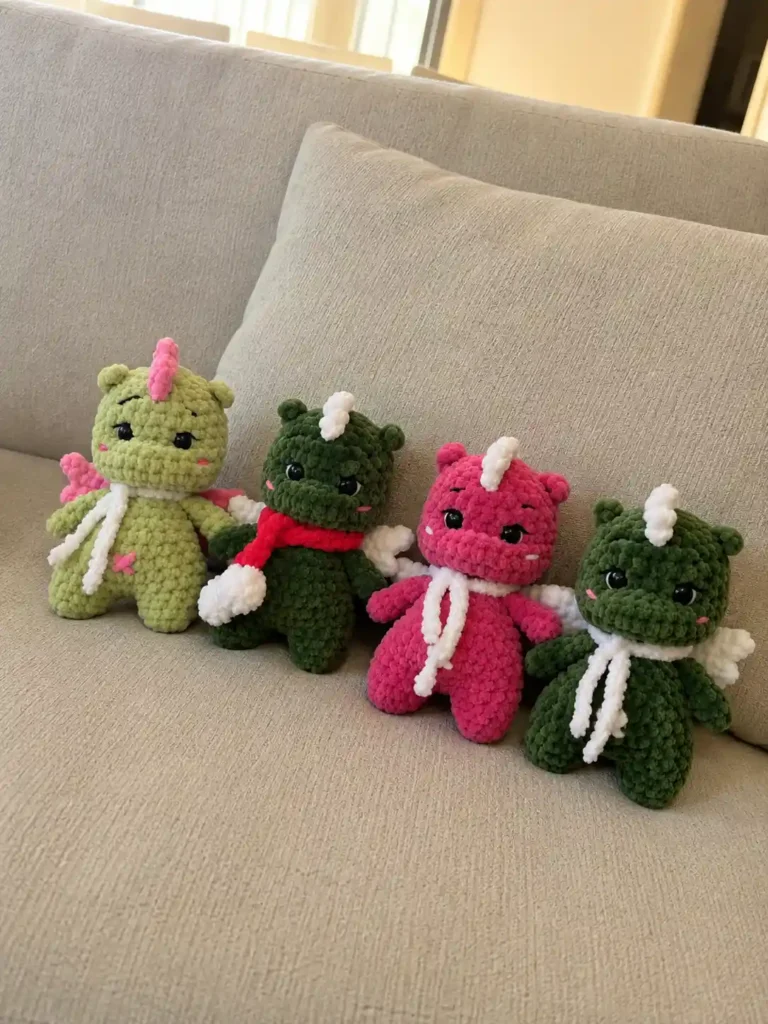
This mini dragon amigurumi pattern brings together a soft, huggable dragon shape with two small winter extras: a knit-look scarf and a pair of fluffy pom-poms. Worked in plush super bulky yarn, the finished dragon stands about 14cm tall, small enough to perch on a shelf or ride along in a bag. The body is made in two plush colors, with a contrasting red carried through the scarf, so the finished piece reads warm and cozy from the very first round.
Every stage of the project is written out in full, from the first magic ring through the final embroidered details on the face. You will work the arms and legs first, then build the body upward into the head, adding ears, spikes, wings, and a curled tail along the way. Facial sculpting with strong thread gives the dragon its expression, while the materials, abbreviations, and troubleshooting sections below walk through exactly what each stage needs before you pick up a hook.
About This Mini Dragon Amigurumi Pattern
One of the more satisfying parts of this project is how the body flows straight into the head without a separate join. The legs are worked first and connected with a short chain, and the body rounds then shape upward and narrow at the neck before expanding again into the head. Because there is no seam at the neck, the transition between body and head stays smooth and continuous, which also makes the neck easier to stuff firmly for a dragon that holds its pose.
The face is not just crocheted; it is also sculpted. After the safety eyes are set in place, strong thread is pulled through specific points around the eye sockets and snout to pull those areas in and give the face real dimension. This sculpting step, paired with embroidered eye whites, eyelashes, eyebrows, and cheeks, is what turns a plain rounded head into an expressive dragon face, so it is worth taking slowly rather than rushing through.
Materials and Tools
This pattern calls for three distinct types of yarn, each doing a different job. The main body and contrast color both use a super bulky plush yarn, which gives the dragon its soft, rounded silhouette and keeps individual stitches from standing out too sharply. The scarf uses a separate red super bulky plush yarn, while the pom-poms are worked in a lighter Alize Softy yarn so they stay light and full rather than heavy.
Because the project mixes yarn weights, it also calls for two hook sizes. The 4.0 mm hook is used for the entire dragon body, including the arms, legs, head, ears, spikes, wings, and tail, while a smaller 3.0 mm hook is reserved just for the scarf. Keeping these hooks paired with their intended yarn helps the plush parts stay dense enough to hold stuffing and the scarf stay soft and drapey.
- Super bulky plush yarn (120m/100g, e.g., YarnArt Dolce, Himalaya Dolphin Baby, or Wolans Bunny Baby) in two colors: Khaki (YarnArt Dolce 772) and Milk (YarnArt Dolce 745)
- Red super bulky plush yarn (for the scarf)
- Alize Softy yarn (for the pom-poms)
- 4.0 mm crochet hook (for the main project)
- 3.0 mm crochet hook (for the scarf)
- Safety eyes (10mm to 14mm, 12mm pictured)
- Fiberfill stuffing
- Strong thread for face sculpting (eye indentation)
- Long needle for sculpting and sewing the tail
- Small amount of black and pink embroidery thread (or YarnArt Jeans split in half) for facial details
- YarnArt Dolce in milk color (for eye whites)
Crochet Abbreviations
The abbreviation list below covers every stitch used across the whole project, but a few show up in specific spots worth flagging. Standard single crochet decreases are used repeatedly through the neck and snout shaping, where the round count needs to drop smoothly without leaving a visible pucker. Reading through the shaping rounds with this in mind makes it easier to see why the stitch counts change the way they do from round to round.
Half double crochet stitches show up in one place only: the ears. Working the two extra chain stitches into half double crochet, rather than single crochet, gives each ear a bit more height and a slightly looser drape than the tightly packed single crochet used everywhere else on the head. If your ears feel floppier than the rest of the dragon, that softness is expected and comes directly from this stitch choice.
- MR — magic ring
- sc — single crochet
- dc — double crochet
- hdc — half double crochet
- inc — increase (2 sc in one stitch)
- dec — decrease (sc 2 together)
- ch — chain
- sl st — slip stitch
- st(s) — stitch(es)
Construction Overview
Construction starts with the pieces that get set aside for later: both arms are made first and left unattached until the body reaches the correct round. This joined-as-you-go approach means you will crochet the arms early, fasten off, and then pick them back up partway through the body instead of sewing them on at the very end. It keeps the finished seam nearly invisible compared to attaching a fully finished limb after the fact.
The legs are worked next and joined at the base of the body with a short connecting chain, which becomes part of the round 5 stitch count. From there, the body rounds increase and then decrease in a defined sequence to shape the chest and shoulders. Once the shaping settles into round 15, both saved arms are attached directly into the body stitches, and the body transitions straight into the head without a break in the yarn.
The head itself expands quickly right after the arms are attached, growing from the narrow neck into a rounder shape over just a few rounds. This is also the point where you will stuff the neck and lower head firmly, since access gets much tighter once the head rounds start decreasing again near the top. Getting stuffing in generously here, rather than trying to add more later, is what keeps the finished head from feeling soft or floppy at the neck.
Before You Start
Before you sit down with the pattern, take a moment to gather your sculpting supplies. Choose a strong thread that either matches the body color closely or can be tucked away easily, since this thread stays inside the finished piece and will not be removed later. It is also worth setting aside your black, pink, and white embroidery threads now so you are not searching for them mid-project once the face is ready for detailing.
It also helps to know ahead of time that you will need to shift your stitch marker before round 21 of the head. Rather than leaving it at the same spot it has held since the first body round, move it to the center back of the neck just before that round begins. This small adjustment keeps the safety eye placement centered on the face instead of drifting to one side as the rounds continue upward.
Mini Dragon Crochet Pattern
The canonical rounds below are written exactly as designed, part by part, so keep your stitch counts nearby as you work through each section. Round 5 of the body is the first place multiple pieces come together, since it joins both finished legs with a connecting chain into a single 28-stitch round. Later, round 15 is worth watching closely too, since it is the exact round where both saved arms are attached, with three stitches of space kept on each side between them.
Arms
- Round 1: 6 sc in MR (6)
- Rounds 2-6: 6 sc (6)
Legs
- Round 1: 6 sc in MR (6)
- Round 2: 6 inc (12)
- Rounds 3-4: 12 sc (12)
Body
- Round 5: ch 2, join to the first leg, 12 sc around the first leg, 2 sc along the ch, 12 sc around the second leg, 2 sc along the other side of the ch (28)
- Round 6: 12 sc, 2 inc, 14 sc (30)
- Round 7: 9 sc, dec, 8 sc, dec, 7 sc (28)
- Round 8: 6 sc, dec, 12 sc, dec, 6 sc (26)
- Round 9: 7 sc, dec, 8 sc, dec, 7 sc (24)
- Round 10: 24 sc (24)
- Round 11: 10 sc, dec, 1 sc, dec, 7 sc (22)
- Round 12: 9 sc, dec, 1 sc, dec, 8 sc (20)
- Round 13: 8 sc, dec, 1 sc, dec, 7 sc (18)
- Round 14: (dec, 1 sc) * 6 (12)
- Round 15: 2 sc, 3 sc attaching the first arm, 3 sc, 3 sc attaching the second arm, 1 sc (12)
Head
- Round 16: 12 inc (24)
- Round 17: (3 sc, inc) * 6 (30)
- Rounds 18-20: 30 sc (30)
- Round 21: 9 sc, 6 dec, 9 sc (24)
- Rounds 22-24: 24 sc (24)
- Round 25: (2 sc, dec) * 6 (18)
- Round 26: (1 sc, dec) * 6 (12)
- Round 27: 6 dec (6)
Ears
- Right ear: Attach yarn to the side of the head in Round 25, ch 4, starting from the 3rd ch from the hook work 2 hdc. Sl st into Round 24.
- Left ear: Attach yarn to the side of the head in Round 24, ch 4, starting from the 3rd ch from the hook work 2 hdc. Sl st into Round 25.
Spikes
- Step 1: In the first stitch work (sc, dc, sc).
- Step 2: In the next stitch work 1 sl st. Repeat alternating down the back.
Wings
- Row 1: ch 17, starting from the 2nd ch from the hook work 16 sc, ch 3, turn
- Row 2: starting from the 2nd ch from the hook work 17 sc, ch 3, turn
- Row 3: starting from the 2nd ch from the hook work 18 sc, ch 3, turn
- Row 4: starting from the 2nd ch from the hook work 19 sc, ch 3, turn
- Row 5: starting from the 2nd ch from the hook work 11 sc
- Row 6: ch 2, turn, starting from the 2nd ch from the hook work 8 sc
Tail
- Round 1: 5 sc in MR (5)
- Round 2: inc, 4 sc (6)
- Round 3: 1 sc, inc, 4 sc (7)
- Round 4: 2 sc, inc, 4 sc (8)
- Round 5: 3 sc, inc, 4 sc (9)
- Round 6: 4 sc, inc, 4 sc (10)
- Round 7: 5 sc, inc, 4 sc (11)
- Round 8: 6 sc, inc, 4 sc (12)
Scarf
- Row 1: ch 51, starting from the 2nd ch from the hook work 50 sc (50)
Pom-poms
- Round 1: 6 sc in MR (6)
- Round 2: 6 inc (12)
- Rounds 3-4: 12 sc (12)
- Round 5: 6 dec (6)
Assembly and Finishing
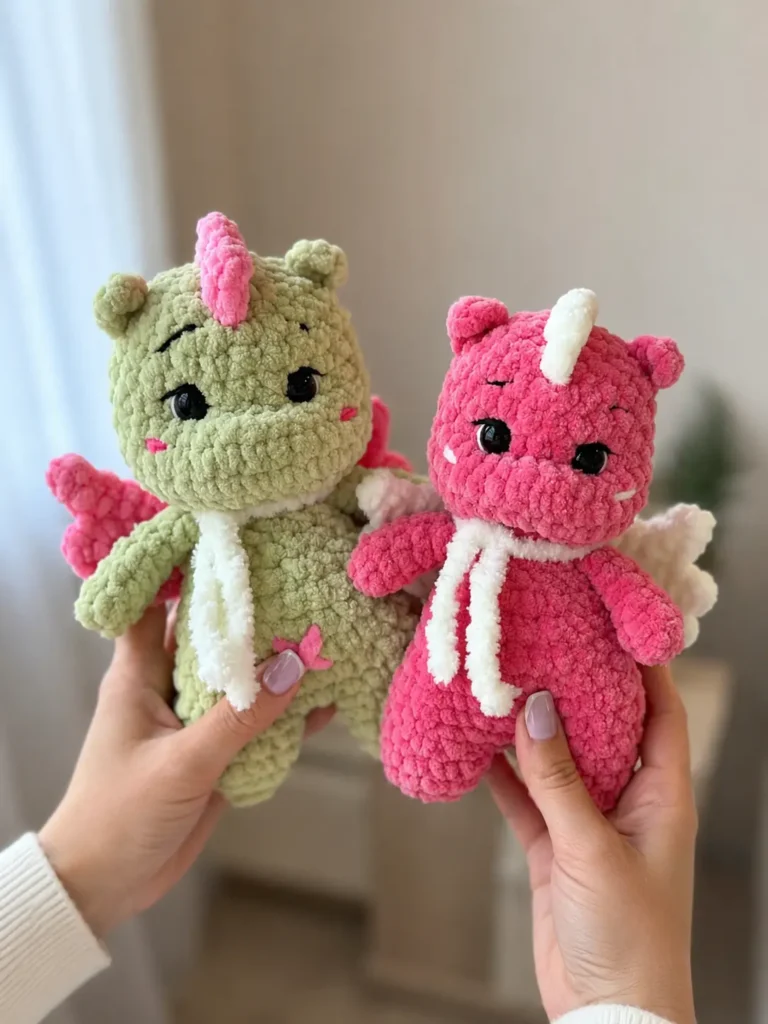
With all of the individual pieces finished, assembly focuses on where each part sits relative to the others. The dorsal spikes begin precisely at the center of the forehead, at round 25 of the head, and travel continuously down the back to round 15 of the body, giving the dragon a single unbroken ridge from face to tail. Because the spikes are worked directly onto the finished surface rather than sewn on separately, their starting point needs to be counted out carefully before you begin.
The wings are positioned using the spikes as a reference point rather than measuring from scratch. Once the lowest spike on the back is in place, the wings are centered horizontally directly beneath it and sewn on so they sit evenly on either side of the spine. Working in this order, spikes first and wings second, makes it much easier to keep both wings level with each other than trying to position them independently.
- Fold unstuffed arms flat and crochet 3 sc through both layers to close.
- Do not cut yarn on second leg; chain 2 and join to first leg to begin body.
- Crochet sl sts to the middle back of the head before starting R21 to align the round.
- Insert safety eyes between R21 and R22 with 3 sts between their inner edges.
- Use strong thread to sculpt eye sockets (Points 1-6) and snout (Points 1, 4, 7, 8).
- Embroider eye whites with milk plush yarn on the outer edges.
- Embroider eyelashes and eyebrows with black thread.
- Embroider cheeks with pink thread, 1 sc wide, between R19 and R20.
- Surface crochet spikes down the spine from R25 to R15 using (sc, dc, sc) and sl st.
- Thread tail through center of wings, gather tightly, and tie off before attaching.
- Sew wings directly beneath the lowest dorsal spike on the back.
- Surface crochet spikes onto the tail increases, stuff lightly, and attach below wings.
- Lightly stuff pom-poms, close, and sew securely to scarf ends.
Pattern Notes and Troubleshooting
Keeping the Legs and Body Aligned
If the finished dragon looks like its arms sit at slightly different heights or the body seems to twist, the most common cause traces back to round 5. Check whether the starting join chain from that round was pulled too tight when the legs were connected, since an overly snug chain there can skew the whole body to one side as the rounds build upward. Loosening just that one chain on your next attempt usually corrects the alignment for the rest of the body.
Preventing a Floppy Head
A head that feels soft or wobbles at the neck almost always comes down to stuffing timing rather than stuffing amount. Make sure the neck area, roughly rounds 14 through 16, is packed firmly while the opening is still wide enough to work stuffing in easily. Waiting until the head rounds have decreased further up makes it much harder to reach the neck, so it is worth over-stuffing that section slightly before you continue.
Sculpting the Eyes Without Popping
Sculpting the face can be finicky the first time, especially if the eyes seem to pull loose or pop partway through. The fix usually comes down to exactly where the strong thread passes through the fabric: it needs to go through the body of a stitch itself, not through the small gap between two stitches. Pulling through an actual stitch anchors the thread securely, while pulling between stitches gives the eye room to shift or pop back out.
Getting the Wings to Fold Correctly
Wings that will not fold into a neat accordion shape usually just need a firmer cinch at the center. Locate the long tail left from row 5 of the wing and use it to gather the folds tightly right at the middle point before tying off. If the gather sits even slightly off-center, one side of the fold will look bulkier than the other, so it is worth checking the center point twice before pulling the tail snug.
Finishing Checklist
Before calling the dragon finished, a short pass through the checklist below helps catch anything easy to miss in the excitement of finishing up. The tail deserves particular attention here, since its placement affects whether the finished dragon can balance and sit upright on its own rather than tipping backward. A few extra minutes checking symmetry and secure threads now saves you from unpicking stitches later.
- Verify both ears are at the same height and slope on the sides of the head.
- Check that the tail provides balanced support if the dragon is meant to sit.
- Ensure all strong sculpting threads are tied off securely and hidden inside the body.
- Confirm the scarf pom-poms are tightly secured to prevent shedding.
- Check that the eye whites are visible only on the outer edge of the black safety eyes.
- Ensure no stuffing is visibly poking out of the tail or body seams.
More Dragon Amigurumi Patterns to Try
- This other dragon amigurumi design offers a different silhouette for fans of larger crocheted dragons.
- The baby dragon crochet pattern free option makes a good next project for a simpler dragon shape.