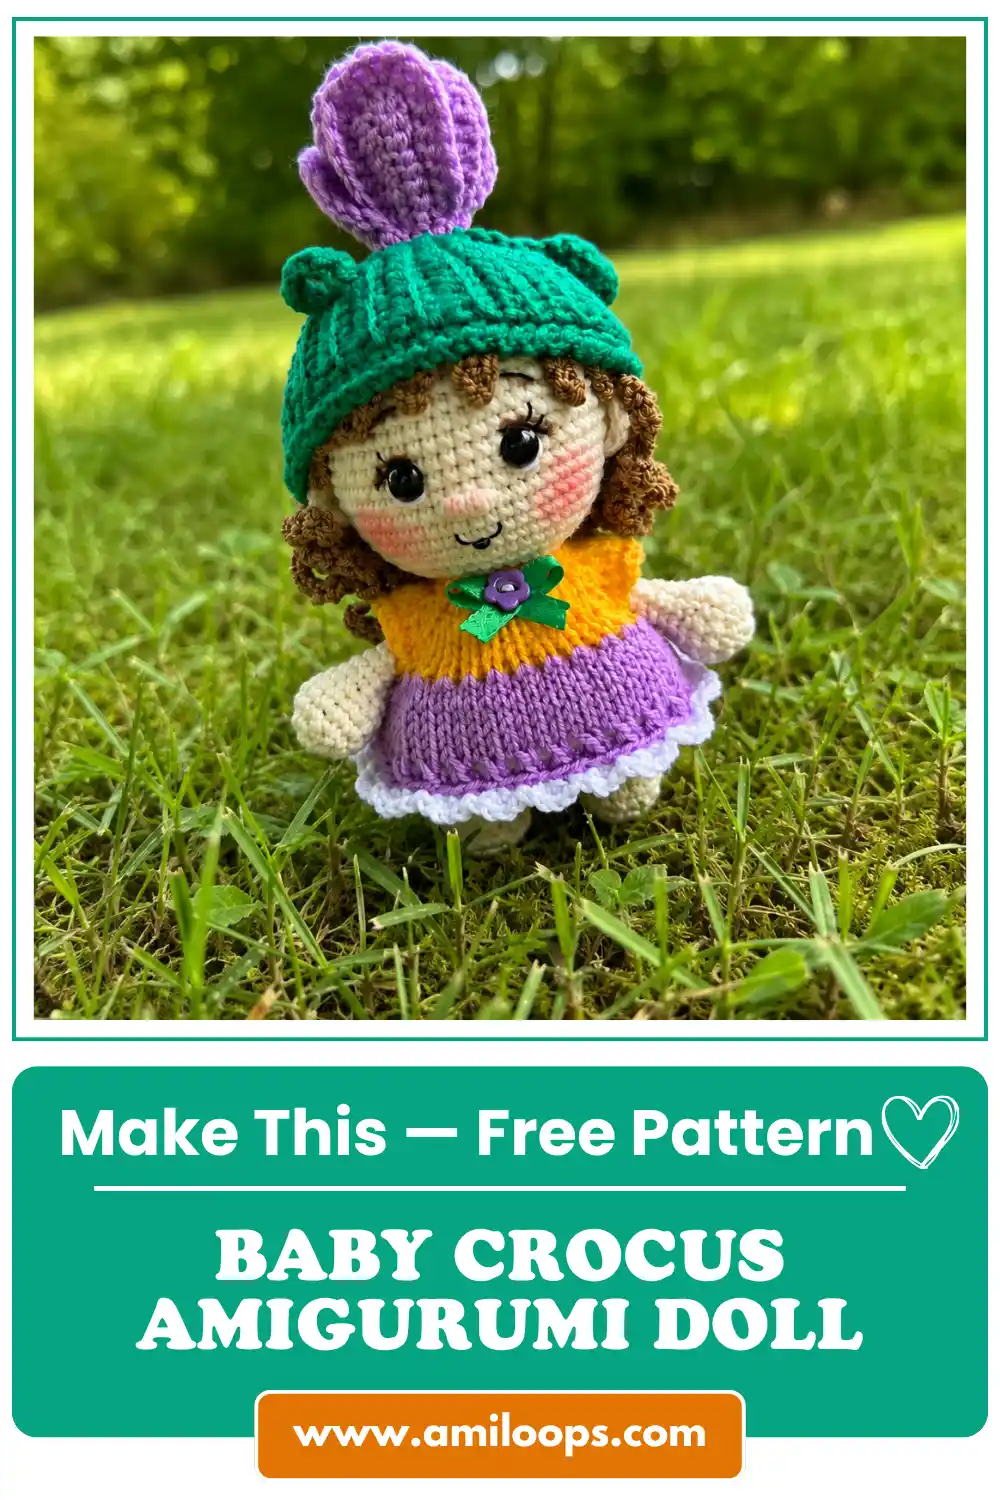
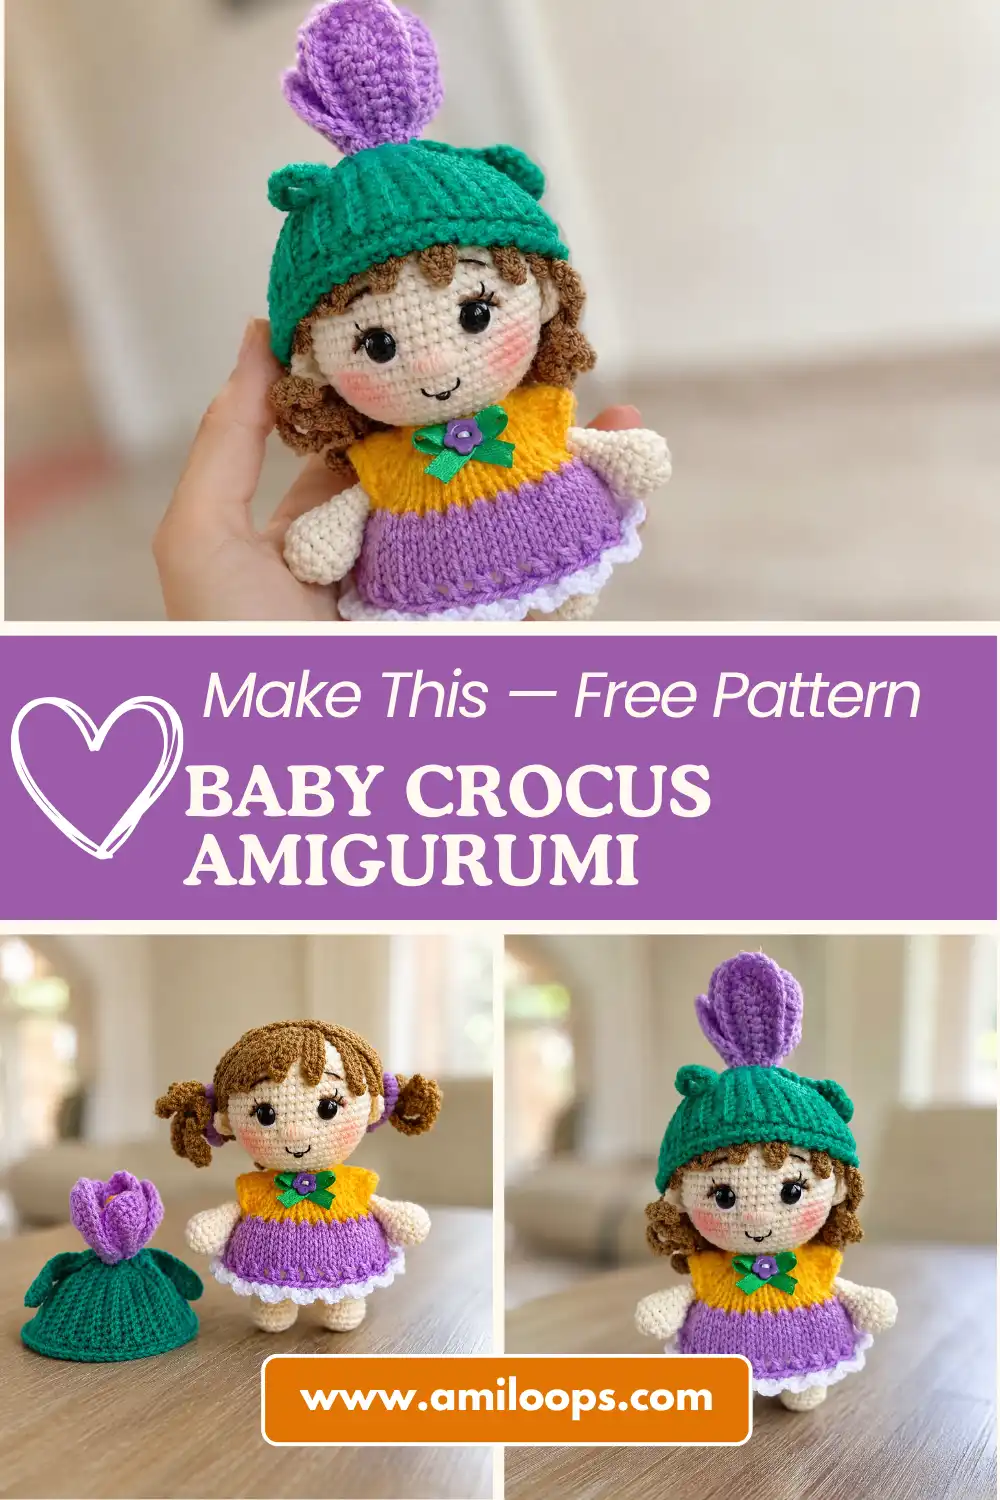
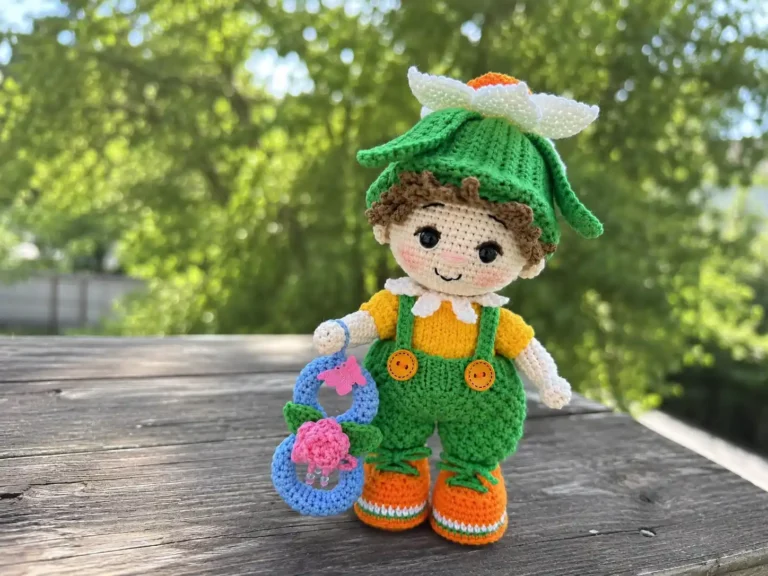
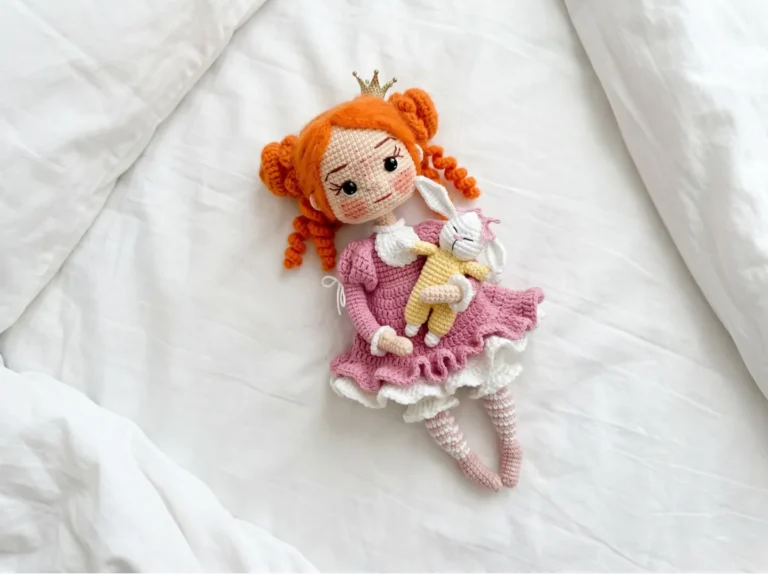
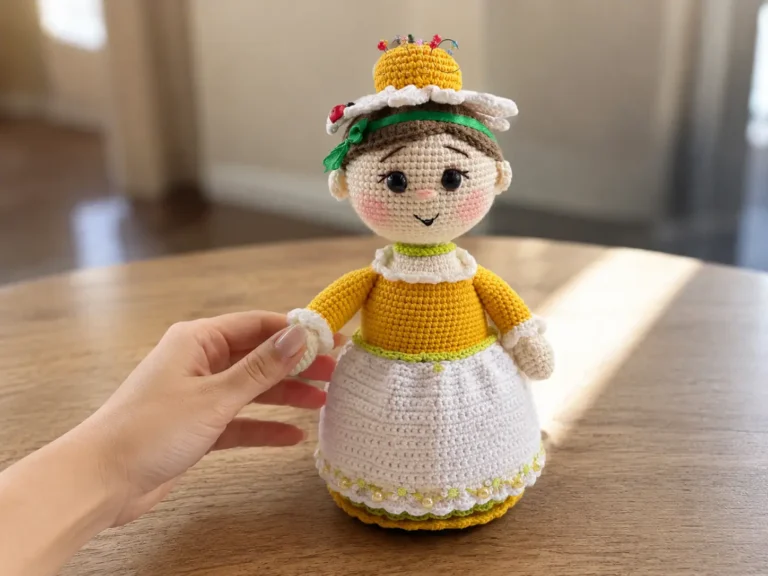
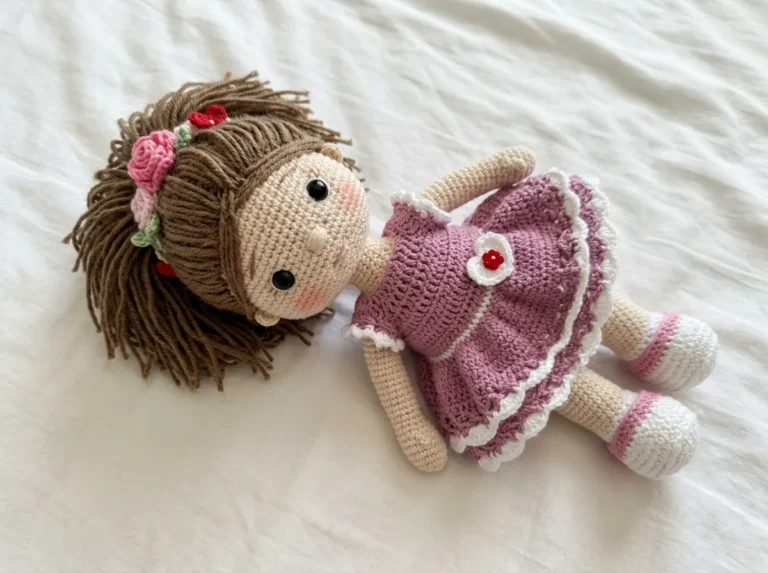
Free Baby Crocus Amigurumi Pattern — A Sweet Flower Doll to Crochet & Knit
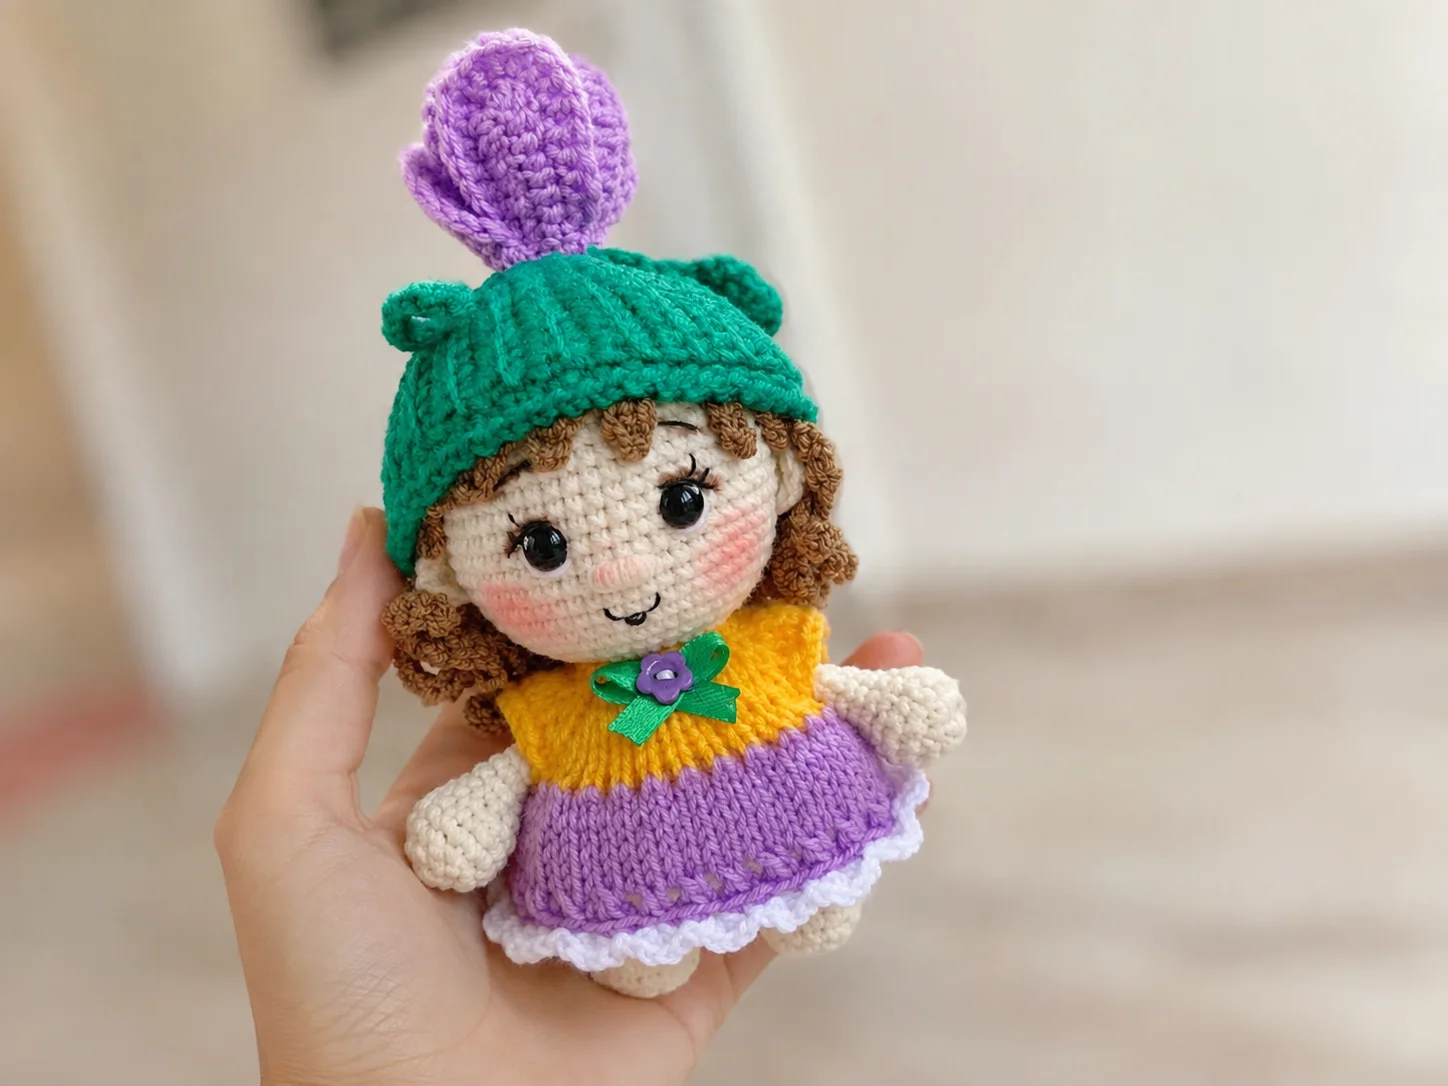
This baby crocus amigurumi free pattern is one of my favorites to look at — and I want to be upfront with you before you grab your hook. This isn’t a one-evening chenille project. It’s a sweet little doll with a knitted dress, a crocheted wig with long ringlets, and a tiny wired flower crown. Honestly? It’s a labor of love, and it’s worth every stitch.
🧶 Why You’ll Love This Pattern
- ⭐ Difficulty: INTERMEDIATE-ADVANCED — this one has a lot of moving parts
- ⏱️ Time: Multiple sessions — this is a “spread it over a few cozy evenings” project, not a one-sitting one
- 🪡 Sewing: Standard — arms are button-jointed, plus ears, wig, dress buttons, and flower assembly
- 🧵 Yarn: DK/Light Worsted weight cotton-blend, several colors
- 💰 Yarn needed: Small amounts of six different colors — a great stash-buster
- 🪡 Bonus skill: Requires basic knitting needles for the dress and part of the wig
Here’s the thing — I’m not going to pretend this is a “no-sew, one-evening” pattern, because it just isn’t, and you deserve to know that going in. But if you take it one part at a time, it’s completely doable. Grab a cup of tea. Let’s break this down together.
What You’ll Need for This Baby Crocus Amigurumi Pattern
- Body yarn: DK/Light Worsted (3) weight cotton-blend in a skin tone (the original uses YarnArt Jeans; Drops Muskat or Paintbox Cotton DK are good US-friendly swaps)
- Wig yarn: A small amount of DK weight yarn in your hair color of choice (cappuccino in the original)
- Dress & flower yarn: Small amounts of DK weight yarn in light purple, green, yellow, and white — this pattern is a fantastic way to use up scraps
- Crochet hook: 1.9mm — heads up, this is a very fine hook with no standard US letter equivalent, so you’ll want to shop by the millimeter size here rather than a lettered size. Check our hook size guide if you’re not sure what that means for you.
- Knitting needles: 1.8mm and 2.0mm (US 0) — yes, actual knitting needles! The dress and part of the wig strands are knitted, not crocheted. If you’ve never knit before, this is the part where I’d tell a friend to either learn a quick garter-stitch basics video first, or ask a knitting friend to help with just this piece.
- Stuffing: Polyester fiberfill (Poly-Fil is my go-to, found at Joann, Michaels, or Hobby Lobby)
- Safety eyes: 5mm, for the doll’s face
- 4 small buttons: 2 for the arm joints, 2 for dress decoration
- Black embroidery thread (Iris or similar) for the face details
- Thin wire: about 3.9 in (10 cm), for the flower stamen
- Tapestry needle and craft glue
This yarn falls into the DK / Light Worsted (3) weight category — a nice middle-ground thickness that’s easy to find and easy to work with. And since this doll uses safety eyes, if you’re making her for a little one, it’s worth a quick look at the CPSC’s toy safety guidance before you gift her.
Abbreviations You’ll Need
| Abbreviation | What It Means |
|---|---|
| mr | magic ring — an adjustable loop that starts your rounds with no hole in the center |
| sc | single crochet — the basic amigurumi stitch |
| hdc | half double crochet — a slightly taller stitch |
| dc | double crochet — a taller stitch still, used mostly in the flower and hat trim |
| sl st | slip stitch — joins or moves your hook without adding height |
| ch | chain — your basic foundation stitch |
| inc | increase — 2 single crochet worked into the same stitch |
| dec | decrease — 2 single crochet worked together (this pattern uses the standard decrease method, not the invisible decrease we usually recommend — see the note below) |
| BLO | back loop only — working into just the back loop of a stitch, for texture |
| k | knit (this shows up in the knitted dress and wig sections) |
| p | purl |
| yo | yarn over |
| k2tog | knit two together |
📝 A quick honest note: This pattern’s “dec” is what’s called a standard decrease — it can leave a tiny visible line compared to the invisible decrease we usually recommend on AmiLoops. If that bothers you, you can swap in an invisible decrease anywhere you see “dec” — the stitch counts will come out exactly the same either way.
Beginner Tips Before You Start
- New to the magic ring? It sounds fancy, but it’s really just a loop that cinches closed with no hole. Our magic ring tutorial gets you there in under two minutes.
- This pattern has a LOT of abbreviations, including some knitting ones mixed in. If you’re feeling lost, our guide to reading amigurumi patterns is a good one to keep open in another tab.
- Because there’s real sewing involved here — button-joint arms, a full wig, a flower crown — take a peek at our sewing amigurumi parts guide before you start. It’ll make the assembly stage so much less intimidating.
- Honestly? If knitting isn’t your thing, you can still crochet every single doll part (legs, body, head, arms, ears, wig base, hat, flower) and just ask a knitting friend for help with the dress. You don’t have to master a whole new craft to make this doll.
Legs (make 2)
Color: body color. Start with a magic ring.
Row 1: 6 sc in mr (6)
Row 2: 6 inc (12)
Row 3: (3 sc, inc)*3 (15)
Rows 4-6: 15 sc (15)
Finish off and cut yarn on the first leg. Crochet the second leg the same way, but don’t cut the yarn this time — you’ll use it to join straight into the body.
🎉 Two little legs done! These always feel like the easiest part to knock out first — nice warm-up before the bigger body section.
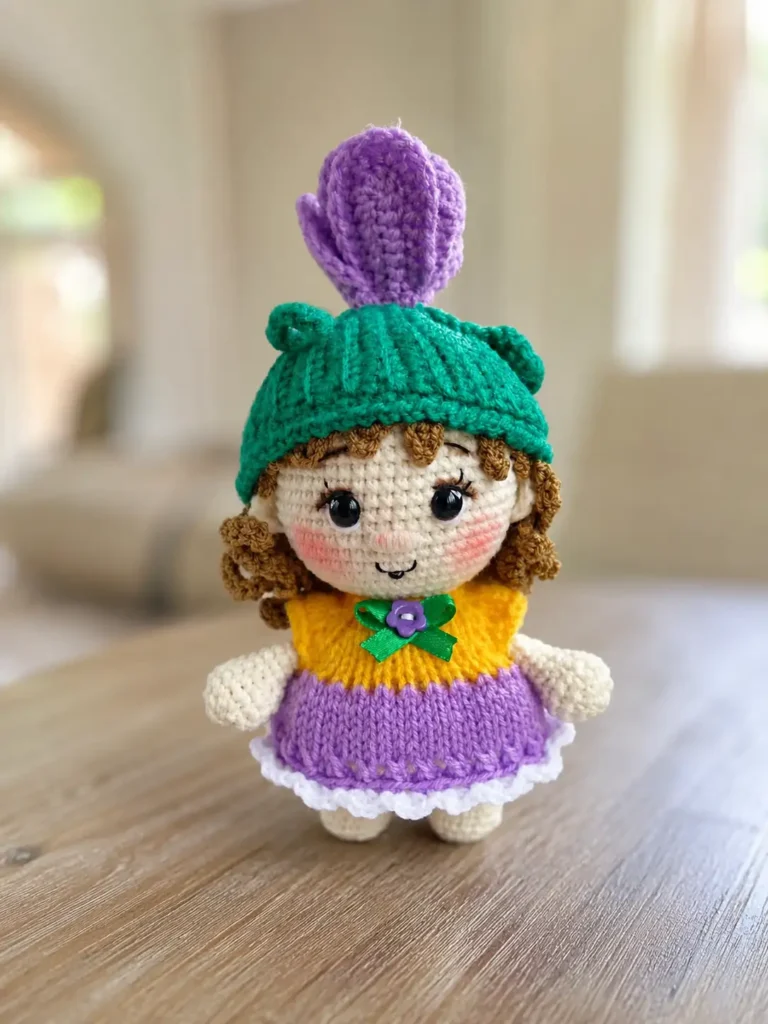
Body-Head (worked continuously from the legs)
Row 7: Ch 2, 15 sc along the first leg, 2 sc along the ch, 15 sc along the second leg, 2 sc along the ch (34)
Row 8: 15 sc, 2 inc, 17 sc (36)
Row 9: (5 sc, inc)*6 (42)
Row 10: 3 sc, inc, (6 sc, inc)*5, 3 sc (48)
Rows 11-13: 48 sc (48)
Row 14: (14 sc, dec)*3 (45)
Row 15: 45 sc (45)
Row 16: (13 sc, dec)*3 (42)
Row 17: 42 sc (42)
Row 18: (12 sc, dec)*3 (39)
Row 19: 39 sc (39)
Row 20: 10 sc, dec, (3 sc, dec)*4, 7 sc (34)
Row 21: 8 sc, dec, (1 sc, dec)*6, 6 sc (27)
Time to add some stuffing — squeeze it in there, working it up into the leg and lower body area so she has something solid to sit on later.
Row 22: dec, 3 sc, (2 sc, dec)*5, 2 sc (21)
Row 23: (dec, 1 sc)*3, dec, 4 sc, (dec, 1 sc)*2 (15)
Row 24: 15 sc (15)
🎉 You’re through the trickiest shaping! The body-to-neck transition is honestly the fussiest part of this whole doll. Everything from here is building up into the head — the fun part.
Add a bit more stuffing into the neck/body before continuing up into the head.
Row 25: 15 inc (30)
Row 26: 2 sc, inc, (4 sc, inc)*5, 2 sc (36)
Row 27: (5 sc, inc)*6 (42)
Row 28: 3 sc, inc, (6 sc, inc)*5, 3 sc (48)
Row 29: (7 sc, inc)*6 (54)
Rows 30-39: 54 sc (54)
Row 40: (7 sc, dec)*6 (48)
Row 41: 3 sc, dec, (6 sc, dec)*5, 3 sc (42)
Row 42: (5 sc, dec)*6 (36)
Add stuffing to the head now, packing it in evenly so her face stays nice and round.
Row 43: 2 sc, dec, (4 sc, dec)*5, 2 sc (30)
Row 44: (3 sc, dec)*6 (24)
Row 45: 1 sc, dec, (2 sc, dec)*5, 1 sc (18)
Row 46: (1 sc, dec)*6 (12)
Top off the stuffing here before closing.
Row 47: 6 dec (6)
Close the opening, finish off, and weave in your ends. Look at that — a whole doll body in one continuous piece!
Arms (make 2)
Color: body color. Start with a magic ring.
Row 1: 6 sc in mr (6)
Row 2: 6 inc (12)
Row 3: (3 sc, inc)*3 (15)
Row 4: 15 sc (15)
Row 5: (3 sc, dec)*3 (12)
Row 6: (4 sc, dec)*2 (10)
Put just a little stuffing into the fist here.
Rows 7-12: 10 sc (10)
Row 13: 5 dec (5)
Close the opening and cut your yarn, leaving a tail for sewing.
Ears (make 2)
Color: body color. Start with a magic ring.
Row 1: 6 sc in mr (6)
Tighten the ring but don’t close it up into a full circle — you want it to stay a small open cap shape. Leave a yarn tail for sewing and cut.
Wig
Color: your hair shade. Start with a magic ring.
Row 1: 6 sc in mr (6)
Row 2: 6 inc (12)
Row 3: in BLO (1 sc, inc)*6 (18)
Row 4: 1 sc, inc, (2 sc, inc)*5, 1 sc (24)
This next row is the fun (and slightly wild) part — you’re going to crochet the “bangs” and long curly strands right onto the cap:
Row 5: Ch 10, starting from the 2nd loop from hook 9 sc, sl st, ch 10, starting from the 2nd loop from hook 9 sc, 2 sl st, (ch 8, from 2nd loop from hook 7 sc, sl st, ch 8, from 2nd loop from hook 7 sc, 2 sl st)*2, ch 10, starting from the 2nd loop from hook 9 sc, sl st. Next crochet long strands: (ch 24, from 2nd loop from hook 3 sc, 20 hdc)*13. Move with sl st to the front loops of round 3 and crochet long strands again the same way, but skipping one stitch each time (6 strands total).
🎉 Honestly, this row looks intimidating written out, but it’s really just repetition. You’re chaining out a strand, then working back down it. Once you do the first one, your hands catch the rhythm fast.
Set the wig aside — you’ll pin and sew it in the assembly step.
Hat
Color: green. Start with Ch 13.
Row 1: starting from the 2nd loop from hook, 12 sc, ch 1, turn (12)
Row 2: in BLO, 12 sc, ch 1, turn (12)
Row 3: through both loops, 12 sc, ch 1, turn (12)
Rows 4-44: repeat rows 2-3 — alternate one row worked in BLO (even rows), one row worked through both loops (odd rows) (12)
Once your strip is done, attach yarn to the bottom edge and crochet 2 rounds of sc worked in the round, then on round 3 work (ch 1, sl st) around to the end of the round.
Sew the side seam of the strip closed to form a cone, then cinch the top closed.
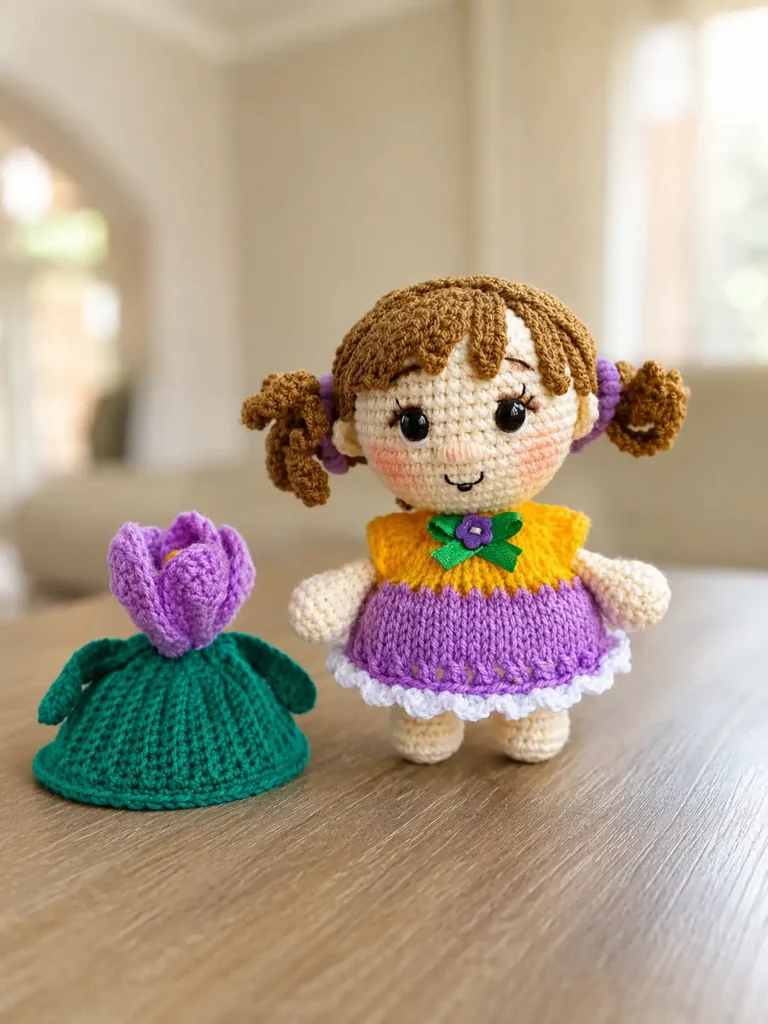
Flower — Petals (make 6)
Color: light purple. Start with Ch 11.
Row 1: starting from the 3rd loop from hook, 2 sc, 3 hdc, 2 dc, 3 dc in the last loop, then along the other side of the chain: 2 dc, 3 hdc, 2 sc, 2 sl st
Row 2: 2 sl st, 2 sc, 3 hdc, (hdc-inc)*3, 2 dc, 3 hdc, 2 sc, 2 sl st
Finish off, leaving yarn tails for sewing.
Flower — Stamen
Color: yellow. Start with Ch 7.
Row 1: sl st into the first loop. Chain 7 again, sl st into the first loop. Chain 7 once more, sl st into the first loop.
Leave a longer yarn tail for wrapping around the wire later, then cut.
Leaves (make 3)
Color: green. Start with Ch 15.
Row 1: starting from the 2nd loop from hook, 13 sc, 5 hdc in the last loop, then along the other side of the chain, 13 sc
The Dress — This Part Uses Knitting Needles
I want to flag this clearly: everything from here uses knitting needles (1.8mm and 2.0mm/US 0), not your crochet hook. If knitting isn’t your thing, this is a completely reasonable part to hand off to a knitting friend, or to substitute with a simple crocheted dress of your own design.
Cast on 26 stitches (24 + 2 edge stitches) on your 2.0mm/US 0 needles. The first and last 2 stitches of every row form the button band and are always knit (garter stitch). Edge stitches aren’t included in the stitch counts below — slip the first stitch of each row and purl the last.
Row 1: k24 (24)
Row 2: k2, k3, yo, k1, yo, k2, yo, k1, yo, k6, yo, k1, yo, k2, yo, k1, yo, k3, k2
Row 3: k2, p28, yo, k2tog (this makes a buttonhole), k2
Row 4: k2, k4, yo, k1, yo, k4, yo, k1, yo, k8, yo, k1, yo, k4, yo, k1, yo, k4, k2
Row 5: k2, p36, k2
Row 6: k2, k5, yo, k1, yo, k6, yo, k1, yo, k10, yo, k1, yo, k6, yo, k1, yo, k5, k2
Row 7: k2, p44, k2
Row 8: k2, k6, bind off 9 sts (sleeve — one stitch remains on the right needle), k12, bind off 9 sts (sleeve — one stitch remains on the right needle), k6, k2
Row 9: k2, p7, p26, k2
🎉 The raglan yoke and both sleeve bind-offs are done! That was genuinely the hardest shaping in the whole pattern. From here it’s just straight rows down to the hem.
Join the light purple yarn here.
Row 10: k2, (k1, yo)*26, k2
Row 11: k1, p52, k1
Row 12: k2, k52, k2
Row 13: k2, p52, yo, k2tog (buttonhole), k2
Row 14: k2, k52, k2
Row 15: k2, p52, k1
Row 16: k2, k52, k2
Row 17: k2, p52, k1
Row 18: k2, (k2tog, yo)*26, k2
Row 19: k2, p52, k1
Bind off all stitches, finish off, and cut yarn. Join white yarn from the right side and crochet the hem edging in BLO: (4 sc in one stitch, sl st, skip 1 st) repeated to the end of the row.
Assembly
This is the part where I’ll be straight with you: there’s real sewing here. Pin everything in place first before you commit to any stitches — it makes a world of difference.
- Sew the arms on using a button joint, with the 2 small buttons — one on the inside of the arm and one on the inside of the body, sewn through so the arm can pivot.
- Insert the safety eyes. Count down 14 rows from the top of the head (between Rows 33 and 34). The distance between the eye placement pins should be 7 sc apart, with the eyes themselves 5 sc apart, then insert.
- Sew the ears on at eye level, about 8 sc away from each eye.
- Pin the wig in place, matching up the centers first. Sew it down starting along the edge, then work your way toward the crown. Pin the loose strands where you want them and sew those down too. Divide the remaining 6 strands to the sides and sew them in place.
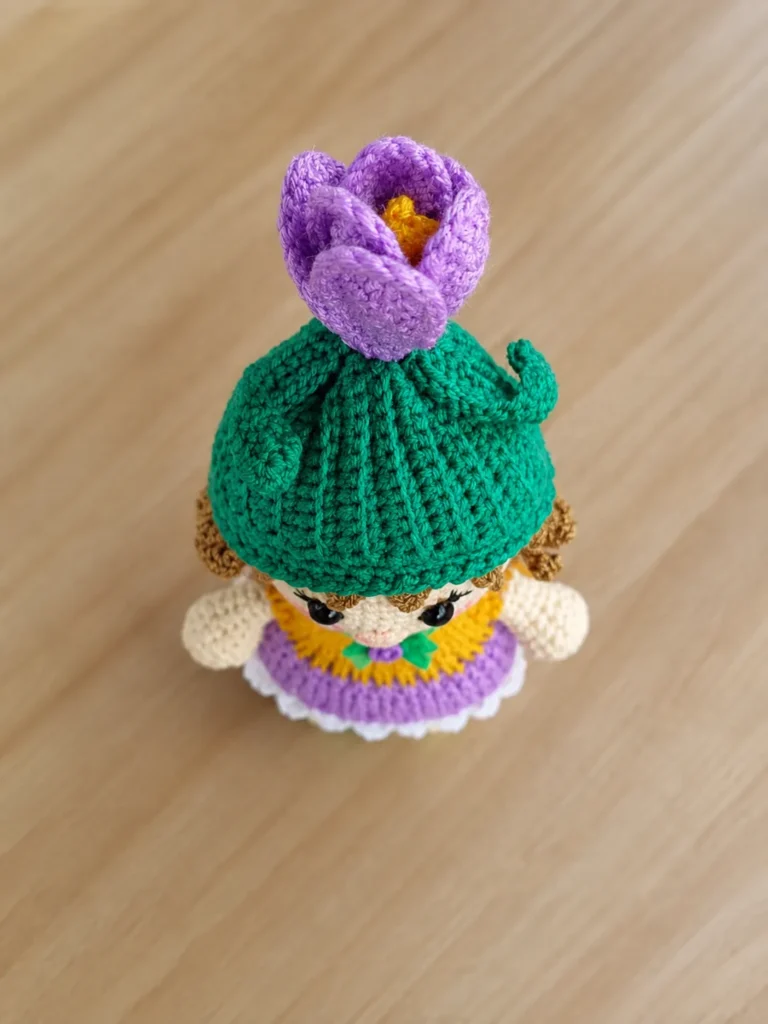
- For the flower: cut your 3.9 in (10 cm) wire, fold it in half, and insert one end into the center of the stamen. Tie a knot to secure it, coat the wire with a little glue, and wrap it with the leftover yarn tail from the stamen (you can also run the second yarn end alongside the wire to help secure it).
- Insert the stamen into the top of the hat, bend the wire ends over to anchor it, sew it in place, and trim the yarn.
- Sew the petals around the stamen — three first, then the remaining three tucked in between.
- Sew the three leaves onto the top of the hat, around the flower.
🎉 She’s basically finished! Everything left from here is the fun detail work that gives her a face and personality.
Face & Final Details
- Embroider the whites of the eyes just below each safety eye using white yarn.
- Add eyelashes and a small eyeliner wing above each eye with black embroidery thread.
- Embroider the nose with body-color yarn, doubled, in about 3 small stitches.
- Embroider the mouth and eyebrows.
- Add a soft tint of blush to the cheeks and nose.
- Sew the 2 decorative buttons onto the dress front, and add the small bow-and-button embellishment to the bodice.
You Did It!
Seriously — take a step back and look at her. A knitted dress, a full wig with ringlets, a wired flower crown, and a hand-sewn face? That is not a small thing to have made with your own two hands. If this was a stretch pattern for you, I hope it stretched you in the good way. Tag AmiLoops when you share her — I want to see every single version of this sweet little crocus baby.
FAQ
What yarn is best for this baby crocus amigurumi pattern?
A DK or Light Worsted (weight 3) cotton-blend yarn is ideal. It provides excellent stitch definition for the doll’s body and creates a beautiful drape for the knitted dress.
Can a beginner make this baby crocus amigurumi?
This pattern is recommended for intermediate to advanced crafters. It involves intricate shaping, button-jointed limbs, making a full wig, and incorporates both crocheting and knitting techniques.
How long does it take to make this doll?
This is a multi-session project. Expect to spend several evenings working through the various components like the curly wig, knitted dress, and the delicate wired flower crown.