A Crochet Baby Elephant Amigurumi Free Pattern That Fits Right in Your Palm
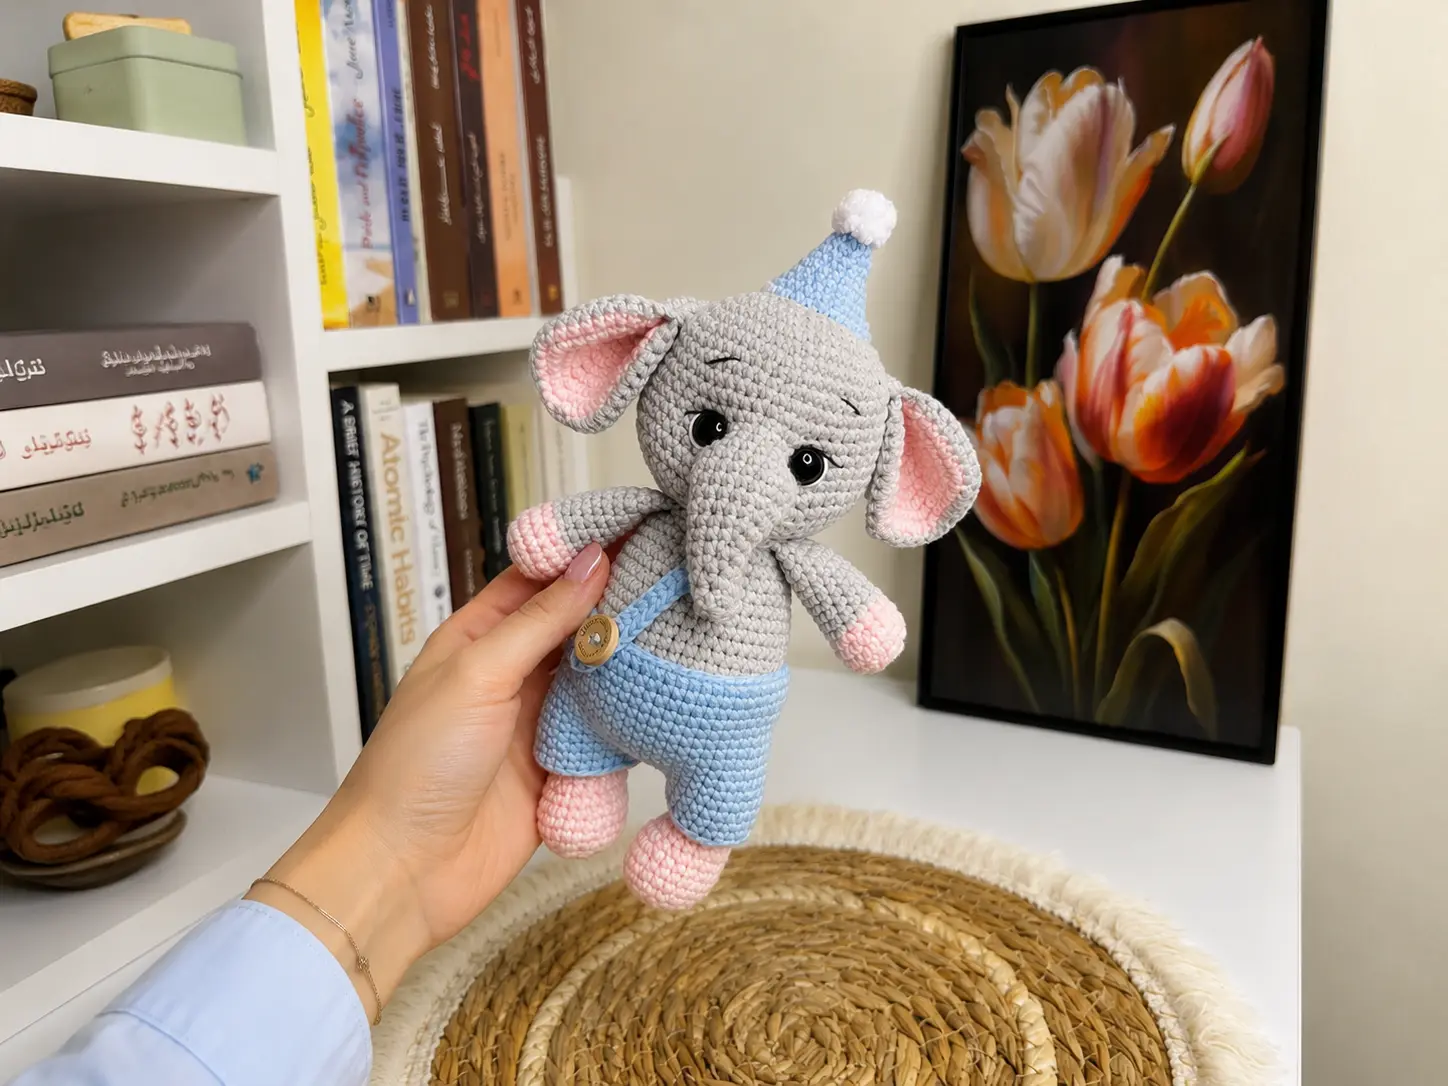
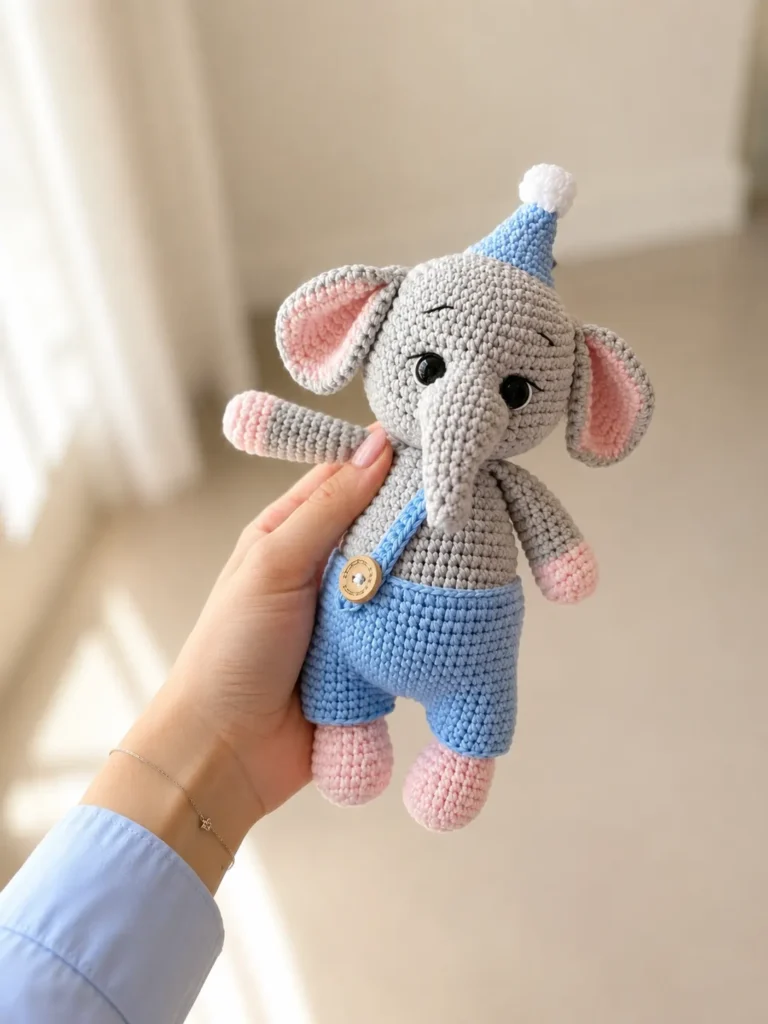
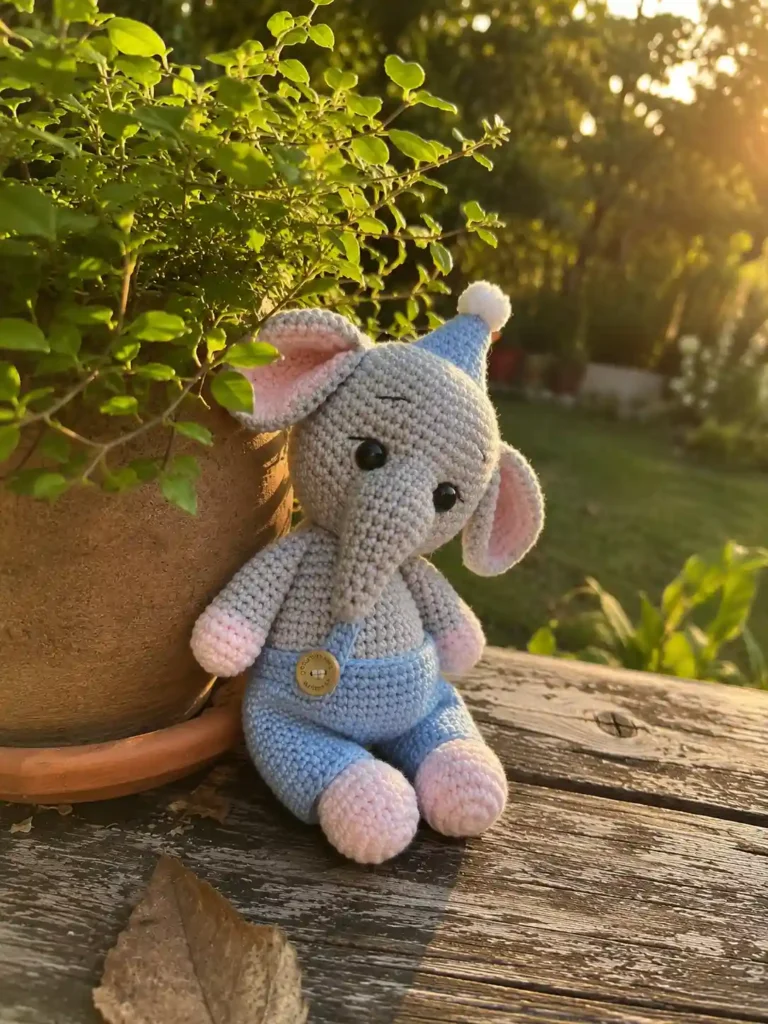
This crochet baby elephant amigurumi free pattern makes the softest little gray elephant you’ve ever seen — round tummy, tiny trunk, blush-pink arms and legs, and a little pom-pom hat that just about finishes me off. He’s got that perfect wobbly-toddler shape, the kind where you just want to line him up next to his stuffed friends and stare. Let’s make him together.
🩷 Pattern Highlights
- Cuteness Rating: 🩷🩷🩷🩷🩷
- Finished Size: Not specified by designer — please measure your finished piece and update
- Difficulty: Intermediate
- Hook Size: 2.0mm (steel hook)
- Yarn Palette: soft dove gray, dusty blush pink, a touch of white and black for the eyes, and a dusty powder blue for the pants and hat
- Key Detail: the tiny gusseted trunk, glossy safety eyes, and a pom-pom topped hat
- Estimated Time: 5-7 hours (multiple small parts)
What You’ll Need for This Crochet Baby Elephant Pattern
This little guy comes together in a soft, DK-weight cotton — the kind of yarn that gives amigurumi that smooth, defined-stitch look without being fussy to work with. Here’s your full materials list:
- Yarn: DK / Light Worsted weight cotton yarn (US alternatives: Drops Muskat, Paintbox Cotton DK) in:
- Dove gray — 1 skein, for the body, head, trunk, tail, and ears
- Dusty blush pink — a small amount, for the arms and legs
- White and black — small amounts, for embroidering the eye detail
- Dusty powder blue (or your favorite pastel) — 1 skein, for the pants, hat, and pom-pom
- Hook: 2.0mm steel hook
- Safety eyes: 8mm or 10mm — the 10mm gives him a slightly more wide-eyed, wondering expression, while 8mm keeps things dainty. I’ll let you pick based on how sleepy or alert you want him to look.
- Polyester stuffing
- Stitch markers, scissors, and a tapestry needle
This yarn falls into the DK / Light Worsted (3) category, which is exactly what you want here — light enough to show off the shaping on that little trunk, but substantial enough that the piece holds its round shape once it’s stuffed.
Abbreviations Used in This Baby Elephant
| Abbreviation | US Full Term |
|---|---|
| mr | magic ring |
| sc | single crochet |
| inc | increase |
| inv dec | invisible decrease |
| sl st | slip stitch |
| ch | chain |
| hdc | half double crochet |
| BLO | back loop only |
| FO | fasten off |
| st(s) | stitch(es) |
| ( ) * or ( ) × | repeat instructions in parentheses the specified number of times |
Before You Begin:
This one has a lot of tiny pieces, so a little prep makes a big difference in how sweet the final elephant looks.
🩷 Chloe’s Detail Tip: This pattern uses continuous rounds throughout (no joining, no visible seam), which keeps that smooth, spiral look you want on a face this small. If you’ve never worked this way before, our continuous rounds tutorial walks through exactly how it’s different from joined rounds.
If you haven’t worked a magic ring before, every single piece in this pattern starts with one — so it’s worth practicing that closed, hole-free start first. And since this pattern shapes almost every part with an invisible decrease, I’d get comfortable with that stitch too — it’s what keeps the head and trunk looking smooth instead of gappy.
🩷 Chloe’s Detail Tip: Before you snap those safety eye washers in, hold the head under a bright lamp and check them from directly in front. Once they click into place, there’s no going back — so take the extra thirty seconds to make sure they’re level. That symmetry is what makes his little face feel alive.
The arms and legs both switch from blush pink to gray partway through — our changing colors tutorial covers how to make that transition clean and seamless rather than lumpy at the color change round.
Crochet Baby Elephant Pattern:
Head
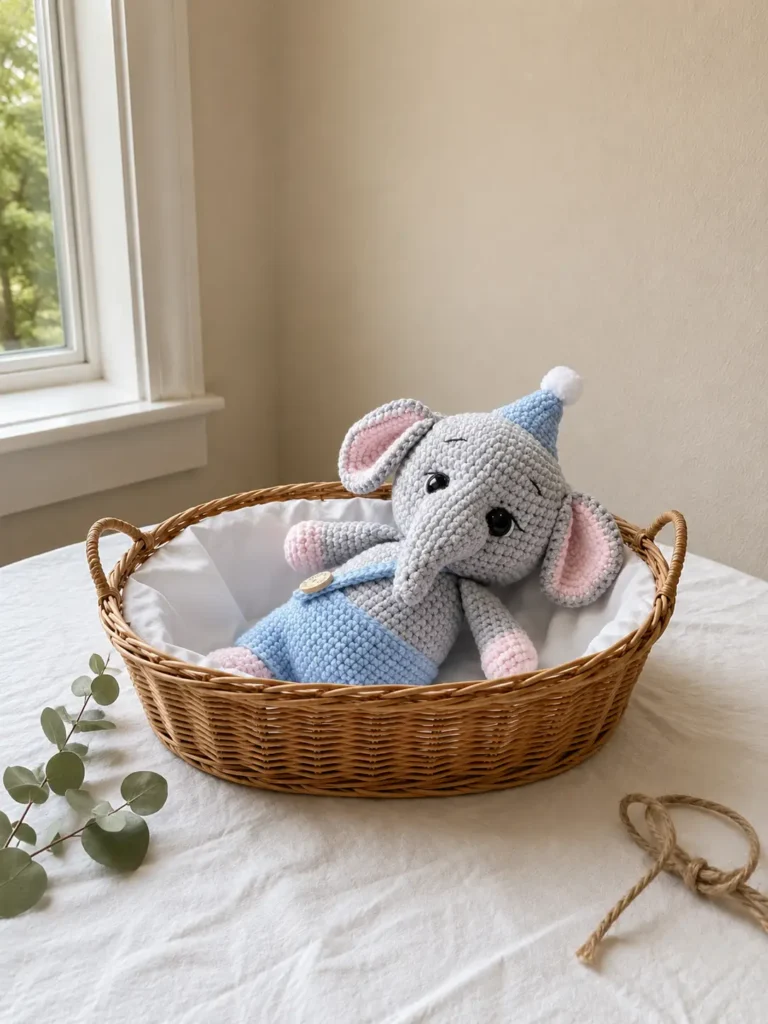
Worked in dove gray, starting with a magic ring.
Row 1: 6 sc in mr (6)
Row 2: 6 inc (12)
Row 3: (1 sc, inc) × 6 (18)
Row 4: (2 sc, inc) × 6 (24)
Row 5: (3 sc, inc) × 6 (30)
Row 6: (4 sc, inc) × 6 (36)
Row 7: (5 sc, inc) × 6 (42)
Row 8: (6 sc, inc) × 6 (48)
Row 9: (7 sc, inc) × 6 (54)
Rows 10-15: 54 sc (54)
This is where the head really rounds out into that big, sweet dome shape — so satisfying to watch it grow between your fingers.
Row 16: Make an opening for the trunk: 23 sc, 8 ch (skip 8 sc), 23 sc (54)
Rows 17-19: 54 sc (54)
Row 20: (7 sc, inv dec) × 6 (48)
Row 21: 48 sc (48)
Row 22: (6 sc, inv dec) × 6 (42)
Row 23: (5 sc, inv dec) × 6 (36)
Row 24: (4 sc, inv dec) × 6 (30)
Row 25: (3 sc, inv dec) × 6 (24)
Row 26: (2 sc, inv dec) × 6 (18)
🩷 Chloe’s Detail Tip: Insert the safety eyes between Rows 15 and 16, spacing them 8 stitches apart on either side of where the trunk opening will be. Placing them slightly wide like this is what gives him that gentle, wondering baby-elephant expression instead of a startled one.
Finish the head with a slip stitch and leave a long tail of yarn for sewing it to the body later.
Legs (make 2)
Worked in blush pink, then dove gray, starting with a magic ring.
Row 1: 6 sc in mr [pink] (6)
Row 2: 6 inc [pink] (12)
Row 3: (1 sc, inc) × 6 [pink] (18)
Row 4: (2 sc, inc) × 6 [pink] (24)
Row 5: 24 sc in BLO [pink] (24)
Rows 6-7: 24 sc [pink] (24)
Row 8: 6 sc, (2 sc, inv dec) × 3, 6 sc [pink] (21)
Row 9: 21 sc [pink] (21)
Row 10: 6 sc, 5 inv dec, 5 sc [pink] (16)
Rows 11-18: 16 sc [gray] (16)
Row 19: (2 sc, inv dec) × 4 [gray] (12)
Row 20: 12 sc + 2 shift sc (on the left leg only) [gray] (12)
Working in the back loop only in Row 5 is what creates that ridge right where the foot meets the leg — such a small thing, but it’s exactly the kind of detail that makes the finished piece look intentional. Change to gray at the end of Row 10, and remember the little “2 shift sc” adjustment only applies to the left leg.
Stuff each leg to about Row 16, then fold it flat and work 6 sc across both edges together, leaving a short tail of yarn.
Arms (make 2)
Worked in blush pink, then dove gray, starting with a magic ring.
Row 1: 6 sc in mr [pink] (6)
Row 2: 6 inc [pink] (12)
Row 3: (1 sc, inc) × 6 [pink] (18)
Row 4: 18 sc in BLO [pink] (18)
Rows 5-6: 18 sc [pink] (18)
Row 7: 6 sc, 3 inv dec, 6 sc [pink] (15)
Rows 8-15: 15 sc [gray] (15)
Row 16: (3 sc, inv dec) × 3 [gray] (12)
Row 17: 12 sc + 2 shift sc [gray] (12)
Same BLO ridge trick here in Row 4, and the color change happens at the end of Row 7. Stuff to about Row 15, fold flat, and work 6 sc across both edges, leaving a short tail.
Trunk
Worked in dove gray, joined directly into the trunk opening left in the head.
Join the gray yarn in the middle of the lower part of the trunk opening.
Row 1: Ch and work 1 sc into the same st, then continue working in the round: 3 sc, 1 sc in the corner, 8 sc, 1 sc in the corner, 4 sc, sl st (18)
Row 2: 18 sc (18)
Row 3: 16 sc, inv dec (17)
Row 4: 15 sc, inv dec (16)
Row 5: 14 sc, inv dec (15)
Row 6: 13 sc, inv dec (14)
Row 7: 12 sc, inv dec (13)
Row 8: 11 sc, inv dec (12)
Row 9: 10 sc, inv dec (11)
Row 10: 9 sc, inv dec (10)
Row 11: 8 sc, inv dec (9)
Row 12: 7 sc, inv dec (8)
Row 13: 6 sc, inv dec (7)
Row 14: 5 sc, inv dec (6)
This is the part that takes a little extra love — after Row 1, don’t chain again; you’re working straight into continuous rounds from here on. Drop a stitch marker at the end of each round so you don’t lose your place, because this taper happens fast. Watching the trunk narrow row by row into that perfect curled little tip is honestly one of my favorite parts of this whole pattern.
Close the opening at the tip and weave in the end.
Tail
Worked in dove gray, starting with a magic ring.
Row 1: 6 sc in mr (6)
Rows 2-11: 6 sc (6)
Fold the tail piece in half and work 3 sc across both edges together, leaving a short tail of yarn for sewing.
Body
Worked in dove gray, starting with a magic ring.
Row 1: 6 sc in mr (6)
Row 2: 6 inc (12)
Row 3: (1 sc, inc) × 6 (18)
Row 4: (2 sc, inc) × 6 (24)
Row 5: (3 sc, inc) × 6 (30)
Row 6: (4 sc, inc) × 6 (36)
Row 7: (5 sc, inc) × 6 (42)
Row 8: (6 sc, inc) × 6 (48)
Row 9: 47 sc + 1 sc worked together with the tail (48)
Row 10: 2 sc worked together with the tail, 7 sc, 6 sc worked together with the leg, 18 sc, 6 sc worked together with the leg, 9 sc (48)
Rows 11-14: 48 sc (48)
Row 15: (14 sc, inv dec) × 3 (45)
Rows 16-17: 45 sc (45)
Row 18: (13 sc, inv dec) × 3 (42)
Rows 19-20: 42 sc (42)
Row 21: (5 sc, inv dec) × 6 (36)
Rows 22-23: 36 sc (36)
Row 24: (4 sc, inv dec) × 6 (30)
Row 25: (3 sc, inv dec) × 6 (24)
Row 26: 6 sc, 6 sc worked together with the arm, 6 sc, 6 sc worked together with the arm (24)
Row 27: 24 sc (24)
Row 28: (2 sc, inv dec) × 6 (18)
This is such a clever construction — the tail, legs, and arms all attach directly into the body as you crochet rather than getting sewn on afterward, which saves a whole round of finishing later. Just make sure each little limb is positioned exactly where you want it before you crochet that joining round, because it locks in place right then.
Finish with a slip stitch and leave a long tail of yarn for sewing the head on.
Ears (make 4 — 2 gray, 2 pink)
Starting with a magic ring.
Row 1: 6 sc in mr (6)
Row 2: 6 inc (12)
Row 3: (1 sc, inc) × 6 (18)
Row 4: (2 sc, inc) × 6 (24)
Row 5: (3 sc, inc) × 6 (30)
Row 6: (4 sc, inc) × 6 (36)
Row 7: (5 sc, inc) × 6 (42)
Make 4 discs total — 2 in gray, 2 in pink. Fasten off the pink discs and weave in the ends. For the gray discs, don’t cut the yarn — instead, join each gray disc to a pink disc wrong sides together, and single crochet around the outside edge of both layers at once. Fold the joined ear in half and work 5 sc across all layers together, leaving a long tail for sewing it to the head.
Pants
Worked in dusty powder blue.
Chain 50, join into a ring with a slip stitch.
Rows 1-5: 50 sc (50)
Row 6: Make an opening for the tail: 47 sc, 3 ch (skip 3 sts), sl st (50)
Rows 7-13: 50 sc (50)
At the beginning of each row, work a turning chain and the first stitch into that same stitch; end each row with a slip stitch.
Pant Legs (make 2)
Continuing directly from the pants, dividing the piece.
Row 1: 22 sc, join into a ring with a sl st, ch (22)
Row 2: 22 sc (22)
Skip 3 sc on both sides above the tail opening between the pant legs. Crochet the second pant leg the same way, joining the yarn fresh. Sew the small gap between the two pant legs closed.
Join the yarn at the top of the pants to the beginning of the round and work slip stitches around the top edge. Without cutting the yarn, chain 40 plus 2 for the strap, then starting in the 3rd chain from the hook, work hdc to the end. Fasten off and weave in all ends.
Hat
Worked in dusty powder blue, starting with a magic ring.
Row 1: 6 sc in mr (6)
Row 2: 6 sc (6)
Row 3: 6 sc (6)
Row 4: 6 inc (12)
Row 5: 12 sc (12)
Row 6: 12 sc (12)
Row 7: (1 sc, inc) × 6 (18)
Row 8: 18 sc (18)
Row 9: 18 sc (18)
Row 10: (2 sc, inc) × 6 (24)
Row 11: (3 sc, inc) × 6 (30)
Row 12: 30 sc (30)
Fasten off with a slip stitch, leaving a tail for sewing the hat onto the head. Then make a small pom-pom in white (or any contrasting pastel you love) and sew it right to the tip — this tiny topper is honestly what sells the whole outfit.
Assembly
- Sew the head to the body, stitch by stitch, so the seam sits invisibly along the round.
- Sew the ears in place on either side of the head, just behind where the eyes sit.
- Sew the pom-pom hat onto the top of the head, tilting it very slightly for personality.
- Sew the closed gap between the pant legs if it needs any reinforcing, then slip the pants onto the body and secure the straps over the shoulders.
If sewing pieces together isn’t your favorite part yet, our sewing amigurumi parts tutorial covers exactly how to keep those seams tight and nearly invisible.
Making This Baby Elephant Extra Cute — Finishing Details
This is where it goes from nice to irresistible. Once the eyes are set and everything’s sewn together, take a single strand of black yarn and embroider small eyebrows and eyelashes just above each eye — this is what gives him that sleepy, sweet expression instead of a blank stare. Then use white yarn to embroider a tiny highlight or the whites of the eyes right beside the black safety eyes, which catches the light beautifully and makes the whole face feel like it’s really looking at you.
The pom-pom on the hat deserves its own moment too — keep it a little loose and fluffy rather than trimmed tight, so it has that soft, cloud-like texture against the smooth stitches everywhere else.
If you want to make a whole little herd, try swapping the pastel palette: a soft lavender pants-and-hat set with mint-green pom-pom, or dusty rose with a cream pom-pom. Since the gray body stays the same, each elephant gets its own personality just from the outfit.
Chloe’s Final Look
I am so in love with how this little elephant turned out — that soft round tummy, the tiny curled trunk, and the way the pom-pom hat just tips to one side like he put it on himself. The blush-pink arms and legs against all that dove gray is such a gentle combination. Make him a little pastel wardrobe and line up two or three in different colors on a shelf — I promise you’ll end up rearranging them more than you’d like to admit. 🩷
FAQ
What yarn is best for crocheting this baby elephant amigurumi?
A DK / Light Worsted weight cotton yarn (such as Drops Muskat or Paintbox Cotton DK) is ideal because it provides smooth stitch definition and holds the round shape well when stuffed without being fussy to work with.
How long does it take to crochet this baby elephant pattern?
This pattern takes approximately 5 to 7 hours to complete, depending on your crochet speed and experience with assembling multiple small parts and working in continuous rounds.
What size safety eyes should I use for this crochet baby elephant?
You can use either 8mm or 10mm safety eyes; 10mm eyes give the elephant a wider-eyed, curious baby expression, while 8mm eyes create a gentler, more dainty look.