Bucktooth Bunny Amigurumi Free Pattern — Wire-Posed Bunny
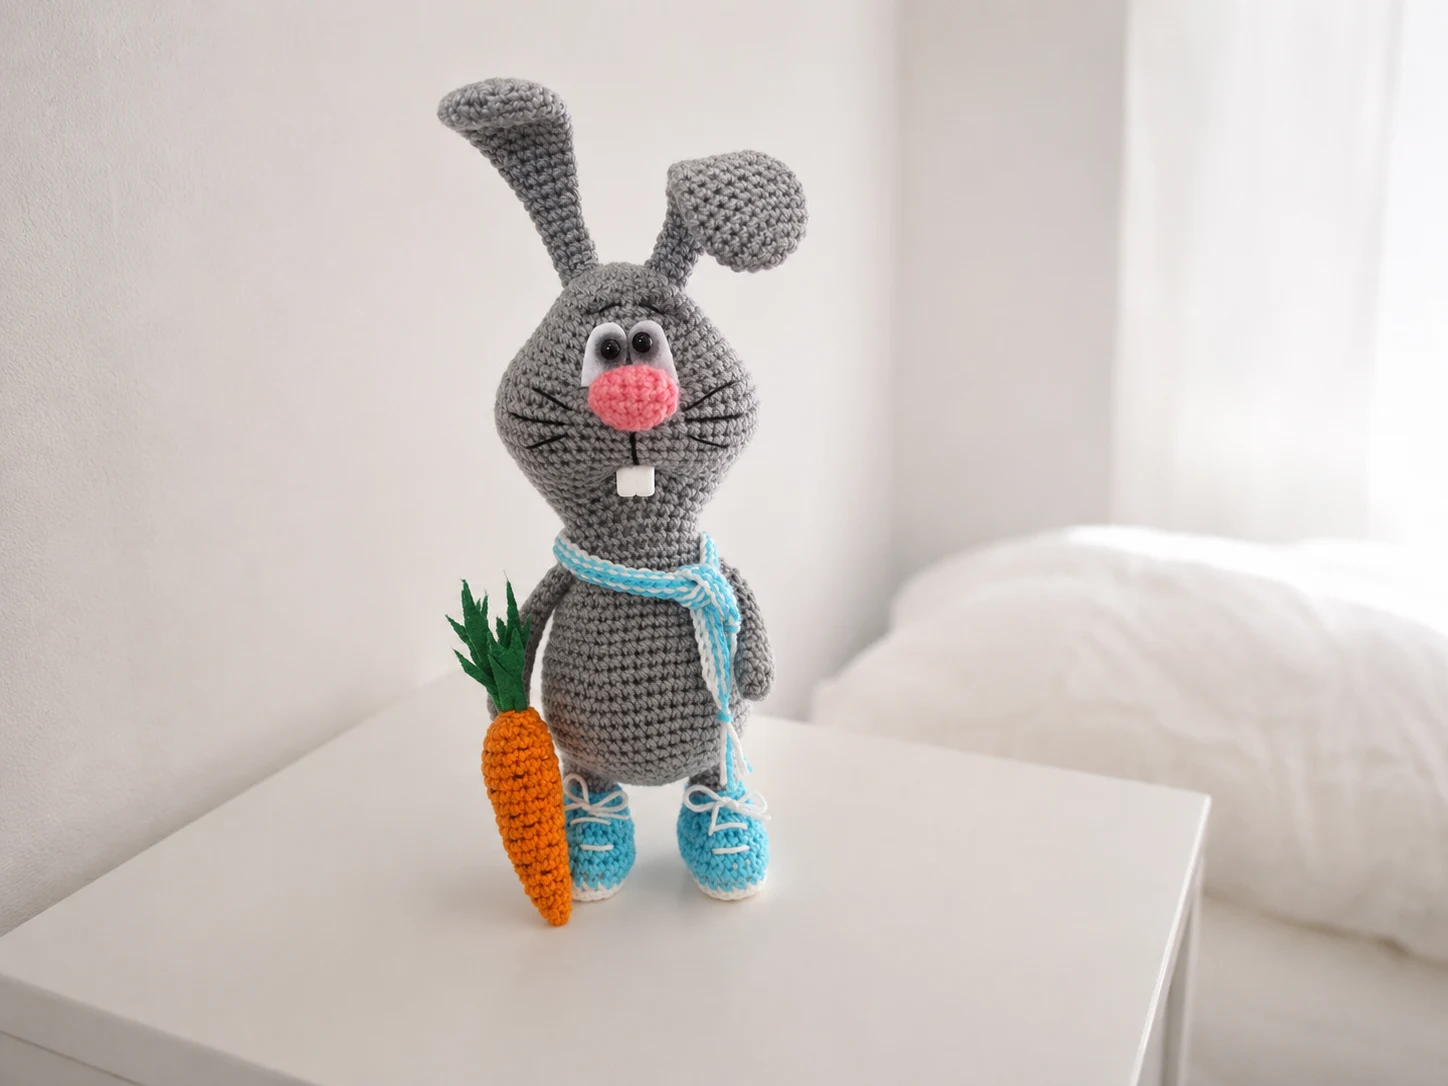
This bucktooth bunny amigurumi free pattern is one of the strangest, most charming things I’ve ever put a hook to — a little steel-gray rabbit with a carrot tucked under his arm, plastic teeth glued under his nose, and wire running through every limb so he can hold a pose. He’s not your average soft-and-floppy bunny. He’s a character piece, built to sit, stand, and strike attitudes on a shelf. If you love patterns with real personality (and don’t mind a little wirework), this one’s worth the evening.
📋 Pattern Quick Stats
- Difficulty: Advanced (Emma’s assessment — not specified in the original pattern)
- Finished Size: approx. 20-24 cm (8-9.5 in)
- Hook Size: 1.5 mm (no direct US letter equivalent — see note below)
- Yarn Weight: DK / Light Worsted (3)
- Techniques Used: magic ring, invisible decrease, back loop only (BLO), color changes, wire armature/jointing, foundation chain start, embroidery
- Estimated Time: 8-10 hours (multi-day project)
Materials for This Bucktooth Bunny Amigurumi
This bucktooth bunny amigurumi uses a fine DK-weight cotton in five colors, worked at a tight 1.5 mm gauge — closer to lace-weight tension than a typical amigurumi. On the Craft Yarn Council yarn weight system, this falls under DK / Light Worsted (3), so any DK-weight cotton blend from your stash should substitute cleanly.
- DK-weight cotton yarn (YarnArt Jeans or Paintbox Cotton DK recommended) in steel/gray — for the body, head, arms, and ears
- DK-weight cotton yarn in white — for the scarf stripes
- DK-weight cotton yarn in marigold/calendula — for the carrot
- DK-weight cotton yarn in turquoise — for the shoes and scarf
- DK-weight cotton yarn in coral — for the nose
- Black embroidery floss (for eyebrows and lashes)
- White felt (backing for the teeth)
- Green felt (for the carrot greens)
- 5 mm half-beads for the eyes
- Plastic teeth (glued detail — see safety note below)
- Chenille stem (pipe cleaner), for the arms
- Copper wire, approximately 1.5-2 mm thick, for the body and legs
- Masking tape or adhesive medical tape, for wrapping wire
- Thick cardboard or plastic, for the shoe soles (an office document folder works well)
- PVA glue, for stiffening the felt carrot greens
- Craft glue, for the teeth and eyes
- Hollofiber or polyester fiberfill, for stuffing
- 1.5 mm crochet hook
- Tapestry needle, for sewing pieces together
Abbreviations Used in This Bucktooth Bunny Pattern
| Abbreviation | Meaning |
|---|---|
| mr | magic ring |
| sc | single crochet |
| inc | increase (2 sc in same stitch) |
| inv dec | invisible decrease |
| sl st | slip stitch |
| ch | chain |
| BLO | back loop only |
Special Techniques for This Amigurumi Bunny
This pattern leans on a handful of techniques that are worth reviewing before you start. It begins, like almost every amigurumi, with a magic ring — if you haven’t worked one before, our step-by-step magic ring tutorial will get you comfortable with it in a few minutes.
Every decrease in this pattern is worked as an invisible decrease, which I use exclusively in my own amigurumi because it keeps the fabric smooth with no visible gap. If you’re used to a standard sc2tog, take a look at our invisible decrease tutorial before you get to the shaping rounds.
The legs also use back loop only (BLO) crochet to create a defined ridge around the shoe, and every part gets firmly stuffed — our guide to stuffing amigurumi properly is a good refresher if lumpy filling has ever been a problem for you. Finally, because this bunny is fully wire-jointed, sewing the parts on securely matters more than usual; our tutorial on sewing amigurumi parts together covers the whip-stitch technique I use for every seam here.
Bucktooth Bunny Amigurumi Pattern
Body
Work the body in steel/gray, starting with a magic ring.
Row 1: 6 sc in mr (6)
Row 2: 6 inc (12)
Row 3: (1 sc, inc) x 6 (18)
Row 4: (2 sc, inc) x 6 (24)
Rows 5-6: 24 sc (2 rows) (24)
Row 7: (3 sc, inc) x 6 (30)
Row 8: 30 sc (30)
Row 9: (4 sc, inc) x 6 (36)
Row 10: 36 sc (36)
Row 11: (5 sc, inc) x 6 (42)
Row 12: 42 sc (42)
Row 13: (6 sc, inc) x 6 (48)
Row 14: 48 sc (48)
Row 15: (7 sc, inc) x 6 (54)
Row 16: 54 sc (54)
Row 17: (21 sc, 3 inv dec) x 2 (48)
Row 18: (18 sc, 3 inv dec) x 2 (42)
Row 19: (15 sc, 3 inv dec) x 2 (36)
Row 20: (4 sc, inv dec) x 6 (30)
Rows 21-23: 30 sc (3 rows) (30)
Row 24: (3 sc, inv dec) x 6 (24)
Rows 25-27: 24 sc (3 rows) (24)
Row 28: (3 sc, inc) x 6 (30)
Rows 29-31: 30 sc (3 rows) (30)
Row 32: (4 sc, inc) x 6 (36)
Rows 33-35: 36 sc (3 rows) (36)
Row 36: (5 sc, inc) x 6 (42)
Row 37: 42 sc (42)
Row 38: (6 sc, inc) x 6 (48)
Row 39: 48 sc (48)
Row 40: (7 sc, inc) x 6 (54)
Rows 41-43: 54 sc (3 rows) (54)
Row 44: (7 sc, inv dec) x 6 (48)
Row 45: (6 sc, inv dec) x 6 (42)
Row 46: (5 sc, inv dec) x 6 (36)
Row 47: (4 sc, inv dec) x 6 (30)
Row 48: (3 sc, inv dec) x 6 (24)
Row 49: (2 sc, inv dec) x 6 (18)
Row 50: (1 sc, inv dec) x 6 (12)
Row 51: 6 inv dec (6)
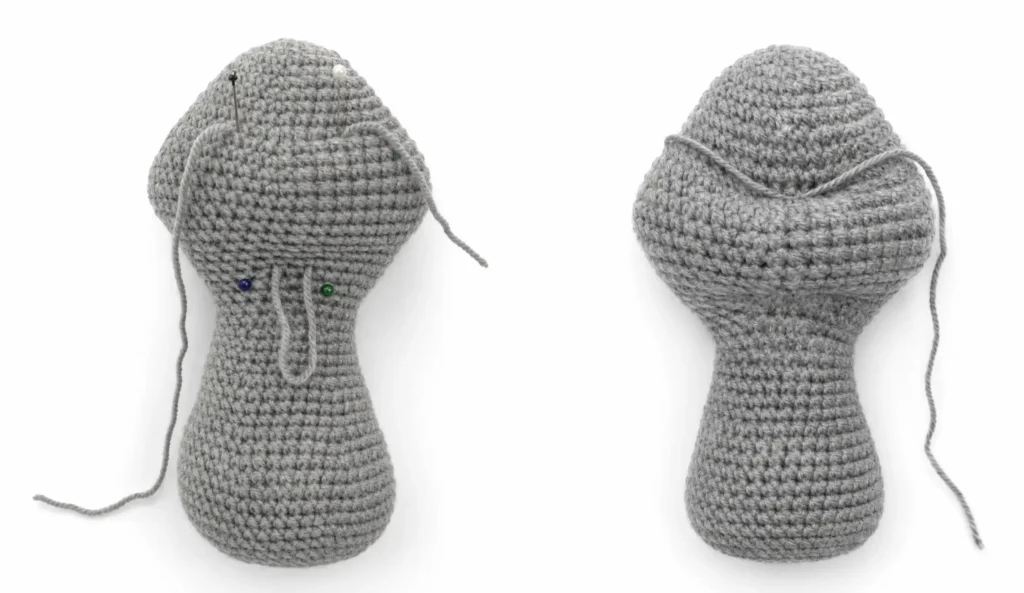
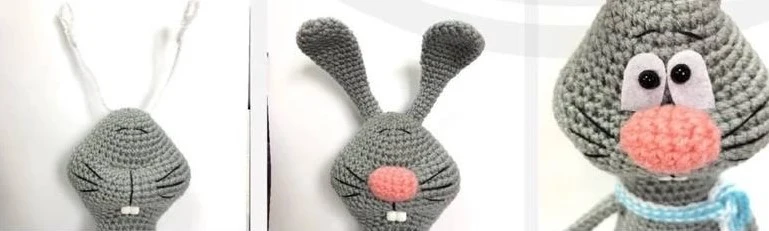
💡 Emma’s Tip: Start stuffing firmly after Row 47. To shape the face indentation, insert a needle with yarn between Rows 11 and 12, bring it out between Rows 22 and 23, skip 7 sc to the side, then bring the needle back down between Rows 11 and 12 so there are 7 sc between the two yarn ends. Tie both ends together to pull the sculpt into place, then finish stuffing completely.
Cut the yarn and close the remaining opening with a needle, weaving the ends in to hide them inside the piece.
Bucktooth Bunny Crochet Pattern — Arms (make 2)
Work each arm in steel/gray, starting with a magic ring.
Row 1: 6 sc in mr (6)
Row 2: 6 inc (12)
Rows 3-5: 12 sc (3 rows) (12)
Row 6: (2 sc, inv dec) x 3 (9)
Rows 7-16: 9 sc (10 rows) (9)
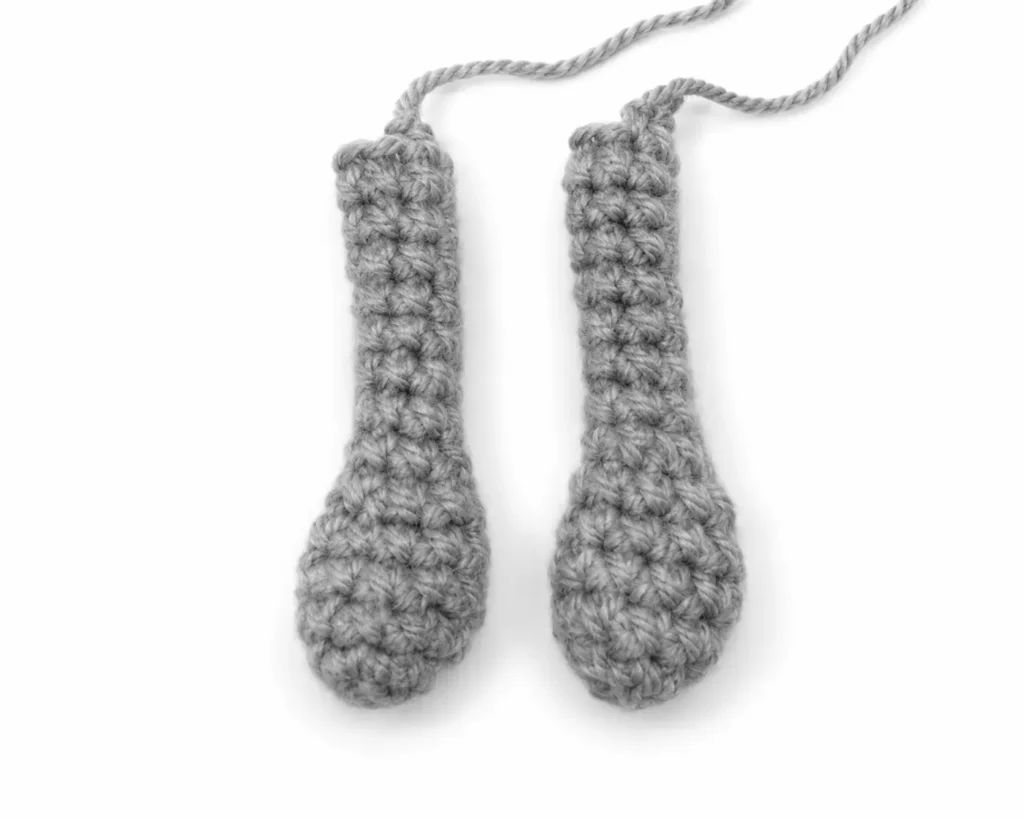
💡 Emma’s Tip: Only lightly stuff the paw (Rows 1-5). Insert a chenille stem wrapped in masking tape into the arm and leave the rest of the tube unstuffed — this is what lets the arms hold a pose later.
Cut the yarn, leaving a long tail for sewing. Do not close the opening.
Bucktooth Bunny Amigurumi Legs (make 2)
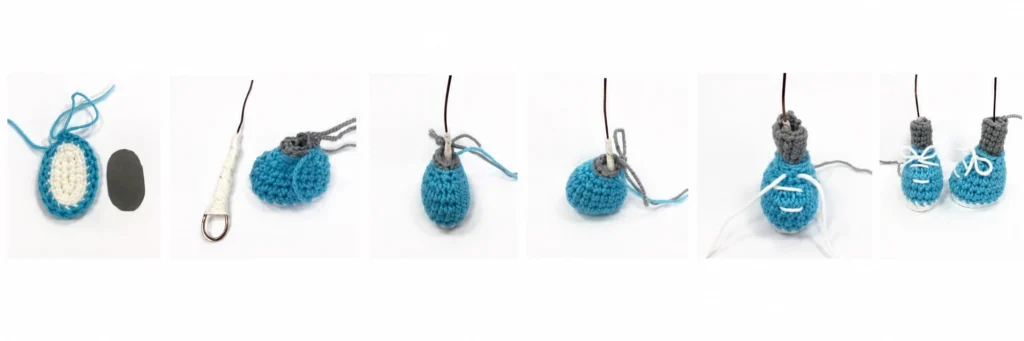
Each leg starts with the shoe in turquoise, worked from a foundation chain to form an oval sole.
Row 1: With turquoise, ch 5. Starting from the 2nd ch from the hook: 3 sc, 3 sc in 1 st (worked into the same stitch); continuing along the opposite side of the starting chain: 2 sc, inc (10)
Row 2: inc, 2 sc, 3 inc, 2 sc, 2 inc (16)
Row 3: 16 sc (16)
Row 4: BLO: 16 sc (16)
Row 5: 4 sc, 4 inv dec, 4 sc (12)
Row 6: 3 sc, 3 inv dec, 3 sc (9)
Row 7: Change to steel/gray: 9 sc (9)
Rows 8-12: 9 sc (5 rows) (9)
💡 Emma’s Tip: Cut a sole from thick cardboard or plastic and slip it into the shoe after Row 4 — it’s what keeps the foot from collapsing under the bunny’s weight. Insert a length of copper wire with a small loop bent at the foot end, wrapped in masking tape, before you stuff. Stuff the shoe firmly and the leg above it lightly, leaving the wire end sticking out of the top opening for attaching to the body.
Cut the yarn, leaving a long tail for sewing. Do not close the opening.
Ears for the Bucktooth Bunny (make 2)
Work each ear in steel/gray, starting with a magic ring.
Row 1: 6 sc in mr (6)
Row 2: (1 sc, inc) x 3 (9)
Row 3: 9 sc (9)
Row 4: (2 sc, inc) x 3 (12)
Row 5: 12 sc (12)
Row 6: (3 sc, inc) x 3 (15)
Rows 7-10: 15 sc (4 rows) (15)
Row 11: (3 sc, inv dec) x 3 (12)
Rows 12-13: 12 sc (2 rows) (12)
Row 14: (2 sc, inv dec) x 3 (9)
Row 15: (1 sc, inv dec) x 3 (6)
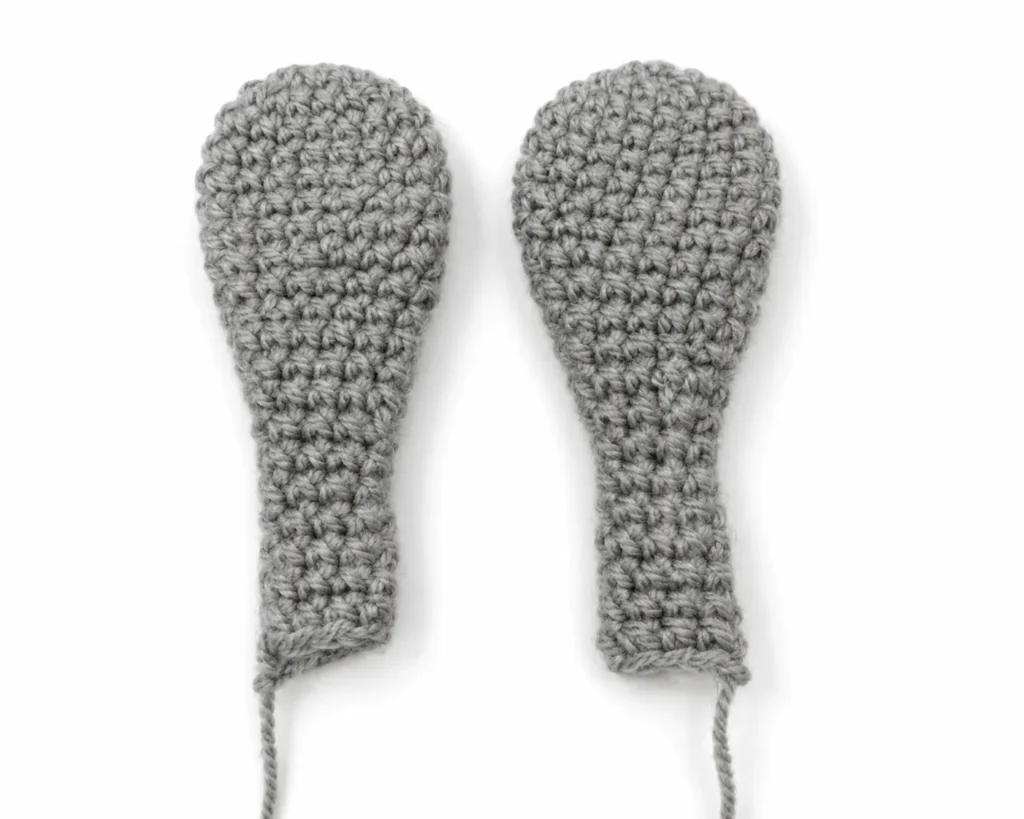
💡 Emma’s Tip: Do not stuff the ears. Flatten the opening and work 3 sc through both layers to close it flat. If you’d like the ears to be poseable, slip a chenille stem inside before flattening.
Cut the yarn, leaving a long tail for sewing.
Tail
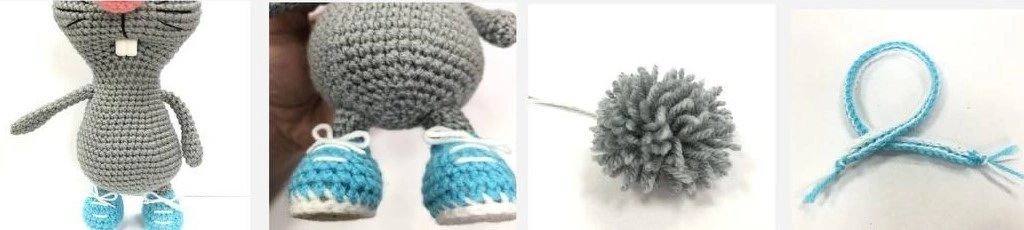
Make a pompom approximately 4 cm in diameter from steel/gray yarn. Trim it evenly into a neat round shape and leave two long yarn ends for sewing it on later.
Carrot for the Bucktooth Bunny Amigurumi
Work the carrot in marigold/calendula, starting at the tip with a magic ring.
Row 1: 6 sc in mr (6)
Row 2: (1 sc, inc) x 3 (9)
Rows 3-4: 9 sc (2 rows) (9)
Row 5: (2 sc, inc) x 3 (12)
Rows 6-7: 12 sc (2 rows) (12)
Row 8: (3 sc, inc) x 3 (15)
Rows 9-10: 15 sc (2 rows) (15)
Row 11: (3 sc, inv dec) x 3 (12)
Row 12: (2 sc, inv dec) x 3 (9)
Row 13: (1 sc, inv dec) x 3 (6)
💡 Emma’s Tip: Stuff with hollofiber as you go, a little at a time, rather than all at once at the end — it keeps the shaping smooth. Leave the small opening at the top open; that’s where the felt greens go in during assembly.
Cut the yarn, leaving a long tail.
Nose
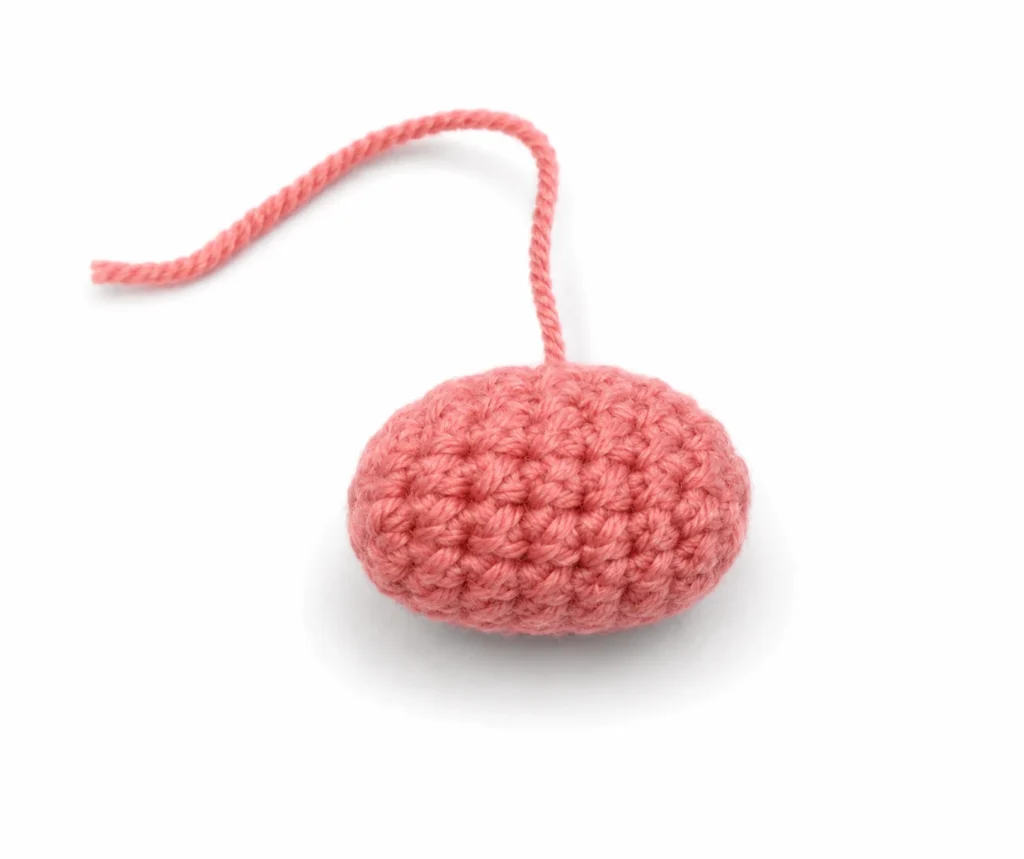
Work the nose in coral, starting with a magic ring.
Row 1: 6 sc in mr (6)
Row 2: 6 inc (12)
Row 3: 12 sc (12)
Cut the yarn, leaving a long tail for sewing. Do not stuff the nose — you want it to sit flat against the face.
Assembling Your Bucktooth Bunny
- Cut a 19 cm length of copper wire and push it straight through the body between Rows 29 and 30. Bend a small loop at each end and wrap it with masking tape. Slide the arms onto the wire ends and sew them around to the body, then hide the yarn tails inside.
- Bend loops on the leg wires, insert the legs into the body between Rows 3 and 5, and sew them around securely. Hide the yarn tails inside the body.
- Sew the pompom tail onto the back of the body between Rows 8 and 10.
- Cut the carrot greens from green felt and stiffen them with PVA glue. Insert them into the remaining opening at the top of the carrot, pull the opening closed with a needle, and secure the felt in place. Sew the finished carrot to one of the bunny’s paws.
- Sew the ears to the top of the head between Rows 46 and 48, spacing them about 5 sc apart.
- Sew the nose to the center front of the face, over Rows 40-42.
Finishing Details on the Bucktooth Bunny
Glue the plastic teeth directly under the nose — if you’d like extra grip, back them with a small scrap of white felt before gluing. Glue the 5 mm half-beads on as eyes between Rows 42 and 43, spacing them about 7 sc apart on either side of the nose. Finish the face by embroidering eyebrows and lashes in black embroidery floss.
To make the scarf: with turquoise yarn, ch 61. Starting from the 2nd ch from the hook, work 60 sl st, then cut the yarn. Attach white yarn and work 60 sl st along the row, then cut the yarn. Attach turquoise yarn again and work 60 sl st, then cut. Repeat that white-then-turquoise sequence two more times to build up the striped scarf, then weave in all your ends and tie the scarf around your bunny’s neck.
⚠️ A note on this design: This bucktooth bunny is built as a display and collector’s piece rather than a hand-me-down toy. The wire-jointed limbs, glued half-bead eyes, and glued plastic teeth are not appropriate for young children — there’s no locking safety-eye backing here, and small glued components can come loose over time. If this one’s headed for a child under three, I’d treat it as a shelf piece to admire rather than something to play with.
Emma’s Note
I fell for this little guy the moment I saw those plastic teeth peeking out under his nose — there’s something so endearing about a bunny with an overbite. The wirework takes patience, and you’ll feel it in your hands by the time you’re bending the second leg loop, but that’s exactly what lets him sit with his carrot tucked just so. Take your time on the face placement before you glue anything down; a few millimeters make a real difference in his expression. Happy hooking! 🧶
FAQ
What yarn is best for this bucktooth bunny amigurumi free pattern?
We highly recommend using a high-quality DK-weight cotton yarn like YarnArt Jeans or Paintbox Cotton DK paired with a 1.5 mm hook to achieve the ideal tight stitch tension.
Can beginners make this amigurumi bunny pattern?
This pattern is rated as Advanced due to the complex wire armature framework, detailed facial sculpting, multi-material assembly, and non-standard hook size.
Is this crochet bucktooth bunny safe for toddlers?
No, this design is intended strictly as a display or collector’s piece because it uses glued-on plastic teeth, half-bead eyes, and internal wire joints which present choking hazards.