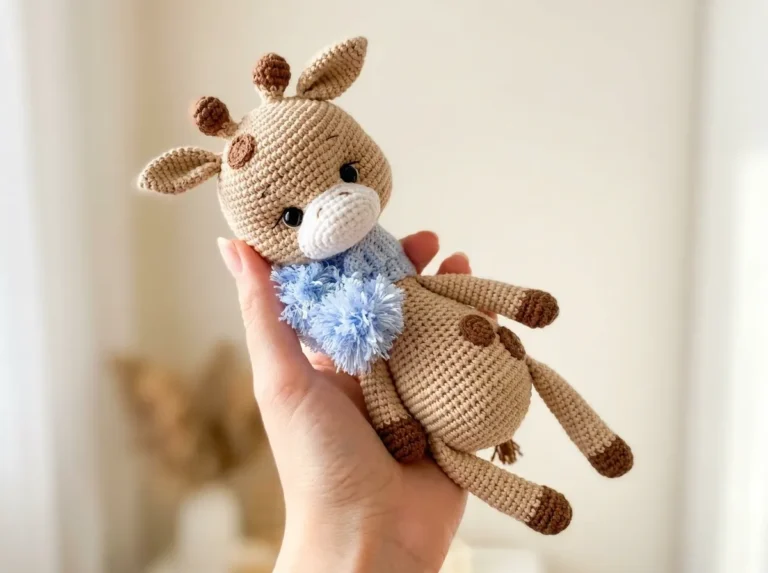
The Tiniest Deer Who Just Wants to Be Carried Everywhere
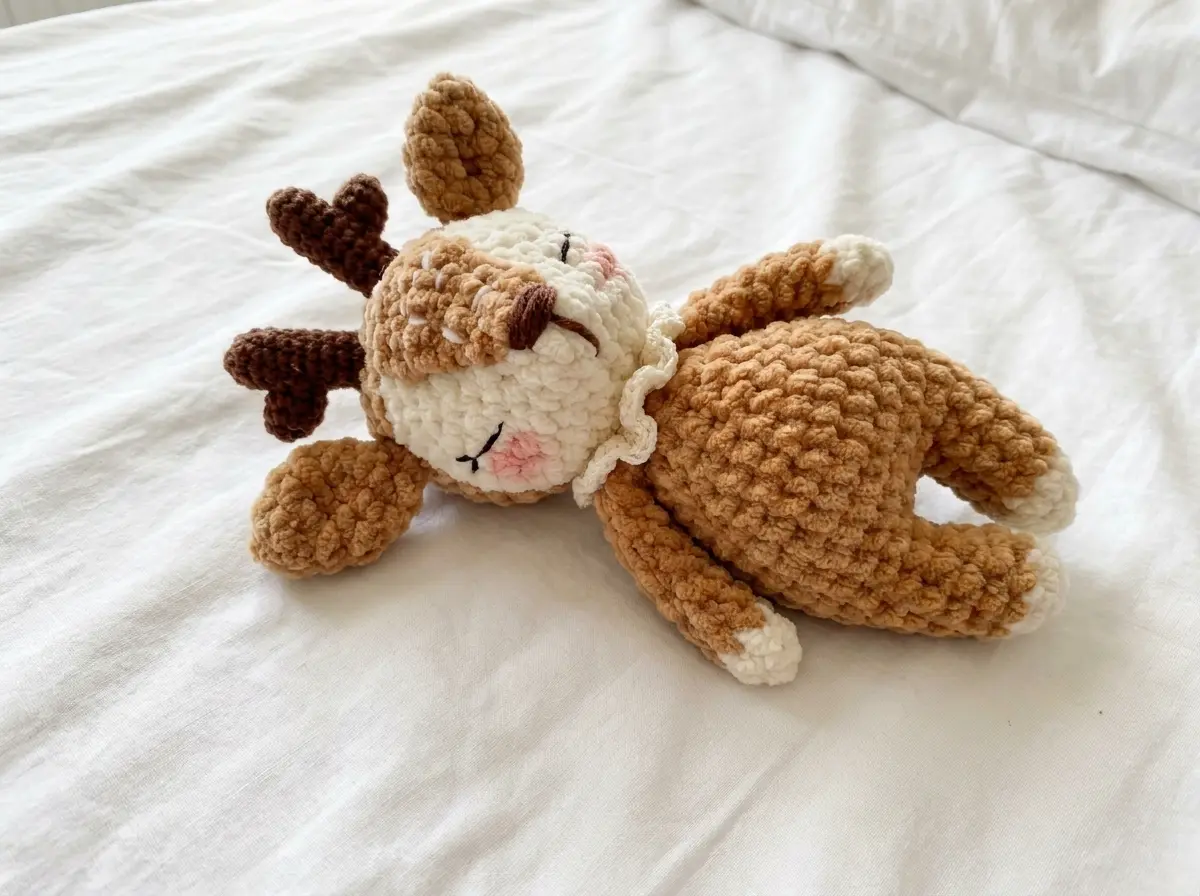
This crochet deer pattern free guide makes the softest little fawn you’ll ever hold — plush velvet chenille body, a delicate muzzle patch that gives her the most heartbreaking expression, and the daintiest cotton antlers you’ve ever seen on something this small. Sweetie fits right in your palm, has that irresistible squishy roundness only chenille can give, and once those embroidered eyes are placed just right, she’s impossible to put down. Let’s make her.
🩷 Pattern Highlights
- Cuteness Rating: 🩷🩷🩷🩷🩷
- Finished Size: approximately 6–8 in (15–20 cm) tall
- Difficulty: Beginner–Intermediate
- Hook Size: E/4–G/6 (3.5–4.0 mm) for chenille; 2.0 mm for antlers
- Yarn Palette: soft chenille main color + contrast color for snout and hooves, natural cotton for antlers
- Key Detail: velvet muzzle patch, embroidered eyes and nose, wispy cotton antlers, embroidered rosy cheeks
- Estimated Time: 4–6 hours
Supplies Needed for This Crochet Deer Pattern Free
Yarn
- Main color — Bulky (5) chenille yarn: Less than half a skein in your chosen deer shade. Warm fawn, soft caramel, dusty blush, creamy ivory — all gorgeous. US alternatives: Bernat Baby Velvet or Premier Parfait give that signature plush pile that makes chenille amigurumi so irresistibly squishy.
- Contrast color — Bulky (5) chenille yarn: For the hooves (arms and legs) and snout area. A slightly deeper or cooler tone against the main color creates the most adorable color-blocking. Think chocolate brown against warm caramel, or dusty rose against cream.
- Antler yarn — DK / Light Worsted (3) cotton-blend yarn: A natural earthy tone — beige, tan, warm white. You only need a small amount. Look for a smooth cotton-blend DK at your local craft store (Joann, Michaels, or Hobby Lobby). This weight is classified as DK / Light Worsted (3) — lightweight and firm enough that the finished antlers will actually stand upright.
Tools and Supplies
- Crochet hook: E/4–G/6 (3.5–4.0 mm) — for the chenille yarn
- Crochet hook: 2.0 mm — for the cotton antlers (no US letter equivalent; check your hook set)
- Tapestry needle — for sewing all the parts together and weaving in ends
- Polyfill stuffing — for the body and head
- Embroidery thread or thin yarn — dark brown or black for eyes and nose; soft pink for cheek blush
- Stitch marker — non-negotiable for tracking your continuous rounds
- Narrow satin ribbon — optional but honestly essential 🩷 (dusty pink, sage, or cream all look beautiful)
Abbreviations Used in This Pattern
| Abbreviation | Meaning |
|---|---|
| sc | single crochet |
| mr | magic ring |
| inc | increase — 2 sc worked into the same stitch |
| dec | invisible decrease — insert hook through front loops only of next 2 stitches simultaneously, yarn over, pull through, yarn over, pull through 2 loops. Always the preferred method in amigurumi. |
| dc | double crochet |
| sl st | slip stitch |
| ch | chain |
| BLO | back loop only — work into the back loop of each stitch only |
| FO | fasten off |
Before You Begin — The Details That Make Sweetie Sweetie
Chenille amigurumi have this beautiful quality where the yarn does a lot of the visual work for you — that soft velvety pile makes the finished piece look plush and rounded without any extra effort. But there are a few details in this pattern that are worth understanding before you pick up your hook.
🩷 Chloe’s Detail Tip: The muzzle patch is the heart of this whole design. It’s worked flat directly onto the head in short rows — not made separately and sewn on. Take your time positioning where you join the yarn; stitch 14 of Row 9 is your anchor point, and getting that right means the whole face sits exactly where it should.
The body is constructed by joining the two finished legs with a chain bridge and continuing in rounds — which sounds more complicated than it is. Once you try it, it’s one of those techniques that feels like magic. The legs become the base of the body all in one go, with no extra sewing needed to attach them. If you’re newer to finishing and assembly, our guide to sewing amigurumi parts together covers all the tips for attaching heads and limbs cleanly once everything’s crocheted.
The antlers are made with a completely different yarn weight and a 2.0 mm hook — much finer than the chenille sections. The cotton-blend yarn holds its shape firmly, which is exactly what you want: those antlers will stand up straight and look intentional rather than floppy. If you’ve never started a piece with a magic ring, our magic ring tutorial walks through it step by step before you dive in.
How to Crochet This Free Deer Pattern — Full Step-by-Step Instructions
Work in continuous rounds unless the instructions specify turning. Use a stitch marker at the beginning of each round.
Ears — Make 2
Yarn: main color | Starting method: magic ring
Row 1: 6 sc in mr (6)
Row 2: (1 sc, inc) × 3 (9)
Row 3: (2 sc, inc) × 3 (12)
Row 4: 12 sc (12)
Row 5: (2 sc, dec) × 3 (9)
Row 6: (1 sc, dec) × 3 (6)
Fasten off, leaving a long yarn tail for sewing.
🩷 Chloe’s Detail Tip: Don’t stuff the ears — leave them flat. Before you sew them on, pinch the base of each ear gently inward to give that natural curved shape. A fawn’s ears are soft and rounded, not stiff. That little pinch makes all the difference.
Arms — Make 2
Yarn: contrast color, then main color | Starting method: magic ring
Row 1: 6 sc in mr [contrast color] (6)
Row 2: 6 sc [contrast color] (6)
Row 3: Change to main color: 6 sc (6)
Rows 4–9: 6 sc (6)
Row 10: Fold flat, work 3 sc through both layers to close
Do not stuff. Fasten off, leaving a long yarn tail for sewing.
The two rows of contrast color at the tips create the most adorable little hooves. It’s such a small detail but the moment you hold one up you’ll be delighted — that tiny color transition is exactly what makes chenille amigurumi feel intentional and considered.
Legs — Make 2
Yarn: contrast color, then main color | Starting method: magic ring
Row 1: 6 sc in mr [contrast color] (6)
Row 2: (1 sc, inc) × 3 (9)
Row 3: Change to main color: dec, 3 sc, inc, 3 sc (9)
Row 4: 9 sc (9)
Row 5: dec, 3 sc, inc, 3 sc (9)
Row 6: 9 sc (9)
First leg: Fasten off and cut yarn. Set aside.
Second leg: Do not cut yarn — continue directly into the body.
Body
Yarn: main color | Starting method: joining the two legs
This is the part where the magic happens. You’re going to bridge from the second leg across to the first with a short chain, then work continuously across both to build the lower body all in one seamless round. Hold the two legs parallel to each other before you begin Row 7 — it helps to visualize the shape you’re creating.
Row 7: 3 ch, 9 sc along leg 1, 3 sc along the chain, 9 sc along leg 2 (24)
Row 8: (3 sc, inc) × 6 (30)
Rows 9–12: 30 sc (4 rows) (30)
Row 13: (3 sc, dec) × 6 (24)
Row 14: 24 sc (24)
Row 15: (2 sc, dec) × 6 (18)
Row 16: 18 sc (18)
Row 17: (1 sc, dec) × 6 (12)
Row 18: Join arms: 2 sc, 3 sc with arm, 3 sc, 3 sc with arm, 1 sc (12)
Row 19: 12 sc (12)
Start adding stuffing gradually from around Row 13 onwards — don’t wait until the very end. Building it up a little at a time as the body closes down gives you a much rounder, more even shape. Our guide to stuffing amigurumi without lumps has the full technique if you want to nail it perfectly.
Head
Yarn: contrast color (snout area first), then main color | Starting method: magic ring
This is where Sweetie’s whole personality takes shape. The contrast color builds outward from the center of the snout, and the switch to main color in Row 9 — worked through back loops only — creates a beautiful defined ridge right where the muzzle patch will later attach. That ridge is structural and decorative at the same time, which I love so much.
Row 1: 6 sc in mr [contrast color] (6)
Row 2: 6 sc (6)
Row 3: (sc, inc) × 3 (9)
Row 4: (2 sc, inc) × 3 (1) ⚠️ Note: the source pattern reads “(1)” here — this appears to be a typo. Count your stitches: you should have 12 after this row. Confirm your stitch count before continuing.
Row 5: (sc, inc) × 6 (18)
Row 6: (2 sc, inc) × 6 (24)
Row 7: (3 sc, inc) × 6 (30)
Row 8: (4 sc, inc) × 6 (36)
Row 9: Change to main color. Work in BLO: 36 sc (36)
Rows 10–11: 36 sc (36)
Row 12: (4 sc, dec) × 6 (30)
Row 13: (3 sc, dec) × 6 (24)
Row 14: (2 sc, dec) × 6 (18)
Row 15: (1 sc, dec) × 6 (12)
Row 16: 6 dec (6)
Stuff as you go — add a little filling each time the opening narrows. Close the remaining opening with a tapestry needle.
Muzzle Patch
Yarn: main color | Starting method: joined directly onto the head
This is the detail that makes this deer pattern so distinctive. Rather than crocheting a separate oval and sewing it on, the muzzle patch grows right out of the head in short flat rows. It creates a naturally tapered shape that sits softly against the contrast snout — and the way it frames the nose embroidery is just the sweetest thing. Take your time finding stitch 14 of Row 9 before you join.
Row 1: Join main color yarn at stitch 14 of Row 9 and work 5 sc (5)
Row 2: ch 1, turn, 5 sc (5)
Row 3: turn, no ch, 4 sc (4)
Row 4: turn, no ch, 3 sc (3)
Row 5: turn, ch 1, 3 sc (3)
Row 6: turn, no ch, 2 sc (2)
Row 7: turn, ch 1, 2 sc (2)
Leave a long yarn tail. Sew the edges of the muzzle patch down onto the snout area so it lays smooth and flat.
Tail
Yarn: main color or contrast color (not specified in source) | Starting method: chain
Row 1: 6 ch, starting from 2nd ch from hook: 2 dc, sc, sl st, 2 sc in last st. Along the other side: sc, sc, 2 dc, sl st in first st.
⚠️ Editorial Note: The abbreviation “см” appears in the original source for this row but was not defined in the pattern’s abbreviation list. It has been interpreted as “sc” based on context. If you have access to the original video source, cross-reference this row before stitching.
Fasten off, leaving a long yarn tail for sewing.
Antlers — Make 2 complete antlers
Yarn: cotton-blend DK / Light Worsted (3) in a natural tone | Hook: 2.0 mm | Starting method: magic ring
Each antler is assembled from two pieces — a longer main column and a shorter branch — then sewn together. The firm cotton holds its shape without any stuffing, which is what gives these tiny antlers their lovely upright posture. Switch to your 2.0 mm hook for this section.
Piece 1 — Main Antler Column (Make 2):
Row 1: 6 sc in mr (6)
Row 2: (1 sc, inc) × 3 (9)
Rows 3–10: 9 sc (9)
Fasten off, leaving a long yarn tail.
Piece 2 — Antler Branch (Make 2):
Row 1: 6 sc in mr (6)
Row 2: (1 sc, inc) × 3 (9)
Rows 3–5: 9 sc (9)
Fasten off, leaving a long yarn tail.
Sew each Piece 2 (branch) onto each Piece 1 (main column) to create two complete antlers. Position the branch roughly a third of the way down from the top of the main column. Those finished antlers are genuinely so satisfying to hold — tiny, firm, and absolutely perfect.
Assembly
- Secure the muzzle patch: Sew all edges of the muzzle patch firmly onto the head so it lays completely flat against the snout. Work slowly around the perimeter so there are no gaps or lifted edges.
- Ears and antlers onto the head: Position the ears on either side of the head — slightly forward of center looks the most natural. Place the antlers between the ears, toward the back of the crown. Pin everything before sewing and check from directly in front for symmetry. A few extra seconds here is always worth it.
- Head onto the body: Center the head on top of the body and sew securely all the way around. A very slight forward tilt as you position it gives Sweetie that soft, curious expression.
- Tail: Sew the tail onto the center back of the body, a few rows up from the base.
Making It Extra Cute — Where Sweetie Gets Her Soul
This is the section I could talk about forever. Everything before this was construction — but this is where she becomes her. The finishing details on this pattern are genuinely some of my favorites, because this deer’s expression comes almost entirely from what you do with thread and a needle at the end.
Embroidered Eyes
The pattern uses embroidered eyes, which means you have complete control over her expression — and I love that. Using dark brown or black embroidery thread, stitch two small satin-stitch ovals in the main-color section of the head, roughly centered between Row 10 and Row 12, one stitch apart. Keep them the same size. A tiny white highlight stitch in the upper corner of each eye — just two or three threads’ worth — is what makes them catch the light and look genuinely alive. That little glint is everything.
🩷 Chloe’s Detail Tip: If you’d prefer glossy safety eyes over embroidery, 9mm black safety eyes placed at the same position give a beautiful result. Insert them before you close the head and check the spacing from directly in front — hold the piece at arm’s length and squint a little. Once those washers press in, they’re permanent. Take the extra thirty seconds. Our safety eyes tutorial walks through exactly how to get them perfectly even every single time.
Nose Embroidery
A small V-shape or short horizontal stitch in dark brown, centered just above the muzzle patch, is all this little face needs. Keep it subtle — Sweetie’s muzzle does most of the expressive work, and a delicate nose completes it without competing. Less is genuinely more here.
Embroidered Cheeks — The Non-Negotiable Detail
A piece isn’t finished without them. Using a length of soft pink embroidery thread (or a single thin strand of blush pink yarn), embroider small, soft circular blush patches on either side of the muzzle patch. Just a few overlapping satin stitches in a rounded shape, kept light and airy. Hold the finished head at arm’s length and check that they’re level before you knot off. Okay but those cheeks though. Every single time.
The Ribbon
The pattern lists a ribbon as optional. I would never skip it. A narrow satin ribbon — dusty pink, sage green, or soft cream — tied in a tiny bow around Sweetie’s neck is the finishing touch that makes her look like she arrived in a gift box. She is a gift. She deserves the bow.
Color Variations Worth Making
The combination of chenille for the body and cotton for the antlers is so versatile — here are a few palettes that would be completely irresistible:
- Classic Woodland Fawn: warm caramel main + chocolate brown contrast + cream cotton antlers
- Pastel Dream: soft lavender main + dusty rose contrast + ivory cotton antlers
- Winter Deer: cream main + pale gray contrast + white cotton antlers
- Blush Forest: dusty rose main + mauve contrast + oatmeal cotton antlers
- Mint Meadow: pale mint main + soft sage contrast + natural cotton antlers
Chloe’s Final Look
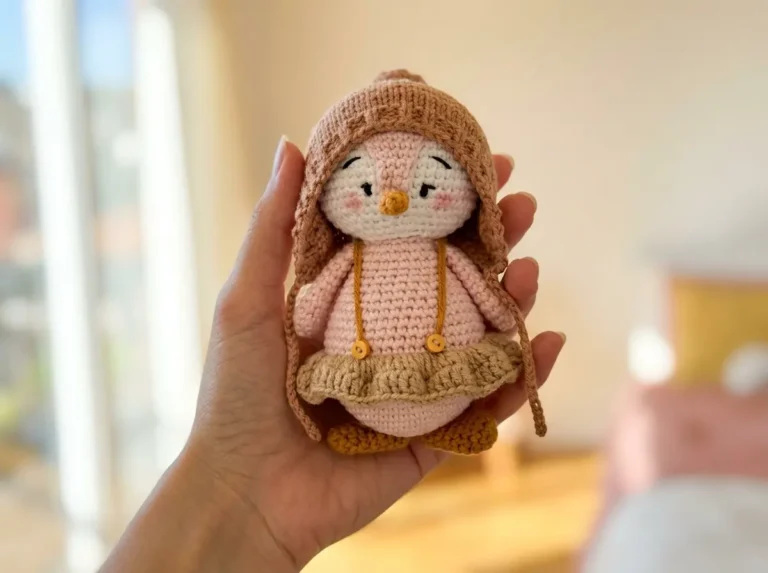
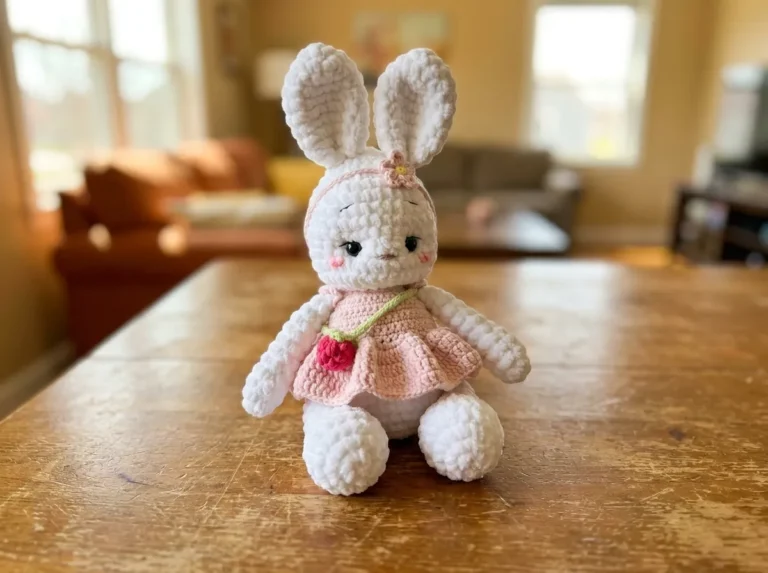
I have been holding this finished little deer under my lamp for an embarrassingly long time and I have absolutely zero regrets. The way the chenille pile makes the body look soft and rounded, the way that velvet muzzle patch sits so perfectly against the contrast snout, the little antlers standing upright like she’s ready for a forest adventure — she’s genuinely one of the most complete-feeling amigurumi I’ve made. Display her on a shelf next to our free bunny amigurumi or our free koala pattern and you’ll have the sweetest little woodland corner you’ve ever seen. Make her in every palette you have. You absolutely will not regret it. 🩷
What is the best yarn for this crochet deer pattern?
Bulky chenille yarn like Bernat Baby Velvet or Premier Parfait is best for the body to achieve a plush, squishy texture, while DK cotton is ideal for firm antlers.
Is this free deer pattern suitable for beginners?
Yes, it is rated for Beginner-Intermediate levels. While it uses some advanced techniques like joining legs, the detailed instructions guide you through each step.
How long does it take to finish the Sweetie fawn amigurumi?
Most crocheters will complete this pattern in approximately 4 to 6 hours, depending on their assembly speed.