Among Us Amigurumi — Free Crochet Astronaut Pattern
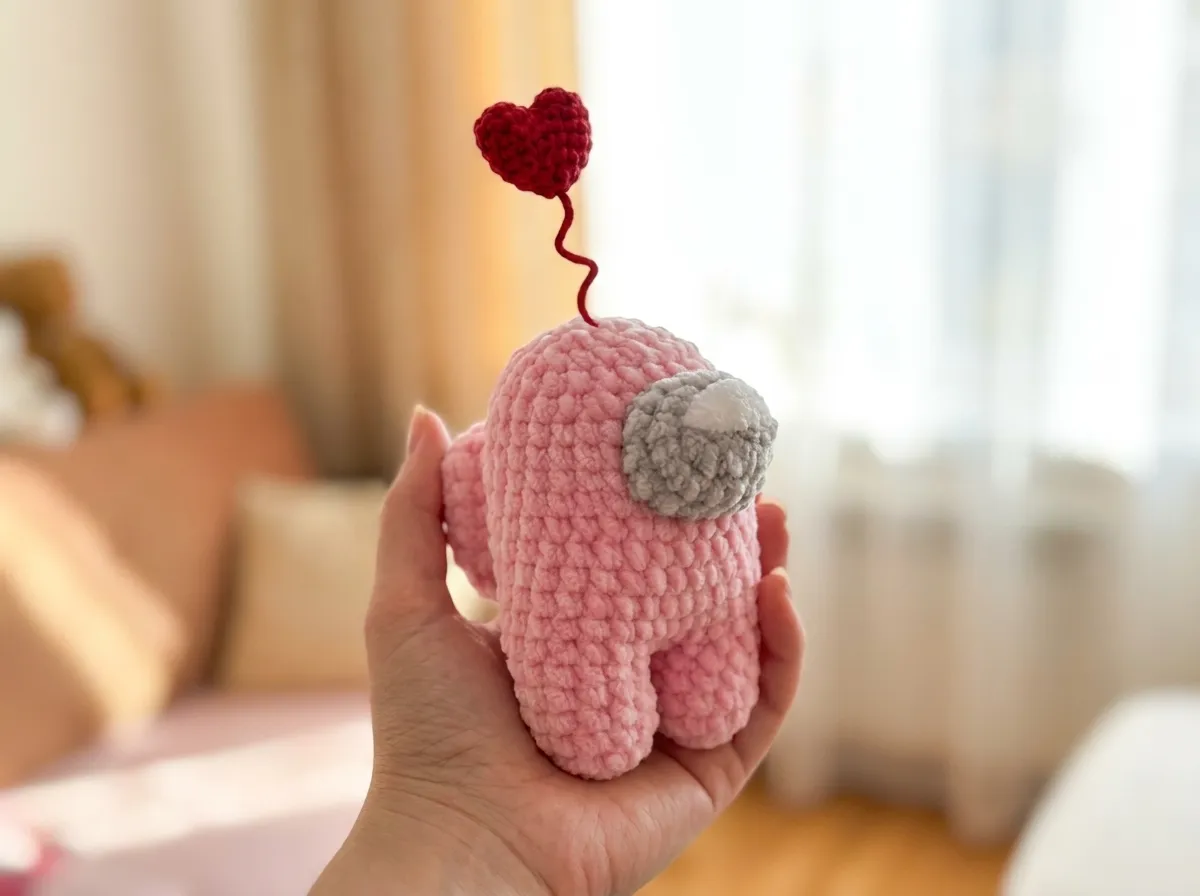
This among us amigurumi has been on my project list for longer than I’d like to admit — and the moment I finished it, I completely understood why it has such a following. That unmistakable round body, the oval visor, the little wire-stem heart held out front like a tiny declaration. I built this with chenille for maximum squish and tested every count twice. The numbers add up. Let’s make this little astronaut.
📋 Pattern Quick Stats
- Difficulty: Intermediate
- Finished Size: Approx. 5.5 in (14 cm) tall
- Hook Sizes: G/6 (4.0 mm) for body; B/1 (2.25 mm) for heart
- Yarn Weight: Bulky (5) chenille/velvet for body; DK (3) cotton for heart
- Techniques: Magic ring, invisible decrease, chain join (legs to body), two-piece join (heart)
- Estimated Time: 4–6 hours
Among Us Amigurumi: Materials and Tools
This project uses two different yarn weights intentionally — the chenille gives the body that satisfying dense squish, while the finer cotton lets you work the small heart with real stitch definition. Do not swap these out for the same yarn throughout. The size difference is structural.
- Yarn A — Bulky (5) chenille/velvet: Himalaya Dolphin Baby or US alternatives: Bernat Baby Velvet, Premier Parfait. Color: your choice — the original is made in pink, but this pattern looks stunning in any single color. Approx. 50–70 yds.
- Yarn B — DK/Light Worsted (3) cotton: YarnArt Jeans or US alternatives: Drops Muskat, Paintbox Cotton DK. Color: red for heart, gray for visor. Approx. 15–20 yds total.
- Stuffing: Polyfill fiberfill (Poly-Fil by Fairfield, widely available at Joann, Michaels, or Hobby Lobby)
- Hook A: G/6 (4.0 mm) — for body, visor, and backpack
- Hook B: B/1 (2.25 mm) — for heart only
- Other tools: Stitch marker, tapestry needle, scissors, thin craft wire (for heart antenna), lighter (to singe wire ends before wrapping)
⚠️ Safety Note: This pattern uses wire in the heart antenna. That detail makes it a decorative piece or a collectible for older children and adults — not a toy suitable for children under 3. If you’re gifting this to a young child, skip the wire entirely and sew the heart directly to the top of the body. The U.S. Consumer Product Safety Commission (CPSC) provides guidelines on toy safety standards if you want to know more.
Both yarns fall within the Craft Yarn Council yarn weight system — Yarn A at Bulky (5) and Yarn B at DK (3).
Abbreviations Used in This Among Us Amigurumi Pattern
| Abbreviation | Meaning |
|---|---|
| mr | magic ring |
| sc | single crochet |
| inc | increase — 2 sc worked into the same stitch |
| dec | invisible decrease — insert hook through front loops only of next 2 stitches simultaneously, yarn over, pull through, yarn over, pull through 2 loops |
| ch | chain |
| sl st | slip stitch |
| ( ) × n | repeat the instructions in parentheses n times |
| (n) | total stitch count at end of row |
💡 Note on decreases: Wherever this pattern calls for “dec,” I always use the invisible decrease method — front loops only. It eliminates the gap that the standard sc2tog creates. On chenille especially, that gap shows. Use the inv dec every single time.
Special Techniques for This Pattern
This among us amigurumi isn’t difficult, but a few techniques show up in ways that are worth knowing before you start. I’d rather you read through these once than frog back three rounds because something surprised you mid-project.
Magic Ring: Every major part of this pattern starts with a magic ring. If you’re new to it or your center keeps popping open, check out our complete magic ring tutorial — it covers both the standard and the tighter close method I use for chenille.
Invisible Decrease: The dec in this pattern is always the invisible decrease. It’s especially important on the body closure (Rows 17–21) where you want the fabric to draw in smoothly without visible holes. Our invisible decrease tutorial walks through exactly how to find those front loops in chenille, which can be trickier than cotton.
Leg Join (Chain Bridge): At Row 6, you’ll join the two legs into one body using a chain bridge — a technique that trips up a lot of people the first time. The key is to use a stitch marker on the second leg before you chain across. This keeps your starting point clear and prevents you from losing your count when you cross over.
Two-Piece Heart Join: The heart is made in two halves (Rows 1–2 each), then joined and worked as one piece through Row 8. This is what gives it a rounded, full shape instead of a flat disc. I’ll walk through this in the pattern section. Read it through before you start the heart — it makes much more sense once you see the shape forming.
Stuffing: Stuff the body gradually as you decrease. Don’t wait until Row 21 to add filling — you won’t be able to get even distribution. For tips on stuffing without lumps, our guide on how to stuff amigurumi properly is worth a read before you start.
How to Crochet This Among Us Amigurumi — Pattern Instructions
Part 1: Legs and Body
Yarn A (Bulky chenille) — Hook G/6 (4.0 mm)
Make 2 legs (Rows 1–5). Join into body at Row 6.
Row 1: 6 sc in mr (6)
Row 2: 6 inc (12)
Rows 3–5: 12 sc (3 rows) (12)
💡 Emma’s Tip: After Row 5 on the first leg, cut yarn and fasten off. Leave a tail long enough to weave in later. On the second leg, do not cut yarn — you’ll continue directly into the body join. Place a stitch marker on the second leg’s last stitch so you know exactly where your round begins.
Row 6 (body join): 12 sc across second leg, ch 3, sl st into first leg, 12 sc across first leg, 3 sc across the back of the ch-3 bridge (30)
💡 Emma’s Tip: The stitch marker will sit at the back of the toy — that’s correct. This becomes your seam line, which runs along the back where the backpack will cover it. If your count at Row 6 gives you anything other than 30, check that you worked 3 sc on each side of the chain bridge (not 2 and not 4).
Rows 7–16: 30 sc (10 rows) (30)
💡 Emma’s Tip: Start adding polyfill gradually around Row 9. The body is long — if you wait until the decreases to stuff, you’ll end up with a lumpy, uneven shape. I stop every 3 rows and add a small pinch of stuffing, pressing it in firmly before continuing.
Row 17: (3 sc, dec) × 6 (24)
Row 18: 24 sc (24)
Row 19: (2 sc, dec) × 6 (18)
Row 20: (sc, dec) × 6 (12)
Row 21: 6 dec, sl st (6)
💡 Emma’s Tip: Add your final stuffing before closing Row 21. The body should feel firm and full — not hard, but with no soft spots. Cut yarn, leaving a 6 in tail. Thread onto a tapestry needle, run through the remaining 6 front loops, and pull tight to close. Weave in the end.
Part 2: Visor
Yarn B (DK cotton) — gray — Hook G/6 (4.0 mm)
Worked flat in a continuous oval starting from a chain foundation.
Foundation: Ch 6.
Row 1: Starting from the 2nd ch from hook, work along both sides of the chain — 4 sc along the front, 3 sc in the corner ch (this creates the oval curve at the far end), 3 sc along the back of the chain, 2 sc inc at the near corner (12)
Row 2: inc, 3 sc, 3 inc, 3 sc, 2 inc (18)
Row 3: 18 sc, sl st (18)
Cut yarn and fasten off. Leave a long tail (approx. 10 in) for sewing.
💡 Emma’s Tip: The visor is worked with the same hook as the body even though the yarn is finer. This keeps the fabric open enough to show clearly against the chenille. If you size down to a B/1 here, it will curl and the oval won’t sit flat.
Part 3: Backpack
Yarn A (Bulky chenille) — same color as body — Hook G/6 (4.0 mm)
Also worked from a chain foundation, same start as visor.
Foundation: Ch 6.
Row 1: Follow visor Row 1 instructions (12)
Row 2: Follow visor Row 2 instructions (18)
Rows 3–6: 18 sc (4 rows) (18)
Row 7: dec, 3 sc, 3 dec, 3 sc, 2 dec, sl st (12)
Cut yarn, leaving a long tail. Thread onto tapestry needle and sew the opening closed. You can lightly stuff the backpack with a small pinch of fiberfill before closing — it gives it a more dimensional, realistic look. Fasten off and weave in ends.
Part 4: Heart
Yarn B (DK cotton) — red — Hook B/1 (2.25 mm)
Made in two halves, then joined and worked as one piece.
Make 2 identical half-hearts (Rows 1–2 only):
Row 1: 5 sc in mr (5)
Row 2: 5 inc, sl st (10)
💡 Emma’s Tip: On the first half-heart, cut yarn after Row 2 and fasten off. On the second half-heart, do NOT cut — you will use this working yarn to join the two halves. Place the first half-heart beside the second and continue directly.
Join and continue:
Row 3: Working across second half-heart then first half-heart continuously — 20 sc total across both pieces (20)
Row 4: 20 sc (20)
Row 5: 20 sc (20)
Row 6: (2 sc, dec) × 5 (15)
Row 7: (sc, dec) × 5 (10)
Row 8: 5 dec, sl st (5)
💡 Emma’s Tip: Add stuffing before closing Row 8 — just a tiny pinch. The heart should be soft but hold its rounded shape. Don’t overstuff it; this is a small piece and too much fiberfill will stretch the DK fabric and make the shape lumpy.
Cut yarn, leaving a tail of approximately 8 in. This tail is used to attach the wire and secure the heart to the antenna position.
Assembling Your Among Us Amigurumi
- Attach the visor. Pin the visor to the front of the body, centered between Rows 12 and 18. The oval shape should sit vertically, with the wider end toward the top of the body. Use the long yarn tail and a tapestry needle to sew around the entire edge. I work a small whip stitch and pull each stitch firmly — the contrast of the gray against the chenille body is one of the best details in this piece, and it’s only as clean as the sewing. Take your time here.
- Attach the backpack. Pin the backpack to the back of the body, centered between Rows 9 and 15. The backpack should sit roughly opposite the visor. Sew around the edge with matching yarn. Because the backpack is the same color as the body, this seam disappears — but it still needs to be even, otherwise the backpack will shift or bubble.
- Prepare the wire antenna. Cut a piece of craft wire approximately 4–5 in long. Fold it in half to create a U-shape. Using a lighter, carefully singe both wire ends to remove any sharp fraying fibers. Let cool completely before handling. Using the 8 in yarn tail from the heart, position the folded end of the wire at the top of the heart and sew it firmly into place. Wrap the remaining yarn tail tightly around the wire, moving downward toward the fold. This binds the wire and gives it a clean wrapped look.
- Insert the heart antenna. Press the wire stem down through the top center of the astronaut body, between the closing stitches of Row 21. The heart should sit slightly above the head, held at a slight forward angle as if being offered. Secure the wire from the inside if needed by wrapping the internal wire ends around a few stitches. The closing stitches of the body hold the wire in place naturally due to the tight chenille fabric.
💡 Emma’s Tip: Before sewing the visor and backpack, hold both up against the unstuffed body and check that they’re centered from every angle. It takes thirty seconds to repin. It takes forty minutes to unpick and redo chenille seams. I learned this the hard way on my second version of this piece.
For more detail on attachment techniques, our guide on how to sew amigurumi parts together covers pinning, tension, and how to hide yarn tails cleanly.
Finishing Details
The one embroidery detail in this pattern makes a significant difference: small white highlight stitches on the visor. Use a short length of white DK cotton yarn and a tapestry needle to embroider 2–3 small straight stitches in the upper corner of the visor oval. These catch the light and give the visor a glassy, dimensional look. Keep the stitches small and irregular — think of how light actually reflects, not a perfect pattern.
Weave in all remaining ends securely. On chenille, I always weave in at least two directions and pull the tail through a few stitches in each direction before trimming. Chenille ends have a tendency to work their way back through the fabric if you’re careless with finishing.
Give the body a gentle squeeze to even out the stuffing, and use your fingers to smooth out any bumps in the chenille pile. A light steam from a distance (not direct iron contact — never on chenille) can help the fabric settle if the texture looks uneven after assembly.
Emma’s Note
I’ve made three versions of this among us amigurumi now, and the heart antenna never stops being satisfying to finish. There’s something about the way it tilts forward slightly — that’s not an accident, that’s what makes it read as a gesture rather than just a prop. If your visor placement feels slightly off the first time, don’t be afraid to frog the seam and reposition it. Chenille is forgiving and the visor yarn is fine enough that unpicking doesn’t damage the fabric. Take the extra ten minutes. You’ll be glad you did. Happy hooking. 🧶
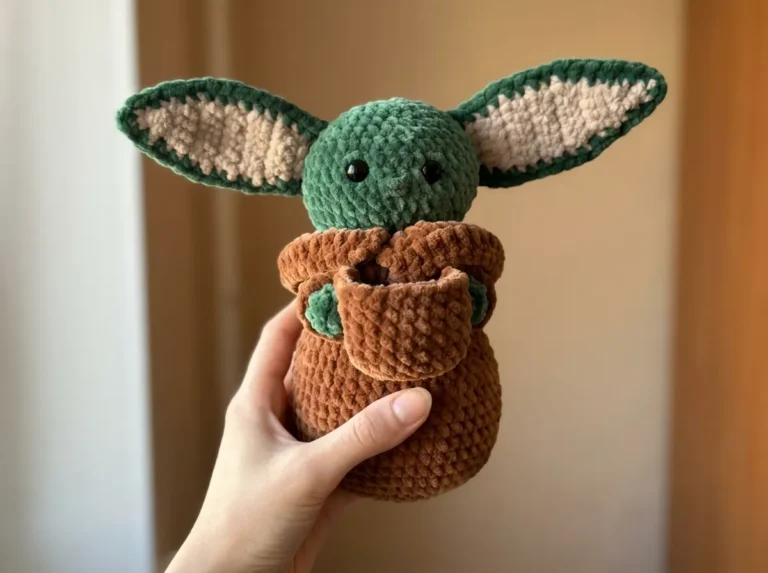
Looking for more character-inspired amigurumi? Check out our free Baby Yoda amigurumi pattern — it’s worked in chunky chenille with a similar satisfying density — or our free Stitch amigurumi pattern if you want something with a bit more detail and color work.
What yarn is best for this among us amigurumi?
This pattern intentionally uses Bulky (5) chenille yarn for the body to give it a squishy texture, and DK (3) cotton yarn for the small heart to retain strict stitch definition.
Can beginners make this among us amigurumi?
Yes, it is an intermediate pattern, but beginners who are comfortable with the magic ring, invisible decreases, and joining legs into a body can easily follow along.
Is the wire heart antenna safe for children?
The wire makes it unsuitable for children under 3. If you are gifting it to a young child, simply skip the wire and sew the heart directly to the top of the astronaut’s head.