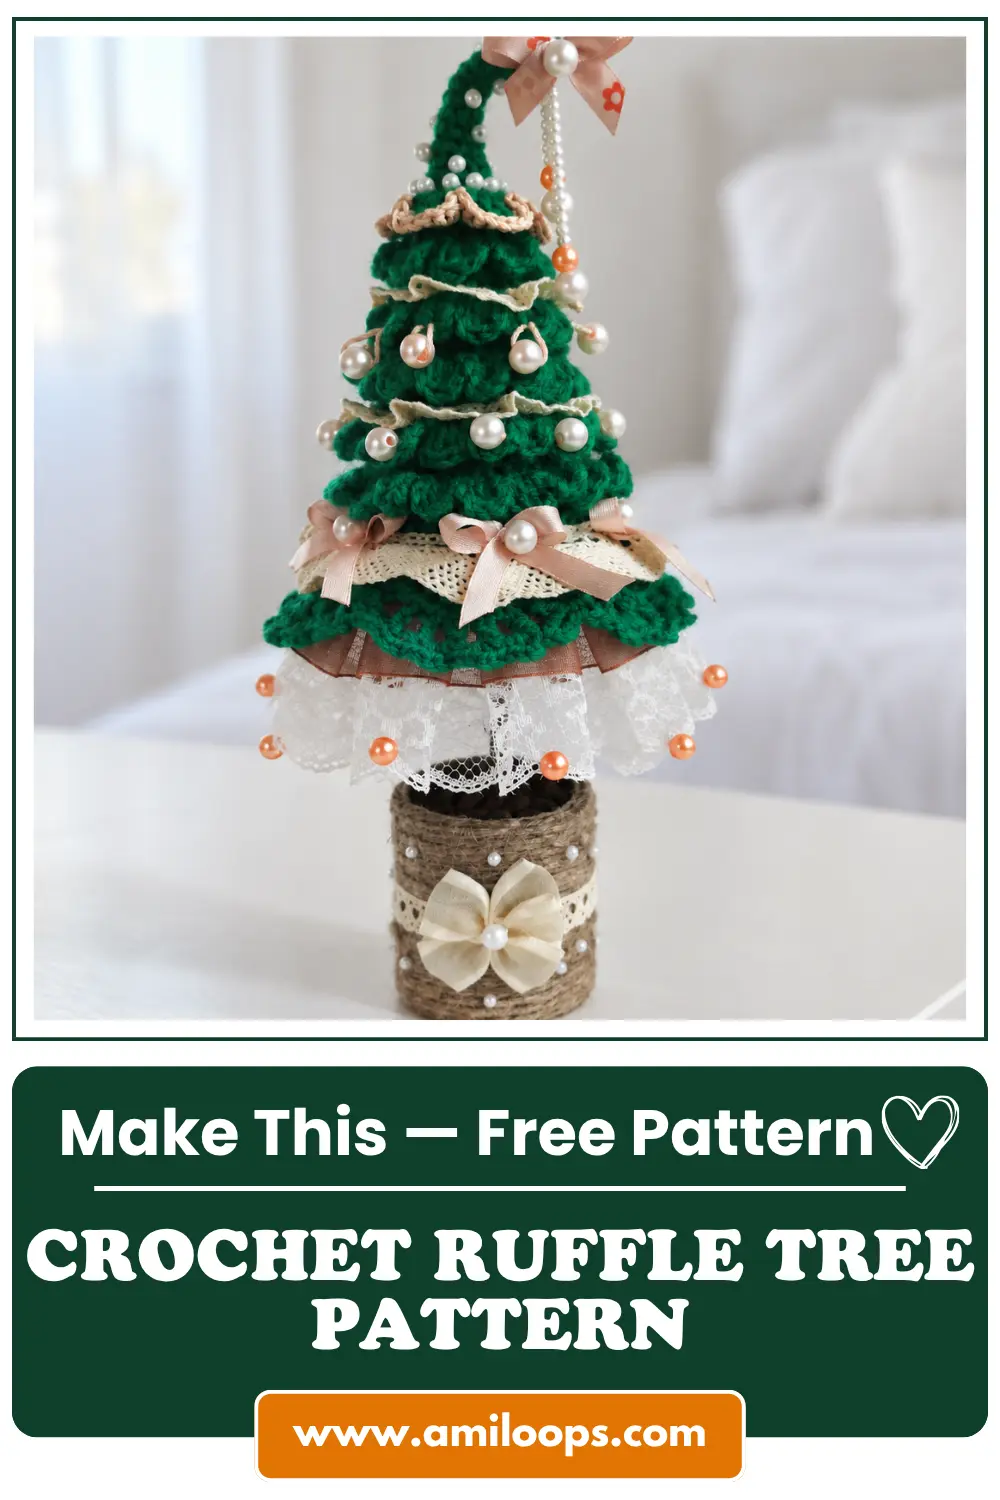
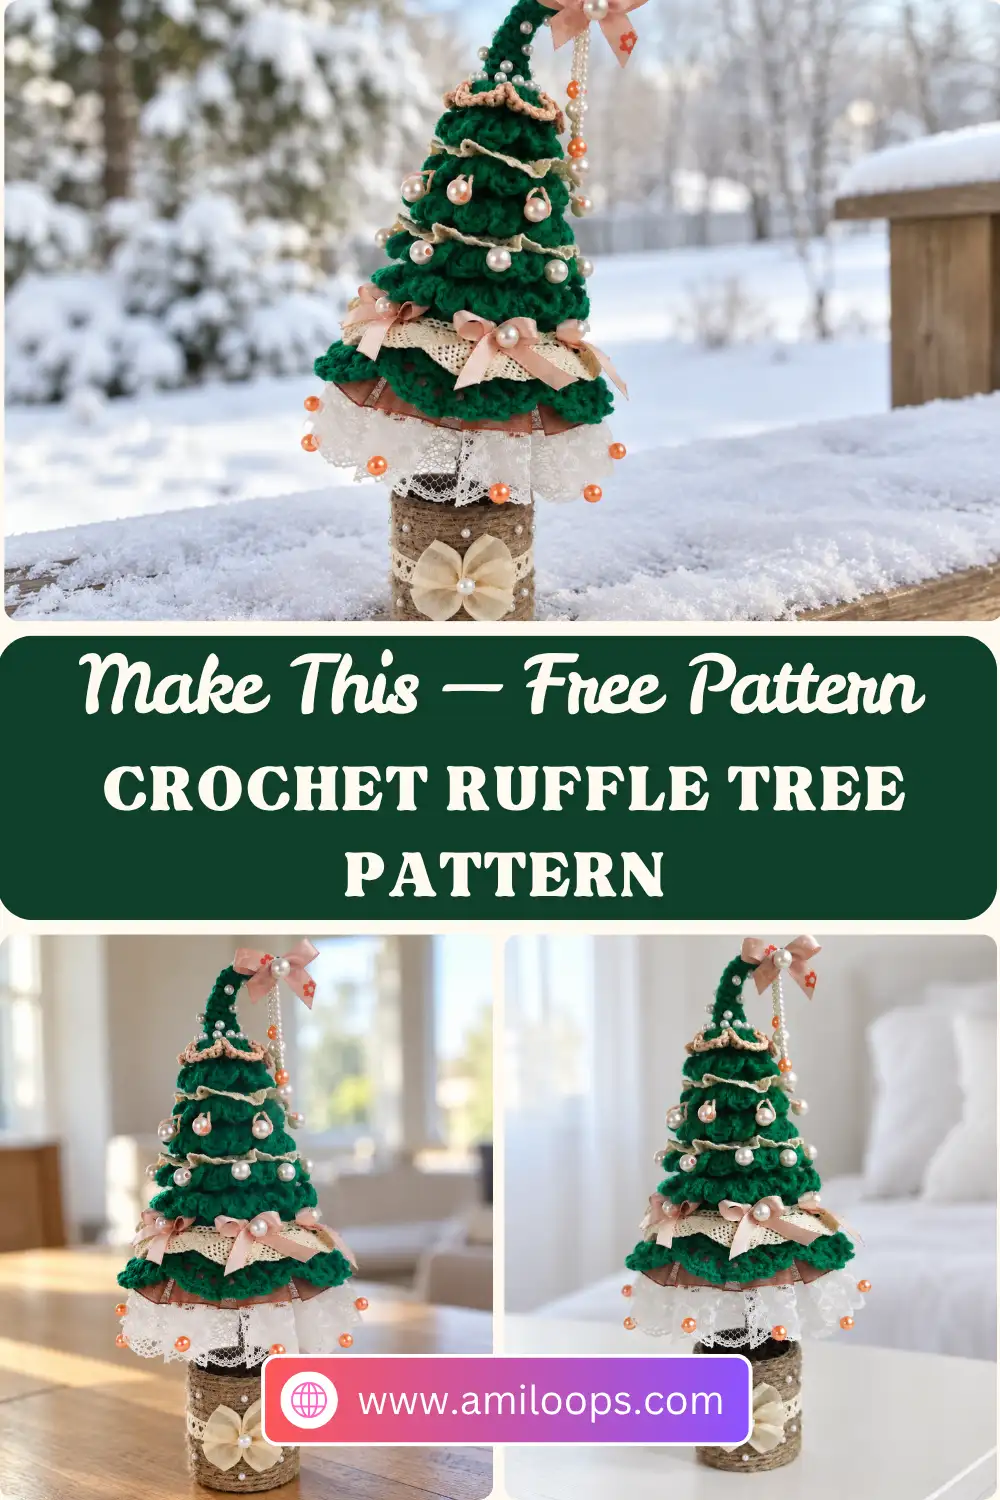
Crochet Ruffle Tree Pattern with Lace, Beads, and a Twine Pot

This crochet ruffle tree pattern sits at the meeting point of two craft tables. On one side you have classic amigurumi work: a green cone crocheted in the round, stuffed, and finished with tiers of frilly edging. On the other side you have mixed-media assembly, where wire gets wrapped in twine, parts are glued together, and a humble tape core becomes a pot. Each half follows its own logic, and the finished piece depends on both working together, so it pays to understand the whole plan before picking up a hook.
Because so much of the project happens away from the yarn, this guide leans into organization. You will see how the crocheted body, the gluing steps, and the wire trunk connect, which supplies belong to structure and which are purely decorative, and where each stage hands off to the next. The canonical rounds are listed in full, followed by the assembly sequence for the stand, the lace and bead placement, and a finishing checklist that helps you confirm every detail before the tree goes on display.
About This Ruffled Lace Tree Crochet Pattern
The tree begins as a flat circle and grows into a cone in one continuous piece. The base spreads out to 48 stitches, then the walls rise and taper toward a narrow tip. What gives the tree its layered look is a simple loop trick: at regular intervals, a round is worked through the back loops only. That leaves a ring of unused front loops sitting on the surface, and those rings later become anchors for the crocheted ruffles, turning a plain cone into a stack of distinct tiers.
The crochet is only part of the presentation. The tree is mounted on a trunk and set into a small pot assembled from an empty double-sided tape core and twine, which gives the display a handmade, rustic base that contrasts with the lace and beads above. Planning both halves together matters, because the spaced front-loop rings decide where the ruffles and lace will sit, while the pot decides how the tree is presented. Treating them as one design from the start keeps the later steps predictable.
Materials and Tools
The supply list is longer than a typical amigurumi list, and it helps to sort it into two groups. The structural group builds and holds the tree: the green yarn, fiberfill, dense plastic, wire, tape core, glues, twine, modeling clay, and foam. The decorative group adds the texture you notice first, meaning the cotton lace in two widths, the pre-finished bottom lace, satin ribbon, and pearl-like beads. These fabric and bead elements add dimension alongside the crocheted ruffles rather than replacing them, so both groups deserve space on your worktable.
- Pehorka “Detskaya Novinka” (Children’s Novelty) yarn, color 742 (Green) for the tree base
- Contrasting light/beige yarn for ruffle edging
- Dense plastic (for the tree base insert)
- Fiberfill stuffing
- Cotton lace (2cm wide)
- Cotton lace (1cm wide)
- Pre-finished bottom lace
- Satin ribbon
- Beads (pearl-like)
- Empty double-sided tape core (for the stand base)
- Wire (approx. 24 cm / 9.5 inches)
- Clear craft glue (Moment Crystal)
- Twine / Jute
- Plasticine or modeling clay (for weighting the stand)
- Super glue (Super Moment)
- Coffee beans
- Foam material (for inserting into the stand)
Keeping the decorative supplies together in one shallow tray, separated by type, makes them easy to reach during the sewing stage. Label the 2cm and 1cm cotton laces so the two widths stay distinct, pour the pearl-like beads into a small dish, and keep the satin ribbon and pre-finished bottom lace close by. Seeing these textured elements side by side also helps you picture how the fabric, ribbon, and beads will layer against the crocheted ruffles.
Crochet Abbreviations
The pattern uses US crochet terms and a compact set of abbreviations. The base opens with a magic ring (MR) holding 6 single crochet (sc) stitches, and increases (inc) spread the spiral into a flat circle of 48 stitches. Pay close attention to back loop only (BLO): Round 9 is the first round worked this way, and it is what turns the flat circle upward into the tree walls. For a broader reference, the Craft Yarn Council crochet abbreviations page covers the standard US terms used here.
- MR — magic ring
- ch — chain
- st(s) — stitch(es)
- sc — single crochet
- dc — double crochet
- sl st — slip stitch
- inc — increase (2 sc in one stitch)
- dec — decrease (sc 2 together)
- BLO — back loop only
- FLO — front loop only
Construction Overview
Once the walls rise, the cone narrows through a series of decrease rounds separated by plain rounds. The decreases are staggered, meaning they do not stack in the same column round after round. Some rounds begin with a few single crochet before the first decrease, while others start the repeat immediately, which shifts the decrease points around the circumference. The result is a smooth taper without abrupt angle changes, and that even surface gives each ruffle tier a consistent place to sit.
The tree does not sit directly in its pot. A twine-wrapped wire acts as a trunk and lifts the crocheted cone about 10cm above the decorative base, giving the piece a topiary-like profile. That height creates leverage, so the stand needs weight. Modeling clay hidden inside the tape core provides the counterbalance that keeps the tree from tipping. Because the clay sits beneath the foam and coffee beans, nobody sees it, yet it quietly does much of the structural work.
Before You Start
Gather every mixed-media component before you crochet the first stitch: the tape core, wire, twine, modeling clay, beads, and lace. These items dictate how the final assembly unfolds, and discovering a missing piece halfway through gluing interrupts the flow. Once the flat base of Rounds 1 through 8 is complete, use it as a template and cut the dense plastic circle to that diameter right away. Having the insert ready means you can place it at the right moment instead of pausing mid-cone to measure.
Prepare the stand materials early as well. Cut the foam circles and test them inside the tape core before any glue comes out, since a snug fit gives the coffee beans a stable surface later. Keep fiberfill within reach while you crochet, because the cone is stuffed firmly as it grows. The exception is the narrow top. Leave the final few rounds unstuffed so the tree ends in a sharp point rather than a rounded dome.
Ruffled Lace Tree Crochet Pattern
The tree base is worked as a continuous spiral, starting with 6 stitches in a magic ring and increasing to a flat 48-stitch circle before the walls rise and taper. Work every round of the Tree Base in order, keeping the stitch counts in view as checkpoints, and then return to the exposed front loops to add the ruffles and the contrasting edging.
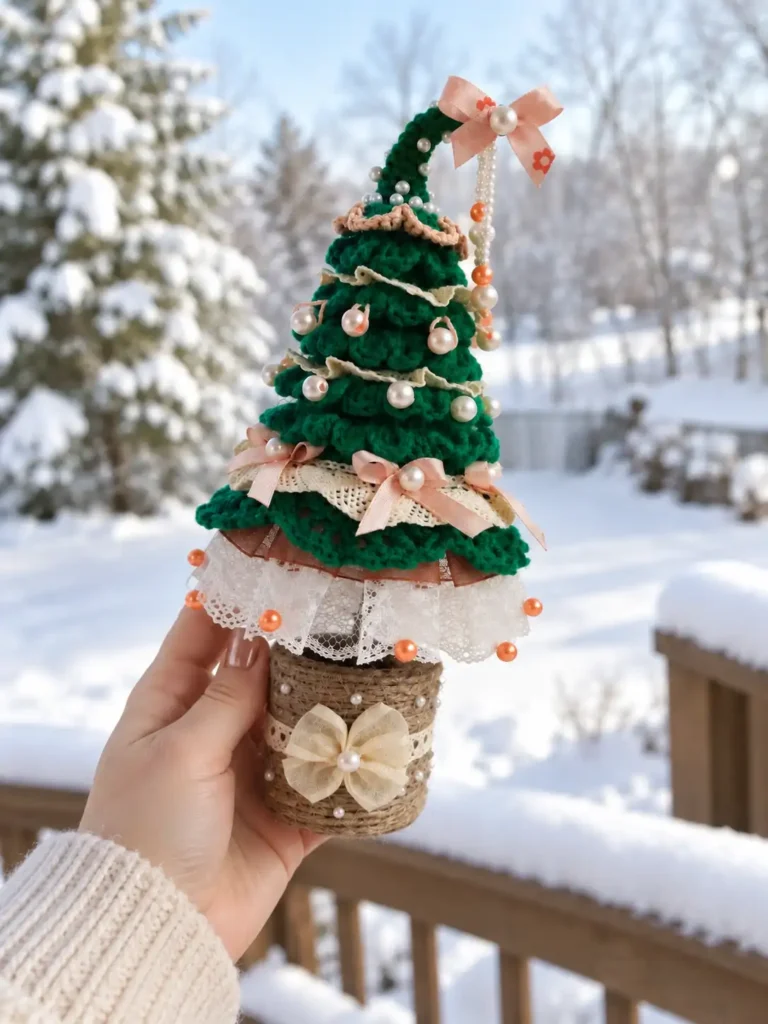
Tree Base
Round 1: 6 sc in a MR. (6 sts)
Round 2: 6 inc. (12 sts)
Round 3: (1 sc, inc) 6 times. (18 sts)
Round 4: 1 sc, inc, (2 sc, inc) 5 times, 1 sc. (24 sts)
Round 5: (3 sc, inc) 6 times. (30 sts)
Round 6: 2 sc, inc, (4 sc, inc) 5 times, 2 sc. (36 sts)
Round 7: (5 sc, inc) 6 times. (42 sts)
Round 8: 3 sc, inc, (6 sc, inc) 5 times, 3 sc. (48 sts)
Round 9: In BLO, 48 sc. (48 sts)
Rounds 10-11: 48 sc. (48 sts)
Round 12: In BLO, 48 sc. (48 sts)
Round 13: 3 sc, dec, (6 sc, dec) 5 times, 3 sc. (42 sts)
Rounds 14-15: 42 sc. (42 sts)
Round 16: In BLO, 42 sc. (42 sts)
Round 17: (5 sc, dec) 6 times. (36 sts)
Rounds 18-19: 36 sc. (36 sts)
Round 20: In BLO, 36 sc. (36 sts)
Round 21: 2 sc, dec, (4 sc, dec) 5 times, 2 sc. (30 sts)
Rounds 22-23: 30 sc. (30 sts)
Round 24: In BLO, 30 sc. (30 sts)
Round 25: (3 sc, dec) 6 times. (24 sts)
Rounds 26-27: 24 sc. (24 sts)
Round 28: In BLO, 24 sc. (24 sts)
Round 29: 1 sc, dec, (2 sc, dec) 5 times, 1 sc. (18 sts)
Rounds 30-31: 18 sc. (18 sts)
Round 32: In BLO, 18 sc. (18 sts)
Round 33: (1 sc, dec) 6 times. (12 sts)
Rounds 34-35: 12 sc. (12 sts)
Round 36: In BLO, 12 sc. (12 sts)
Round 37: (2 sc, dec) 3 times. (9 sts)
Rounds 38-41: 9 sc. (9 sts)
Round 42: (1 sc, dec) 3 times. (6 sts)
Rounds 43-50: 6 sc. (6 sts)
Ruffles and Edging
Ruffle placement: The ruffles are worked into the exposed front loops of Rounds 16, 20, 24, 28, 32, and 36 with one repeating stitch sequence. Only the topmost ruffle receives the contrasting single crochet border.
Row 1: Attach yarn to the remaining front loops of Rounds 36, 32, 28, 24, 20, and 16. Work the following sequence: (sl st, ch 3, 2 dc, ch 3, sl st) all in one stitch, skip 1 stitch. Repeat this sequence to the end of each round.
Row 2: For the remaining front loops of Round 12, crochet according to the visual diagram provided in the source pattern. Finally, edge the topmost ruffle round (Round 36 ruffle) using contrasting yarn with sc, making 1 sc in each stitch across.
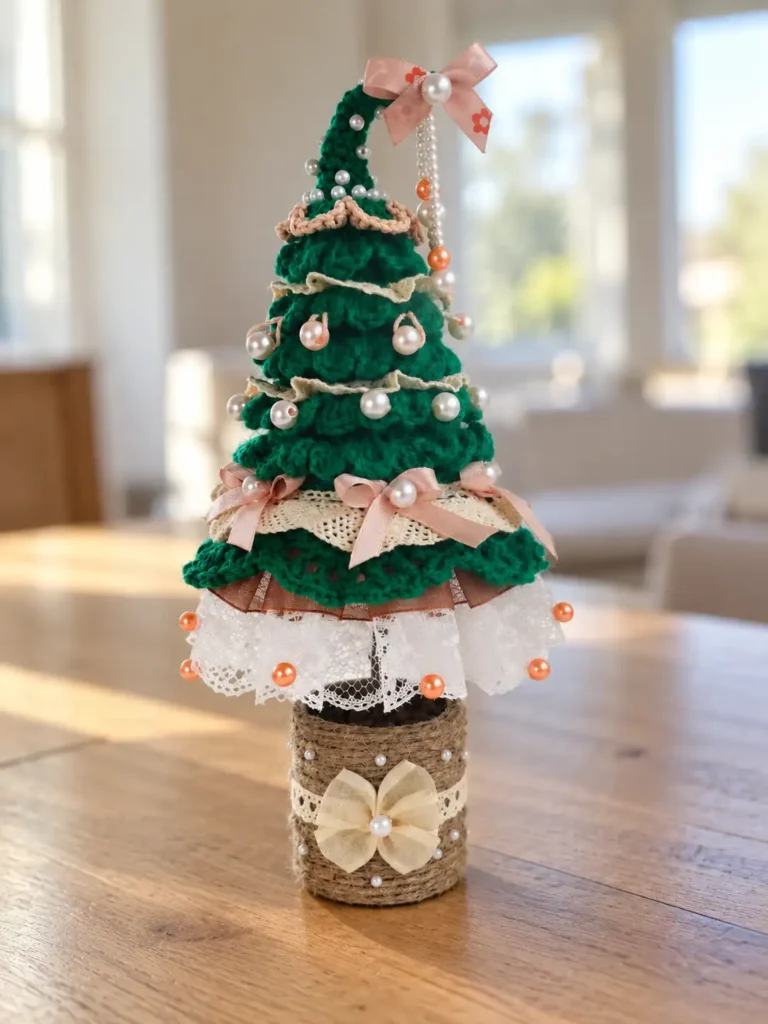
Assembly and Finishing
Assembly actually begins during the crochet stage. Round 16 ends with 42 stitches, and that is the point to place the plastic circle inside the cone so it supports the flat bottom. Later, the 24cm wire joins tree and pot. Each end is bent into an L-shape: one bent end anchors horizontally inside the tape core, and the other lies flat against the plastic bottom of the tree. That flat contact at both ends is what lets the trunk hold its position.
The twine does the disguising. It covers the glue-coated wire completely and wraps the entire outside of the tape core, so no bare wire or cardboard shows. Inside the pot, the foam layers fill the space, and the top circle receives a coat of glue followed by a single layer of coffee beans. From a normal viewing distance, the beans read as dark soil, completing the look of a small potted tree.
- Cut a circle of dense plastic the size of the flat bottom base.
- Insert this plastic circle after completing Round 16.
- Stuff the tree firmly with fiberfill as you crochet, but leave the very top tip unstuffed.
- Fasten off and weave in the end to close the tip.
- Cut a plastic circle to fit the bottom of the empty tape core and glue it in place.
- Take the 24cm wire, coat it with clear craft glue (Moment Crystal), wrap it tightly with twine, and let it dry.
- Glue twine to the bottom of the tape core base, then wrap and glue twine around the entire exterior of the tape core.
- Bend both ends of the twine-wrapped wire into an L-shape to create a stem (approx. 10cm).
- Glue one bent end inside the tape core stand.
- Add modeling clay (plasticine) inside the stand for weight and stability.
- Apply super glue (Super Moment) to the other bent end and secure it firmly to the plastic bottom of the crocheted tree.
- Cut 3 to 4 circles of foam to fit inside the tape core stand.
- Layer them inside, gluing the topmost circle in place around the wire stem.
- Coat the top foam circle with glue and cover it entirely with coffee beans to look like soil.
- Between the last two ruffle rows, sew the 2cm wide cotton lace, creating small pleats approximately every 3.5cm.
- Skip the space between the next rounds.
- Sew the 1cm wide cotton lace between the next two ruffle rows, adding pleats.
- Skip another space, then sew lace again.
- Sew the pre-finished bottom lace around the very bottom edge.
- Make 5 bows from satin ribbon and sew them along the bottom row of lace where the pleats are positioned.
- Sew beads on the next row up.
- Sew beads with small hanging loops on the following row.
- Sew single beads to the top of the tree.
- Decorate the tree tip with a bow or hanging beads.
- Attach additional beads to the bottom lace.
When you reach the lace, notice the alternating rhythm. The 2cm lace goes between one pair of ruffle tiers, a space is skipped, the 1cm lace follows between the next pair, and the spacing continues in the same way. This alternation keeps the tiers from looking crowded and lets the crocheted ruffles, fabric lace, bows, and beads each remain visible as separate layers.

Pattern Notes and Troubleshooting
When the Tree Leans on Its Trunk
A leaning tree usually points to one of two problems. First, look at the wire bends: if either L-shaped end is not bent flat enough, it cannot sit squarely at its connection point, and the trunk tilts. Second, consider the counterbalance. If there is not enough modeling clay inside the base to offset the cone above it, the whole piece may drift out of line. Flatten the bends, add more clay if needed, and check the angle again.
Keeping the Ruffles From Bunching
Ruffles that crowd together or pucker usually come from losing the skip. After each sequence of slip stitch, chain 3, 2 double crochet, chain 3, and slip stitch worked into one stitch, a single stitch is skipped before the next sequence begins. Missing that skip packs extra clusters into the round, and the frill has nowhere to go but over itself. Count along a short section to confirm each cluster is separated by exactly one skipped stitch.
Fixing a Tip That Flops Over
The narrow top of the tree is meant to stay unstuffed. If the tip bends over, fiberfill has probably crept into Rounds 43 through 50, where the count holds steady at 6 stitches. Remove some of that stuffing so the tube can stand on its own. A firmly stuffed cone below the tip still matters, but that firmness should end before the final rounds begin.
Finishing Checklist
Before displaying the tree, look closely at its flat bottom. If the plastic insert is warping the base, the circle may have been cut slightly too large. Trim it until it matches the Round 8 diameter, and the bottom should lie flat again. Then work through the checklist below, which confirms the decorative and structural details that are easiest to overlook once everything has been glued and sewn.
- Verify all 5 satin bows are sewn evenly along the pleated bottom lace.
- Ensure the topmost ruffle features the contrasting single crochet edging.
- Check that the wire is completely obscured by tightly wrapped twine.
- Confirm the coffee beans fully cover the foam insert inside the stand.
- Ensure the hanging beads are securely looped so they drape naturally from the lace rows.
- Check that the very tip of the tree is securely fastened off and adorned with the final beads/bow.