Stompy Crochet Christmas Tree Toy Pattern with Boots, Mittens and Hat
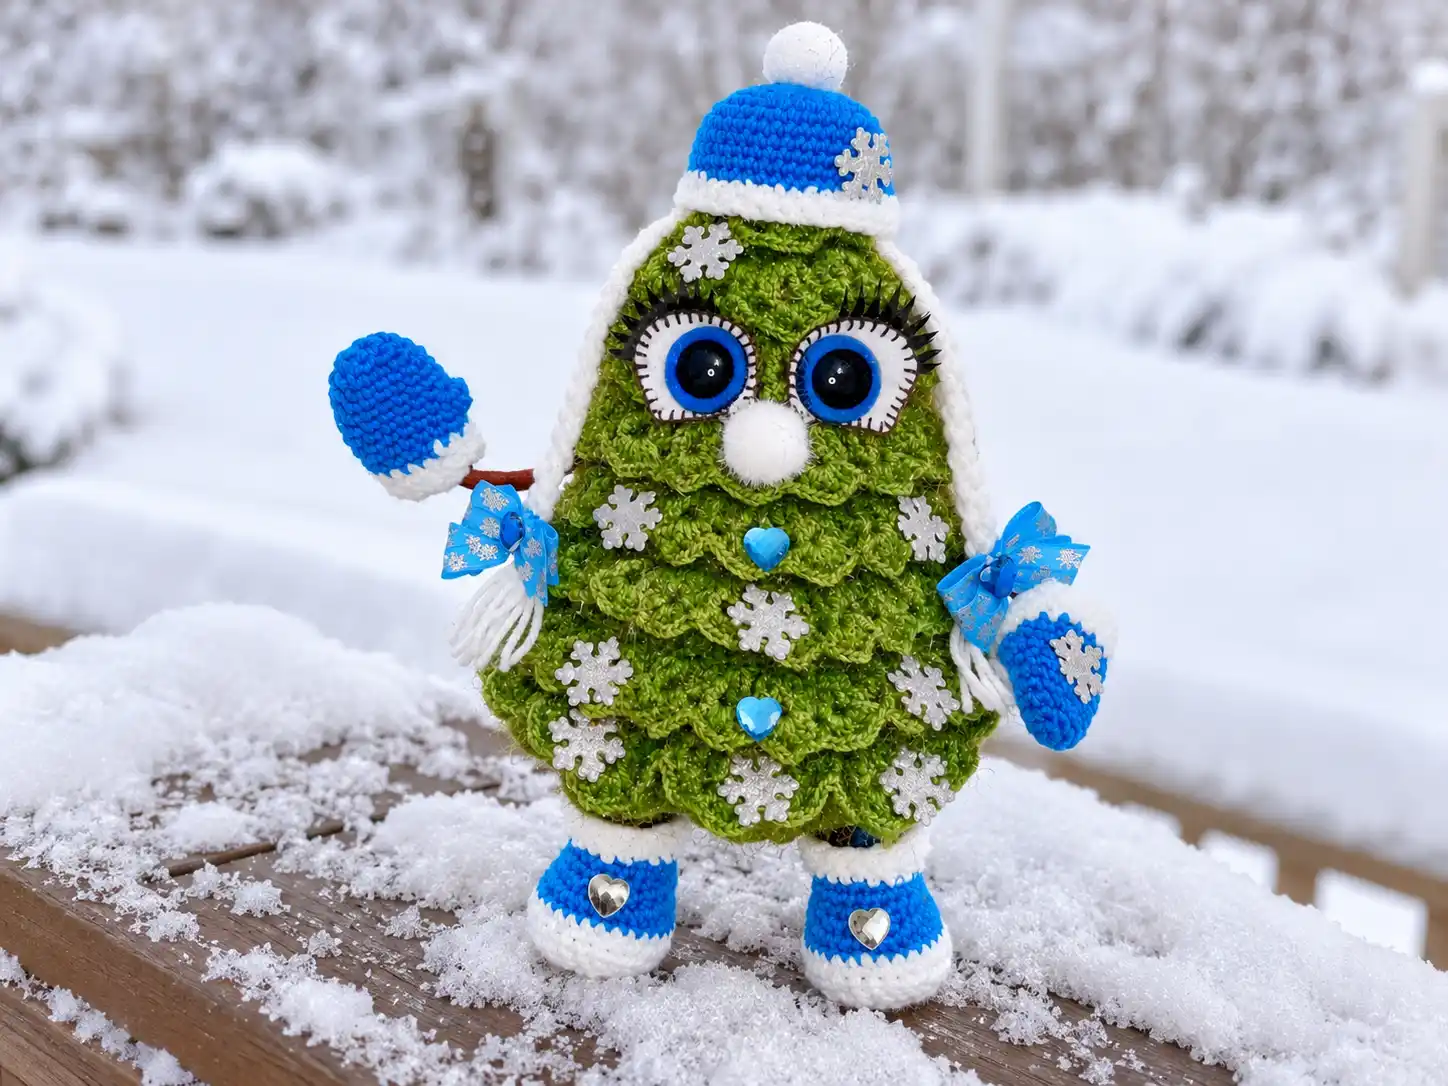
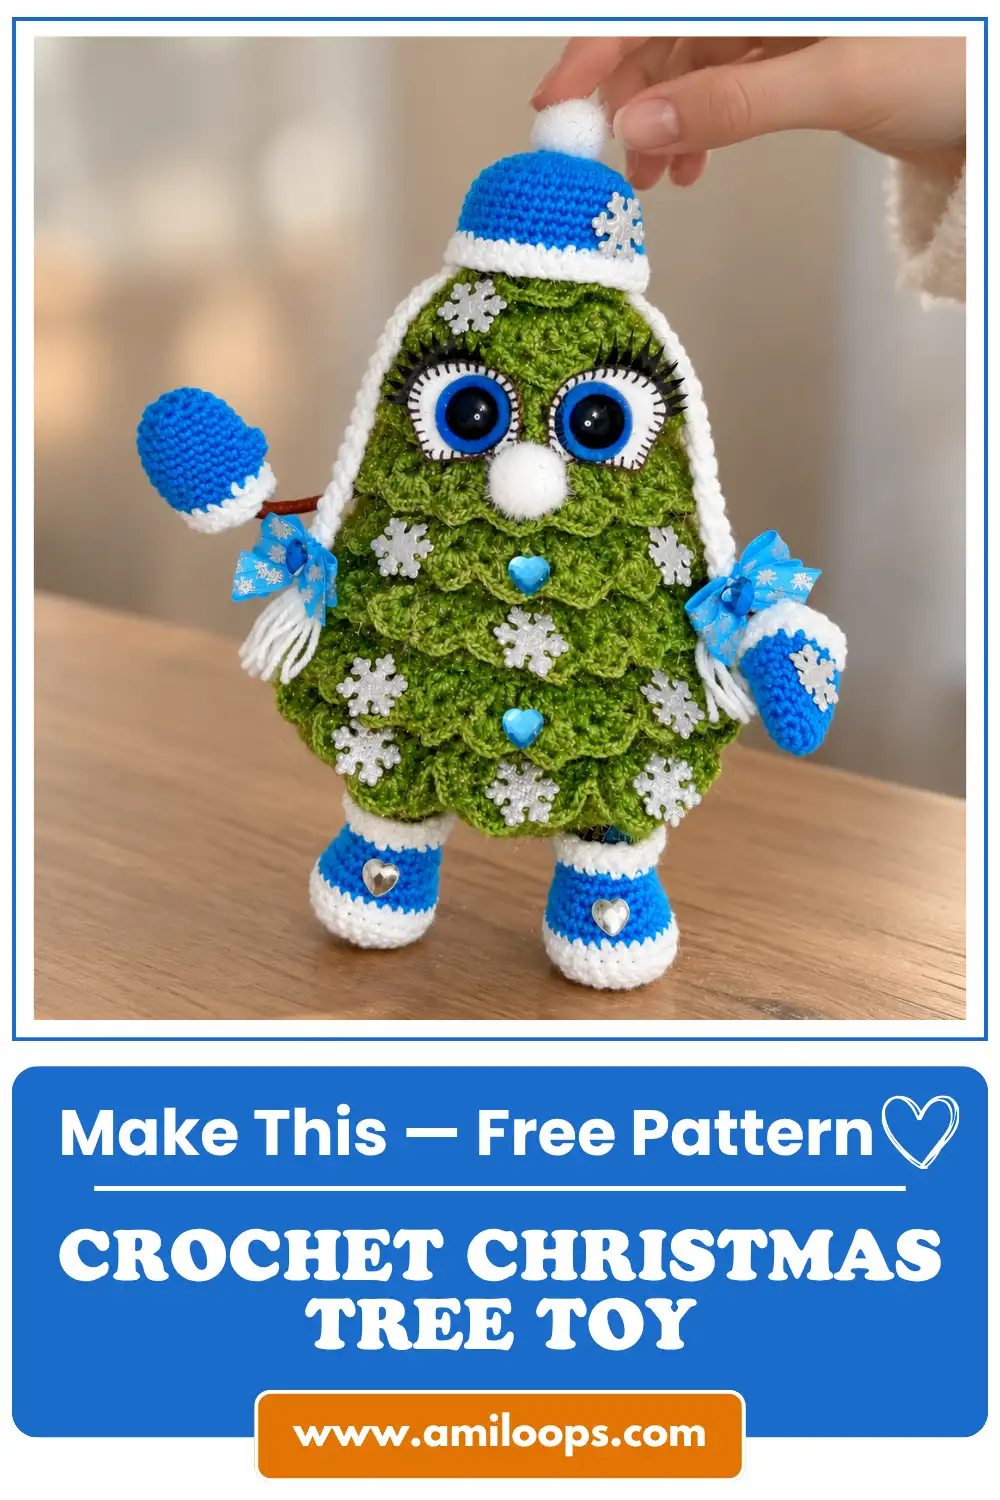
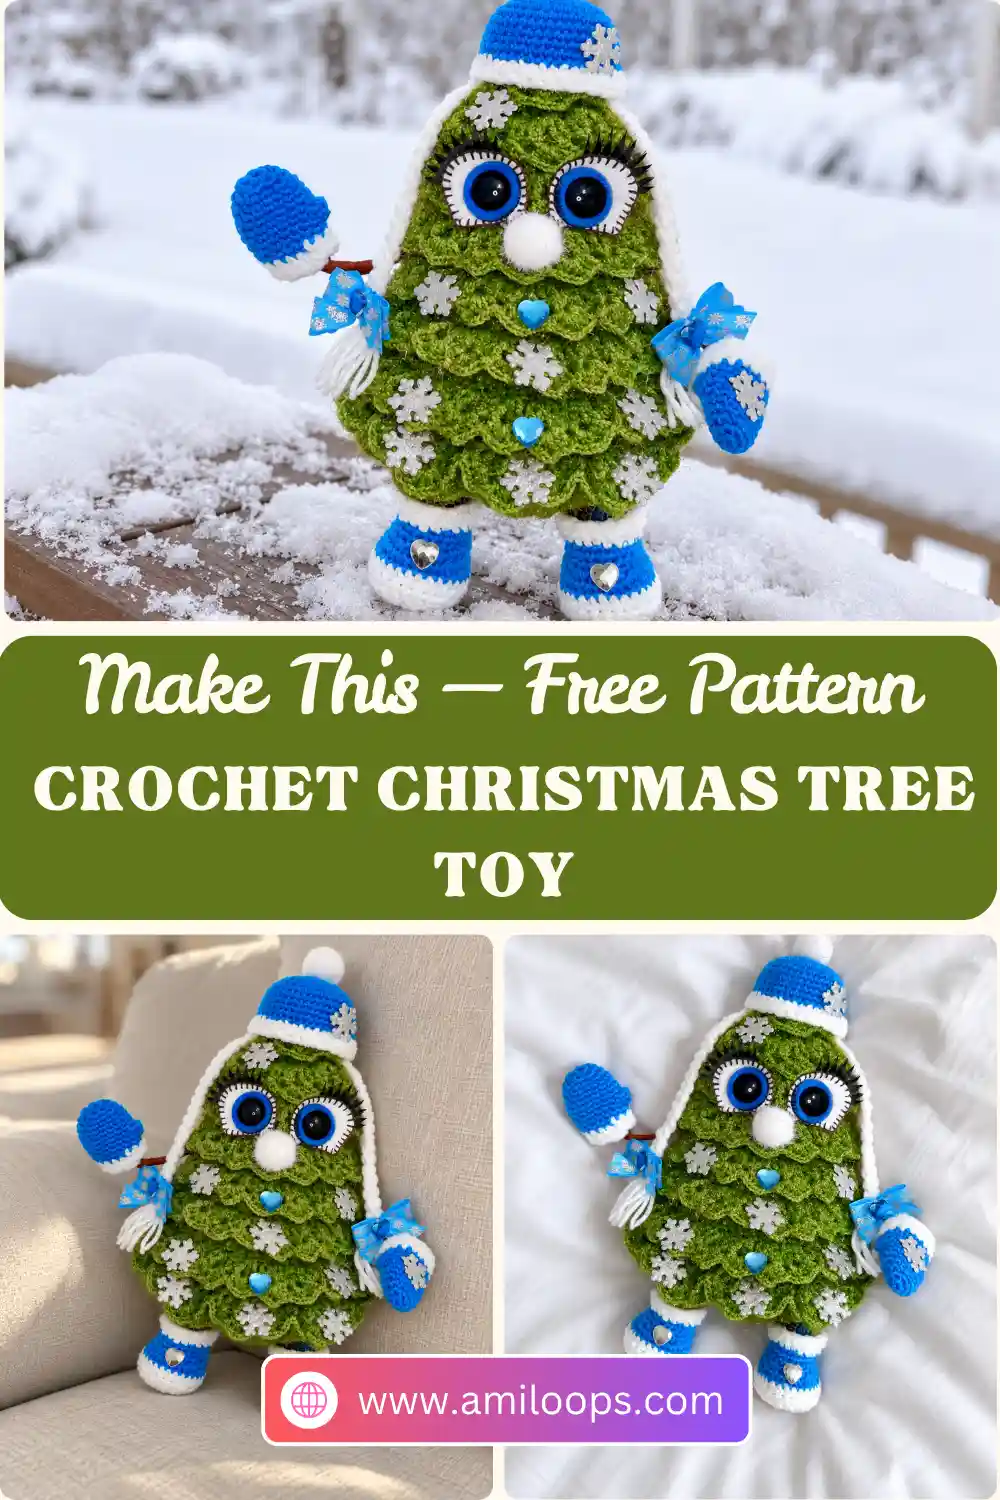
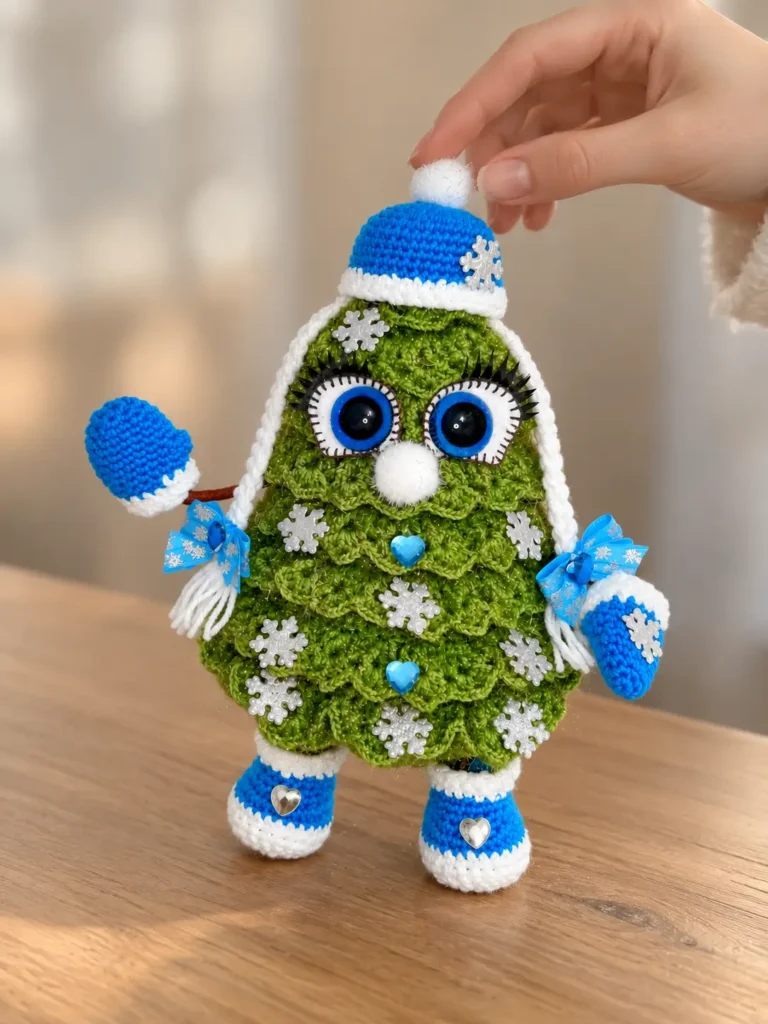
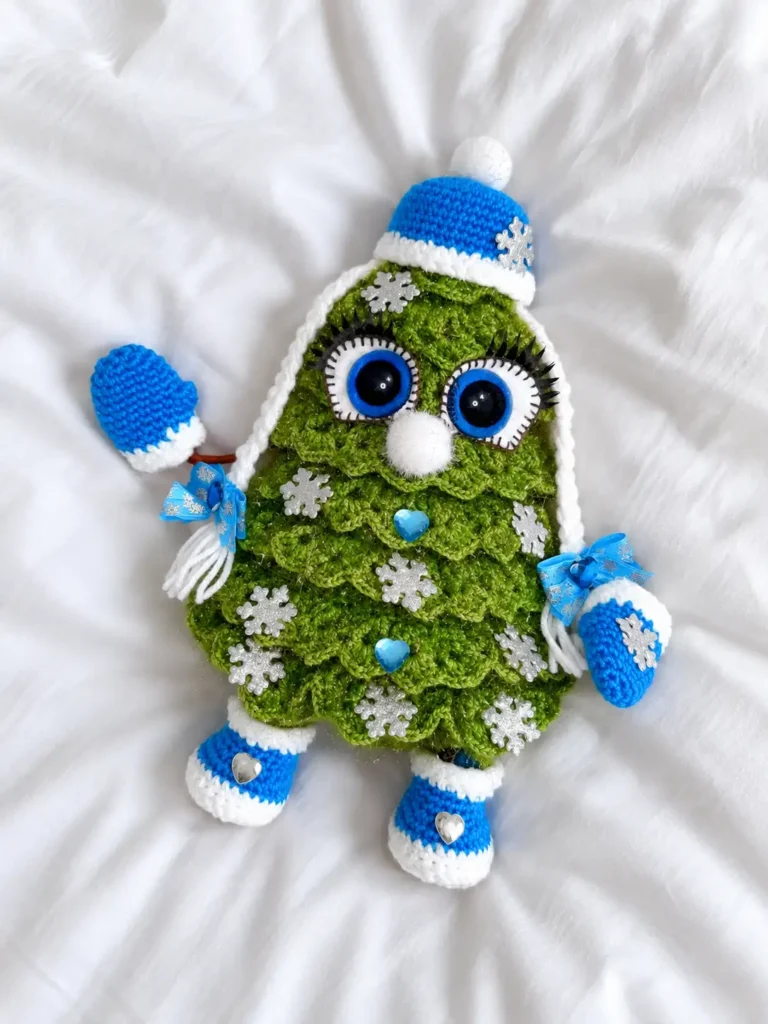
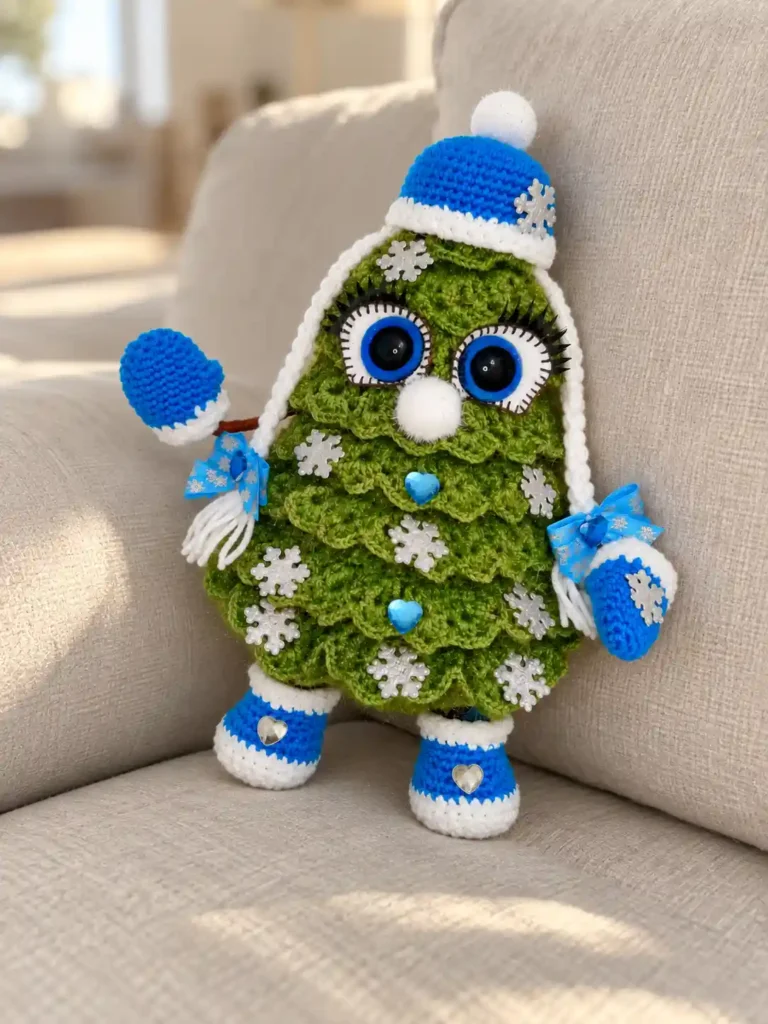
This crochet Christmas tree toy has plenty of personality for its holiday job: a plump green cone ruffled with nine tiers of shell-stitch needles, big blue doll eyes framed with lashes, and two wire legs that stomp around in turquoise boots with fluffy white cuffs. Matching mittens, a fur-trimmed hat and a pair of long white braids finish the look.
The construction is what makes this tree work. The cone is crocheted from the tip down in a spiral, alternating back-loop-only rounds with regular rounds. Each BLO round leaves a ring of front loops on the outside, and every third ring becomes the base for a tier of needles. A separate round bottom, backed with a plastic or heavy cardboard circle, carries the wire legs, while a single yarn-wrapped wire passes straight through the body to form both arms.
Materials · Abbreviations · Tree body · Bottom · Needles · Legs, arms and eyes · Assembly · Clothes · FAQ
Before your first stitch: The tree body and the bottom both finish at 126 stitches, so they can be joined stitch for stitch with single crochet at the end. Each piece also has planned openings: two ch-1 arm holes in Rnd 31 of the cone and two ch-2 leg holes in Rnd 13 of the bottom. Count carefully on those rounds.
Order of work: Crochet the cone and the bottom, then add the needle tiers to the empty cone. Next, prepare the wire legs, the arm wire and the felt eyes, and assemble and stuff the tree. The mittens, boots and hat come last.
Plan for glue time: The wire parts, eyes and bottom circle are secured with hot glue and super glue, and the arms need the glue to set completely before you keep stuffing. Set up a spot where pieces can rest undisturbed.
Materials and Tools
- Yarn Art Christmas (100% polyamide, 50 g/142 m, about 155 yd per skein) in green, about 2.5 skeins, for the tree body, bottom and needles
- Crochet hook No. 2 (or No. 1.75)
- Kamteks Bambino (35% wool, 65% acrylic, 150 m/50 g, about 164 yd) in turquoise, a small amount, for the boots, hat and mittens. Any other yarn works.
- Kamteks Bambino in white, a small amount, for the braids and the boot soles. Any other yarn works.
- Kamteks Bambino in brown, a small amount, for wrapping the arm and leg wires. Any other yarn works.
- Alize Softy in white, a small amount, for the fur trim on the clothes
- White plastic or heavy cardboard, 15 × 15 cm (about 6 × 6 in), to reinforce the bottom
- Aluminum craft wire, 2 mm diameter, 1.5 m (about 5 ft)
- White felt, a small amount, for the eyes
- Blue doll eyes with a highlight, 25 mm diameter, 1 pair
- False eyelashes or doll eyelashes
- Brown Iris thread or embroidery floss, a small amount, for the eyes
- 2 small white pompoms, 1.5–2 cm (about ⅝–¾ in) diameter, for the nose and the hat
- Hot glue
- Clear super glue, a small amount, for attaching the eyes and decorations
- Fiberfill (hollow-fiber fiberfill, polyester batting or synthetic down), about 100–150 g (about 3.5–5.3 oz)
- Electrical tape or white cloth adhesive tape, a small amount, for wrapping the wire ends
- Scissors, a large-eye needle, stitch markers for the arm holes, and an awl for piercing the plastic circle
- Optional: weighting material for toys, such as glass pellets
- Optional: satin ribbons, rhinestones, snowflakes, small ornament balls, bells, beads and any other decorations you like
Abbreviations
This pattern uses US crochet terms. For the standard US names and a US/UK comparison, see the Craft Yarn Council crochet abbreviations list.
| Abbreviation | Meaning |
|---|---|
| MR | magic ring |
| ch | chain |
| sc | single crochet |
| inc | increase: 2 sc in the same st |
| dec | single crochet decrease: work the next 2 sts together with sc (2 sts become 1) |
| dc | double crochet |
| dc2tog | double crochet 2 together (2 sts become 1) |
| tr | treble crochet |
| sl st | slip stitch |
| BLO | back loop only |
| st(s) | stitch(es) |
| sp | space |
| 4-dc bobble | [yarn over, insert the hook in the st, pull up a loop, yarn over and draw through 2 loops] 4 times in the same st, then yarn over and draw through all 5 loops on the hook |
Part 1: Tree Body (Cone)
Work in a spiral with green Yarn Art Christmas and a No. 2 hook, starting from a magic ring at the tip of the tree. If you would like a refresher first, see how to crochet the magic ring.
How the cone is shaped: From Rnd 5 onward, every odd round is worked in the back loops only. The unused front loops stay on the outside of the cone, and some of them become the foundation for the needle tiers in Part 3. Even rounds add 6 increases each, with the increases staggered from round to round, until the cone reaches 126 stitches in Rnd 40.
Rnd 1: 6 sc in MR (6)
Rnd 2: 6 inc (12)
Rnd 3: 12 sc (12)
Rnd 4: [sc, inc] 6 times (18)
Rnd 5: 18 sc in BLO (18)
Rnd 6: Sc, inc, [2 sc, inc] 5 times, sc (24)
Rnd 7: 24 sc in BLO (24)
Rnd 8: [3 sc, inc] 6 times (30)
Rnd 9: 30 sc in BLO (30)
Rnd 10: 2 sc, inc, [4 sc, inc] 5 times, 2 sc (36)
Rnd 11: 36 sc in BLO (36)
Rnd 12: [5 sc, inc] 6 times (42)
Rnd 13: 42 sc in BLO (42)
Rnd 14: 3 sc, inc, [6 sc, inc] 5 times, 3 sc (48)
Rnd 15: 48 sc in BLO (48)
Rnd 16: [7 sc, inc] 6 times (54)
Rnd 17: 54 sc in BLO (54)
Rnd 18: 4 sc, inc, [8 sc, inc] 5 times, 4 sc (60)
Rnd 19: 60 sc in BLO (60)
Rnd 20: [9 sc, inc] 6 times (66)
Rnd 21: 66 sc in BLO (66)
Rnd 22: 5 sc, inc, [10 sc, inc] 5 times, 5 sc (72)
Rnd 23: 72 sc in BLO (72)
Rnd 24: [11 sc, inc] 6 times (78)
Rnd 25: 78 sc in BLO (78)
Rnd 26: 6 sc, inc, [12 sc, inc] 5 times, 6 sc (84)
Rnd 27: 84 sc in BLO (84)
Rnd 28: [13 sc, inc] 6 times (90)
Rnd 29: 90 sc in BLO (90)
Rnd 30: 7 sc, inc, [14 sc, inc] 5 times, 7 sc (96)
Rnd 31: Working in BLO: 24 sc, ch 1, skip 1 st, 46 sc, ch 1, skip 1 st, 24 sc (96)
Mark the arm holes: Place markers at the two holes made by the ch-1s so you don’t lose track of them. The arms will be inserted through these holes later.
Rnd 32: [15 sc, inc] 6 times (102)
Rnd 33: 102 sc in BLO (102)
Rnd 34: 8 sc, inc, [16 sc, inc] 5 times, 8 sc (108)
Rnd 35: 108 sc in BLO (108)
Rnd 36: [17 sc, inc] 6 times (114)
Rnd 37: 114 sc in BLO (114)
Rnd 38: 9 sc, inc, [18 sc, inc] 5 times, 9 sc (120)
Rnd 39: 120 sc in BLO (120)
Rnd 40: [19 sc, inc] 6 times (126)
Rnd 41: 126 sc in BLO (126)
Rnd 42: 126 sc (126)
Rnd 43: 126 sc in BLO (126)
Rnd 44: 126 sc (126)
Rnd 45: 126 sc in BLO (126)
Rnd 46: 126 sc (126)
Rnd 47: 126 sc in BLO (126)
Rnd 48: 126 sc (126)
Rnd 49: 126 sc in BLO (126)
Rnd 50: 126 sc (126)
Rnd 51: 126 sc in BLO (126)
Rnd 52: 126 sc (126)
Rnd 53: 126 sc in BLO (126)
Rnd 54: 126 sc (126)
Fasten off and weave in the end.
Part 2: Bottom
Work in a spiral with green Yarn Art Christmas and a No. 2 hook. The bottom is a flat circle with no BLO rounds, and it grows to the same 126 stitches as the cone.
Rnd 1: 6 sc in MR (6)
Rnd 2: 6 inc (12)
Rnd 3: [sc, inc] 6 times (18)
Rnd 4: Sc, inc, [2 sc, inc] 5 times, sc (24)
Rnd 5: [3 sc, inc] 6 times (30)
Rnd 6: 2 sc, inc, [4 sc, inc] 5 times, 2 sc (36)
Rnd 7: [5 sc, inc] 6 times (42)
Rnd 8: 3 sc, inc, [6 sc, inc] 5 times, 3 sc (48)
Rnd 9: [7 sc, inc] 6 times (54)
Rnd 10: 4 sc, inc, [8 sc, inc] 5 times, 4 sc (60)
Rnd 11: [9 sc, inc] 6 times (66)
Rnd 12: 5 sc, inc, [10 sc, inc] 5 times, 5 sc (72)
Rnd 13: Ch 2, skip 2 sts, 9 sc, inc, [11 sc, inc] 2 times, ch 2, skip 2 sts, 9 sc, inc, [11 sc, inc] 2 times (78)
Leg holes: Each ch-2 worked over 2 skipped sts makes a hole. The legs will be inserted through these holes later.
Rnd 14: 6 sc, inc, [12 sc, inc] 5 times, 6 sc (84)
Rnd 15: [13 sc, inc] 6 times (90)
Rnd 16: 7 sc, inc, [14 sc, inc] 5 times, 7 sc (96)
Rnd 17: [15 sc, inc] 6 times (102)
Rnd 18: 8 sc, inc, [16 sc, inc] 5 times, 8 sc (108)
Rnd 19: [17 sc, inc] 6 times (114)
Rnd 20: 9 sc, inc, [18 sc, inc] 5 times, 9 sc (120)
Rnd 21: [19 sc, inc] 6 times (126)
Fasten off and weave in the end.
Reinforce the bottom: Cut a circle from the plastic or heavy cardboard, slightly smaller in diameter than the crocheted bottom. Lay the crocheted bottom on the circle and mark where the holes are. Use an awl to make holes in the plastic circle about 5 mm in diameter. Place the crocheted bottom on the plastic circle so the holes line up, and glue it in place with hot glue.
Part 3: Needles
Join green Yarn Art Christmas to the first front loop left unworked in Rnd 5 of the cone (where you worked in BLO). Work the needles with a No. 2 hook.
Where the tiers go: Needle tiers are worked on every third round of unworked front loops on the cone: Rnds 5, 11, 17, 23, 29, 35, 41, 47 and 53. There are 9 needle tiers in total. The other BLO rounds, including the arm-hole round, stay without needles.
Shell spacing: In Rnd 1 of the first tier, work each shell into every 3rd front loop. Work Tiers 2–3 the same as Tier 1. For Tiers 4–9, work the shells in Rnd 1 into every 5th front loop on the cone instead of every 3rd.
| Tier | Cone round | Front loops available | Shells in Rnd 1 |
|---|---|---|---|
| 1 | Rnd 5 | 18 | every 3rd loop |
| 2 | Rnd 11 | 36 | every 3rd loop |
| 3 | Rnd 17 | 54 | every 3rd loop |
| 4 | Rnd 23 | 72 | every 5th loop |
| 5 | Rnd 29 | 90 | every 5th loop |
| 6 | Rnd 35 | 108 | every 5th loop |
| 7 | Rnd 41 | 126 | every 5th loop |
| 8 | Rnd 47 | 126 | every 5th loop |
| 9 | Rnd 53 | 126 | every 5th loop |
Reading the table: The loop count of each tier matches the stitch count of its cone round. Tiers 1–3 divide evenly by 3, and Tier 5 divides evenly by 5, but Tiers 4 and 6–9 leave 1 to 3 extra loops, so the last gap before you join will come out a little different from the others. Counting the loops before you start a tier lets you decide where that small difference lands. The table also helps with placement later: the eyes sit between Tier 3 and Tier 4, and the arm holes in Rnd 31 fall between Tier 5 and Tier 6.
Each tier
Rnd 1: Ch 4 (counts as tr), tr in the same loop, ch 3, 2 tr in the same loop, ch 1. *Skip 2 loops, (2 tr, ch 3, 2 tr) in the next loop, ch 1*. Repeat from * to * to the end of the round. At the end of the round, sl st into the first ch-3 sp. (For Tiers 4–9, skip 4 loops between shells instead of 2.)
Rnd 2: In the first ch-3 sp, work (ch 3 [counts as dc], 2 dc, ch 3, 3 dc), ch 1. *(3 dc, ch 3, 3 dc) in the next ch-3 sp, ch 1*. Repeat from * to * to the end of the round. Sl st into the top of the beginning ch-3. Fasten off and weave in the end.
Repeat Rnds 1–2 for each of the 9 tiers, joining the yarn to the next tier round each time.
Part 4: Legs, Arms and Eyes
Legs
- Cut 2 pieces of wire, 55 cm (about 21½ in) each.
- Put glue on the tip of one wire, glue the end of the brown yarn to it, and wrap the yarn along the whole wire to the other end. Glue the yarn at that end. Repeat with the second piece.
- Fold one wire in half and form a loop about 4.5 cm (about 1¾ in) long at the fold. Twist the two wire ends together. Repeat with the second piece.
- Wrap the ends of both leg pieces with electrical tape or cloth adhesive tape.
Arms
- Cut 1 piece of wire, 40 cm (about 15¾ in) long.
- Put glue on the tip of the wire, glue the end of the brown yarn to it, and wrap the yarn along the whole wire to the other end. Glue the yarn at that end. Set this piece aside for now.
Eyes
- Cut 2 eye pieces from white felt, about 35 × 35 mm (about 1⅜ × 1⅜ in) each. Make a small slit in the center of each piece.
- Work an overcast stitch around the edge of each felt piece with brown Iris thread or embroidery floss.
- Insert the blue 25 mm doll eyes through the slits in the felt pieces. Glue them to the felt with clear super glue.
- Glue the false eyelashes to the edge of each eye with super glue.
The felt eye pieces can be any shape you like, such as round or oval.
Part 5: Assembly
Stuffing happens in stages here: lightly at the top before the arm wire goes in, then the rest of the cone, and finally a last top-up once the bottom is in place. For tips on even filling, see how to stuff amigurumi without lumps.
- Insert the leg wires through the holes in the crocheted bottom. Leave 5–6 cm (about 2–2⅜ in) of each leg outside; the rest of the wire goes inside the tree.
- On the wrong side of the bottom, secure the legs first with electrical tape or cloth adhesive tape wrapped around them where they meet the bottom. Then, for extra security, run hot glue all around each leg.
- Twist the leg wires together and wrap them with electrical tape or cloth adhesive tape.
- Stuff the top of the cone lightly, only up to the level of the arms.
- Insert the arm wire through the arm holes in the cone (the ones you marked). Each arm will be about 14 cm (about 5½ in) long.
- Secure the arms from the inside with hot glue so they can’t move, and let the glue set completely.
- Bend the ends of the arm wire into loops, about 3 cm (about 1¼ in) each.
- Stuff the cone.
- Insert the bottom with the legs into the cone. Finish stuffing the cone completely.
- Join the bottom to the cone by working sc through the stitches of both pieces at the same time (126 sc).
- Attach the eyes with hot glue between the 3rd and 4th needle tiers.
- Just below and between the eyes, sew or hot-glue on a white pompom for the nose.
Part 6: Clothes for the Tree
Mittens (make 2)
Work in a spiral with turquoise Bambino and a No. 2 hook.
Rnd 1: 6 sc in MR (6)
Rnd 2: 6 inc (12)
Rnd 3: [5 sc, inc] 2 times (14)
Rnd 4: [6 sc, inc] 2 times (16)
Rnds 5–9 (5 rnds): 16 sc (16)
Rnd 10: Sc, 4-dc bobble in the next st, 14 sc (16)
Rnds 11–13 (3 rnds): 16 sc (16)
Color change: Change to white Alize Softy for the fur trim on the mitten.
Rnd 14: 16 sc (16)
Fasten off and weave in the end. Decorate the mittens however you like.
Boots (make 2)
Start with the sole in white Bambino, using a No. 2 hook. Rnd 1 is worked around both sides of a foundation chain, and Rnds 1 and 2 are each joined with a slip stitch.
Rnd 1: Ch 12 (10 foundation ch plus 2 ch that count as the first dc). Work 4 dc in the 3rd ch from the hook, dc in each of the next 8 ch, then 5 dc in the last ch. Working along the other side of the chain, dc in each of the next 8 ch. Sl st to the top of the beginning ch-2 to join (26).
Rnd 2: Ch 2 (counts as dc), dc in the same st, 2 dc in each of the next 4 sts, dc in each of the next 8 sts, 2 dc in each of the next 5 sts, dc in each of the next 8 sts, sl st to the top of the beginning ch-2 to join (36)
Rnd 3: 36 sc in BLO (36)
Color change: Change to turquoise Bambino.
Rnds 4–6 (3 rnds): 36 sc (36)
Toe placement: The decreases in Rnd 7 should sit at the center of the toe. Work extra sc to shift the start of the round if needed.
Rnd 7: 16 sc, [dc2tog] 7 times, 6 sc (29)
Rnd 8: 15 sc, 4 dec, 6 sc (25)
Rnds 9–11 (3 rnds): 25 sc (25)
Color change: Change to white Alize Softy for the fur trim at the top of the boot.
Rnds 12–13: 25 sc (25)
Fasten off and weave in the end. Decorate the boots however you like.
Hat
Work in a spiral with turquoise Bambino and a No. 2 hook.
Rnd 1: 6 sc in MR (6)
Rnd 2: 6 inc (12)
Rnd 3: [sc, inc] 6 times (18)
Rnd 4: Sc, inc, [2 sc, inc] 5 times, sc (24)
Rnd 5: [3 sc, inc] 6 times (30)
Rnd 6: 2 sc, inc, [4 sc, inc] 5 times, 2 sc (36)
Rnd 7: [5 sc, inc] 6 times (42)
Rnd 8: 3 sc, inc, [6 sc, inc] 5 times, 3 sc (48)
Rnd 9: [7 sc, inc] 6 times (54)
Rnds 10–15 (6 rnds): 54 sc (54)
Color change: Change to white Alize Softy for the fur trim on the hat.
Rnds 16–17: 54 sc (54)
Fasten off and weave in the end.
Braids for the hat
- Cut white yarn into pieces about 20 cm (about 8 in) long. Make 18 pieces.
- Divide the pieces into 2 groups of 9, one for each braid.
- Hot-glue the ends of 9 pieces together at one end.
- Braid the pieces, using 3 strands in each section.
- Tie off the end of the braid so it doesn’t come undone. Trim the ends with scissors.
- Decorate the end of the braid with a bow.
- Repeat with the remaining 9 pieces for the second braid.
- Hot-glue the finished braids inside the hat, one on each side.
Decorate the hat with a pompom and a snowflake (optional).
Finishing
Put the boots on the tree’s legs. For extra stability, you can pour any weighting material into the boots, though the tree stands well without it. Put the mittens on the arms. Put the hat on top of the tree and secure it with hot glue (optional). Decorate the tree with snowflakes, rhinestones and ribbons as you like (optional).
A note on small parts: This tree has a wire frame, glued-on doll eyes and lashes, pompoms, and possibly rhinestones, beads and bells. Keep those details in mind if it will be within reach of young children; the U.S. CPSC guidance on small parts explains how small parts are treated for children’s products.
Questions about the Stompy Christmas tree
Why does the cone alternate BLO rounds and regular rounds?
Every BLO round leaves a ring of unworked front loops on the outside of the cone. The needles are worked into every third of those rings, Rnds 5, 11, 17, 23, 29, 35, 41, 47 and 53, which gives the tree its 9 tiers of shells.
Where do the arms and legs come through the tree?
The arm wire passes through the two ch-1 holes made in Rnd 31 of the cone, which you mark as you crochet them. The legs go through the two ch-2 holes made in Rnd 13 of the bottom, lined up with holes about 5 mm wide pierced in the plastic or cardboard circle.
Should I add the needles before or after stuffing?
The pattern adds all 9 needle tiers to the empty cone in Part 3, before the wires, eyes and stuffing go in during assembly.
Where do the eyes and nose go?
Hot-glue the felt eyes between the 3rd and 4th needle tiers, which are worked on Rnds 17 and 23 of the cone. The nose is a white pompom sewn or glued just below and between the eyes.
Do I need weighting material in the boots?
No. Weighting material such as glass pellets is optional and can be poured into the boots for extra stability, but the tree stands well without it. The plastic or heavy cardboard circle in the bottom is part of the construction, though.