Little Dragon Crochet Pattern (Step-by-Step Amigurumi)
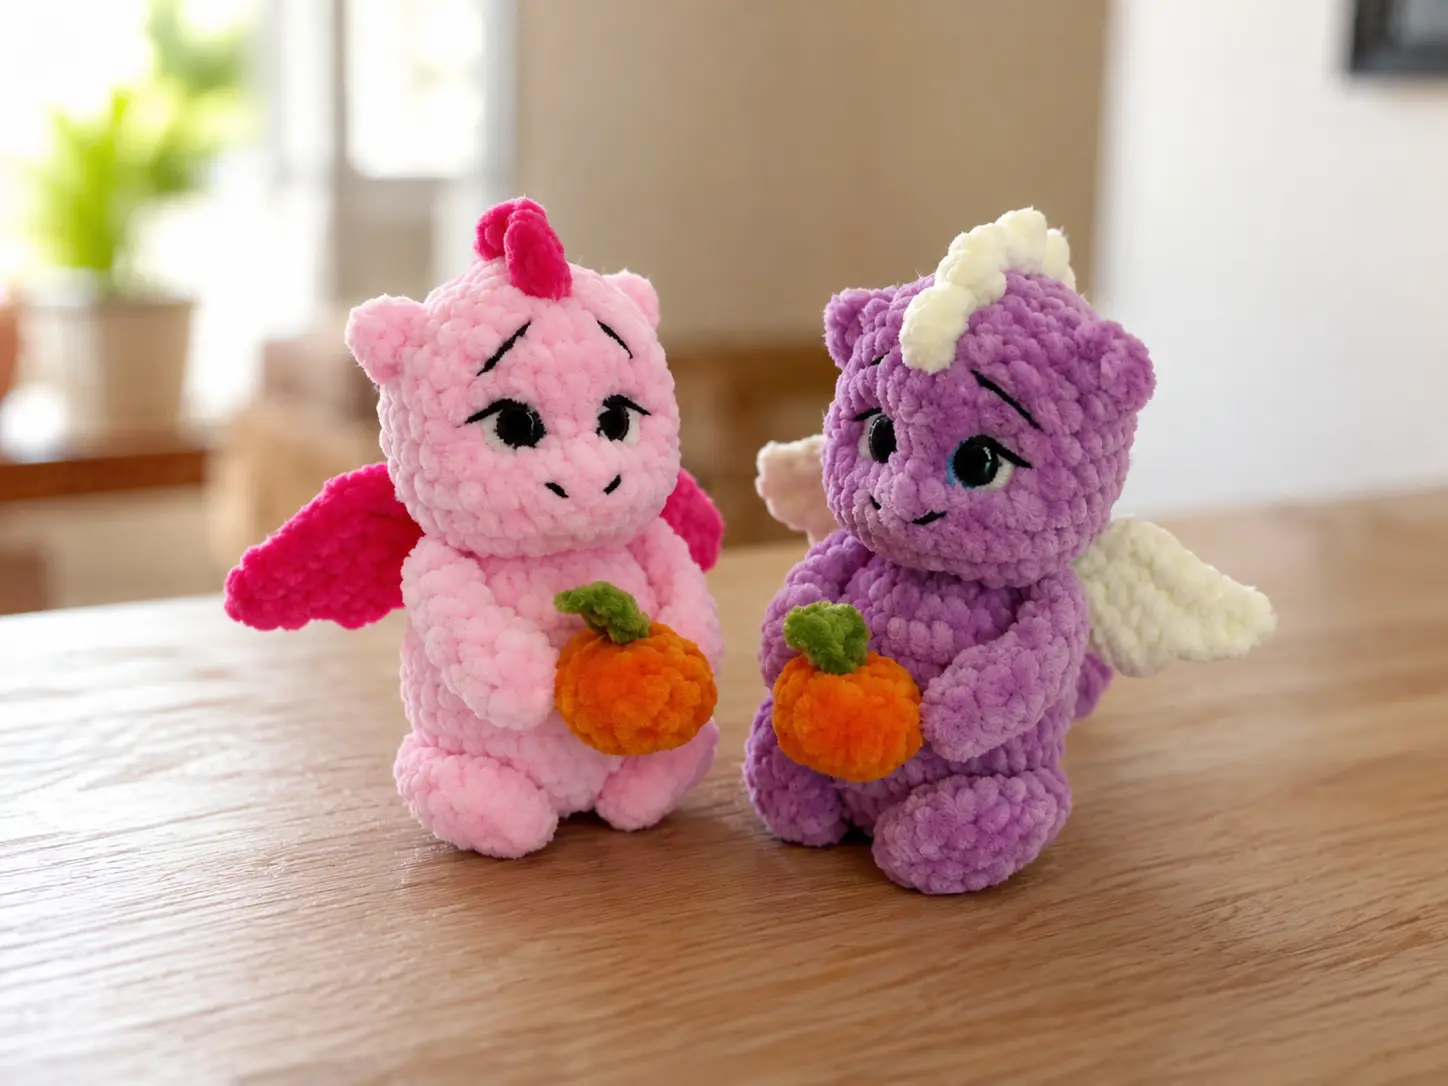
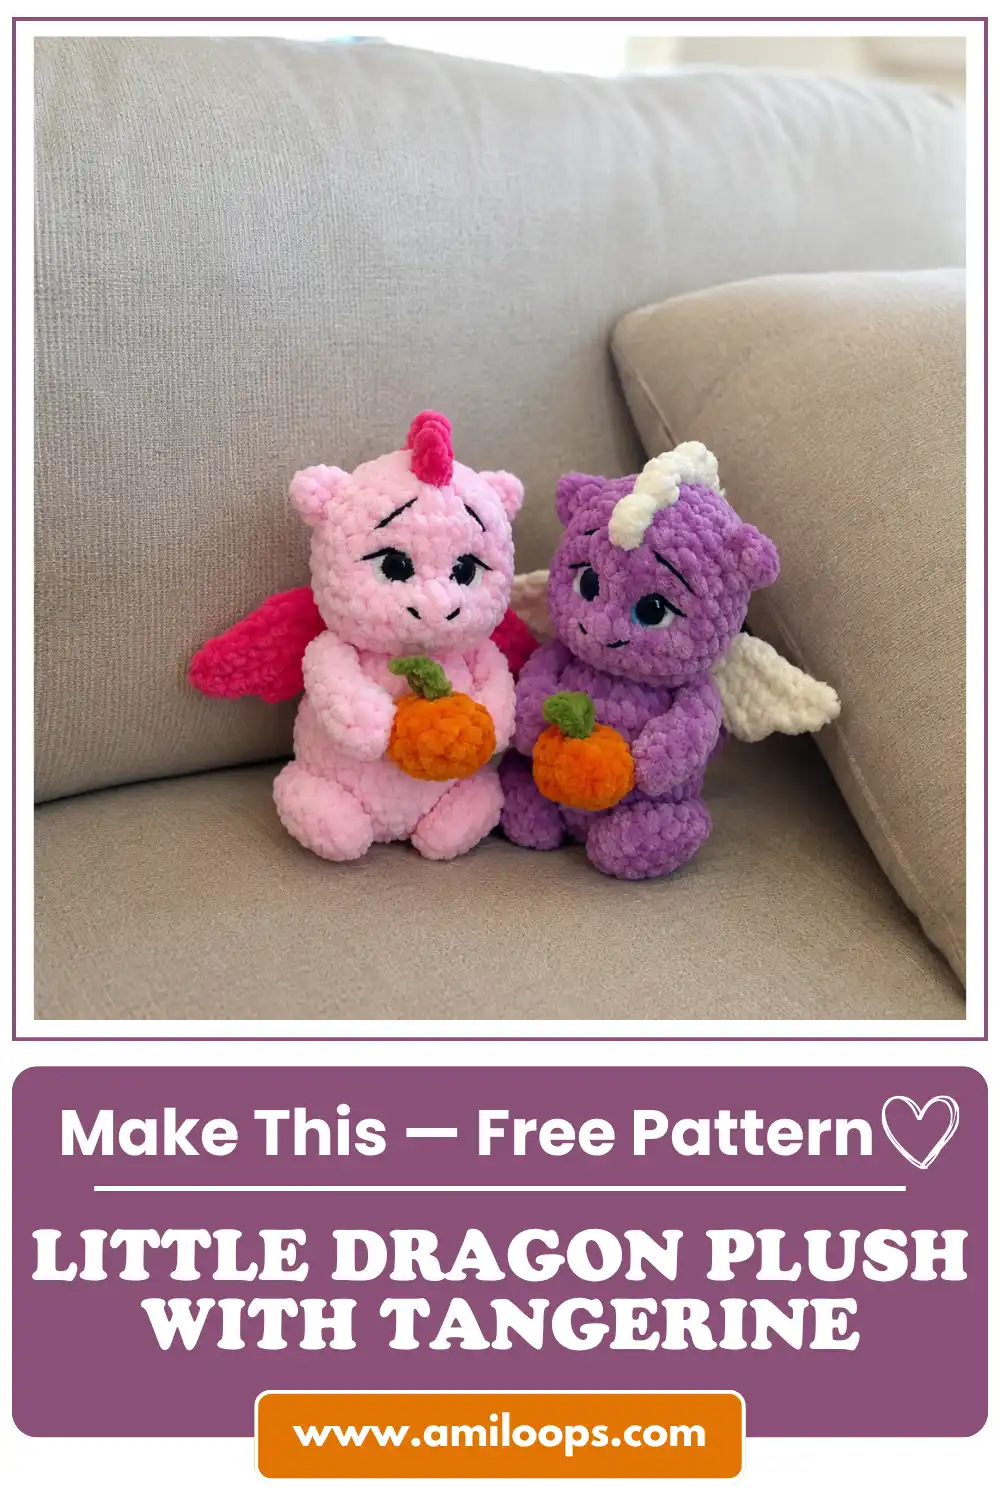
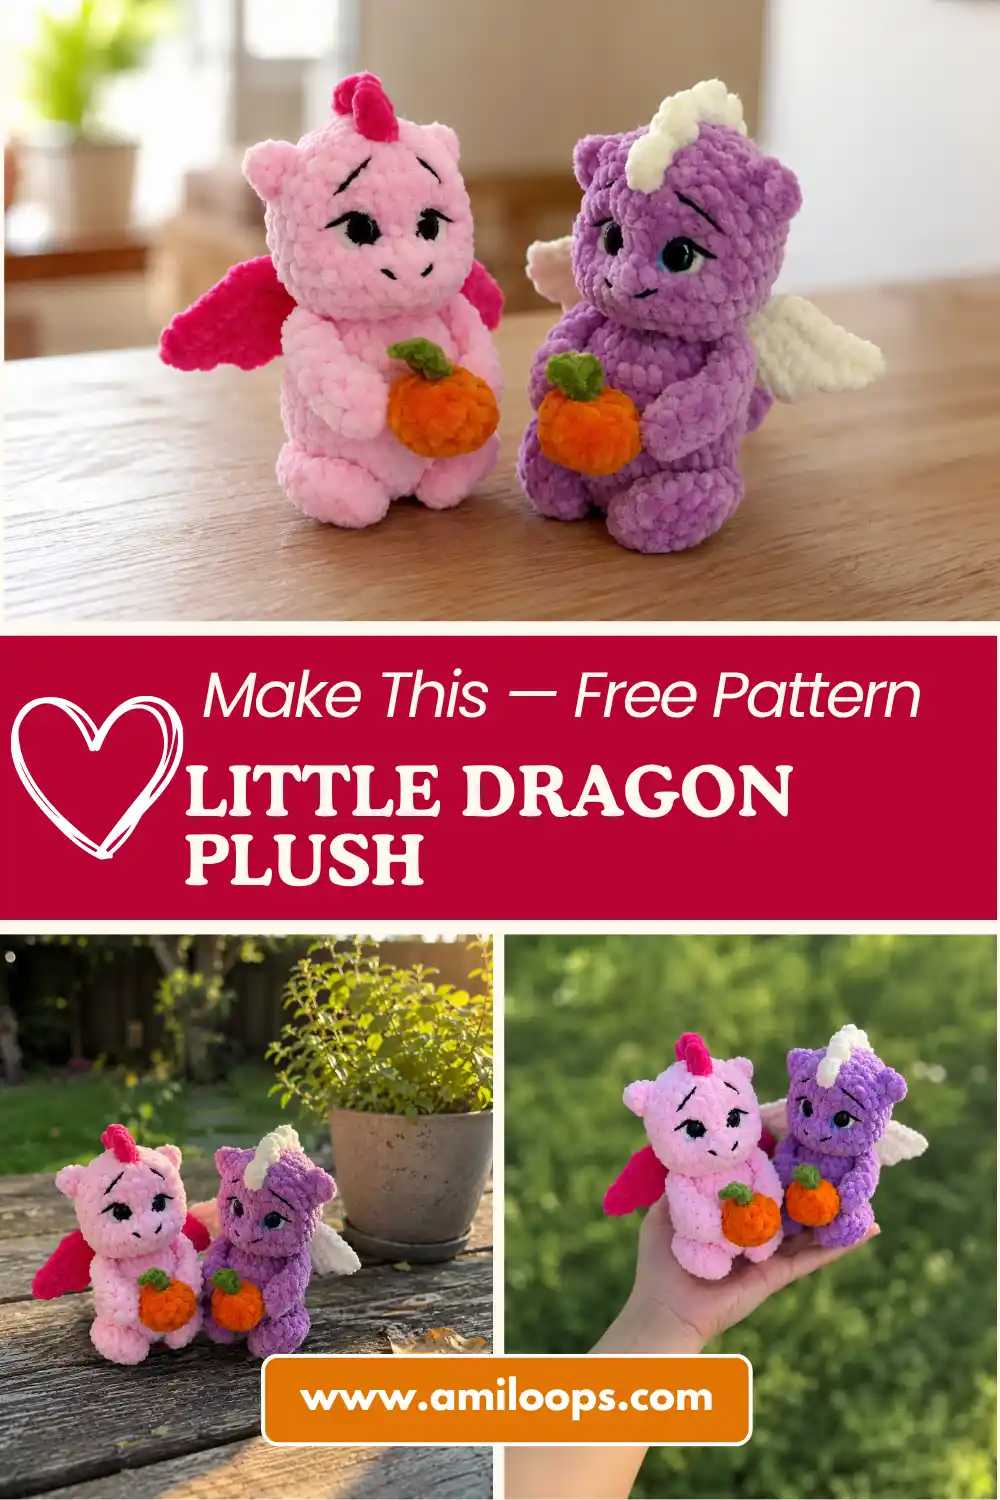
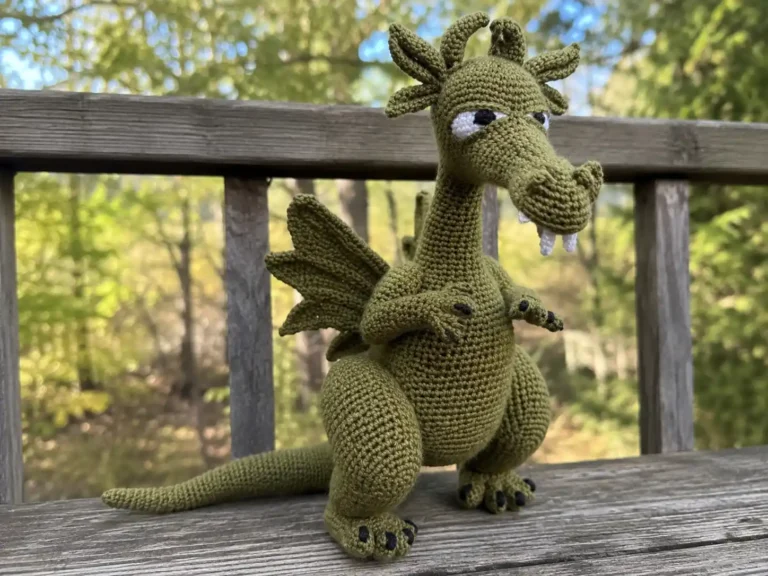
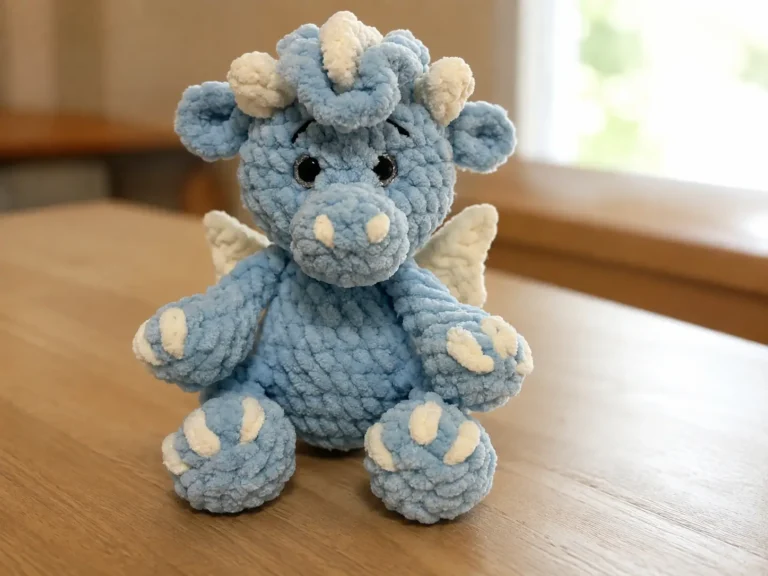
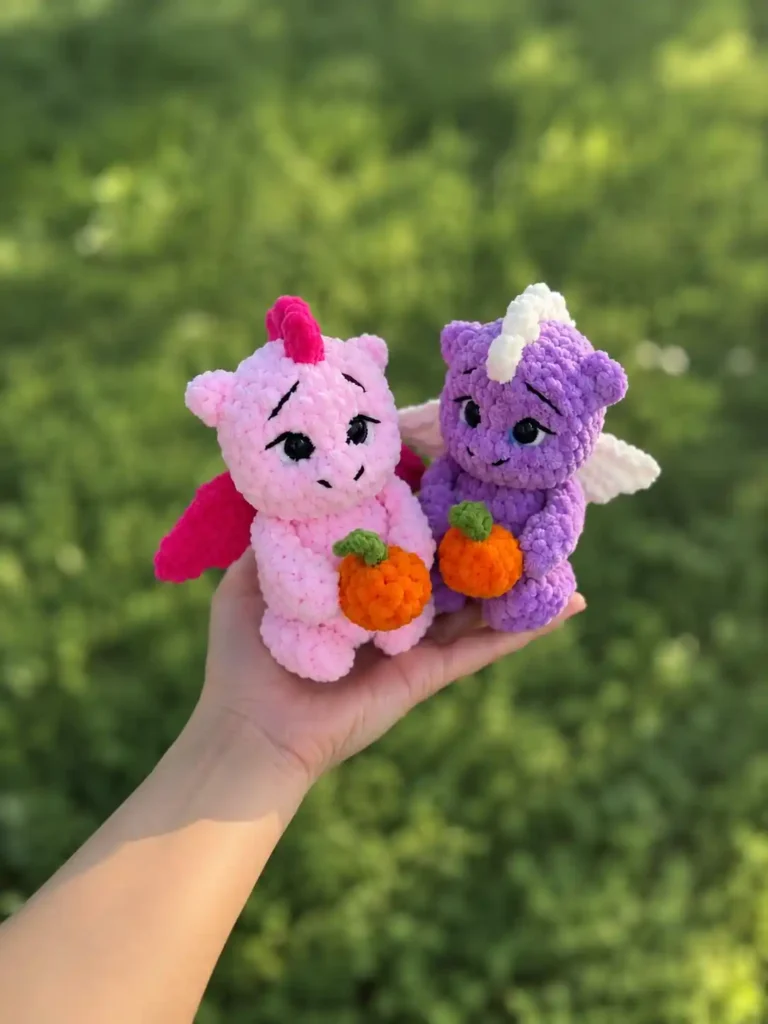
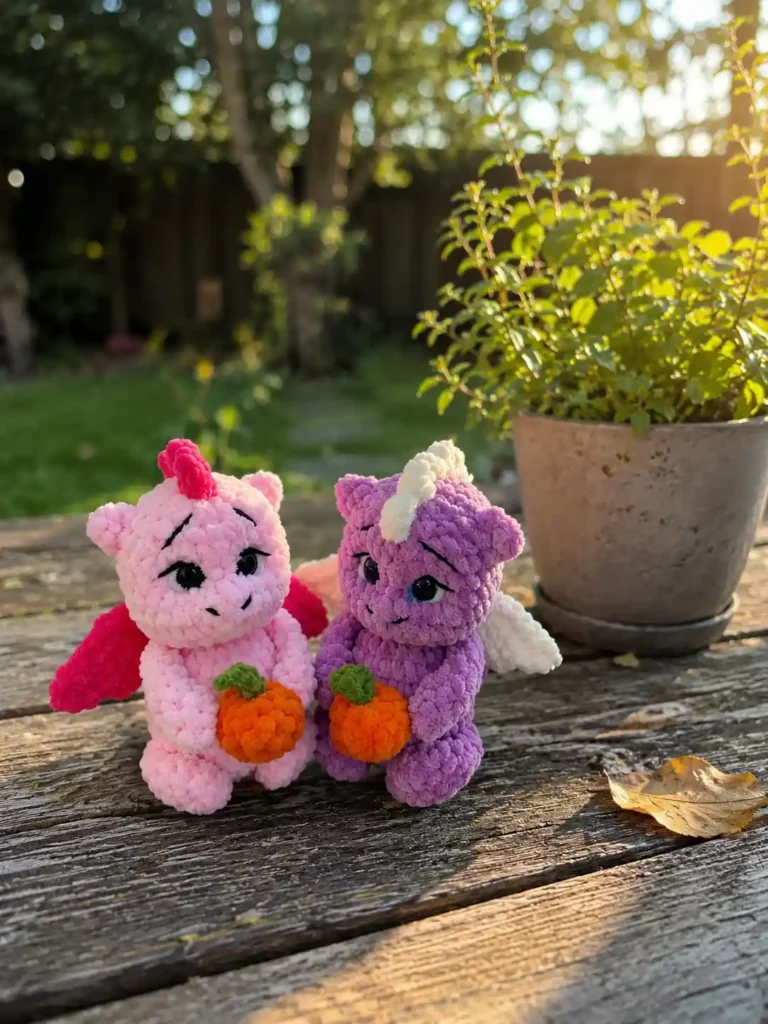
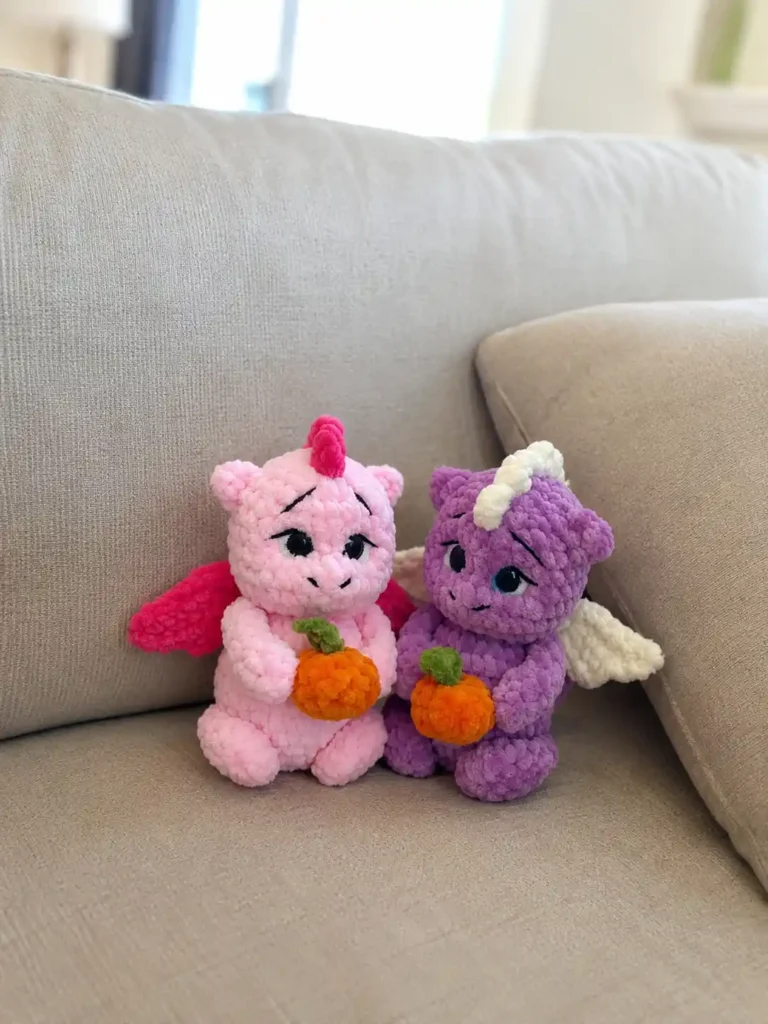
This little dragon amigurumi is a palm-sized plush that brings together intermediate crochet techniques into one captivating stuffed toy. The dragon features a dimensional body constructed from plush yarn with thoughtfully placed safety eyes and embroidered details that give it a gentle, expressive personality. What makes this pattern especially charming is the dimensional spinal crest that runs from the dragon’s forehead down its back to the tip of its tail—a three-dimensional texture element that catches light and defines the toy’s silhouette beautifully.
The dragon holds a crocheted tangerine accessory complete with a leaf accent, adding a playful element to its character. Assembled from nine separate crochet parts—legs, arms, tail, ears, body and head, wings, a spinal crest, the tangerine, and leaf—this project rewards careful stitch planning and assembly sequencing. The plush yarn creates a soft, inviting texture, while the construction method allows the limbs and accessories to attach securely during the building process rather than requiring separate sewing steps, making the assembly logical and satisfying.
About This Little Dragon Crochet Pattern
This little dragon pattern combines solid amigurumi fundamentals with thoughtful finishing techniques. The dragon’s construction method is deliberately structured: the legs and arms attach to the body during specific rounds of the head assembly rather than after completion, which means they’re fully integrated and secure from the start. The body and head form one continuous piece, expanding from the initial ring to create the full form, narrowing toward the neck, and then expanding again to shape the larger head section.
Embroidery plays a meaningful role in bringing the dragon to life. Black thread creates subtle eye-socket contours through a numbered-point sculpting technique, while eyebrows and mouth are stitched to complete the expression. The 12 mm safety eyes are positioned between the head’s 19th and 20th rounds, allowing them to sit prominently in the finished face without appearing overdone. Wings provide balance and visual interest, finished with single crochet edging before being sewn to the back. The optional feature of tacking the legs to the body with thread allows this dragon to stand upright on a shelf or desk—a practical detail for a handmade toy.
Materials and Tools
Plush yarn is the primary material for this project, chosen for its soft texture and stitch definition. The pattern uses approximately 150 to 200 meters of main-color plush yarn for the complete dragon, with smaller yardages in contrasting colors for the wings and spinal crest, plus orange for the tangerine and green for the leaf. Black semi-cotton or embroidery yarn adds the facial embroidery details. Plush yarns typically have a weight of 120 meters per 100 grams, which translates to a DK or worsted-equivalent thickness.
- Plush yarn, any brand, 120 m per 100 g weight; main body color (approximately 150–200 m for complete project based on stitch density)
- Plush yarn, contrasting secondary color for wings and spine crest (approximately 30–40 m)
- Plush yarn, orange for tangerine (approximately 15–20 m)
- Plush yarn, green for leaf (approximately 5–10 m)
- Black semi-cotton or embroidery yarn for eye sculpting channels and facial embroidery (approximately 10–15 m)
- 3.5 mm crochet hook
- 12 mm safety eyes with washers and posts (1 pair)
- Fiberfill polyester stuffing
- Large-eye sewing needle
- Sewing thread (color-matched to main body, black for embroidery accents)
- Scissors
The 3.5 mm hook is the specified size for this pattern and creates a fabric tight enough to hold stuffing securely while remaining soft to the touch. Safety eyes with locking posts ensure the eyes stay in place, an important feature for any stuffed toy. Fiberfill polyester stuffing is standard for amigurumi; firm stuffing helps the dragon maintain its shape and dimension. A large-eye needle makes threading and sewing the parts together manageable, and color-matched thread helps seams blend seamlessly into the finished toy.
Crochet Abbreviations
This pattern uses standard US crochet abbreviations. Reading through the rows and rounds, you’ll encounter increases and decreases frequently—these shaping techniques create the rounded form of the dragon’s body. The magic ring (MR) is the starting method for nearly every circular piece, creating a seamless center that looks polished in the finished toy.
- MR — Magic ring
- ch — Chain stitch
- sc — Single crochet
- inc — Increase
- dec — Decrease / Single crochet 2 together
- hdc — Half double crochet
- dc — Double crochet
- sl st — Slip stitch
- rnd — Round
- rnds — Rounds
- st — Stitch
- sts — Stitches
Construction Overview
The dragon is built from nine distinct parts, each crocheted separately before assembly. The two legs and two arms are small circular pieces that fold in half and close with just a few stitches before being integrated into the body. The tail is a graduated cylinder that expands steadily from a narrow base to a wider end, creating a dimensional shape that curves naturally. The ears are decorative shell elements, and the body and head form the project’s largest and most complex component, incorporating limb attachments within its own row sequence.
Three additional components—the wings, spinal crest, and tangerine with leaf—are worked separately or worked directly onto the body. The wings are flat pieces worked in rows, creating a triangular silhouette. The spinal crest uses a special attachment technique, working a repeating motif of chains and half double crochets while anchoring them to the body with slip stitches. This creates a row of three-dimensional bumps that defines the dragon’s spine from forehead to tail. The tangerine and leaf are small, quick accessories that complete the dragon’s charming accessory piece.
The most distinctive feature of this construction is that the legs and arms are not sewn to a finished body—instead, they attach during the body’s assembly. As you reach Round 6 of the body and head, you’ll simultaneously fold a leg in half and crochet it into the body fabric, anchoring it securely. The same technique repeats at Round 13 for the arms. This method eliminates separate attachment stitches and ensures limbs won’t loosen over time, making the toy durable enough for regular play and handling.
Before You Start
Consistency with tension and stitch placement is essential for this project. Plush yarn can sometimes obscure individual stitches, so it’s helpful to mark your yarn entry point with a stitch marker or scrap yarn before turning to the next round. Count your stitches regularly, especially during the rounds where limbs attach, since you’re working multiple stitches simultaneously with both the body and a folded limb. The pattern specifies Round 6 for leg attachment and Round 13 for arm attachment; these placement points are intentional and contribute to the dragon’s proportions.
Prepare your materials before starting. Sort your plush yarn colors and make sure your hook slides smoothly through stitches without catching. The 12 mm safety eyes should have their posts and washers intact. Cut small lengths of yarn for the color changes on the wings and crest—planning ahead prevents unraveling mid-round. A scrap of yarn or removable stitch marker will help you track the beginning of each round, especially in the later head rounds where stitches are closer together and easier to miscount.
The assembly sequence matters. The pattern suggests crocheting all nine parts first, then proceeding through a specific assembly order: folding and attaching legs during body construction, then arms, then completing the body with stuffing and eye placement. After closing the body, you’ll stuff and attach the tail, add embroidery, create the crest, finish the wings, and finally prepare the tangerine and leaf. Following this sequence ensures each component is stable before the next is added and prevents the need to work into awkwardly positioned pieces.
Little Dragon Crochet Pattern
Crochet all nine pieces in the order listed below. Follow each part’s instructions completely, then proceed to the assembly section. Pay close attention to stitch counts after each round—they serve as checkpoints to confirm you’re on track. The legs and arms are deliberately not stuffed; their folded structure creates natural, curved limbs that rest at the dragon’s sides.
Legs
Round 1: 6 sc in a magic ring (6 sts)
Round 2: 6 inc (12 sts)
Rounds 3–5: 12 sc (12 sts)
Round 6: [1 sc, dec] × 4 (8 sts)
Round 7: 8 sc (8 sts)
Arms
Round 1: 6 sc in a magic ring (6 sts)
Rounds 2–6: 6 sc (6 sts)
Tail
Round 1: 6 sc in a magic ring (6 sts)
Round 2: 6 sc (6 sts)
Round 3: [1 sc, inc] × 3 (9 sts)
Round 4: 9 sc (9 sts)
Round 5: [2 sc, inc] × 3 (12 sts)
Round 6: 12 sc (12 sts)
Round 7: [3 sc, inc] × 3 (15 sts)
Round 8: 15 sc (15 sts)
Round 9: [4 sc, inc] × 3 (18 sts)
Round 10: 18 sc (18 sts)
Ears
Round 1: 4 hdc in one stitch, sl st (4 sts)
Body/Head
Round 1: 6 sc in a magic ring (6 sts)
Round 2: 6 inc (12 sts)
Round 3: [1 sc, inc] × 6 (18 sts)
Round 4: [2 sc, inc] × 6 (24 sts)
Round 5: [3 sc, inc] × 6 (30 sts)
Round 6: 3 sc with leg, 1 sc, inc, 4 sc, inc, 3 sc with leg, 1 sc, inc, 4 sc, inc (36 sts)
Rounds 7–9: 36 sc (36 sts)
Round 10: [4 sc, dec] × 6 (30 sts)
Round 11: [3 sc, dec] × 6 (24 sts)
Round 12: [2 sc, dec] × 6 (18 sts)
Round 13: 1 sc, dec with arm, 1 sc, dec, dec, 1 sc, dec with arm, 1 sc, dec, dec (12 sts)
Round 14: 12 inc (24 sts)
Round 15: [3 sc, inc] × 6 (30 sts)
Round 16: [4 sc, inc] × 6 (36 sts)
Rounds 17–20: 36 sc (36 sts)
Round 21: [4 sc, dec] × 6 (30 sts)
Round 22: [3 sc, dec] × 6 (24 sts)
Round 23: [2 sc, dec] × 6 (18 sts)
Round 24: [1 sc, dec] × 6 (12 sts)
Round 25: 6 dec (6 sts)
Wings
Row 1: 8 ch, turn, ch 1
Row 2: 7 sc, turn, ch 1 (7 sts)
Rows 3–4: 5 sc, turn, ch 1 (5 sts)
Row 5: 3 sc, turn, ch 1 (3 sts)
Row 6: 3 sc (3 sts)
Spinal Crest
Crest: Attach yarn at center of forehead. Work: 1 ch, 3 hdc inc, 2 sl st to body. Repeat from forehead to tail tip.
Tangerine
Round 1: 6 sc in a magic ring (6 sts)
Round 2: 6 inc (12 sts)
Rounds 3–4: 12 sc (12 sts)
Round 5: [1 sc, dec] × 4 (8 sts)
Round 6: 4 dec (4 sts)
Leaf
Row 1: 4 ch, turn
Row 2: sl st, 1 dc, sl st
Assembly and Finishing
Begin assembly after all nine parts are crocheted. Fold each leg in half lengthwise so the raw edges meet and the work is inside-out. Crochet three single crochets through both wall thicknesses to close the leg, leaving a tail for sewing. Do not stuff the legs; their folded structure creates the natural curve. Repeat with both arms, using two single crochets instead of three. Set legs and arms aside.
As you work the body and head rounds, watch for Round 6, where the first leg attachment happens. During this round, you’ll fold a leg in half with its seam facing inward and crochet it simultaneously into the body stitches. Crochet three single crochets working through the folded leg edge and body stitch together, positioning the leg on one side of the body. Complete the rest of the round normally, then position the second leg on the opposite side and attach it with the same technique. The legs now secure themselves as part of the body structure.
Continue the body rounds normally through Round 12. When you reach Round 13, attach the arms using the same integration method. The arms attach at the narrowest section of the body, just before the head expansion, so they rest naturally at the dragon’s sides. Like the legs, the arms fold and crochet into the body stitches, becoming permanent parts of the structure. Complete Round 13 and continue through Round 25, the final round.
Before closing the body completely, insert the 12 mm safety eyes between Rounds 19 and 20, spaced approximately three single crochets apart horizontally. The eyes should sit prominently in the dragon’s face, creating an expressive appearance. Push the posts through the crocheted fabric from the outside, and secure the washers and posts on the inside. After eye placement, work the final decrease round (Round 25) and close by cutting the yarn, threading the tail through the remaining stitches, and pulling tight.
Stuff the body firmly with fiberfill before fully closing. Once stuffed and closed, sew the tail to the rear base of the body using a ladder stitch or long-tail yarn, positioning it so it curves naturally behind the dragon. Add facial embroidery details using black thread: create eye-socket contours by threading through numbered points on the head fabric (points 1–6, then revisiting 3–4) to add shadows around the eyes. Embroider eyebrows and mouth to complete the expression and bring the dragon’s personality forward.
Create the spinal crest by attaching yarn at the center of the forehead. Work a repeating motif of one chain, three half double crochets in one stitch (creating three bumps), and two slip stitches to the body. Move along the center of the head and down the back seam, positioning the motif evenly from forehead to the tail tip. This creates a striking ridge of three-dimensional texture that runs the entire length of the dragon’s spine. Finish the wings by working single crochet around all perimeter edges, then sew them symmetrically to the back of the body.
Prepare the tangerine and leaf. Stuff the tangerine lightly with fiberfill and close it by drawing the tail yarn through the remaining stitches. Sew the leaf to the top of the tangerine, creating a finished fruit accessory. Attach the tangerine to the dragon’s hand or arm area, positioning it as if the dragon is holding or presenting it. Finally, optionally tack the dragon’s legs to the body with thread so it can stand upright on a shelf or desk—this prevents the legs from splaying and gives the finished toy a proud, stable stance.
- Crochet all nine parts.
- Fold and close legs; attach to body during Round 6 of Body/Head by crocheting folded leg simultaneously into stitches.
- Fold and close arms; attach to body during Round 13 of Body/Head.
- Stuff body/head fully before closing Round 25.
- Insert 12 mm safety eyes between Rounds 19–20 of head, spaced 3 sc apart.
- Close final round of body.
- Stuff and sew tail to rear base of body.
- Embroider face details: eye sculpting channels using black thread (numbered point method: points 1–6, then 3–4 revisited) to define eye sockets; eyebrows and mouth embroidered in black.
- Crochet ears directly onto head or sew afterward.
- Create spinal crest by attaching yarn at forehead center and working crest motif down back to tail tip.
- Finish wings with single crochet edging and sew to back, positioned symmetrically.
- Stuff and sew tangerine to dragon’s hand/arm area.
- Sew leaf to top of tangerine.
- Optional: Tack dragon’s legs to body with thread so it can stand upright.
Pattern Notes and Troubleshooting
Understanding Limb Attachment During Construction
The legs and arms are attached during the body rounds rather than sewn afterward, which differs from many traditional amigurumi patterns. This simultaneous attachment means you’re working through multiple thicknesses at once—the folded leg or arm and the active body row. Place a stitch marker or scrap yarn at the beginning of the round so you don’t lose track of your position while navigating the integration. Count carefully, as integrating a limb changes the normal stitch pattern. Once the leg or arm is attached, continue the round’s stitch sequence normally. This method creates security that rivals or exceeds sewn attachment and eliminates the need for multiple sewing passes.
Plush Yarn Visibility and Stitch Definition
Plush yarn has a fuzzy texture that softens stitch definition, which can make it challenging to see exactly where stitches begin and end. Develop a consistent entry point by always inserting your hook in the same part of the stitch (typically the front loop or the entire loop depending on the round). Use a stitch marker or scrap yarn loop at the round’s beginning so you can easily locate where to close each round. Some crocheters prefer to pull plush yarn gently as they work to compress the pile slightly and see individual stitches more clearly. Consistent tension helps the fabric maintain its shape as you build.
Achieving Symmetry in the Spinal Crest and Wings
The spinal crest runs continuously from the dragon’s forehead to the tail tip, and even spacing creates visual impact. After inserting the safety eyes and before adding the crest, mark the center of the forehead with a pin or yarn marker. Work the crest motif at regular intervals—for example, every two or three stitches along the center back seam. Step back occasionally and view the dragon from behind to confirm the crest is centered and evenly distributed. For the wings, measure their position so they’re equidistant from the body’s center seam before sewing. Symmetrical placement balances the dragon’s silhouette and enhances its visual appeal.
Finishing Checklist
Before considering your dragon complete, work through this checklist to ensure all components are present and securely attached. Each item represents both a visible design element and a structural checkpoint. A thorough final review confirms the toy is complete, durable, and ready to delight its recipient.
- Body and head are fully stuffed and securely closed.
- Safety eyes are firmly anchored with posts and washers; test gently to confirm they won’t pull free.
- All four limbs (two legs, two arms) are securely attached to the body with no loose stitches at attachment points.
- Tail is sewn firmly to the rear base of the body.
- Black embroidery adds eye-socket contours (points 1–6, revisiting 3–4) and eyebrow and mouth details.
- Spinal crest runs evenly from forehead to tail tip with consistent bumps and stitch placement.
- Wings are finished with single crochet edging and sewn symmetrically to the back.
- Tangerine is lightly stuffed and closed, with leaf sewn securely to its top.
- Tangerine is attached to the dragon’s hand or arm area.
- All yarn ends are woven in securely; no tail ends protrude from the fabric.
- The finished dragon is clean and ready for display or gifting.
- Optional: Legs are tacked to the body with thread so the dragon stands upright.
FAQ
What yarn is best for this little dragon crochet pattern?
Plush yarn (120 m per 100 g) is recommended for its soft texture and dimensional structure, though any worsted or DK weight yarn can be substituted with an appropriate hook size.
Do I have to sew the arms and legs onto the dragon?
No, this pattern uses a seamless integration technique where the folded legs and arms are crocheted directly into the body during specific rounds (rounds 6 and 13), eliminating the need for sewing.
Is this dragon amigurumi suitable for beginners?
This pattern is best suited for intermediate crocheters, as it involves simultaneous limb attachment, 3D structural shaping, and specific facial embroidery techniques.