Free Crochet Donut Pattern — Squishy Amigurumi with Sprinkles
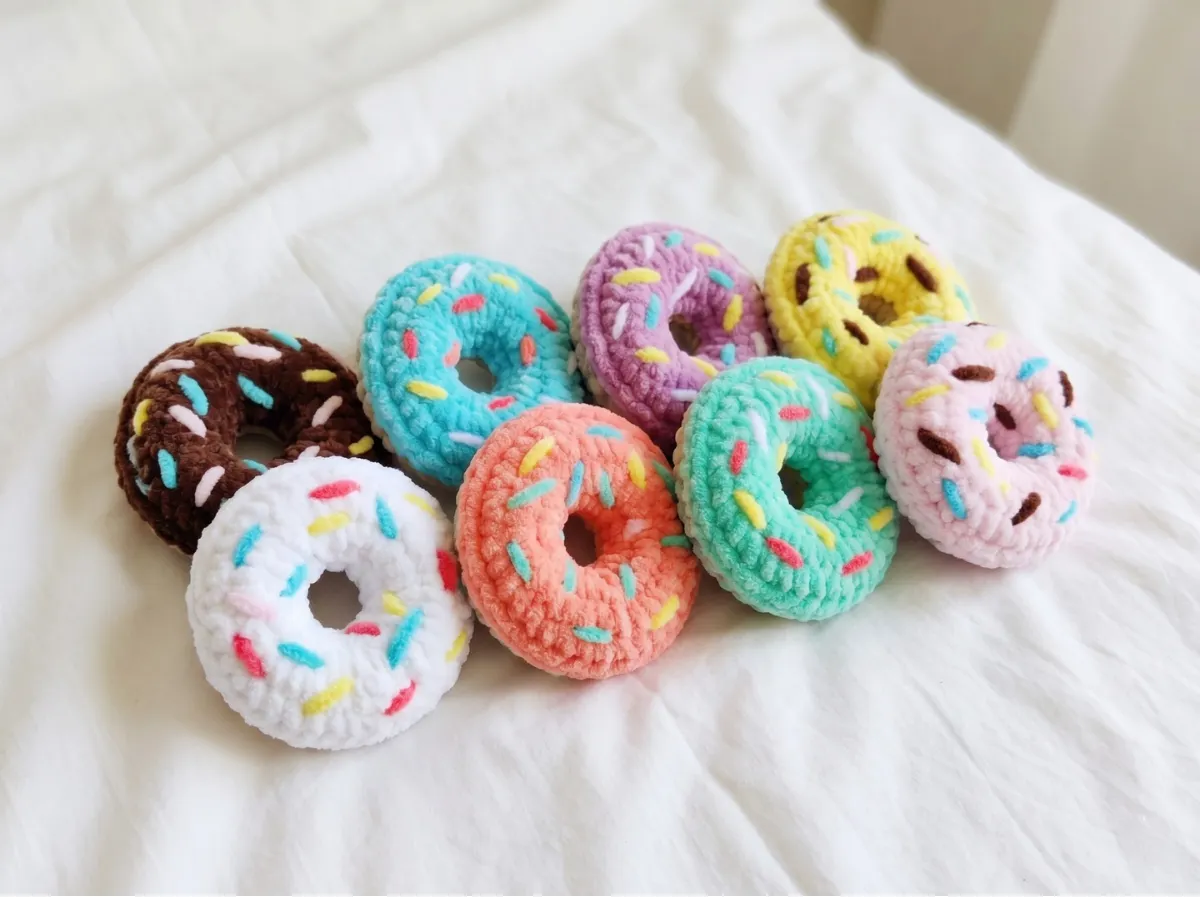
If you are looking for a fun, quick project, this crochet donuts free pattern makes the most irresistible little pastry you’ve ever held — soft vanilla dough, a swoosh of blush pink glaze, and the tiniest embroidered sprinkles scattered on top like confetti. At about 3 in across, it fits perfectly in your palm and has that squishy, satisfying weight you never want to put down. Crochet donuts are made to be made in batches. Let me show you how. 🩷
🩷 Pattern Highlights
- Cuteness Rating: 🩷🩷🩷🩷🩷
- Finished Size: approx. 3 in (7.5 cm) across
- Difficulty: Beginner
- Hook Size: 3.5mm (US E/4)
- Yarn Palette: soft vanilla cream + blush pink glaze — also stunning in lavender, mint green, or warm chocolate!
- Key Detail: embroidered rainbow sprinkles scattered across the glaze — this is where the personality happens
- Estimated Time: 1–2 hours
What You’ll Need for This Crochet Donuts Free Pattern
One of my favorite things about this pattern is how little you need to end up with something this adorable. The magic really lives in the color choices — pick a glaze color that makes you happy and the rest will follow.
- Main color yarn — the dough: soft vanilla cream or warm beige. DK weight (CYCA 3) gives a beautifully crisp stitch definition for food amigurumi.
- Glaze color yarn — one contrasting color for the icing: I used a dreamy blush pink, but soft lavender, pale mint green, buttery yellow, and warm chocolate brown are all absolutely stunning. Pick something that makes your heart happy.
- Assorted embroidery thread or thin yarn — for the sprinkles: the more colors the better. Bright coral, sky blue, pale yellow, and lime green together are so good against a pink glaze.
- Hook: 3.5mm (US E/4)
- Polyester fiberfill stuffing — enough to fill the donut ring firmly and evenly
- Tapestry needle — for embroidering sprinkles and weaving in ends
- Stitch marker — to track the beginning of each round
- Scissors
This pattern uses DK weight (CYCA 3) yarn — lightweight, smooth, and perfect for showing off the tiny stitch details that make amigurumi food look so crisp and sweet. You can find it at Joann, Michaels, or Hobby Lobby in every pastel shade imaginable.
Abbreviations Used in This Crochet Donut Pattern
| Abbreviation | Meaning |
|---|---|
| ch | chain |
| sc | single crochet |
| inc | increase — 2 single crochets worked into the same stitch |
| FO | fasten off |
Before You Begin — Three Things That Make This One Special
The starting chain creates the center hole. Unlike most amigurumi pieces that start with a magic ring, this donut begins with a ch 12 joined into a ring. That chain forms the inner hole — the detail that gives it that unmistakable donut shape. Don’t pull it too tight. It looks a little loose at first, but it firms up beautifully as you work the first round of increases, and that little open center is going to look so charming when the whole thing is finished.
The glaze is worked from the inside out. This is the part I find so clever. After completing the first half, you’ll turn the piece inside out, join your glaze color to the inner ring, and crochet the glaze section outward from there. When you flip it right-side out later, the glaze drapes naturally across the top — just like real icing. It’s one of those technique moments where the shape clicks into place and you’ll want to squeal a little. 🩷
You stuff the donut as you close it. In the final joining step, you’ll be crocheting both halves together along the outer edge while stuffing through the gap as you go. Aim for firm and even — you want that donut to hold its beautiful round shape. If you’d like some guidance on getting the stuffing just right, our tutorial on how to stuff amigurumi without lumps walks through exactly how to get a smooth, professional finish every time.
Step-by-Step Crochet Donuts Free Pattern Instructions
All rounds are worked in continuous rounds (spiral) unless otherwise noted. Place a stitch marker at the beginning of each round and move it up as you go.
Part 1: First Half of the Donut
Yarn color: main color (vanilla cream or your chosen dough color)
This section forms the bottom half of the donut. The starting chain ring creates the center hole — that signature shape that makes this piece instantly recognizable as something delicious.
Row 1: ch 12, join into a ring and crochet in the round: 12 sc (12)
Row 2: 12 inc (24)
Row 3: (1 sc, inc) × 12 (36)
Rows 4–5: 36 sc (2 rows) (36)
FO, cut yarn, and leave a tail for weaving in later.
🩷 Chloe’s Detail Tip: After Row 3 your piece will flatten out into a beautiful little disc with that perfect open circle in the center. Hold it up and look. That’s your donut taking shape right there. So satisfying to watch it happen. ✨
Part 2: The Glaze — Second Half of the Donut
Yarn color: contrasting glaze color (blush pink, lavender, mint, chocolate — your dream glaze!)
Before starting this section, turn your completed first half inside out. Join your glaze color yarn to the inner ring at the center hole, and begin crocheting outward from there in continuous rounds. When you flip the piece right-side out later, the glaze will sit beautifully on top — exactly like icing drizzled across a real donut. The transformation is the most magical little moment in this whole pattern.
Row 1: 12 inc (24)
Row 2: (1 sc, inc) × 12 (36)
Rows 3–4: 36 sc (2 rows) (36)
🩷 Chloe’s Detail Tip: As you work these rounds, the glaze color expands outward from the center hole — blush pink (or lavender, or mint!) spreading across what will become the top of your donut. Watch it happen and try not to make excited little sounds. I always do.
Part 3: Joining the Two Halves
Yarn color: continue with your glaze color yarn
This is the moment your donut becomes whole. Flip the piece right-side out so the glaze sits on top. Hold both halves together with their outer edges aligned, then crochet them shut all the way around — stuffing the donut through the gap as you go. Take your time here, check the stuffing from all angles before you close the last few stitches, and make sure that center hole is still beautifully open and round.
Row 1: Hold both halves of the donut together (top and bottom aligned along the outer edge) and crochet them together with 36 sc in the round, stuffing the donut firmly with fiberfill as you go (36)
FO, cut yarn, and weave the remaining yarn tail inside the donut.
🩷 Chloe’s Detail Tip: Before you stitch those last few sc closed, give the donut a gentle squeeze all the way around. Is the stuffing even? Is the center hole still open and circular? Add or adjust fiberfill now — once you’ve fastened off, that shape is set. Our guide on fastening off and weaving in ends has tips for finishing so cleanly that no yarn tails ever poke through the surface.
Assembly — The Full Sequence
The assembly for this crochet donut happens entirely through crocheting — no sewing needed. Here’s the full order at a glance:
- Complete the first half (main color, Rows 1–5). Fasten off.
- Turn the piece inside out. Join glaze color yarn to the inner ring at the center hole.
- Work the glaze section (Rows 1–4) in continuous rounds, expanding outward from the center.
- Flip the donut right-side out. The glaze now sits on top.
- Hold both outer edges together and join them by crocheting 36 sc around the outer edge, stuffing the donut firmly with fiberfill as you go.
- Fasten off and weave the yarn tail inside the donut.
At this point your donut has its shape, its glaze, and that lovely squishy weight. Now for the really fun part.
Making It Extra Cute — Sprinkles, Color, and All the Tiny Details
A plain glazed donut is already sweet. But a donut with tiny rainbow sprinkles scattered across that blush pink icing? That’s the one you can’t stop looking at. This is the section where your crochet donut goes from charming to completely irresistible.
Embroidering the sprinkles: Thread your tapestry needle with a length of brightly colored embroidery thread (thinner thread gives cleaner, more delicate lines than yarn — it really does look more like the real thing). Stitch short, straight lines across the glaze section in random angles — think scattered, not evenly spaced. That casual randomness is exactly what makes them look like actual sprinkles. Bright coral, sky blue, lemon yellow, lime green, and pale lilac together look absolutely dreamy against blush pink. Against lavender? Even better. I usually do 8–12 little stitches total — enough to look colorful and playful without covering the glaze color you chose so carefully.
Add a kawaii face (optional but so encouraged): This is fully optional, but if you want to take this donut into complete kawaii territory — use black embroidery thread to stitch two tiny dot eyes and a small curved smile on the glaze section. Then add two small embroidered circles in soft pink on either side of the face for blush cheeks. 🩷 It takes about two minutes and turns this from a cute food amigurumi into a tiny creature with an entire personality. I may have made a batch of six with faces and given them all names. No regrets whatsoever.
Glaze color combinations that make my heart sing:
- The Classic: vanilla cream dough + blush pink glaze + rainbow sprinkles
- The Lavender Dream: warm beige dough + soft lavender glaze + white and lemon yellow sprinkles
- The Mint Moment: cream dough + pale mint glaze + pink and coral sprinkles
- The Chocolate Box: warm tan dough + chocolate brown glaze + pastel sprinkles in every color
- The Lemon Drop: cream dough + pale yellow glaze + soft blue and white sprinkles
🩷 Chloe’s Detail Tip: Make a batch of five in different glaze colors and arrange them in a tiny wicker basket or on a small decorative plate. It is one of the most satisfying photo set-ups you will ever create with a crochet hook. One skein of variegated rainbow embroidery thread from Joann is enough for dozens of donuts and costs almost nothing — stock up.
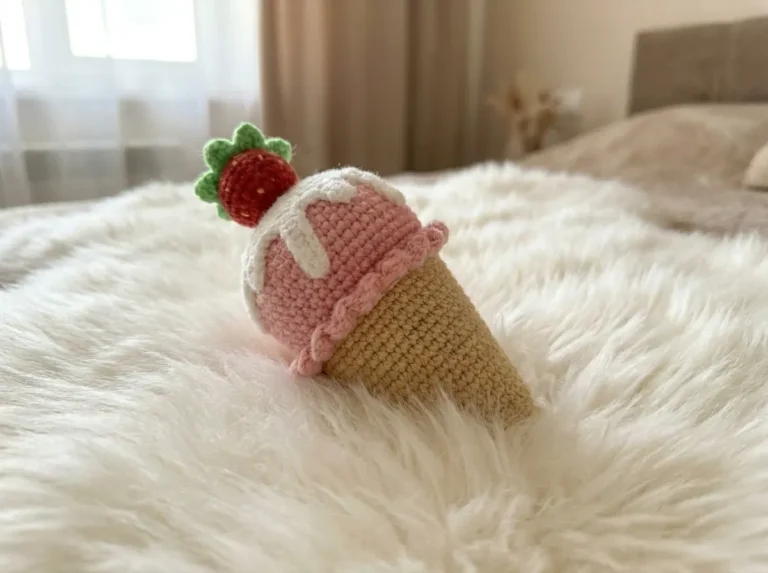
If you love making tiny food amigurumi as much as I do, you’ll want to meet our squishy chenille strawberry amigurumi and our little ice cream cone amigurumi too — the three of them together make the most precious little dessert collection.
Chloe’s Final Look
I’ve been staring at this finished piece from our crochet donuts free pattern for an unreasonable amount of time and I don’t plan to stop. The way the blush glaze sits on top of that soft cream dough, the scatter of tiny bright sprinkles, the perfect little center hole — it’s everything a miniature food amigurumi should be. Squishy, sweet, and completely impossible to look at without smiling.
Make one. Then make five more in every pastel glaze color you can dream up. Line them up in a tiny basket and try telling me that’s not the most satisfying thing you’ve ever crocheted. I’ll wait. 🩷
What yarn weight is best for this crochet donuts free pattern?
DK weight (CYCA 3) yarn is ideal for this pattern because it provides crisp stitch definition, ensuring the amigurumi donut looks smooth, professional, and holds its shape perfectly.
Can beginners successfully complete this amigurumi donut pattern?
Yes, this pattern is highly beginner-friendly as it uses basic stitches like chains and single crochets, though it requires attention when joining the two halves together.
How long does it take to finish crocheting one donut?
It typically takes between 1 to 2 hours to crochet and fully assemble one donut, making it an excellent quick project for weekend crafting or gifts.