The Sweetest Little Scoop You’ll Ever Make
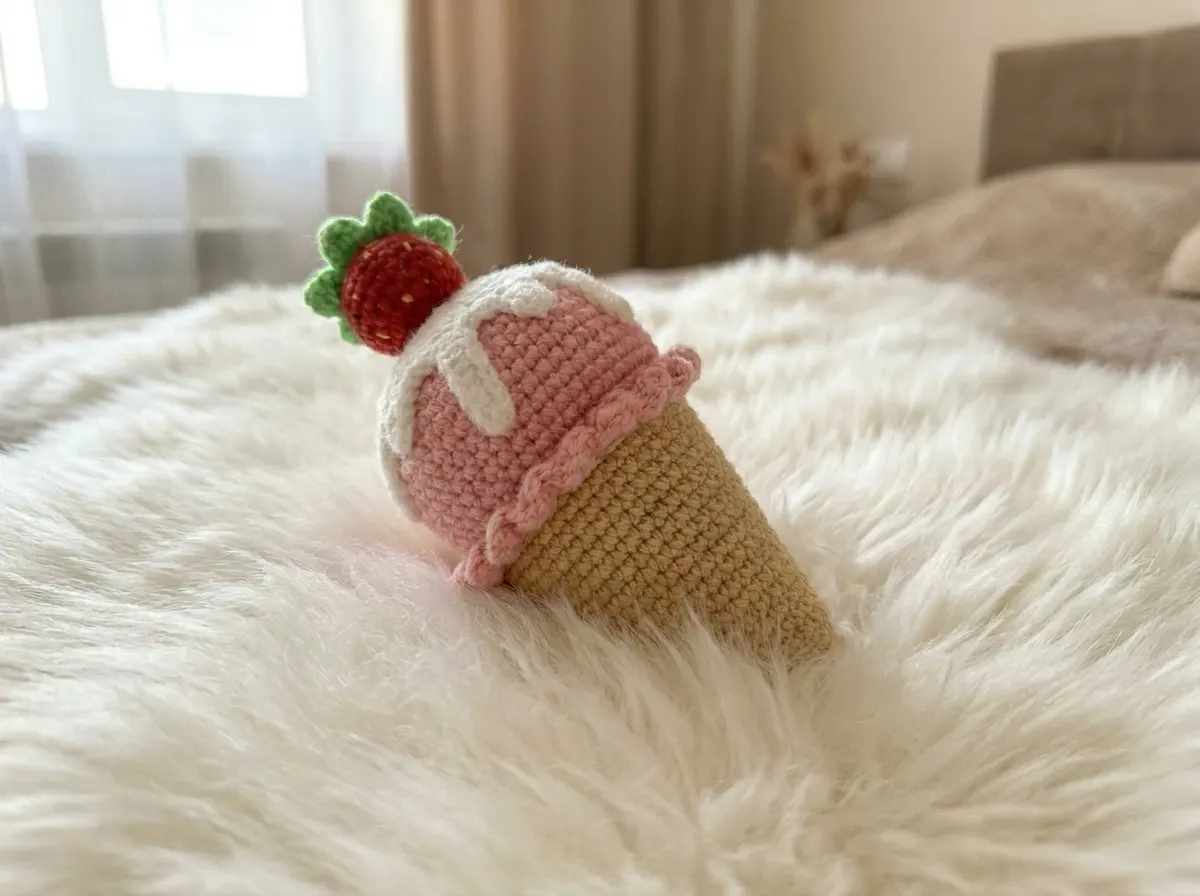
This free crochet ice cream cone pattern is everything amigurumi food was invented to be — a blush-pink scoop perched on a warm beige cone, crowned with a rippling white glaze and a teeny-tiny red strawberry on top. It’s the kind of amigurumi food that makes people stop mid-conversation and say “wait, what IS that?” in the best possible way. It stands about 5.5 in tall, has the most satisfying squishy-firm feeling when you squeeze it, and honestly? I’ve already made three. Let’s make yours. 🩷
🩷 Pattern Highlights
- Cuteness Rating: 🩷🩷🩷🩷🩷
- Finished Size: 5.5 in (14 cm)
- Difficulty: Intermediate Beginner
- Hook Size: 1.75mm
- Yarn Palette: soft blush pink, warm sandy beige, creamy white, cherry red, leafy green
- Key Detail: ruffled ice cream edge, drip-detail glaze, embroidered strawberry seeds
- Estimated Time: 4–6 hours
What You’ll Need to Make This Amigurumi Food
The color story here is everything. A warm sandy beige for the cone, a soft blush pink for the scoop, and a clean creamy white for that drippy glaze — together they feel like a pastel dream. The little red strawberry on top is what takes it from sweet to unreasonably cute.
- Yarn: YarnArt Jeans (DK/Light Worsted, weight 3) — or any smooth DK-weight cotton substitute such as Drops Muskat or Paintbox Simply DK Cotton
- Color 1: Beige (color 7) — for the cone
- Color 2: Soft blush pink (color 36) — for the ice cream scoop
- Color 3: Creamy white (color 61) — for the glaze/drip
- Color 4: Cherry red (color 90) — for the strawberry
- Color 5: Leafy green (color 60) — for the strawberry leaves
- Hook: 1.75mm (the snug fit this hook creates is exactly what gives the finished piece that firm, perfectly round shape)
- Stuffing: Polyester fiberfill — Poly-Fil by Fairfield works beautifully and is easy to find at Joann, Michaels, or Hobby Lobby
- Tapestry needle — for sewing parts together and weaving in ends
- Scissors
- Thin yellow embroidery thread — for the strawberry seeds (this tiny detail is SO worth it)
- Stitch marker — essential for tracking rounds
YarnArt Jeans is a DK / Light Worsted weight (3) cotton-acrylic blend that gives wonderfully defined stitches — perfect for showing off all five parts of this little cone. A US cotton alternative like Paintbox Simply DK will give you the same crisp stitch definition.
Abbreviations Used in This Pattern
| Abbreviation | Meaning |
|---|---|
| mr | magic ring |
| ch | chain |
| sc | single crochet |
| inc | increase — 2 sc worked into the same stitch |
| inv dec | invisible decrease — insert hook through front loops only of next 2 stitches simultaneously, yarn over, pull through, yarn over, pull through 2 loops |
| sl st | slip stitch |
| hdc | half double crochet |
| FLO | front loops only |
| BLO | back loops only |
| ( ) × # | repeat the instructions inside the parentheses the stated number of times |
🩷 A note on decreases: Wherever this pattern calls for a decrease, use the invisible decrease (inv dec) — it inserts through the front loops only of two stitches at once and leaves no visible gap. It’s what keeps the surface of your strawberry and ice cream scoop looking smooth and flawless.
Before You Begin — Little Details That Make a Big Difference
This five-part amigurumi food project connects into a single finished piece, and a little preparation goes a long way toward a finished piece you’ll genuinely love.
Work tightly throughout. This pattern uses a 1.75mm hook with DK-weight yarn intentionally. The tight gauge creates a firm, dense fabric that holds its shape and prevents stuffing from peeking through the stitches. If your tension is naturally loose, try going down half a size. If you’re just getting started with keeping even tension, our guide on how to hold your crochet hook walks you through the hand positions that make a real difference for amigurumi.
Leave long tails for sewing. When you fasten off each piece, leave a tail of at least 8–10 in. You’ll use these tails to sew each part to the next, and having plenty of length means you can take your time positioning everything perfectly before committing.
Don’t stuff until the pattern tells you to. The cone and scoop are joined through specific loop rows — stuffing too early makes that alignment much harder. Follow the assembly order exactly and you’ll be rewarded with a clean, seamless connection between the two main pieces.
If this is your first time starting crochet pieces from the center, our magic ring tutorial shows you how to get that perfectly closed center that amigurumi food really needs — no hole, no fuss.
The Pattern
Part 1: Ice Cream Scoop (×1)
Yarn: Soft blush pink (color 36)
Start: Magic ring
This piece starts small and round, then blooms out into the most satisfying half-sphere shape. Watch it transform — this is one of those parts where you can really see the amigurumi food coming together row by row.
Row 1: 6 sc in mr (6)
Row 2: 6 inc (12)
Row 3: (1 sc, inc) × 6 (18)
Row 4: 1 sc, inc, (2 sc, inc) × 5, 1 sc (24)
Row 5: (3 sc, inc) × 6 (30)
Row 6: 2 sc, inc, (4 sc, inc) × 5, 2 sc (36)
Row 7: (5 sc, inc) × 6 (42)
Row 8: 3 sc, inc, (6 sc, inc) × 5, 3 sc (48)
Rows 9–17: 48 sc (9 rows even) (48)
🩷 Chloe’s Detail Tip: By Row 12 or 13, the blush-pink dome shape really starts to show itself. Hold it in your palm — it should already feel soft and round and right. This is where it stops being yarn and starts being ice cream. 🩷
Row 18: (1 sl st, 4 hdc) × 24 — work into the front loops only of each stitch
🩷 About Row 18: This is the ruffle! Working into the front loops only creates a delicate frill that runs all the way around the edge of the scoop — it’s what gives the ice cream that classic soft-serve silhouette. Take your time on this row. The little ruffled edge is genuinely one of the most satisfying moments in this whole pattern.
Finishing: Fasten off and weave in ends. Set aside — do not stuff yet.
Part 2: Cone (×1)
Yarn: Warm sandy beige (color 7)
Start: Magic ring
The cone builds from a tight tip and opens gradually into a wide, stable base. Those evenly-spaced plain rows between the increase rows are what give it that smooth, tapered shape.
Row 1: 6 sc in mr (6)
Row 2: 6 inc (12)
Rows 3–4: 12 sc (2 rows even) (12)
Row 5: (1 sc, inc) × 6 (18)
Rows 6–8: 18 sc (3 rows even) (18)
Row 9: (2 sc, inc) × 6 (24)
Rows 10–11: 24 sc (2 rows even) (24)
Row 12: (3 sc, inc) × 6 (30)
Rows 13–14: 30 sc (2 rows even) (30)
Row 15: (4 sc, inc) × 6 (36)
Rows 16–18: 36 sc (3 rows even) (36)
Row 19: (5 sc, inc) × 6 (42)
Rows 20–23: 42 sc (4 rows even) (42)
Row 24: (6 sc, inc) × 6 (48)
Rows 25–26: 48 sc (2 rows even) (48)
🩷 Chloe’s Detail Tip: Stuff the cone firmly as you work — the tapered tip especially benefits from being packed well before the opening gets too wide. A firmly stuffed cone will hold the whole piece upright once it’s assembled, which is exactly what you want when you display it on a shelf. 🩷
Finishing: Do not fasten off yet — the cone will be joined to the scoop through the back loops of Row 26.
Part 3: Glaze / Drip (×1)
Yarn: Creamy white (color 61)
Start: Magic ring
Oh, this part. This is the tiny detail that makes people do a double-take. A flat white circle with little drip-shaped chains hanging off the edge — when it sits on top of the pink scoop, it looks exactly like melting ice cream glaze. So. Good.
Row 1: 6 sc in mr (6)
Row 2: 6 inc (12)
Row 3: (1 sc, inc) × 6 (18)
Row 4: (2 sc, inc) × 6 (24)
Row 5: (3 sc, inc) × 6 (30)
Row 6 (drip edge): *5 ch, working along the chain from the 2nd ch from hook: 4 sc, sl st into the main piece, 3 sc along the main piece, 9 ch, working along the chain from the 2nd ch from hook: 8 sc, sl st into the main piece, 2 sc along the main piece, 2 ch, 1 sc along the chain, sl st into the main piece.* Repeat from * around.
🩷 About the drip edge: This row creates alternating short and long drip shapes around the whole circumference of the glaze piece. The short drips (5-ch) and long drips (9-ch) give it that organic, melting look. Take it slowly on this row — it’s the most intricate part of the whole pattern, and the finished result is absolutely worth the focus it takes.
Finishing: Fasten off and leave a long tail for sewing onto the scoop.
Part 4: Strawberry (×1)
Yarn: Cherry red (color 90)
Start: Magic ring
Teeny. Tiny. Perfect little strawberry. It’s worked in a slightly different increase pattern than the other rounds (working in groups of 3 rather than 6) which gives it that rounder, more rounded-base strawberry silhouette. I love this little shape so much.
Row 1: 6 sc in mr (6)
Row 2: (1 sc, inc) × 3 (9)
Row 3: (2 sc, inc) × 3 (12)
Row 4: (3 sc, inc) × 3 (15)
Row 5: (4 sc, inc) × 3 (18)
Row 6: (5 sc, inc) × 3 (21)
Rows 7–8: 21 sc (2 rows even) (21)
Row 9: (5 sc, inv dec) × 3 (18)
Row 10: (4 sc, inv dec) × 3 (15)
Row 11: (3 sc, inv dec) × 3 (12)
Row 12: 6 inv dec (6)
Finishing: Stuff firmly with fiberfill. Cut yarn, pull the remaining stitches closed, and weave in the end securely.
Part 5: Strawberry Leaves (×1)
Yarn: Leafy green (color 60)
Start: 5 chains joined into a ring
These tiny leaves are worked from a central ring with groups of double crochet stitches (4 stitches per petal, with stitches sharing a top) to form a six-pointed leaf shape. The original pattern diagram shows petal clusters worked outward from the central ring. Work 6 petals total, each formed by 4 dc stitches with their tops drawn together at the petal tip.
🩷 Note: This piece is worked from a schematic in the original pattern. If you find the written description tricky to follow, search for a small crochet flower-leaf tutorial with dc clusters — the finished shape is a flat, six-pointed green top about 1 in across, exactly like a real strawberry cap.
Finishing: Fasten off, leaving a tail for sewing onto the strawberry.
Assembly Assembling Your Amigurumi Food Ice Cream Cone
Now comes the moment when five separate little pieces become one impossibly cute amigurumi food. Take your time with the positioning — especially on the glaze and strawberry — because that top layer is what everyone looks at first.
- Stuff both the cone and the ice cream scoop firmly before joining. The cone especially should feel solid — it’s the base that keeps everything upright.
- Join the scoop to the cone by sewing through the back loops of Row 26 of the cone and the free back loops of Row 17 of the ice cream scoop (the row just before the ruffle). Work all the way around the opening to create a clean, even seam. Take your time here — this join is the structural heart of the piece.
- Sew the glaze piece on top of the pink scoop. Center it carefully so the drips hang evenly all the way around. Pin it in place before sewing if that helps.
- Sew the green strawberry leaves onto the top of the red strawberry, positioning them flat against the top surface.
- Sew the finished strawberry on top of the glaze, right in the center. Make sure it’s secure — it’ll be the star of the whole piece.
For a beautiful, invisible seam on every join, our guide to sewing amigurumi parts together walks through exactly how to anchor, stitch, and finish each connection so nothing gaps or pulls.
Making It Extra Cute — The Finishing Details
Okay. This is my favorite section. This is where amigurumi food goes from really nice to completely irresistible. None of these steps are optional in my heart.
Embroidered strawberry seeds. Thread your tapestry needle with the thin yellow embroidery thread and add tiny scattered dots across the surface of the red strawberry. They don’t need to be perfectly even — real strawberry seeds aren’t! About 8–12 little dots, slightly elongated, scattered randomly over the upper half of the berry. This single embroidery detail takes maybe five minutes and completely transforms the strawberry from a red ball into a recognizable, detailed piece of amigurumi food. Don’t skip it.
Embroidered cheeks on the scoop. I add a tiny blush to almost everything I make, and this ice cream scoop is no exception. Using a length of soft pink yarn or pink embroidery thread, embroider two small oval shapes onto the front of the pink scoop — one on each side, just below center. Keep them soft and rounded, not too dark. This detail adds so much warmth and personality to the finished piece. Thread the yarn in from the back, make 3–4 satin stitches in a small oval shape, then bring the needle back through to the back and weave in the end.
An optional tiny face. If you want to go full kawaii, you can add a small embroidered smile to the scoop using black thread — two tiny curved lines for closed happy eyes and a small curved line for a smile. It turns this from a food prop into a character with feelings, and honestly? A smiling ice cream scoop is one of the most heartwarming things I’ve ever made.
Getting the glaze drips to sit right. After sewing the glaze in place, gently tug each drip so it hangs downward rather than flopping sideways. A tiny dab of craft stiffener on the tips of the longer drips can help them hold their shape — especially if you want it to look perfect for display or photos.
Color variations to try. this amigurumi food pattern is a pastel playground. Imagine the scoop in soft mint green with a pale lavender glaze and a blueberry on top. Or lavender scoop with a white glaze and a tiny yellow lemon. Or baby blue with a pink glaze. The cone stays beige in every version — that warm sandy color is the perfect neutral anchor for any color story you choose. Once you’ve made one, you’ll want to make a whole row of flavors. (I’m speaking from experience.)
Chloe’s Final Look 🩷
I finished my first one of these at almost midnight and held it under the lamp for a solid two minutes just admiring it. The way the ruffle sits around the base of the pink scoop, the way the white drips hang just right, the tiny red strawberry on top with its little yellow seed dots — it’s the complete picture of what amigurumi food is supposed to be. Try making three in a row: strawberry, mint, and lemon. Line them up on a windowsill or shelf and I promise you will not stop smiling at them. They are that kind of cute. 🩷
What yarn is best for an amigurumi food pattern like this?
A DK-weight cotton-acrylic blend like YarnArt Jeans works best — it gives crisp, defined stitches and creates a firm fabric that holds the amigurumi food shape without showing the stuffing underneath. A cotton substitute like Paintbox Simply DK gives the same clean finish.
How long does it take to crochet this ice cream cone amigurumi?
Most crocheters complete this pattern in 4–6 hours. The five separate parts can be worked in separate sessions, making it an ideal project to spread across a weekend.
Can beginners make this amigurumi food ice cream cone?
This pattern is rated Intermediate Beginner — if you’re comfortable with single crochet, magic rings, and basic increases and decreases, you can make it. The only trickier row is the glaze drip edge in Part 3, which is described in detail in the pattern.