Free Crochet Mermaid Amigurumi Pattern — Rosy-Cheeked Doll
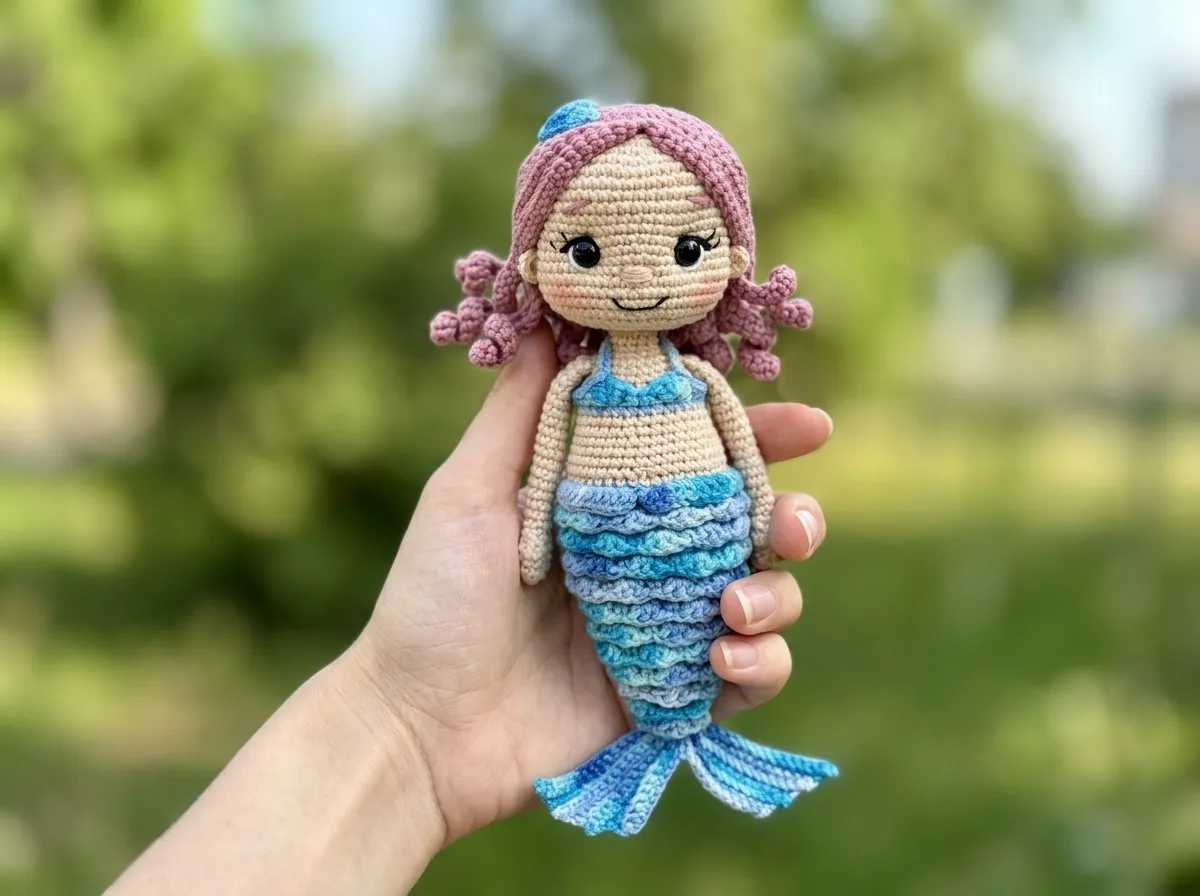
This free crochet mermaid pattern creates the most ethereal little amigurumi doll — a soft stone-toned figure with shimmering blue melange scales, a cascade of dusty pink curls, and the tiniest embroidered eyelashes you’ve ever seen. She has sculpted eyes and the softest blush dusted across her cheeks. This crochet mermaid is one of those pieces you finish and just stare at for a while. Let’s make her together.
🩷 Pattern Highlights
- Cuteness Rating: 🩷🩷🩷🩷🩷
- Finished Size: Approx. 5 in tall
- Difficulty: Intermediate
- Hook Size: 1.5mm
- Yarn Palette: warm stone (sandy skin tone), shimmering ocean blue melange (scales and tail), dusty rose (soft curly hair)
- Key Detail: sculpted eye sockets, embroidered eyelashes and eyebrows, blush-tinted cheeks and ears, and curly dusty-rose hair strands
- Estimated Time: 6–10 hours
What You’ll Need to Make This Crochet Mermaid
Yarn
- Blue melange (shimmering ocean blue) — DK / Light Worsted weight (3). This is the color that becomes her shimmering scales, beautiful tail, and delicate bodice details. US alternatives: Drops Muskat or Paintbox Simply DK Cotton in a blue variegated shade.
- Stone (warm sandy skin tone) — DK / Light Worsted weight (3). Used for the head, ears, arms, and upper body. US alternatives: Drops Muskat or Paintbox Simply DK Cotton in a neutral stone or sand shade.
- Dusty rose (the softest, most romantic pinkish blush) — DK / Light Worsted weight (3). This becomes her curly, cloud-like hair. US alternatives: Drops Muskat or Paintbox Simply DK Cotton in dusty rose or soft blush pink.
All three yarns are classified as DK / Light Worsted (CYCA 3) — smooth, even, and perfect for showing off tiny stitch details at a fine gauge.
Tools and Supplies
- 1.5mm crochet hook
- 8mm safety eyes (×2) — that deep, glossy finish is everything on this little face
- Polyester fiberfill for stuffing (Poly-Fil brand, available at Joann, Michaels, or Hobby Lobby)
- Tapestry needle
- Black embroidery floss (for eyelids, eyelashes, and embroidered mouth)
- White thread (for embroidered eye highlights)
- Brown thread (for embroidered eyebrows)
- Small amount of stone-colored yarn (for embroidering the nose)
- Dry pastel chalk or pressed blush powder + a small soft makeup brush (for cheek and ear tinting)
- Stitch markers
- Scissors
Abbreviations Used in This Pattern
| Abbreviation | Meaning |
|---|---|
| mr | magic ring |
| sc | single crochet |
| hdc | half double crochet |
| dc | double crochet |
| inc | increase (2 sc worked into the same stitch) |
| inv dec | invisible decrease (insert hook through front loops only of next 2 stitches simultaneously, yarn over, pull through, yarn over, pull through 2 loops) |
| sl st | slip stitch |
| ch | chain |
| BLO | back loop only |
| FLO | front loop only |
| bobble | 3-hdc bobble stitch: 3 half double crochets worked into the same stitch with a shared top loop |
🩷 Chloe’s Detail Tip: Every decrease in this pattern is worked as an invisible decrease (inv dec) — inserting your hook through the front loops only of the next two stitches. It keeps the surface of her body beautifully smooth and gap-free, which matters enormously on a doll with this much face detail. Our invisible decrease tutorial walks you through it step by step if you’d like a refresher before you start.
Before You Begin — Details That Make This Crochet Mermaid Extra Magical
This is not a quick-finish project, and I wouldn’t want it to be. She has eight separate parts, multiple color changes in the body, and some of the most detailed face embroidery I’ve ever worked on. Every single step is worth it when you see what she becomes. Here are a few things to keep in mind before your first stitch.
The BLO rows in the tail section create her scale texture. Those alternating back-loop-only rows aren’t just structural — they build up visible ridges that read exactly like mermaid scales when the piece is finished. Work them carefully and they’ll be one of the first things people notice.
Color changes happen three times in the body. The yarn shifts before Rows 27, 34, and 36, and each change creates a distinct visual zone: the shimmering blue tail, a transitional stone skirt section, a decorative blue band, and then the warm stone skin of the upper body and neck. It’s a beautiful effect that comes together gradually as you work. If color changes feel intimidating, our color change in amigurumi tutorial covers everything you need.
The safety eyes go in before you close the head — and their placement defines her entire expression. Insert the 8mm eyes between Rows 15 and 16, with 10 sc between them. Take a long look under a bright lamp before those washers click in. Once they’re in, they’re in. If you’d like help with positioning and securing safety eyes perfectly, our safety eyes tutorial has every detail covered.
The Crochet Mermaid Pattern
Head (×1)
Yarn: stone | Start: magic ring
Row 1: 6 sc in mr (6)
Row 2: 6 inc (12)
Row 3: (inc, 1 sc) × 6 (18)
Row 4: (inc, 2 sc) × 6 (24)
Row 5: (inc, 3 sc) × 6 (30)
Row 6: (inc, 4 sc) × 6 (36)
Row 7: (inc, 5 sc) × 6 (42)
Row 8: (inc, 6 sc) × 6 (48)
Rows 9–16: 48 sc (8 rows) (48)
Row 17: (inc, 7 sc) × 6 (54)
Rows 18–21: 54 sc (4 rows) (54)
Row 22: (inv dec, 7 sc) × 6 (48)
Row 23: 2 sc, (inv dec, 4 sc) × 7, inv dec, 2 sc (40)
Row 24: (inv dec, 3 sc) × 8 (32)
Row 25: 1 sc, (inv dec, 2 sc) × 7, inv dec, 1 sc (24)
Row 26: 12 inv dec (12)
🩷 Pattern Note: Stuff with fiberfill gradually as you go — a little at a time lets you shape the head as it forms. Insert the 8mm safety eyes between Rows 15 and 16 with 10 sc between them. Do this before the opening becomes too small to reach inside comfortably.
Cut the yarn and weave in ends.
Hair (×1)
Yarn: dusty rose | Start: magic ring
The moment this dusty rose cap starts to form, you’ll understand why I obsessed over the color choice. Against the warm stone of her skin, it looks like something out of a dream.
Row 1: 12 sc in mr (12)
Row 2: 12 inc (24)
Row 3: (ch 31, starting from the second chain from hook: 30 sc, 1 sc into the base) × 24 (creates 24 individual curly hair strands — stitch total not counted for this decorative row)
Cut the yarn, leaving a long tail for sewing. Pull the yarn tails tight to secure, tie, and hide the ends inside.
Ears (×2)
Yarn: stone | Start: magic ring
Row 1: 7 sc in mr (7)
Pull tight to close. Cut the yarn, leaving a long tail for sewing.
Arms (×2)
Yarn: stone | Start: magic ring
Row 1: 6 sc in mr (6)
Row 2: (inc, 1 sc) × 3 (9)
Row 3: (inc, 2 sc) × 3 (12)
Row 4: 12 sc (12)
Row 5: bobble, 11 sc (12)
Row 6: (inv dec, 1 sc) × 4 (8)
Rows 7–22: 8 sc (16 rows) (8)
🩷 Pattern Note: Do not stuff the arms. Fold each arm flat and crochet 4 sc across both layers to close. Set them aside — they will be joined directly into the body at Row 38.
Body (×1)
Yarn: blue melange and stone | Start: magic ring in blue melange
This is the heart of the whole pattern. The alternating BLO rows in the lower section build up those scale ridges one row at a time, and the color changes gradually transform a sparkling tail into a warm, skin-toned torso. Take your time here — it’s one of the most satisfying parts to watch develop.
🩷 Color Change Guide: Begin in blue melange. Switch to stone before Row 27. Switch back to blue melange before Row 34. Switch back to stone before Row 36.
Row 1: 6 sc in mr — blue melange (6)
Row 2: 6 inc (12)
Row 3: In BLO: (5 sc, inc) × 2 (14)
Row 4: 3 sc, inc, 6 sc, inc, 3 sc (16)
Row 5: In BLO: (7 sc, inc) × 2 (18)
Row 6: 4 sc, inc, 8 sc, inc, 4 sc (20)
Row 7: In BLO: (9 sc, inc) × 2 (22)
Row 8: 5 sc, inc, 10 sc, inc, 5 sc (24)
Row 9: In BLO: (11 sc, inc) × 2 (26)
Row 10: 6 sc, inc, 12 sc, inc, 6 sc (28)
Row 11: In BLO: (13 sc, inc) × 2 (30)
Row 12: 7 sc, inc, 14 sc, inc, 7 sc (32)
Row 13: In BLO: (15 sc, inc) × 2 (34)
Row 14: 8 sc, inc, 16 sc, inc, 8 sc (36)
Row 15: In BLO: (17 sc, inc) × 2 (38)
Row 16: 9 sc, inc, 18 sc, inc, 9 sc (40)
Row 17: In BLO: (19 sc, inc) × 2 (42)
Row 18: 10 sc, inc, 20 sc, inc, 10 sc (44)
Row 19: In BLO: (21 sc, inc) × 2 (46)
Row 20: 46 sc (46)
Row 21: In BLO: 46 sc (46)
Row 22: 46 sc (46)
Row 23: In BLO: 46 sc (46)
Row 24: (inv dec, 21 sc) × 2 (44)
Row 25: In BLO: 10 sc, inv dec, 20 sc, inv dec, 10 sc (42)
Row 26: 42 sc (42)
Row 27: In BLO: 42 sc — change to stone (42)
Row 28: 6 sc, (inv dec, 12 sc) × 2, inv dec, 6 sc (39)
Row 29: 39 sc (39)
Row 30: (inv dec, 11 sc) × 3 (36)
Row 31: 36 sc (36)
Row 32: (inv dec, 7 sc) × 4 (32)
Row 33: 32 sc (32)
Row 34: 32 sc — change to blue melange (32)
Row 35: In BLO: 32 sc (32)
Row 36: (inv dec, 6 sc) × 4 — change to stone (28)
Row 37: 28 sc (28)
Row 38: 5 sc, 4 sc together with the left arm, 10 sc, 4 sc together with the right arm, 5 sc (28)
Row 39: (inv dec, 5 sc) × 4 (24)
Row 40: 12 inv dec (12)
Rows 41–43: 12 sc (3 rows) (12)
🩷 Pattern Note: Stuff with fiberfill gradually as you work up the body. Keep your stitch marker at the center back throughout. Stuff the neck section (Rows 41–43) firmly so the head sits upright and proud. Row 38 is the moment you join the arms — make sure both are oriented correctly before you crochet them in.
Cut the yarn, leaving a long tail for sewing to the head.
Tail Edging
Yarn: blue melange | Attach at center back, working in FLO in a spiral
This is where her tail becomes something truly magical. The shell-stitch edging rows create a layered, dimensional scale effect, and the tail fin at the end gives her that perfect mermaid silhouette.
Row 1: 19 dc, (3 dc in 1 stitch), ch 2, 2 sl st, ch 2, (3 dc in 1 stitch), 19 dc
Rows 2–12: (skip 1 stitch, 3 dc in 1 stitch, skip 1 stitch, 1 sc) repeated — 11 rows
Row 13 — Tail Fin: Working into the last row of the body, crochet the tail fin in turning rows: ch 16, starting from the second chain from hook: 15 sc, 1 sc in FLO, turn, 14 sc in BLO, turn, 13 sc in BLO, 1 sc in FLO, turn, 12 sc in BLO, turn, 11 sc in BLO, 1 sc in FLO, turn, 10 sc in BLO, turn, 9 sc in BLO, 1 sc in FLO. ch 10, starting from the second chain from hook: 9 sc, 1 sc in FLO, turn, 9 sc in BLO, ch 3, starting from the second chain from hook: 11 sc in BLO, 1 sc in FLO, turn, 11 sc in BLO, ch 3, starting from the second chain from hook: 13 sc in BLO, 1 sc in FLO, turn, 13 sc in BLO, ch 3, starting from the second chain from hook: 15 sc in BLO, 1 sl st in FLO.
Cut the yarn and weave in ends.
Bodice Edging
Yarn: blue melange | Attach at center back of the bodice area
Two short rows that frame her upper body in the prettiest way — a fan-stitch shell along the top edge and a delicate chain strap that ties it all together.
Row 1: 12 sc, skip 1 stitch, (5 dc in 1 stitch), skip 1 stitch, 2 sc, skip 1 stitch, (5 dc in 1 stitch), skip 1 stitch, 12 sc (36)
Row 2: 15 sl st, ch 20, skip 6 sc, 15 sl st
Cut the yarn and weave in ends.
Shell (×1, Decoration)
Yarn: blue melange | Start: ch 7, work into the third chain from hook, in turning rows — all stitches in BLO
Five tiny turning rows create the sweetest curved shell shape — just the right size to nestle into her dusty rose hair. I may have made an extra one just to keep.
Row 1: In BLO: 1 dc, 1 hdc, 1 sc, 2 sl st, ch 1 (5)
Row 2: In BLO: 2 sl st, 1 sc, 1 hdc, 1 dc (5)
Row 3: In BLO: 1 dc, 1 hdc, 1 sc, 2 sl st, ch 1 (5)
Row 4: In BLO: 2 sl st, 1 sc, 1 hdc, 1 dc (5)
Row 5: In BLO: 1 dc, 1 hdc, 1 sc, 2 sl st, ch 1 (5)
Cut the yarn, leaving a long tail for sewing.
Assembling Your Crochet Mermaid
- Eye sculpting — do this before any face decoration: Marks 1 and 4 are located between Rows 25 and 26 of the head, with 1 sc between them. Insert the needle at point 1, bring it out at point 2 (near the eye), insert at point 3, and bring it out at point 4. Work the second eye the same way, using the sequence 1–5–6–4. Gently pull the yarn tails to create soft, recessed eye sockets, tie securely, and hide the ends inside the head.
- Sew the ears: Attach each ear to the head between Rows 16 and 18, at a distance of 7 sc from the nearest eye.
- Sew the hair: Position the dusty rose hair cap on top of the head with the strands falling naturally around the face and down the back. Sew it securely into place all the way around the base.
- Sew the head to the body: Complete all face embroidery and decoration first (see below), then attach the finished head to the neck of the body, aligning the center front carefully.
- Attach the shell: Tuck the tiny blue melange shell into the hair at a sweet angle and stitch it down.
For everything you need to know about sewing amigurumi parts together cleanly — including how to hide yarn tails so no seam ever shows — our guide to sewing amigurumi parts has you covered.
Making your crochet mermaid Extra Cute — The Finishing Details
This is the section I’ve been thinking about since Row 1. The face is everything on this little mermaid, and it has more layered detail than almost any piece I’ve worked. There’s embroidery, highlights, brow work, and soft dusted blush — and together they turn a beautifully crocheted doll into something that genuinely looks like it has a soul. Take your time here. This is where she goes from finished to irresistible.
Embroidered Nose
Mark a width of 3 sc between Rows 17 and 18 of the head. Thread your tapestry needle with stone-colored yarn folded in half and embroider the nose with 3–4 short horizontal stitches. Keep it small and delicate — the goal is just a whisper of a nose, not a bold feature. Tiny and sweet is everything.
Eye Whites
Using white thread, embroider a small highlight arc along the outer or lower edge of each safety eye. It’s such a small step and such an enormous difference — the eyes suddenly look glossy, reflective, and alive instead of flat. This is the detail that makes people lean in closer when they look at her.
Eyelashes and Eyebrows
Using two strands of black embroidery floss, embroider soft, curved lashes above each eye — a few individual stitches fanning upward from the outer edge looks the most natural. Then switch to brown thread for thin, gently arched eyebrows just above them. Keep both sides as symmetrical as you can; this combination of lashes and brows is what gives her that serene, dreamy expression.
Embroidered Mouth
Using two strands of black embroidery floss, embroider a small curved smile a few rows below the nose. A very slight upturn at each corner gives her that calm, contented expression — like she’s in the middle of a very good daydream under the sea.
Blush — The Detail That Truly Brings Her to Life
Using dry pastel chalk or soft pressed blush and a small makeup brush, dust a gentle rose-pink circle onto each cheek, lightly across the tip of the nose, and a soft bloom across the ears. Layer it slowly — start light and build up. This is my absolute favourite finishing step. The moment the blush goes on, she suddenly looks warm and alive in a way that takes your breath away a little.
🩷 Chloe’s Detail Tip: Before you press those safety eye washers in, hold the head under a bright lamp and look at it straight on. Check that both eyes sit at exactly the same height, the same distance from center, and that the pupils face the same direction. That extra thirty seconds of checking is the most important step in the entire pattern. Once those washers click, her expression is set — and you want it to be perfect.
Color Variations Worth Dreaming About
She is stunning in the original ocean blue melange with dusty rose hair — but close your eyes and imagine her in soft mint green scales with lavender curls, or pale coral with golden yellow hair and cream skin. Every colorway gives her a completely different personality. I’m already planning a trio in pastel shades to sit on a shelf together like sisters from different seas.
Chloe’s Final Look
I’ve been staring at this finished little mermaid for an embarrassing amount of time and I regret nothing. The scale ridges on her tail, the way the dusty rose curls frame her face, those tiny embroidered lashes catching the light — every detail comes together into something that feels almost too precious to set down. Display her on a shelf, nestle her in a little ocean-themed vignette with some tiny coral, or make three in different colorways and line them up like they’re waiting for the tide to come in. 🩷
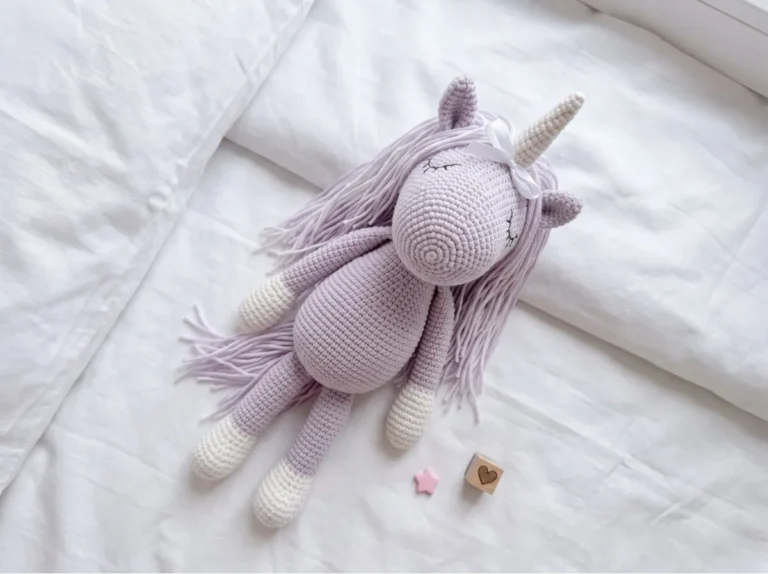
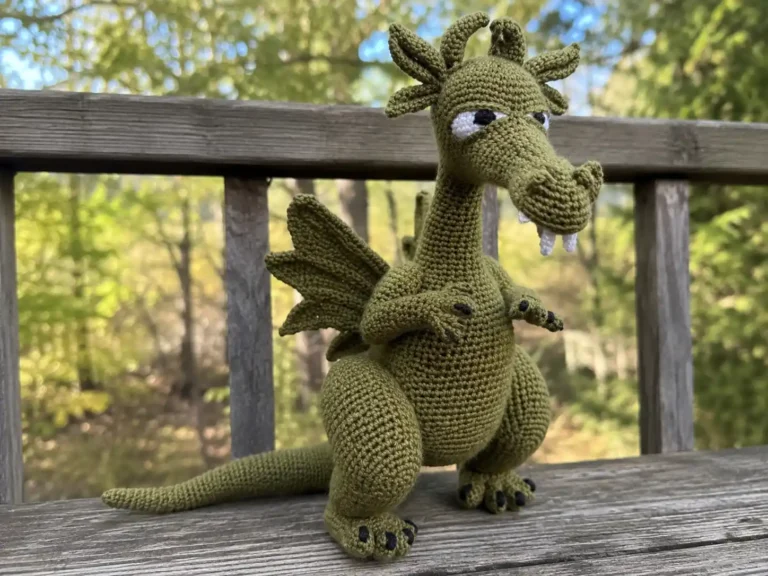
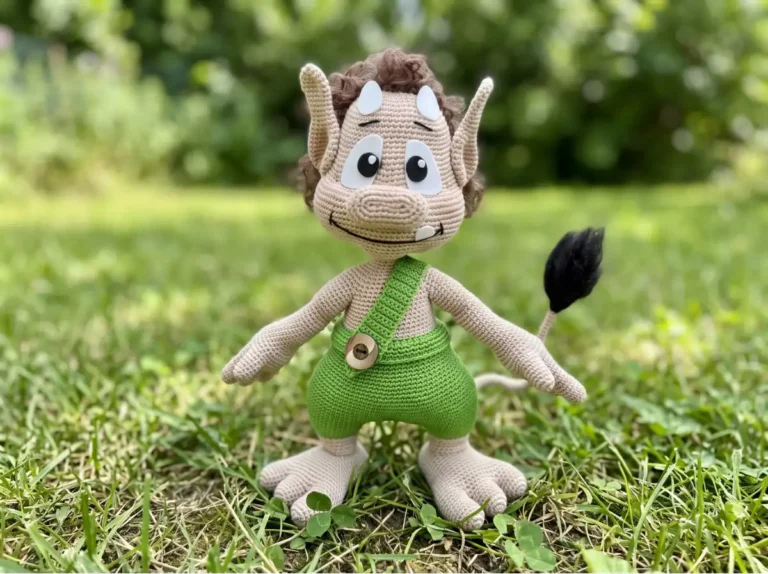
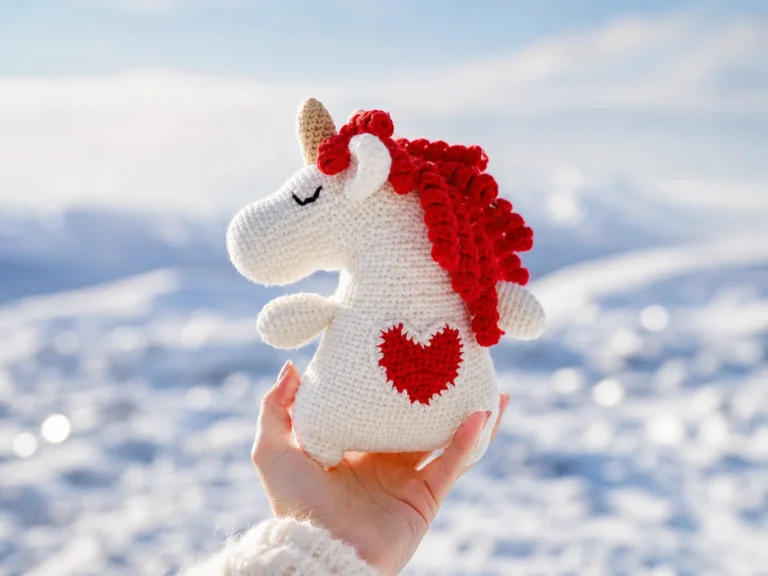
If you love detailed character amigurumi like this one, our free unicorn amigurumi pattern and the enchanting Vesper the Forest Dragon bring the same level of magic — each one a tiny world of their own.
What yarn is best for this crochet mermaid?
DK or Light Worsted weight (CYCA 3) cotton yarn is ideal. The pattern recommends smooth yarns like Drops Muskat or Paintbox Simply DK Cotton for the best stitch definition.
How long does it take to crochet this mermaid?
This is an intermediate project with detailed face embroidery, multiple color changes, and eight separate parts. It takes approximately 6 to 10 hours to complete.
Can beginners make this crochet mermaid pattern?
This pattern is rated as intermediate. While it uses basic stitches, the intricate facial embroidery, color changes, and tiny 1.5mm gauge require some prior amigurumi experience.