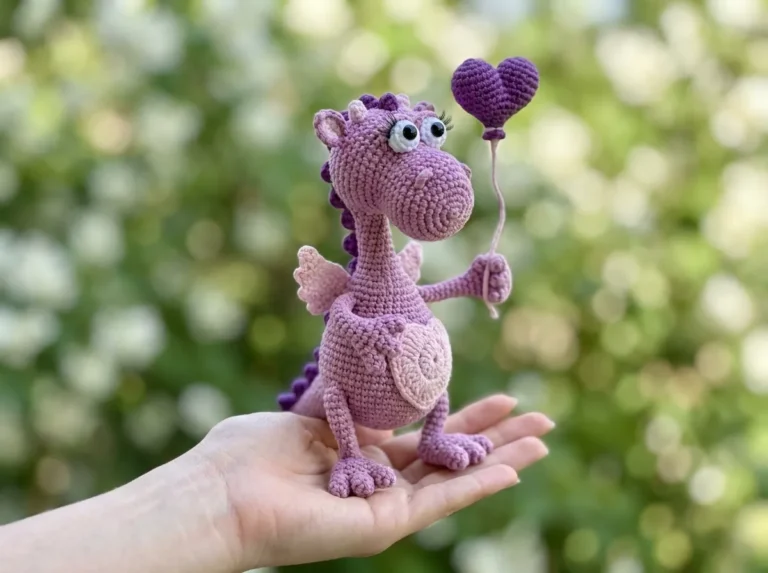
Free Dragon Crochet Pattern — Squishy Chenille Amigurumi with Rosy Cheeks
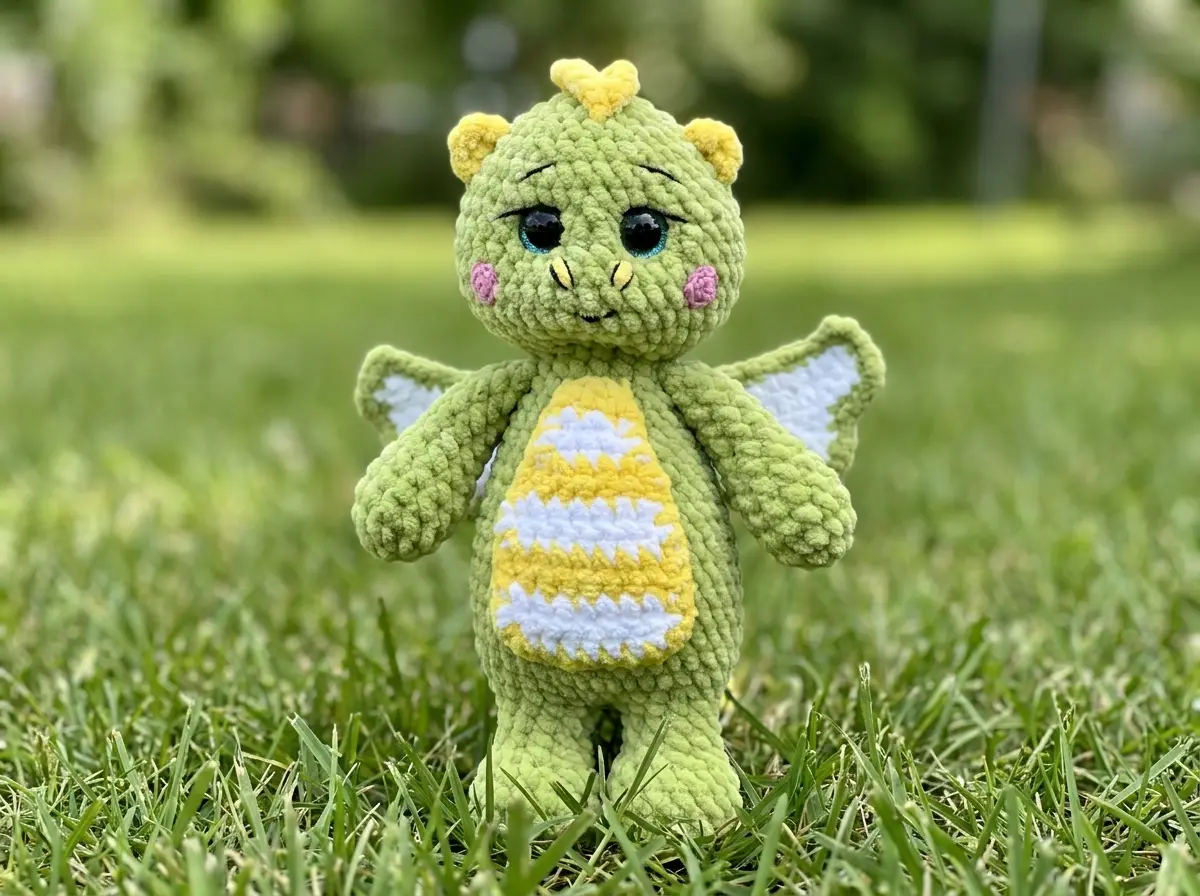
This dragon crochet pattern free for absolute keeps — soft chenille body, a striped little tummy, pastel wings, and the glossiest 16mm safety eyes you’ve ever pressed into anything. This free dragon crochet pattern creates a squishy, palm-filling amigurumi that stands around 9–10 in tall once assembled, with spines running all the way from the tip of the tail to the top of the head. It’s one of those pieces that genuinely stops people in their tracks. Let’s make it together.
🩷 Pattern Highlights
- Cuteness Rating: 🩷🩷🩷🩷🩷
- Finished Size: 9–10 in (23–25 cm)
- Difficulty: Intermediate
- Hook Size: G/6 (4.0 mm)
- Yarn Palette: soft main color chenille (try dusty sage, powder blue, or lavender), two contrast chenille shades for the tummy stripes and spines, pink cotton DK for the cheeks
- Key Detail: crocheted striped tummy, layered contrast wings, dorsal spines along the full back, embroidered face details, and 16mm glossy safety eyes
- Estimated Time: 8–12 hours
Materials for This Free Dragon Crochet Pattern
- Main color yarn — Bulky (5) chenille, approx. 1.5 skeins (approx. 180 yds / 164 m total). US options: Premier Parfait or Bernat Baby Velvet. Try a soft dusty lavender, sage green, or powder blue — chenille in pastel shades is just unreal.
- Contrast color 1 — same chenille weight, ¼ skein. This becomes part of the tummy stripes. A warm cream or soft white pairs beautifully.
- Contrast color 2 — same chenille weight, ¼ skein. Used for the tummy stripes and the dorsal spines. Try a blush pink, pale peach, or mint to echo the cheeks.
- Black DK cotton — small amount. US options: Drops Muskat or Paintbox Cotton DK. For embroidering the eyelashes, eyebrows, and nostrils.
- Pink DK cotton — small amount. For the crocheted cheek rounds and any extra embroidered detail around the face.
- Hook: G/6 (4.0 mm)
- 16mm safety eyes — two. At this size they give the dragon an enormous, wide-eyed expression. Absolutely precious.
- Polyfill stuffing — available at Joann, Michaels, or Hobby Lobby. You’ll need a generous amount for the body and head.
- Strong thread — for the eye-cinching technique that shapes the muzzle (details in Assembly).
- Tapestry needle, stitch markers, scissors, straight pins
This yarn is classified as Bulky (5) chenille — the plush, velvety weight that gives amigurumi that irresistibly soft, stuffed-animal quality. Chenille hides stitch definition, which means your gauge doesn’t have to be flawless — it just has to be consistent and tight enough that stuffing doesn’t peek through.
Abbreviations Used in This Dragon Crochet Pattern
| Abbreviation | Meaning |
|---|---|
| ch | chain |
| sc | single crochet |
| hdc | half double crochet |
| dc | double crochet |
| sl st | slip stitch |
| mr | magic ring |
| inc | increase (2 sc in same stitch) |
| dec | invisible decrease (insert hook through front loops only of next 2 stitches) |
| hdc-inc | half double crochet increase (2 hdc in same stitch) |
| dc-inc | double crochet increase (2 dc in same stitch) |
| FLO | front loop only |
| BLO | back loop only |
| FO | fasten off |
Before You Begin — Details That Make This Dragon Extra Cute
This is an intermediate pattern with quite a few separate parts. Read through the full assembly section before you start crocheting — knowing how the pieces connect will help you leave the right yarn tails and position things perfectly. Here are the details that will take your dragon from sweet to showstopping.
The tummy is worked flat in turning rows. Unlike the rest of the dragon, this piece is not worked in continuous rounds — it’s a flat striped panel that gets sewn on. The color changes are part of the row sequence, so pay attention to which contrast color belongs to each row. The stripe pattern is what gives this little dragon its personality.
Each wing is made from two layers. You’ll crochet each wing piece twice — once in contrast color, once in main color — then layer them and sc around the outline to join them. This gives the wings a two-tone look with a neat edged finish. So satisfying to watch them come together.
The safety eyes go in before you finish closing the head. Insert them between Rows 37 and 38 of the Body and Head section, with 6–7 stitches between them. At 16mm, these eyes are big and expressive — take your time positioning them. If you’ve never worked with safety eyes before, our safety eyes tutorial walks you through exactly how to position and lock them so they’re perfectly even.
🩷 Chloe’s Detail Tip: Before you snap those 16mm washers in, hold the head under a bright lamp and check from directly in front. At this size, even a one-stitch difference reads clearly on the finished face. Take the extra thirty seconds — you’ll be so glad you did.
All decreases in this pattern use the invisible decrease method (inserting through front loops only of the next two stitches). Our invisible decrease tutorial shows you exactly how — it keeps the fabric smooth and gap-free, especially important in chenille where any opening really shows.
The Free Dragon Crochet Pattern
Tail (×1) — main color
Start with a magic ring. Work in continuous rounds.
Row 1: 6 sc in mr (6)
Row 2: 1 sc, inc, 2 sc, inc, 1 sc (8)
Row 3: 8 sc (8)
Row 4: (3 sc, inc) × 2 (10)
Row 5: 10 sc (10)
Row 6: 2 sc, inc, 4 sc, inc, 2 sc (12)
Row 7: 12 sc (12)
Row 8: (5 sc, inc) × 2 (14)
Row 9: 14 sc (14)
Row 10: 3 sc, inc, 6 sc, inc, 3 sc (16)
Row 11: (7 sc, inc) × 2 (18)
Row 12: 18 sc (18)
FO, cut yarn. Do not stuff the tail yet — it gets joined into the body at Row 13.
Arms (×2) — main color
The little paws start round and taper into the sweetest stubby arms. Make two.
Row 1: 6 sc in mr (6)
Row 2: 6 inc (12)
Rows 3–5: 12 sc (3 rows) (12)
Row 6: (2 sc, dec) × 3 (9)
Rows 7–11: 9 sc (5 rows) (9)
Row 12: (1 sc, dec) × 3 (6)
Row 13: Fold the arm in half and sc through both edges: 3 sc (3)
Stuff as you go through Row 8, then leave the upper portion unstuffed so the arm sits flat when joined. FO, cut yarn.
Tummy (×1) — contrast color 1 and contrast color 2
This is the only piece worked flat in turning rows, with a ch 1 turn at the end of each row. The stripe sequence is built into the row order — rows 1, 2, 3, 6, 7, and 12 in contrast color 1; rows 4, 5, 8, 9, 10, and 11 in contrast color 2. Read the color note carefully before starting.
Start with ch 4.
Row 1: sc in 2nd ch from hook and in each ch across, ch 1 (3)
Row 2: 1 sc, inc, 1 sc, ch 1 (4)
Row 3: 4 sc, ch 1 (4)
Row 4: inc, 2 sc, inc, ch 1 (6)
Row 5: 6 sc, ch 1 (6)
Row 6: inc, 4 sc, inc, ch 1 (8)
Row 7: 8 sc, ch 1 (8)
Rows 8–9: 8 sc, ch 1 (2 rows) (8)
Rows 10–11: 8 sc, ch 1 (2 rows) (8)
Row 12: 8 sc, then continue working sc edging around the three remaining sides of the tummy; work 2 sc in each corner.
After Row 11, fasten off contrast color 2. FO after the edging, leaving a long tail for sewing.
🩷 Chloe’s Detail Tip: When the two contrast colors play against each other in those tummy stripes, the palette of your whole dragon clicks into place. A cream-and-blush stripe combo on a sage main color? Genuinely irresistible.
Wings (×2) — main color and contrast color
Each finished wing is made from two separate pieces layered together. Make the contrast color piece first (cut yarn when done), then the main color piece (don’t cut yarn). Layer contrast on top of main, then sc around the entire outline to join them, working 3 sc into each outer corner for a clean edge.
Start each piece with ch 15.
Row 1: sc in 2nd ch from hook and in each ch across, ch 1 (14)
Row 2: 8 sc, 6 sl st, ch 1 (14)
Row 3: 11 sc, ch 1 (11)
Row 4: 5 sc, 6 sl st, ch 1 (11)
Row 5: 8 sc, ch 1 (8)
Row 6: 3 sc, 5 sl st (8)
Layer the two pieces with contrast on top, then sc around the full outline with the main color yarn (still attached). Work 3 sc into each outer corner. FO, leaving a long tail for sewing. Make two complete wings.
Ears (×2) — contrast color
Tiny and sweet — just one round each.
Row 1: 6 sc in mr (6)
FO, leaving a long tail for sewing. Make two.
Cheeks (×2) — pink DK cotton
These little pink circles are the finishing touch that make the whole face sing.
Row 1: 7 sc in mr, join round with sl st (7)
FO, leaving a long tail for sewing. Make two.
Left Leg (×1) — main color
Row 1: 6 sc in mr (6)
Row 2: 6 inc (12)
Row 3: (3 sc, inc) × 3 (15)
Rows 4–6: 15 sc (3 rows) (15)
Row 7: 5 sc, 5 dec (10)
Rows 8–9: 10 sc (2 rows) (10)
End Row 9 at the center of the inner side of the leg — work 1–2 sc more or less to align the yarn position there, then work 1 sl st. FO, cut yarn.
Right Leg (×1) — main color
Row 1: 6 sc in mr (6)
Row 2: 6 inc (12)
Row 3: (3 sc, inc) × 3 (15)
Rows 4–6: 15 sc (3 rows) (15)
Row 7: 5 dec, 5 sc (10)
Rows 8–9: 10 sc (2 rows) (10)
End Row 9 at the center of the inner side of the leg. Do not cut yarn — you’ll continue directly into the Body and Head from here.
Body and Head (×1) — main color
This is the heart of the pattern. The body grows up from the joined legs, the tail merges in at Row 13, the arms are folded in at Row 28, and then the head blooms out from Row 30. Keep your stitch marker moving — you’ll need it especially around Rows 13–18 when a lot is happening at once.
Row 10: Ch 2, join to left leg (at sl st). 10 sc around left leg, 2 sc across chain, 10 sc around right leg, 2 sc across chain (24)
Row 11: (3 sc, inc) × 6 (30)
Row 12: 2 sc, inc, (4 sc, inc) × 5, 2 sc (36)
Row 13: (5 sc, inc) × 2, 4 sc, (inc, 5 sc) × 2, 8 sc joining body to tail (40)
🩷 Note (Row 13): The tail is joined by working 8 sc into the open stitches at the top of the tail piece, at the center back of the body. Place the tail inside the body opening and sc through both layers for those 8 stitches.
Row 14: 32 sc around body, 10 sc around tail (42)
Row 15: 32 sc, dec, 6 sc, dec (40)
Rows 16–17: 40 sc (2 rows) (40)
Row 18: Work an incomplete row (approx. 37 sc) to shift the stitch marker to the center of the back.
🩷 Note (Row 18): Watch your round marker here — it should run straight down the center of the back. This is important for the spine placement later.
Row 19: 9 sc, dec, 18 sc, dec, 9 sc (38)
Row 20: 8 sc, dec, 18 sc, dec, 8 sc (36)
Row 21: (7 sc, dec) × 4 (32)
Row 22: 32 sc (32)
Row 23: 3 sc, dec, (6 sc, dec) × 3, 3 sc (28)
Row 24: 28 sc (28)
Row 25: (5 sc, dec) × 4 (24)
Row 26: 24 sc (24)
Row 27: (2 sc, dec) × 6 (18)
Row 28: 3 sc, 3 sc joining arm, 6 sc, 3 sc joining arm, 3 sc (18)
🩷 Note (Row 28): For each arm join, hold the flattened end of the arm against the body opening and sc through both layers for 3 stitches. This locks the arms right into the body structure — no sewing needed for the arms.
Row 29: 18 sc (18)
This is where the body closes and the head begins — the satisfying moment where this little creature starts to take shape.
Row 30: 18 inc (36)
Row 31: (5 sc, inc) × 6 (42)
Rows 32–37: 42 sc (6 rows) (42)
🩷 Safety Eyes — Insert Now: Before Row 38, insert your 16mm safety eyes between Rows 37 and 38, with 6–7 stitches between them. Stuff the head partially, check your eye placement from the front and both sides, then press the washers firmly. Once you’re happy — and this is the most important check in the whole pattern — continue.
Row 38: (5 sc, dec) × 6 (36)
Rows 39–40: 36 sc (2 rows) (36)
Row 41: 2 sc, dec, (4 sc, dec) × 5, 2 sc (30)
Row 42: (3 sc, dec) × 6 (24)
Row 43: 1 sc, dec, (2 sc, dec) × 5, 1 sc (18)
Row 44: (1 sc, dec) × 6 (12)
Row 45: 6 dec (6)
FO, cut yarn, and pull the closing tail through the remaining 6 stitches to close. Stuff firmly as you go — our stuffing guide shows how to build shape without lumps, which matters a lot for the rounded head and chunky body of this dragon.
Spines — contrast color 2
The spines run all the way up the back from the tail base to the top of the head, worked directly onto the finished body. This is the detail that makes you go “oh” when you see the finished piece.
Row 1: Starting from the base of the tail, work a row of sl st up along the back to Rows 42–43 at the front of the head.
Row 2 (head spines): (1 sc, hdc-inc, dc-inc, hdc-inc, 1 sc, sl st) × 3, then sc.
Row 3 (body spines): (1 sc, hdc, dc-inc, hdc, 1 sc, sl st) × 4.
🩷 Spine Note: After the first row of sl sts worked into the back loops, turn the work and work the mirror-image spines in the opposite direction into the second row of loops. This creates a mirrored ridge along the center back — the finishing detail that makes the whole silhouette.
Join the last spine to the first with a sl st. FO and weave in all ends.
Assembly
- Eye cinching (muzzle shaping): Thread a strong thread and pass it through the marked points on the face to shape the muzzle. First pass: points 1→3, 4→2, 1→5, 6→2. Second pass: 1→4, 7→2 and 1→6, 8→2. This gently cinches the fabric into a soft muzzle shape and aligns the eyes. Pull with consistent tension on both sides.
- Ears: Sew on 3 rows away from the first spine, one on each side of the head. Use straight pins to test position before committing — symmetry matters here as much as the eyes.
- Tummy: Sew the striped tummy panel onto the front of the body, starting 2 rows down from the base of the head. The long sewing tail from Row 12 is your main stitching thread. Take your time — the amigurumi parts tutorial shows exactly how to mattress stitch a flat panel smoothly.
- Wings: Sew at the base of the spines, 3 rows down from the base of the head, one on each side. Use straight pins to mirror the position on both sides before sewing.
- Cheeks: Sew the two pink crocheted circles onto the sides of the muzzle, below and slightly outside the eyes.
Making It Extra Cute — Finishing Details
This is the section I get the most excited about. The dragon looks lovely after assembly — but these final embroidery details are what give it a face, a personality, and that undeniable kawaii quality.
Eyelashes: Using black DK cotton and a tapestry needle, embroider 2–3 short diagonal stitches above each eye. Keep them small and symmetrical — eyelashes too long look heavy; the right size makes the eyes look bright and expressive.
Eyebrows: Two small angled stitches just above the eyelash line. A slight upward tilt gives a curious, friendly expression. A slight inward tilt gives a determined little scowl. You decide the personality.
Nostrils: Embroider two small stitches or French knots in contrast color yarn at the tip of the muzzle. Not too big — just enough to read as nostrils without overwhelming the face.
Mouth: A simple upward-curved stitch in black DK cotton. The curve matters — even a tiny upturn reads as a smile from across a room.
🩷 Chloe’s Detail Tip: Do all your face embroidery before sewing the cheek circles on. The cheeks partially frame the face, so getting the eyes, brows, and mouth placed first lets you use the cheeks to balance the final composition. It makes a real difference.
Color palette variations: The chenille takes color beautifully. A mint green dragon with cream and blush tummy stripes and pink spines is impossibly sweet. A lavender dragon with white and lilac stripes has a dreamy, ethereal quality. A soft peach dragon with cream and pale yellow stripes reads almost like a little sunrise. Any combination with the pink cheek circles works — the cheeks are the constant.
Chloe’s Final Look
There’s something about this little dragon that just stops me every time I look at it — the way the spines catch the light running all the way from that tiny tail tip to the top of the head, those enormous 16mm eyes with the muzzle cinched just so, the striped tummy peeking out from the front. It’s a lot of parts and it takes a little love to put together, but finished? Absolute showpiece.
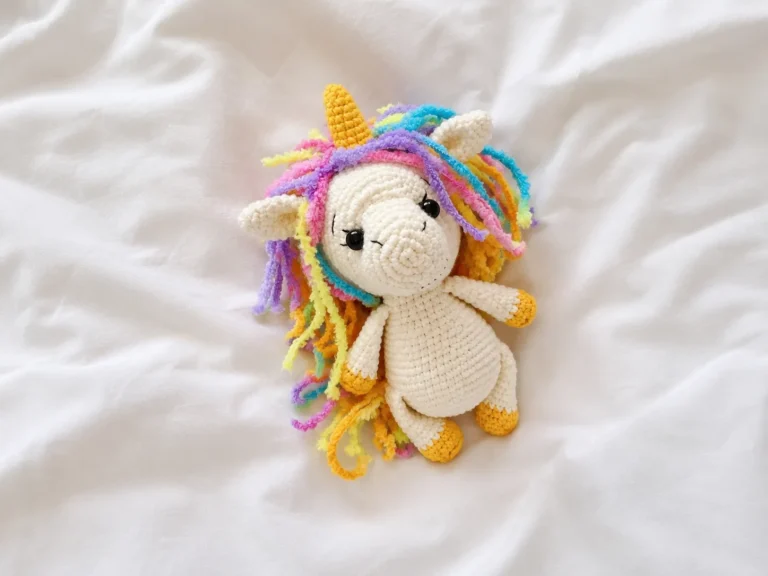
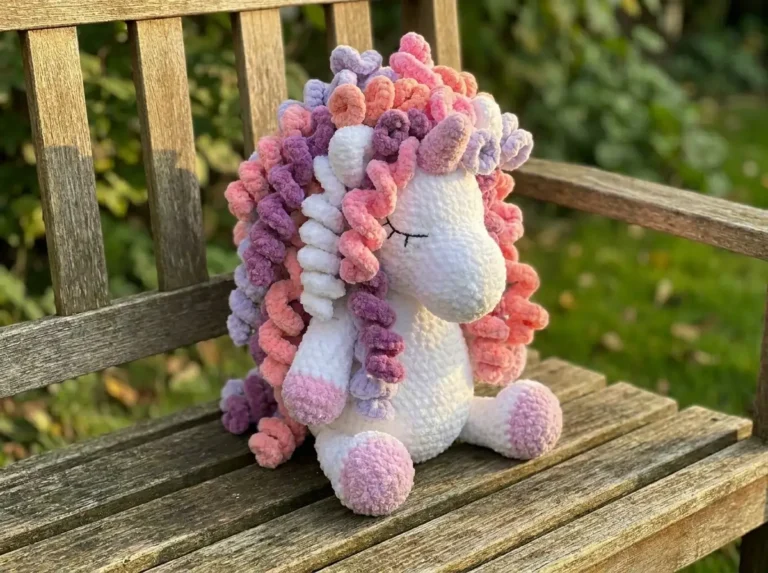
Make it in a soft dusty blue with cream and pale pink stripes and it looks like it came from a fairy tale. Make it in sage green with mint and white and it looks like something that lives in a mossy forest. Line it up next to our fluffy unicorn amigurumi for a fantasy shelf display that will genuinely make you smile every morning. 🩷
What is the best yarn for this dragon crochet pattern free?
Bulky (5) chenille yarn like Premier Parfait or Bernat Baby Velvet is ideal for achieving the squishy, soft texture shown in this pattern.
How long does it take to finish this amigurumi dragon?
Depending on your skill level, this intermediate pattern typically takes between 8 to 12 hours to complete, including assembly and embroidery.
What size safety eyes should I use for this dragon?
We recommend 16mm safety eyes. This specific size creates the wide-eyed, “kawaii” expression that makes this dragon so adorable.