Meet Your New Favorite Free Cat Crochet Pattern
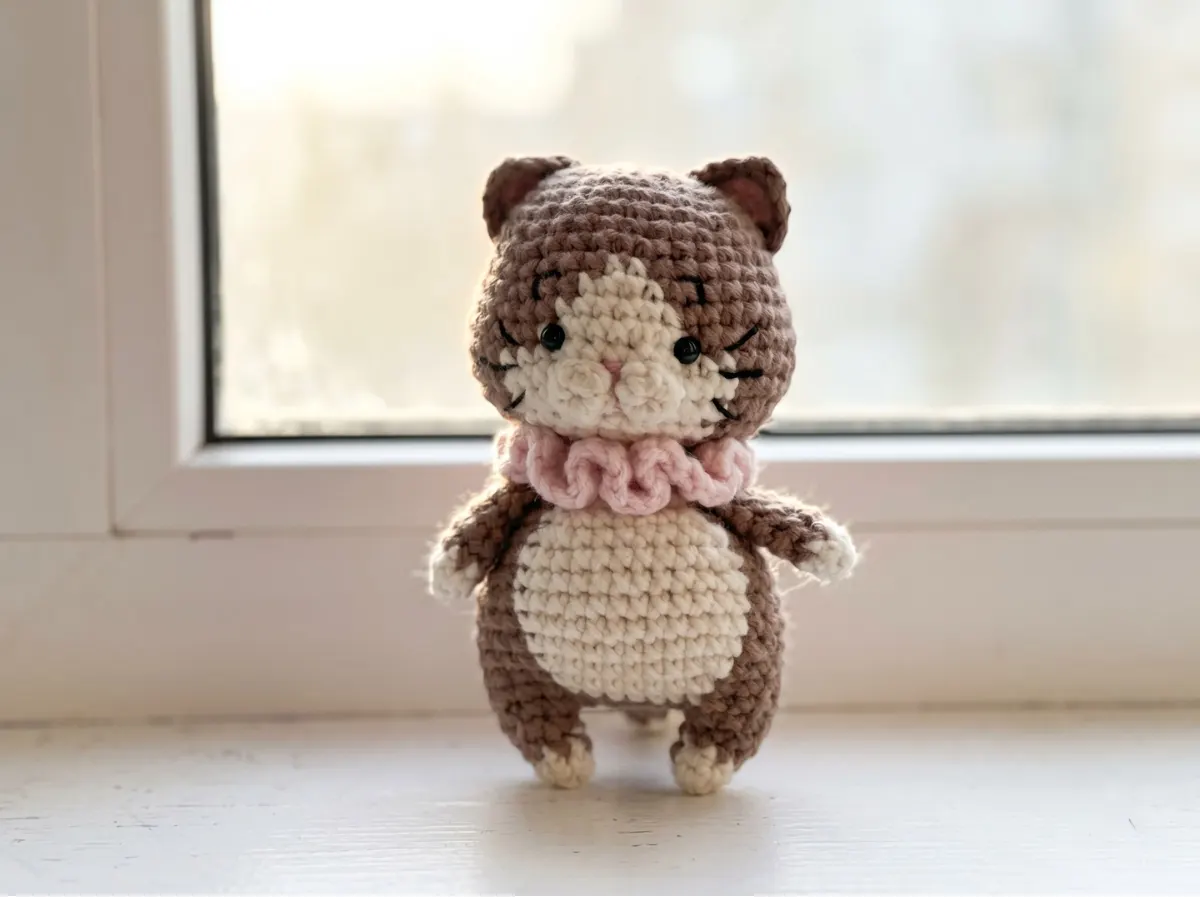
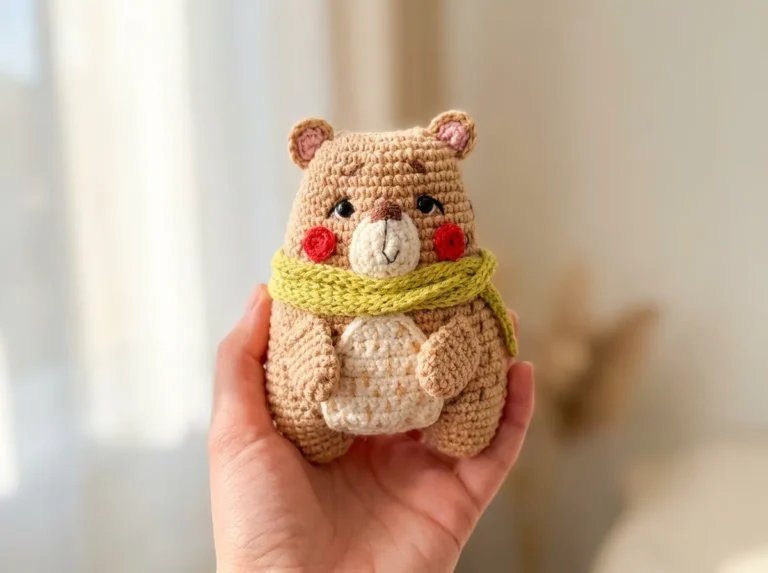
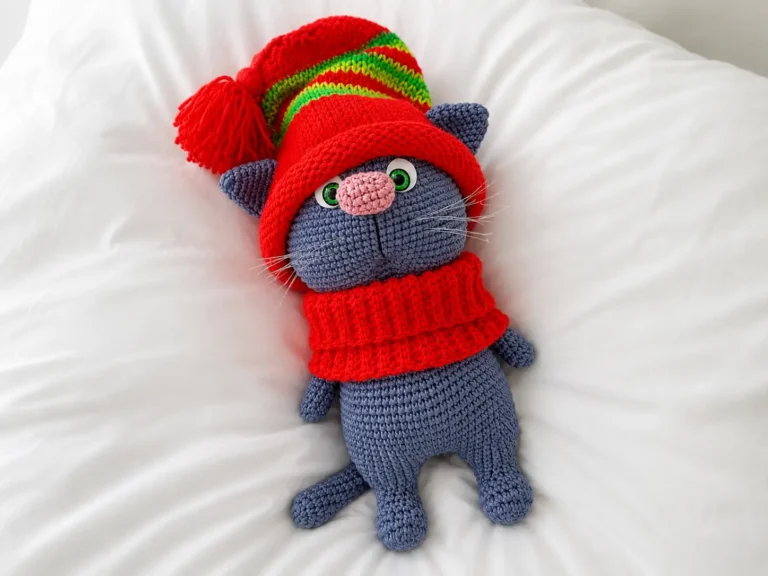
This free cat crochet pattern creates the most irresistible tiny kitty — warm coffee-brown fur, a ruffled pink collar, and two glossy eyes that catch the light in the most heart-melting way. At just 3.9 in tall, this cat crochet pattern is completely free and fits right in your palm. The twin white muzzle circles, embroidered whiskers, and blush-pink cheeks are what make this one completely special. Let me show you how it all comes together. 🩷
🩷 Pattern Highlights
- Cuteness Rating: 🩷🩷🩷🩷🩷
- Finished Size: 3.9 in (10 cm)
- Difficulty: Intermediate
- Hook Size: 2.0mm (fine steel hook)
- Yarn Palette: warm coffee brown, creamy off-white, soft blush pink
- Key Detail: twin white muzzle circles, embroidered black whiskers, and a frilly ruffled collar
- Estimated Time: 3–5 hours
What You’ll Need for This Cat Crochet Pattern Free
The color palette for this little kitty is what I love most about it — that deep, warm coffee brown against the creamy off-white belly is such a classic combination, and the blush pink collar gives it a personality all its own.
- Yarn — Warm Coffee Brown (main color): DK/Light Worsted (CYCA 3) cotton blend, such as YarnArt Jeans. US alternatives: Drops Muskat or Paintbox Cotton DK. This is the main body, outer ears, and outer paws.
- Yarn — Creamy Off-White: Same weight as above. Used for the belly, inner legs, muzzle circles, and tail tip. That soft contrast is everything.
- Yarn — Soft Blush Pink: Same weight. Used for the frilly collar and the embroidered nose. The tiniest pop of pink and the whole thing transforms.
- Yarn — Matte Black (small amount): Embroidery thread or fine yarn for stitching the whiskers and eyebrows.
- Hook: 2.0mm fine steel crochet hook
- Safety Eyes: 2 glossy black safety eyes, 8mm or 9mm. The right size gives this face its whole expression — see my tips below.
- Stuffing: Polyester fiberfill (Poly-Fil by Fairfield is widely available at Michaels and Joann)
- Tapestry Needle: For sewing parts and weaving in ends
- Stitch Markers: At least 2 — non-negotiable for tracking continuous rounds
🩷 Chloe’s Yarn Note: This pattern uses a fine 2.0mm steel hook intentionally — it creates a beautifully tight fabric that keeps the stuffing from peeking through and gives every stitch that crisp, defined look. YarnArt Jeans is a cotton-acrylic blend classified as DK / Light Worsted (3) — smooth, slightly firm, and absolutely perfect for small amigurumi details.
Abbreviations
| Abbreviation | Meaning |
|---|---|
| mr | magic ring |
| sc | single crochet |
| inc | increase — 2 sc worked into the same stitch |
| inv dec | invisible decrease — insert hook through front loops only of next 2 stitches simultaneously, yarn over, pull through, yarn over, pull through 2 loops. This is the only decrease method used in this pattern. |
| dc | double crochet |
| hdc | half double crochet |
| sl st | slip stitch |
| ch | chain |
| BLO | back loop only |
| FLO | front loop only |
| st / sts | stitch / stitches |
Before You Begin — Little Details That Make This Kitty Irresistible
This cat crochet pattern has a couple of lovely quirks that are worth knowing before you pick up your hook. Take a few minutes here and the whole process will feel so much smoother.
The legs are made separately and joined. You’ll crochet both legs, then join them with a chain bridge and continue straight into the body — all in one piece. It sounds more complicated than it is, and watching the little body take shape from those two tiny legs is genuinely one of the most satisfying moments in this pattern.
The body has a two-color belly section. From row 5 of the body onward, the inner/front stitches are worked in creamy off-white to create that classic cat belly, while the outer stitches stay coffee brown. The original pattern marks these sections with underlines — as you work, follow the color placement visible in the finished kitty photo and switch colors at the belly section each row. It’s worth taking your time here.
The invisible decrease is your best friend. Every decrease in this pattern should be worked as an invisible decrease — it keeps the surface smooth and prevents those little gaps that can show through on small amigurumi. If you’re new to it, our invisible decrease tutorial walks you through the technique step by step before you start.
Safety eyes go in before you close the head. This one is always worth saying twice. Before the head is stuffed and closed, you’ll want your safety eyes in and locked. Our safety eyes guide has everything you need for getting them perfectly level — because nothing matters more to me than symmetrical eyes, and I know I’m not alone in that. 🩷
Free Cat Crochet Pattern — Step by Step
All parts are worked in continuous rounds unless otherwise noted. Use a stitch marker to track the beginning of each round.
Legs + Body (make as one joined piece)
You will crochet two legs, then join them to form the body. Begin in creamy off-white.
First Leg:
Row 1: 4 sc in mr (4)
Row 2: (1 sc, inc) 2 (6)
🩷 After Row 2, change to coffee brown (main color) for the upper leg.
Row 3: (2 sc, inc) 2 (8)
Row 4: 8 sc (8)
🩷 Fasten off and cut the yarn on the first leg only. Set it aside. For the second leg, do NOT fasten off after Row 4 — continue directly to joining.
Second Leg: Repeat Rows 1–4 exactly as above. After Row 4 of the second leg, do not fasten off.
Joining the legs: Chain 6. Insert the hook into the first leg and join with a sl st. You are now working around both legs and the chain bridge — this is the start of the body.
From Row 5 onward, the belly/inner section stitches are worked in creamy off-white. The outer and back stitches remain in coffee brown. Follow the color placement in your reference photo, switching at the belly section each row.
Row 5: 4 sc, inc, 13 sc, inc, 9 sc (30)
Row 6: 8 sc, 7 sc, 15 sc (30)
Row 7: 8 sc, inc, 5 sc, inc, 8 sc, inc, 5 sc, inc (34)
Row 8: 8 sc, inc, 7 sc, inc, 17 sc (36)
Row 9: 8 sc, 11 sc, 17 sc (36)
Row 10: 8 sc, 10 sc, inc, 17 sc (37)
Row 11: 8 sc, 12 sc, 17 sc (37)
Row 12: 8 sc, inv dec, 10 sc, 17 sc (36)
Row 13: 8 sc, 11 sc, 17 sc (36)
Row 14: 8 sc, inv dec, 7 sc, inv dec, 8 sc, inv dec, 5 sc, inv dec (32)
Row 15: 8 sc, inv dec, 5 sc, inv dec, (3 sc, inv dec) 3 (27)
Row 16: 3 sc, inv dec, 3 sc, inv dec, 3 sc, inv dec, (3 sc, inv dec) 2, inv dec (21)
Row 17: (2 sc, inv dec) 5, 1 sc (16)
Row 18: BLO 16 sc (16)
🩷 Chloe’s Note: Row 18 is worked in back loops only — this creates a little ridge that the collar will attach to later. The front loops of this row are left free and waiting. Do not close the body yet; continue stuffing gradually as you go.
Head (×1)
Worked in coffee brown (main color). The head starts from a 6-chain foundation to create a lovely oval shape — this is what gives the kitty that sweet, rounded cat face.
Starting method: Chain 6. Work into and around this chain to create an oval foundation.
Row 1: inc, 3 sc, 4 sc in last st, 3 sc, inc (14)
Row 2: 2 inc, 3 sc, 4 inc, 3 sc, 2 inc (22)
Row 3: sc, inc, 7 sc, inc, 2 sc, inc, 7 sc, inc, sc (26)
Row 4: 26 sc (26)
Row 5: 2 sc, inc, 7 sc, inc, 4 sc, inc, 7 sc, inc, 2 sc (30)
Row 6: 30 sc (30)
Row 7: (4 sc, inc) 6 (36)
Row 8: 9 sc, 2 sc, 25 sc (36)
🩷 Chloe’s Note: From Row 8 onward, some rows are written in sections. These groupings mark the face center area — use them to help position your safety eyes and muzzle circles later.
Row 9: 5 sc, inc, 2 sc, 4 sc, inc, 4 sc, inc, (5 sc, inc) 3 (42)
Row 10: 8 sc, 6 sc, 28 sc (42)
Row 11: 6 sc, inc, 6 sc, inc, 1 sc, 5 sc, inc, (6 sc, inc) 3 (48)
Row 12: 7 sc, 12 sc, 29 sc (48)
Row 13: 7 sc, 12 sc, 29 sc (48)
🩷 This is the widest point of the head — hold it up and look at that round little face forming. This is the part where the magic happens. 🩷
Row 14: 4 sc, inv dec, sc, 3 sc, inv dec, 4 sc, inv dec, 2 sc, 2 sc, inv dec, (4 sc, inv dec) 4 (40)
Row 15: 3 sc, inv dec, sc, 2 sc, inv dec, 3 sc, inv dec, 2 sc, sc, inv dec, (3 sc, inv dec) 4 (32)
Row 16: (1 sc, inv dec) 2, (sc, inv dec) 2, sc, inv dec, (1 sc, inv dec) 5, 2 sc (22)
Row 17: 2 sc, inv dec, sc, 1 sc, inv dec, (2 sc, inv dec) 3, inv dec (16)
🩷 Before closing the head: Install your safety eyes now, between rows 10–12 of the head. Stuff firmly as you close. Once the stuffing is in and the eyes are locked, this face will absolutely stop your heart.
Collar (×1)
Worked in soft blush pink, directly onto the body. This is the part that makes the whole piece — that little ruffle of pink is so impossibly sweet.
Join blush pink yarn to the front loops only (FLO) of Row 18 of the body (the loops you left free earlier).
Row 1: (5 dc in st) 16 — working into each of the 16 FLO stitches from Row 18 (80)
🩷 Those 5 double crochets fanned into every stitch create the most gorgeous little ruffled collar. Watch it fan out as you go — every stitch is worth it.
Ears (Make 2)
Begin in soft blush pink.
Row 1: 3 sc in mr, ch, turn (3)
Row 2: inc, (in same st: hdc, dc, hdc), inc (7)
🩷 After Row 2, change to coffee brown (main color).
Row 3: 3 sc, dc, 3 sc (7)
Fasten off, leaving a long tail for sewing. Make 2.
The pink inner ear peeking through the coffee-brown outer ear is one of those tiny details that makes the whole piece sing.
Muzzle Circles (Make 2)
Worked in creamy off-white.
Row 1: 6 sc in mr, sl st (7)
Fasten off, leaving a long tail for sewing. Make 2.
These two little circles side by side are what give the kitty her cheeks — the rounder and fluffier they sit on the face, the better. Don’t rush the placement.
Upper Paws (Make 2)
Begin in creamy off-white.
Row 1: 4 sc in mr (4)
Row 2: (1 sc, inc) 2 (6)
🩷 After Row 2, change to coffee brown (main color).
Row 3: (2 sc, inc) 2 (8)
Row 4: 8 sc (8)
Row 5: inv dec, 6 sc (7)
Row 6: 7 sc (7)
Finishing: Do not stuff. Fold the piece in half and close with 3 sc worked through both layers. Make 2.
Tail (×1)
Begin in creamy off-white.
Row 1: 5 sc in mr (5)
Row 2: (inc, sc) 2, inc (8)
Row 3: 8 sc (8)
🩷 After Row 3, change to coffee brown (main color).
Row 4: 8 sc (8)
Row 5: inv dec, 6 sc (7)
Row 6: 7 sc (7)
Row 7: inv dec, 5 sc (6)
Row 8: 6 sc (6)
Row 9: inv dec, 4 sc (5)
Finishing: Do not stuff. Fold the piece in half and close with 3 sc worked through both layers.
Assembly
- Head to body: Sew the completed head onto the top of the body, centered and facing forward. Make sure it sits upright before securing fully.
- Safety eyes: Install your safety eyes between rows 10–12 of the head, evenly spaced on either side of center. Lock the washers firmly before the head is fully closed.
- Ears: Sew the ears to the top of the head, positioned between rows 1 and 8. Space them symmetrically — hold the piece at arm’s length to check before anchoring.
- Muzzle circles: Sew the two white muzzle circles side by side onto the lower face area, slightly below the safety eyes. The wrong side (inside) of each circle faces outward. Position them so they create a soft, rounded cheek shape together.
- Upper paws: Sew one paw to each side of the body, just below the neckline. They should hang naturally downward at a slight angle.
- Tail: Sew the tail to the back of the body at the base, curving it gently to one side.
- Collar: The collar is already attached — it was crocheted directly onto the body in Row 18’s front loops. Give it a gentle fan-out with your fingers if needed.
Making It Extra Cute — The Finishing Details That Matter Most
Okay, this is my favorite part of any pattern to write — and honestly the part that separates a cute amigurumi from an absolutely irresistible one. Don’t skip any of this. 🩷
The embroidered nose. Using your soft blush pink yarn or embroidery thread, embroider a small upside-down triangle shape just above where the two muzzle circles meet. Keep it tiny — on a face this small, a nose that’s even slightly too large changes the whole expression. Three or four stitches in an inverted V is often all you need. Take your time and redo it if it doesn’t feel right.
The whiskers. Thread your black embroidery thread through the tapestry needle and stitch whiskers out from either side of the muzzle — three on each side, angled slightly upward. Keep them delicate and light. The key is even spacing: if one side has three whiskers, the other side gets exactly three whiskers at the same angles. Hold the piece under a bright lamp and check both sides from directly in front before you tie off.
🩷 Chloe’s Detail Tip: For the eyebrows, use the same black thread and stitch two short, slightly curved lines above each safety eye. Angling them inward just slightly gives your kitty the most impossibly sweet, slightly worried little expression. It’s the tiniest detail and it makes the whole face.
The embroidered cheeks. This is the step I genuinely cannot skip on any amigurumi and I will not start skipping now. Using a very thin length of soft pink yarn, embroider two small round blush circles, one on each cheek just beside the muzzle circles. Use small circular stitches and keep the color gentle — you want a rosy glow, not a full flush. The moment those cheeks go on, the piece goes from lovely to completely squeezable.
Safety eye symmetry. I say this every time and I’ll say it again: before you press those washers in, hold the piece up under a bright light and check from directly in front — not from an angle, directly in front. Eyes that look level from the side can be off-center when you look straight on. Once the washer clicks into place, it is staying there. Take thirty extra seconds. It is always worth it.
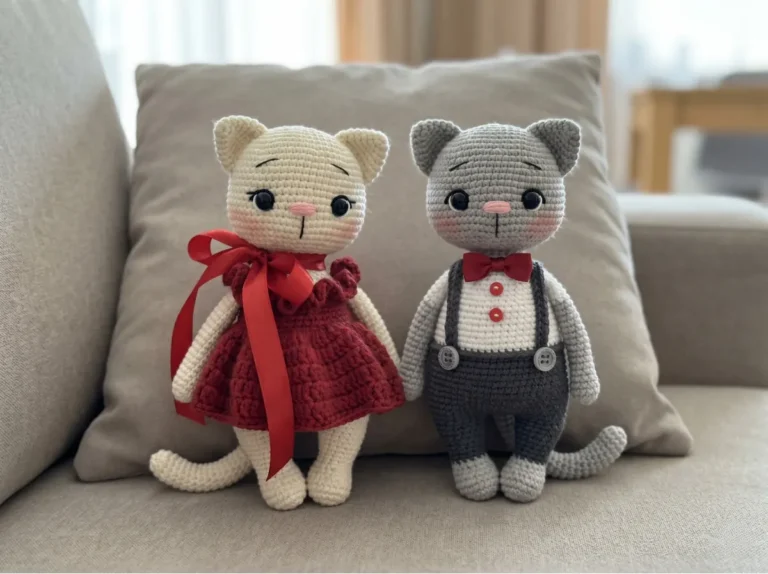
Color variations to dream about. This kitty is stunning in the original coffee and cream, but imagine her in soft grey with a lavender collar, or creamy vanilla with mint green. If you want to try something a little different, our sweet little bunny pattern uses a similar pastel palette approach if you want more color inspiration — and our tiny hamster amigurumi has the same irresistible pocket-sized energy as this kitty.
Chloe’s Final Look
I’ve been holding this finished little kitty under my lamp for an embarrassingly long time and I have absolutely no regrets. That coffee-brown fur against the creamy belly, the way the pink collar fans out like a tiny ruffle, the glossy eyes catching the light — it’s everything I want a small crochet piece to be. Try making a set of two in different colorways and sitting them side by side on a shelf. You’re going to need a minute to recover from how cute that is. 🩷
What yarn is best for this cat crochet pattern?
A DK or Light Worsted (CYCA 3) cotton-acrylic blend, like YarnArt Jeans, is highly recommended. It creates a smooth, firm fabric that holds small amigurumi details perfectly.
What size hook do I need for this amigurumi kitty?
You will need a fine 2.0mm steel crochet hook. This ensures your stitches are tightly packed, preventing the stuffing from showing through the finished fabric.
How long does it take to crochet this cat?
This is an intermediate-level pattern that typically takes between 3 to 5 hours to complete, depending on your crochet speed and comfort with small details.