Little Bull Amigurumi Free Pattern — Step-by-Step Guide
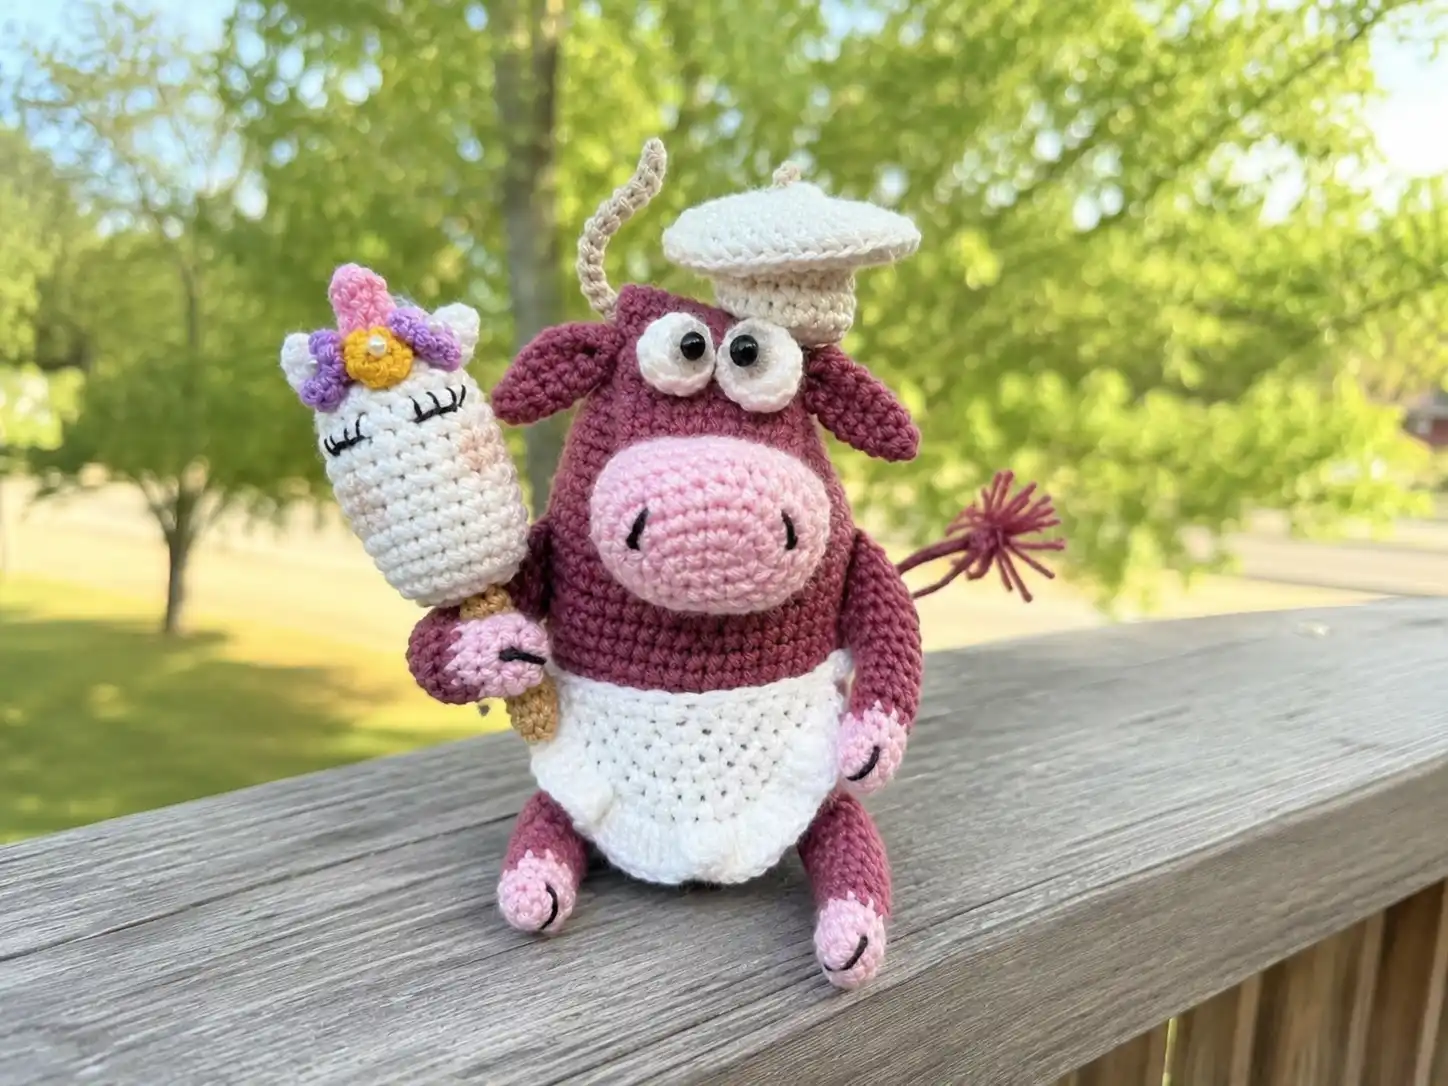
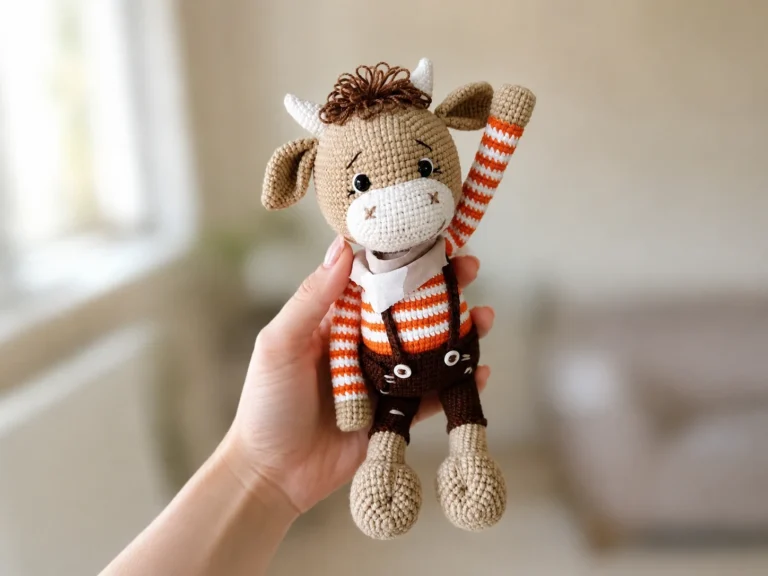
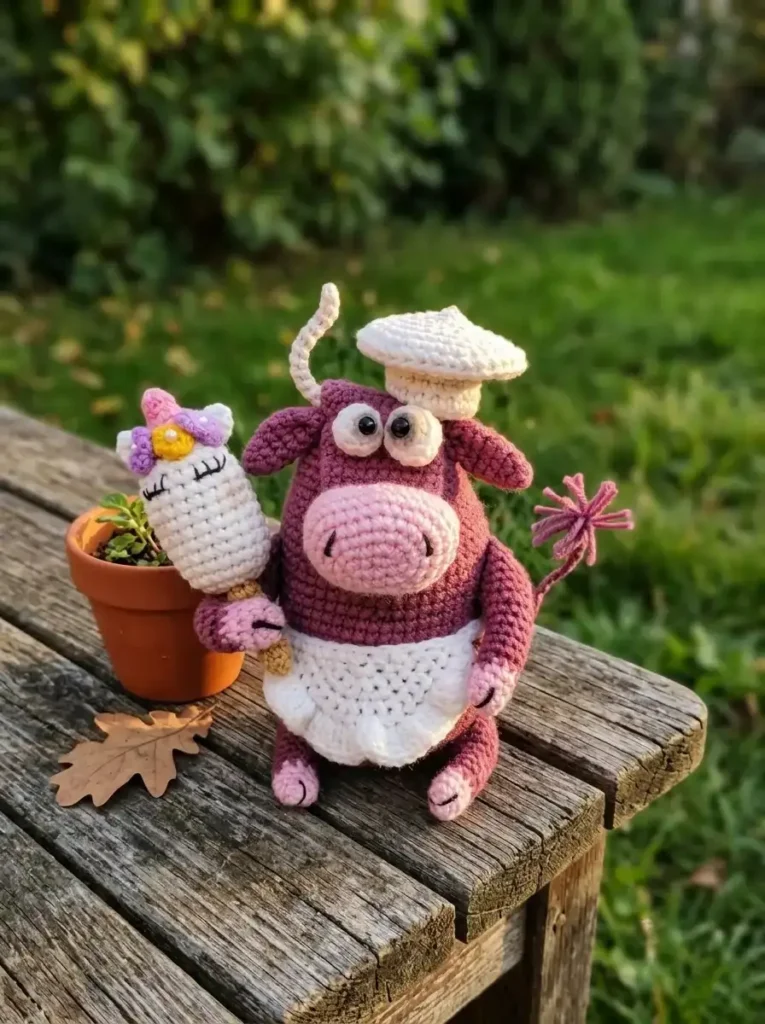
This little bull amigurumi free pattern is one of the more layered projects I’ve written — a full bull figure, dressed in a tiny white apron and hat, cradling a hand-crocheted ice cream cone. I tested every round with a tight, dense tension so the wire-supported horns and tail hold their shape properly. Grab a fine hook and a bit of patience, and let’s build him piece by piece.
📋 Pattern Quick Stats
- Difficulty: Advanced (editorial assessment — not stated in source)
- Finished Size: Not stated in source — flagged for confirmation
- Hook Size: 1.5 mm (no US letter equivalent); 1.25 mm for the horns (no US letter equivalent)
- Yarn Weight: DK / Light Worsted (3)
- Techniques: magic ring, invisible decrease, color changes, wire armature, sewing multiple parts
- Estimated Time: Not stated in source — flagged for confirmation
Materials for This Little Bull Amigurumi Free Pattern
Here’s everything you’ll need. I’ve kept the original yarn references alongside general US-friendly substitutions where the source pattern offered them.
- Cranberry DK-weight yarn (body) — check local availability for a similar DK (3) yarn
- Light pink DK-weight yarn (muzzle)
- White DK-weight yarn (eyes, hat, ice cream, apron)
- Small amounts of yellow, pink, purple, and beige yarn (for the ice cream cone)
- Black DK-weight yarn (nostril and eye embroidery)
- A DK/Light Worsted (3) yarn split into two strands, US alternatives such as Drops Muskat or Paintbox Cotton DK (horns)
- Hook: 1.5 mm (no US letter equivalent) for the body; 1.25 mm (no US letter equivalent) for the horns
- Polyester fiberfill
- Wire, including one 11.8 in (30 cm) piece for the tail
- 0.3 cm beads (flower decoration)
- Tapestry needle
- Masking tape or electrical tape
This project uses a DK (3) weight yarn throughout — if you want to double-check where that falls on the standard scale, the Craft Yarn Council yarn weight system is a good reference.
Abbreviations Used in This Bull Amigurumi Pattern
| Abbreviation | Meaning |
|---|---|
| mr | magic ring |
| ch | chain |
| sc | single crochet |
| inc | increase |
| inv dec | invisible decrease |
| dc | double crochet |
| tr | treble crochet |
| sl st | slip stitch |
| BLO | back loop only |
Special Techniques for This Little Bull Amigurumi Free Pattern
A few techniques come up throughout this pattern that are worth reviewing before you start:
Nearly every part of this bull begins with a magic ring — if you want a refresher, our step-by-step magic ring tutorial walks through it slowly.
Every decrease in this pattern is worked as an invisible decrease, which keeps the shaping clean instead of leaving a visible gap. If you haven’t tried it yet, our invisible decrease tutorial is worth a look before you reach the muzzle shaping.
The muzzle, arms, and legs all involve a color change partway through — our guide to changing colors seamlessly covers how to keep that transition tidy.
Because this bull has so many separate pieces, you’ll be doing a fair amount of hand-sewing at assembly. Our tutorial on sewing amigurumi parts together is a good companion for that stage.
Finally, most parts need firm stuffing to hold their shape under the wire supports — our guide to stuffing amigurumi without lumps will help, especially on the body.
Little Bull Amigurumi Free Pattern — Muzzle
Start with the muzzle so you have a reference point for the rest of the head shaping.
Yarn: light pink | Start: ch 5
Row 1: starting from the 2nd ch from hook, 3 sc, 4 sc*, along the other side of the chain 3 sc, inc (12)
Row 2: (1 sc, inc) x 6 (18)
Row 3: 1 sc, inc, 3 sc, (1 sc, inc) x 3, 3 sc, (1 sc, inc) x 2 (24)
Row 4: (3 sc, inc) x 6 (30)
Row 5: (4 sc, inc) x 6 (36)
Rows 6-7: 36 sc (2 rows) (36)
Row 8: (4 sc, inv dec) x 6 (30)
Row 9: (3 sc, inv dec) x 6 (24)
Row 10: (2 sc, inv dec) x 6 (18)
Finishing: sl st, fasten off, cut the yarn leaving a tail for sewing.
Little Bull Amigurumi Free Pattern — Arms and Legs (4 pieces)
You’ll repeat this piece four times total — two arms, two legs. The cranberry section forms the hoof color block.
Yarn: light pink, then cranberry | Start: mr
Row 1: 6 sc in mr [light pink] (6)
Row 2: (1 sc, inc) x 3 (9)
Rows 3-4: 9 sc (2 rows) (9)
Rows 5-9: 9 sc (5 rows) [cranberry] (9)
💡 Emma’s Tip: Change to cranberry after Row 4 — that’s where the color block for the hoof begins.
Row 10: (2 sc, inc) x 3 (12)
Rows 11-15: 12 sc (6 rows) (12)
Finishing: Stuff with fiberfill. Fold in half and single crochet both sides together. Fasten off, cut the yarn leaving a tail for sewing. Make four total.
Little Bull Amigurumi Free Pattern — Body
The body is the longest piece in this pattern, so take your time and keep a stitch marker handy.
Yarn: cranberry | Start: mr
Row 1: 6 sc in mr (6)
Row 2: 6 inc (12)
Row 3: (1 sc, inc) x 6 (18)
Row 4: (2 sc, inc) x 6 (24)
Row 5: (3 sc, inc) x 6 (30)
Row 6: (4 sc, inc) x 6 (36)
Row 7: (5 sc, inc) x 6 (42)
Row 8: (6 sc, inc) x 6 (48)
Row 9: (7 sc, inc) x 6 (54)
Row 10: (8 sc, inc) x 6 (60)
💡 Emma’s Tip: Place a stitch marker right after Row 2 — you’ll use it as a stuffing reference. Stuff up to that marker first, then continue stuffing the lower part of the body as you go. Don’t overstuff the upper section yet.
Rows 11-24: 60 sc (14 rows) (60)
Row 25: (8 sc, inv dec) x 6 (54)
Rows 26-27: 54 sc (2 rows) (54)
Row 28: (7 sc, inv dec) x 6 (48)
Rows 29-30: 48 sc (2 rows) (48)
Row 31: (6 sc, inv dec) x 6 (42)
Rows 32-33: 42 sc (2 rows) (42)
Row 34: (5 sc, inv dec) x 6 (36)
Rows 35-36: 36 sc (2 rows) (36)
Row 37: (4 sc, inv dec) x 6 (30)
Rows 38-39: 30 sc (2 rows) (30)
Row 40: (3 sc, inv dec) x 6 (24)
Rows 41-44: 24 sc (4 rows) (24)
Row 45: 1 inv dec, 22 sc (23)
Rows 46-47: 23 sc (2 rows) (23)
Row 48: 5 sc, inv dec, 16 sc (22)
Rows 49-50: 22 sc (2 rows) (22)
Row 51: 10 sc, inv dec, 10 sc (21)
Rows 52-53: 21 sc (2 rows) (21)
Row 54: 15 sc, inv dec, 4 sc (20)
Rows 55-59: 20 sc (5 rows) (20)
Finishing: Fold the top flat and single crochet both sides together to close it. Fasten off, cut the yarn, secure, and weave the end inside the piece.
Little Bull Amigurumi Free Pattern — Eye Patches
The two eye patches are worked slightly differently from each other, so follow each one carefully.
Eye Patch 1
Yarn: white | Start: mr
Row 1: 6 sc in mr (6)
Row 2: (1 sc, inc) x 3 (9)
Rows 3-4: 9 sc (2 rows) (9)
Row 5: (1 sc, inv dec) x 3 (6)
Finishing: Cut the yarn leaving a tail for sewing. Cinch the opening closed with a needle. Stuff lightly with fiberfill.
Eye Patch 2
Yarn: white | Start: mr
Row 1: 6 sc in mr (6)
Row 2: 6 inc (12)
Rows 3-4: 12 sc (2 rows) (12)
Row 5: 6 inv dec (6)
Finishing: Cut the yarn leaving a tail for sewing. Cinch the opening closed with a needle. Stuff lightly with fiberfill.
Little Bull Amigurumi Free Pattern — Ears (2 pieces)
Yarn: cranberry | Start: mr
Row 1: 6 sc in mr (6)
Row 2: 6 sc (6)
Row 3: (1 sc, inc) x 3 (9)
Rows 4-7: 9 sc (4 rows) (9)
Finishing: Fold in half and single crochet both sides together. Fold in half again and join the sides with a slip stitch. Cut the yarn leaving a tail for sewing. Make two total.
Little Bull Amigurumi Free Pattern — Horns (2 pieces)
These are worked long and thin, then reinforced with wire so they hold their curve.
Yarn: DK/Light Worsted (3), split into two strands | Start: mr | Hook: 1.25 mm (no US letter equivalent)
Row 1: 6 sc in mr (6)
Rows 2-31: 6 sc (30 rows) (6)
Finishing: Cut the yarn leaving a tail for sewing. Cut a piece of wire equal to the length of the piece and make a loop at each end. Insert the wire inside the tube, cinch the opening closed with a needle, and weave the end inside the piece. Make two total.
💡 Emma’s Tip: This is a wire-supported piece rather than a soft, huggable one — worth keeping in mind if this bull is headed to a small child rather than a shelf. See the note at the end of this article for more on that.
Little Bull Amigurumi Free Pattern — Apron
Yarn: white | Start: mr
Row 1: 6 sc in mr, do not join the round, ch, turn (6)
Row 2: (1 sc, inc) x 3, ch, turn (9)
Row 3: (2 sc, inc) x 3, ch, turn (12)
Row 4: (3 sc, inc) x 3, ch, turn (15)
Row 5: (4 sc, inc) x 3 (18)
Row 6: ch 30, starting from the 2nd ch from hook work 28 sc. Single crochet along the top edge of the apron. Make the second tie: ch 30, starting from the 2nd ch from hook work 28 sc. (total not stated in source)
Row 7: Single crochet along the bottom edge of the apron, working 2 dc in each stitch. (total not stated in source)
Finishing: Fasten off, secure the yarn.
Little Bull Amigurumi Free Pattern — Hat
Yarn: white | Start: ch 18, sl st to join
Row 1: ch 18, sl st (18)
Rows 2-7: 18 sc (6 rows) (18)
Row 8: ch 2, 2 tr in each stitch (36)
Row 9: 36 sc in BLO (36)
Row 10: (4 sc, inv dec) x 6 (30)
Row 11: (3 sc, inv dec) x 6 (24)
Row 12: (2 sc, inv dec) x 6 (18)
Row 13: (1 sc, inv dec) x 6 (12)
Row 14: 6 inv dec (6)
Finishing: Fasten off, cut the yarn leaving a tail. Cinch the opening closed with a needle and secure the yarn.
Little Bull Amigurumi Free Pattern — Ice Cream Cone
This little cone is the sweetest add-on in the whole design — a fun way to use your scrap yellow, pink, purple, and beige yarn.
Ice Cream Scoop
Yarn: yellow, pink, purple, beige | Start: ch 5
Row 1: starting from the 2nd ch from hook, 3 sc, 4 sc*, along the other side of the chain 3 sc, inc (12)
Row 2: (1 sc, inc) x 6 (18)
Rows 3-12: 18 sc (10 rows) (18)
Row 13: (1 sc, inv dec) x 6 (12)
Row 14: 6 inv dec (6)
💡 Emma’s Tip: Stuff the scoop with fiberfill right after Row 13, before closing the last round.
Finishing: Fasten off, cut the yarn, cinch the opening closed with a needle, and weave the end inside the piece.
Ice Cream Ears (2 pieces)
Yarn: pink | Start: mr
Row 1: 6 sc in mr (6)
Row 2: 6 sc (6)
Row 3: (1 sc, inc) x 3 (9)
Rows 4-7: 9 sc (4 rows) (9)
Finishing: Fold in half and single crochet both sides together. Make two total.
Ice Cream Horn
Yarn: beige | Start: mr
Row 1: 6 sc in mr (6)
Rows 2-5: 6 sc (4 rows) (6)
Finishing: Stuff with fiberfill. Fasten off, cut the yarn leaving a tail for sewing.
Flower
Yarn: purple | Start: mr
Row 1: in mr, ch, 2 sc, ch, sl st — repeat 5 times. (total not stated in source)
Ice Cream Stick
Yarn: beige | Start: mr
Row 1: 6 sc in mr (6)
Rows 2-9: 6 sc (8 rows) (6)
Finishing: Cut a piece of wire slightly longer than the crocheted stick, bend it into the stick shape, and wrap it with masking tape or electrical tape. Insert it into the ice cream scoop and place the crocheted piece over it. Sew the stick around the base of the ice cream.
Assembly
- Stuff the muzzle and sew it onto the body, positioning it around the 3rd row of the body.
- Sew the eye patches in place, five rows up from the muzzle.
- Embroider the nostrils onto the muzzle with black yarn.
- Glue the eyes in place.
- Bend the horns into shape and insert them under the muzzle.
- Sew the ears under the horns, joining both sides of the body so the horns stay upright and supported.
- Sew on the arms and legs. The cranberry sections you crocheted earlier already form the hoof color block, so no extra shaping is needed there.
Forming the Tail
- Cut an 11.8 in (30 cm) piece of wire.
- Pierce it all the way through the body at the point where the tail will sit.
- Twist both ends of the wire together and shape a small loop at the tip.
- Cut several strands of yarn, fold them together, and secure them to the wire loop.
- Attach the yarn where the wire meets the body and wrap it back and forth along the wire to cover it completely.
- Secure the yarn end and weave it inside the piece.
Finishing & Details
Once the main bull is assembled, sew the ears, horn, and flower onto the ice cream scoop, then embroider small eyes onto it with black yarn. Add a little shading around the bull’s eyes and a touch of blush to the ice cream’s face for warmth. Decorate the flower with the small 0.3 cm beads for a finishing sparkle. Tie the apron around the bull’s body and settle the hat over the top of the head — both are worked separately, so you can position them exactly where you like before securing them with a few discreet stitches.
Emma’s Note
This is one of those patterns where the payoff is entirely in the details — the tiny hoof color blocks, the wire that lets the tail curl just right, the ice cream cone that turns a simple bull into a whole little scene. Take the horns slowly; that fine 1.25mm hook and split yarn take patience, but the shape holds beautifully once the wire goes in. If your stitch count drifts anywhere along the body, don’t panic — just frog back to the last round where the numbers matched and pick it back up. Happy hooking! 🧶
FAQ
What yarn is best for this little bull amigurumi?
This pattern uses DK (3) weight yarn. Cranberry, light pink, and white cotton or acrylic blends work perfectly to ensure the pieces hold their shape under the wire supports.
What size hook do I need for this pattern?
You will need a 1.5 mm hook for the main body parts and an even finer 1.25 mm hook for the delicate horns.
Is this amigurumi safe for small children?
Because this design uses wire armature in the horns and tail, it is intended as a display piece rather than a soft toy for young children.