Crochet Unicorn Amigurumi Free Pattern — Meet Viola
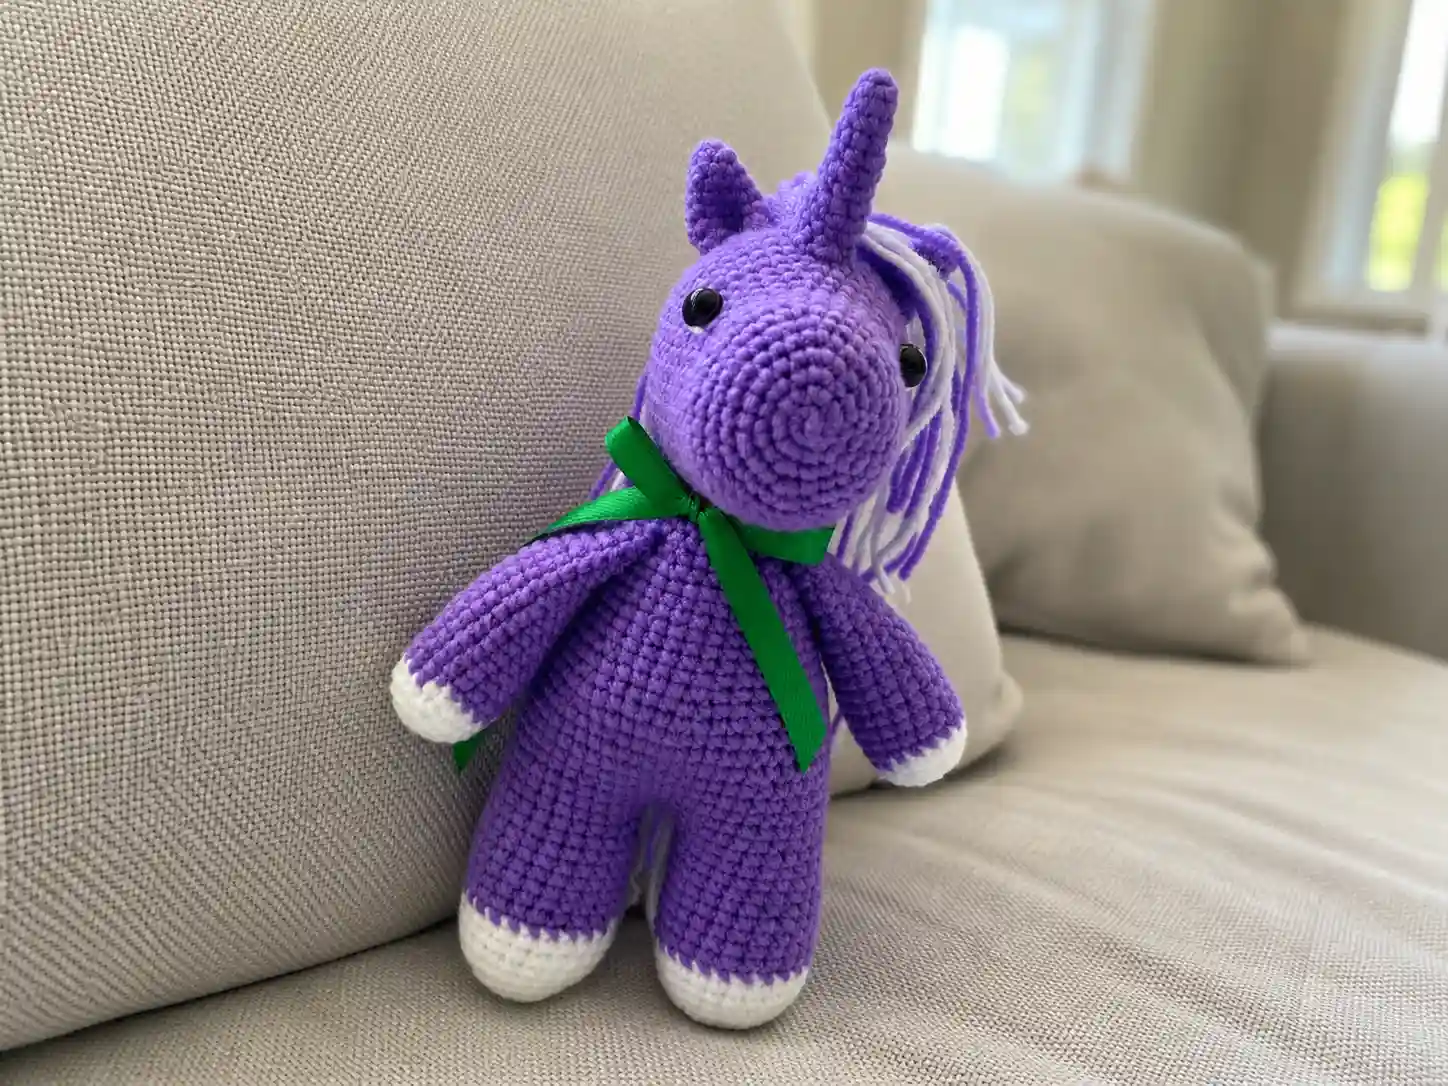
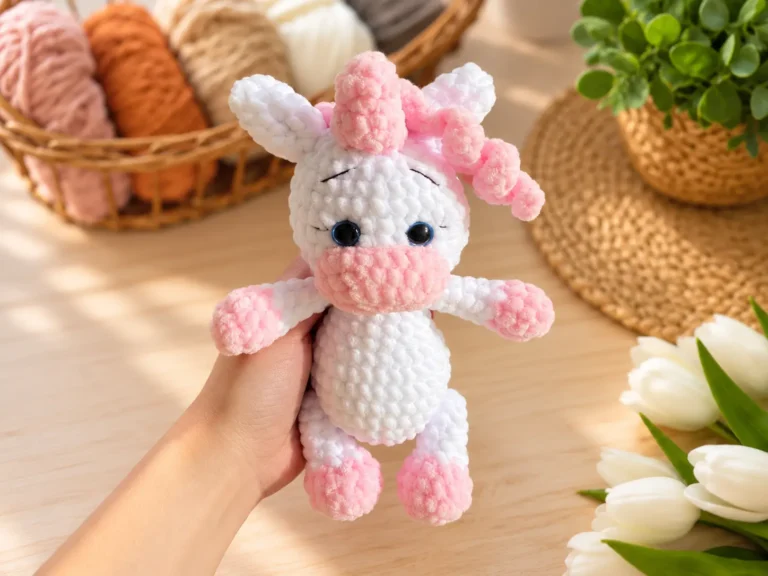
This crochet unicorn amigurumi free pattern brings to life a small violet creature who looks like she’s stepped straight out of a half-remembered dream. She’s the kind of unicorn who doesn’t gallop so much as drift — head tilted, mane a little wild, like she’s just wandered in from somewhere quieter than here. I named her Viola before her horn was even finished, and something about the way her ears sit made the name feel obvious. If you’ve been wanting to make something soft and a little magical, this is where you start.
📖 Meet Viola
- 🌟 Personality: dreamy, gentle, a little mischievous
- 🎨 Color Palette: soft violet with a snow-white muzzle and hooves
- 📏 Size: 6 in
- 🪝 Hook: 1.75mm
- ⏱️ Time: 6-9 hours
- ✨ Signature Detail: a hand-trimmed yarn mane and tail, fluffed to look like she’s mid-daydream
- 💡 Difficulty: Intermediate
Materials for This Crochet Unicorn Amigurumi Pattern
Viola is worked almost entirely in a soft violet yarn, with just a touch of white at her hooves and muzzle to keep her looking gentle rather than bold. A matte, slightly fuzzy cotton-acrylic blend gives her that storybook softness — nothing too shiny, nothing too stiff.
- Violet yarn — Sport/DK weight (3). A US alternative like Lion Brand Comfy Cotton Blend or Premier Cotton Fair in a dusty lavender or amethyst tone will work beautifully. Look for it at Joann, Michaels, or Hobby Lobby.
- A small amount of white yarn in the same weight, for the hooves and muzzle
- Hook: 1.75mm — this falls below standard US letter sizing, so a fine steel hook in that range is your best bet. The smaller hook is intentional here; it keeps Viola’s stitches tight enough that no stuffing peeks through.
- Safety eyes, sized to suit a 6 in finished piece
- Polyester fiberfill, for stuffing
- Tapestry needle, for sewing all the pieces together
- Scissors
- A length of satin ribbon, if you’d like to tie a little bow at her neck (optional, but it suits her)
Abbreviations
| Abbreviation | Meaning |
|---|---|
| mr | magic ring |
| sc | single crochet |
| inc | increase (2 sc in the same stitch) |
| inv dec | invisible decrease |
| ch | chain |
| sl st | slip stitch |
| FLO | front loop only |
| * … * / ( … ) | repeat the instructions inside the brackets the stated number of times |
✨ Sophie’s Note: You’ll notice this pattern calls for invisible decreases throughout rather than the standard sc2tog decrease. It’s a small substitution, but it makes a real difference — invisible decrease closes up neatly with no visible gap, which matters a lot on a face as small as Viola’s. Stitch counts stay exactly the same either way. If you haven’t tried it, our invisible decrease tutorial walks through it slowly.
Before the Story Begins
Every part of Viola starts the same quiet way — with a magic ring. If that’s new to you, our magic ring tutorial covers it step by step; it’s simpler than it looks, and it’s the foundation for almost everything here.
Because Viola is small and fairly dense, take your time with the stuffing — a little at a time, checking the shape as you go, rather than all at once at the end. Our guide on stuffing amigurumi without lumps is worth a look before you start the body.
And don’t rush the finishing touches. The mane and tail are where Viola really becomes herself — that part’s worth savoring, not speeding through.
Head (make 1)
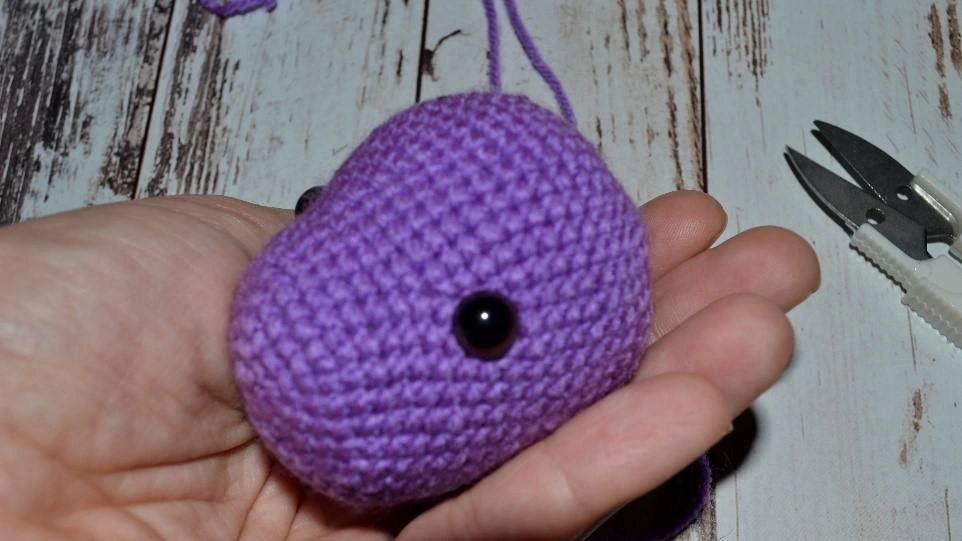
Yarn: violet | Start: mr
Row 1: 6 sc in mr (6)
Row 2: 6 inc (12)
Row 3: *1 sc, inc* 6 times (18)
Row 4: *2 sc, inc* 6 times (24)
Row 5: *3 sc, inc* 6 times (30)
Row 6: *4 sc, inc* 6 times (36)
Rows 7-11: 36 sc, worked even (5 rows) (36)
Row 12: 12 sc, inc, *4 sc, inc* 2 times, 13 sc (39)
Row 13: 12 sc, inc, *5 sc, inc* 2 times, 14 sc (42)
Row 14: 12 sc, inc, *6 sc, inc* 2 times, 15 sc (45)
Row 15: 12 sc, inc, *7 sc, inc* 2 times, 16 sc (48)
Rows 16-21: 48 sc, worked even (6 rows) (48)
✨ Sophie’s Note: Right after row 12, place the safety eyes about 14 stitches apart. This is the moment Viola stops being a round shape and starts being someone — move them even slightly and the whole expression shifts, so take a breath and place them carefully before locking them in. Our safety eyes tutorial covers the placement and backing in more detail.
Row 22: *6 sc, inv dec* 6 times (42)
Row 23: *5 sc, inv dec* 6 times (36)
Row 24: *4 sc, inv dec* 6 times (30)
Row 25: *3 sc, inv dec* 6 times (24)
Row 26: *2 sc, inv dec* 6 times (18)
Row 27: *1 sc, inv dec* 6 times (12)
Row 28: 6 inv dec (6)
Finishing: Fasten off, cut yarn, and weave the tail in through the inside of the head.
Set the head down for a moment before moving on. Even without the mane, there’s already something wistful about her.
Ears (make 2)
Yarn: violet | Start: mr
Row 1: 4 sc in mr (4)
Row 2: *1 sc, inc* 2 times (6)
Row 3: *2 sc, inc* 2 times (8)
Row 4: *3 sc, inc* 2 times (10)
Row 5: *4 sc, inc* 2 times (12)
Row 6: *5 sc, inc* 2 times (14)
Row 7: *6 sc, inc* 2 times (16)
Fold the ear flat and work 8 sl st through both layers to close it.
Finishing: Fasten off, leaving an 8 in tail for sewing.
Horn (make 1)
Yarn: violet | Start: mr
Row 1: 4 sc in mr (4)
Row 2: *1 sc, inc* 2 times (6)
Row 3: 6 sc (6)
Row 4: 5 sc, inc (7)
Row 5: 7 sc (7)
Row 6: 6 sc, inc (8)
Row 7: 8 sc (8)
Row 8: 7 sc, inc (9)
Row 9: 9 sc (9)
Row 10: 8 sc, inc (10)
Finishing: Fasten off, leaving an 8 in tail for sewing. Stuff the horn lightly so it holds its shape without going stiff.
Front Legs (make 2)
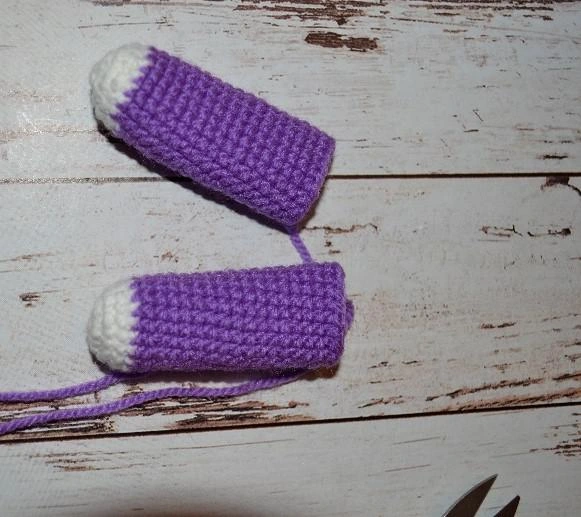
Yarn: white, then violet | Start: mr
Row 1: 6 sc in mr [white] (6)
Row 2: 6 inc [white] (12)
Row 3: *1 sc, inc* 6 times [white] (18)
Row 4: 18 sc [white] (18)
Rows 5-19: 18 sc [violet], worked even (15 rows) (18)
✨ Sophie’s Note: Switch to violet right after row 4. That little white cuff at the top of each leg is what gives Viola her socked, storybook-pony look — worth taking a moment over the color change so the line stays crisp. Our color-change tutorial shows the cleanest way to do it.
Finishing: Fasten off, leaving an 8 in tail for sewing. Stuff each leg about a third full.
Hind Legs (make 2)
Yarn: white, then violet | Start: mr
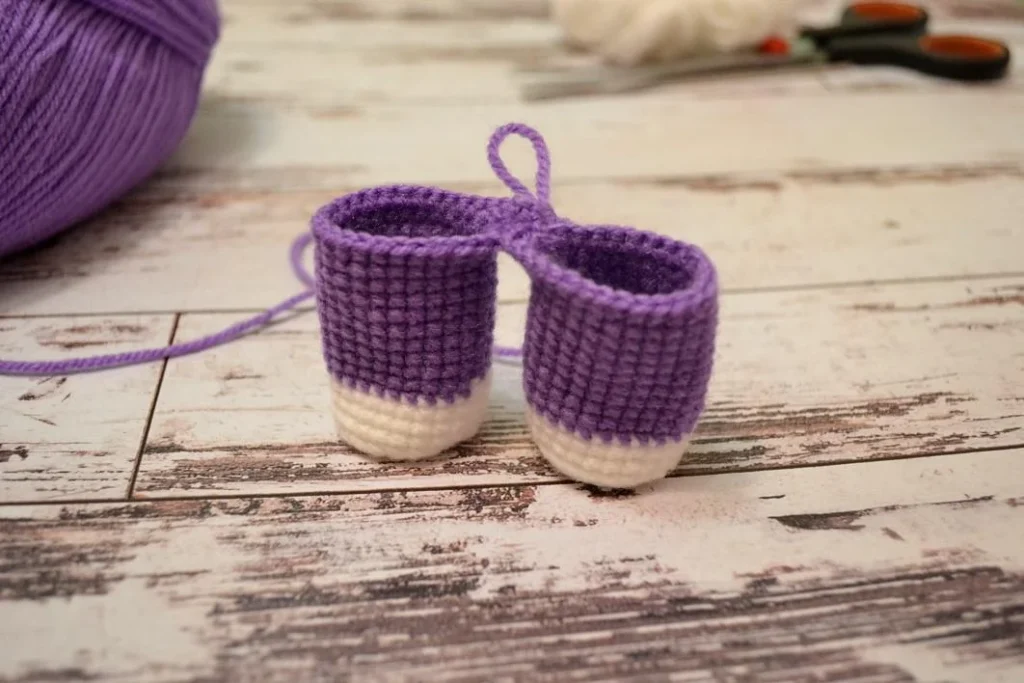
Row 1: 6 sc in mr [white] (6)
Row 2: 6 inc [white] (12)
Row 3: *1 sc, inc* 6 times [white] (18)
Row 4: *2 sc, inc* 6 times [white] (24)
Row 5: 24 sc, worked in the front loop only (FLO) [white] (24)
Rows 6-8: 24 sc [white] (3 rows) (24)
Rows 9-19: 24 sc [violet], worked even (11 rows) (24)
Finishing: For the left leg, fasten off and cut yarn. For the right leg, do not cut yarn — you’ll continue straight into the body.
Body
Yarn: violet | Start: continuing from the right hind leg
Connecting round: Chain 2 and join to the left leg. Work 24 sc along the left leg, 2 sc across the chain, 24 sc along the right leg, and 2 sc across the opposite side of the chain (52)
Row 20: 11 sc, inc, 28 sc, inc, 11 sc (54)
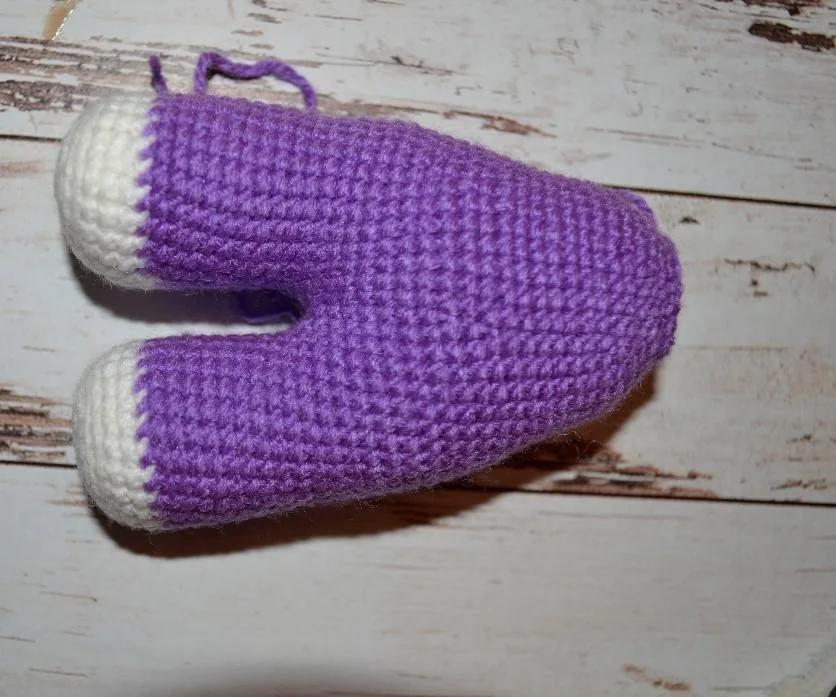
Rows 21-24: 54 sc, worked even (4 rows) (54)
Row 25: 8 sc, inv dec, 16 sc, inv dec 2 times, 8 sc (35)
Row 26: *15 sc, inv dec* 3 times (48)
Row 27: 7 sc, inv dec, (14 sc, inv dec) 2 times, 7 sc (31)
Row 28: *13 sc, inv dec* 3 times (42)
Row 29: 6 sc, inv dec, (12 sc, inv dec) 2 times, 6 sc (27)
Row 30: *11 sc, inv dec* 3 times (36)
Rows 31-35: 36 sc, worked even (5 rows) (36)
Row 36: 5 sc, inv dec, (10 sc, inv dec) 2 times, 5 sc (23)
Row 37: *9 sc, inv dec* 3 times (30)
Row 38: 4 sc, inv dec, (8 sc, inv dec) 2 times, 4 sc (19)
Row 39: *7 sc, inv dec* 3 times (24)
Row 40: 3 sc, inv dec, (6 sc, inv dec) 2 times, 3 sc (15)
Row 41: 5 sc, inv dec 3 times (21)
Notes: When you finish the connecting round (52 sts), place a stitch marker in the first stitch to mark where each round begins. After row 25, start stuffing — the legs especially should be packed firmly so Viola can stand on her own. Keep stuffing firmly as you work rows 31-35.
Finishing: Fasten off, leaving a 12-16 in tail for sewing on the head.
Assembly — Bringing Viola Together
This is the moment all these separate little pieces stop being parts and start being her.
- Sew the ears to the head, with the horn nestled between them.
- Sew the head onto the body.
- Sew the front legs to the body, checking they sit symmetrically before you commit to the stitching.
✨ Sophie’s Note: Take an extra minute with the ear and horn placement — tilt them slightly forward or to one side and Viola goes from alert to sleepy in an instant. There’s no single correct angle, just the one that matches the personality you want her to have. Our guide to sewing amigurumi parts has some good tips on keeping everything even.
Outfit & Accessories — Viola’s Finishing Touches
Viola doesn’t wear clothes, but her finishing details do just as much work as an outfit would.
- Using white yarn, work one small stitch around each eye — it softens the look considerably and makes her gaze feel warmer.
- Tie a length of satin ribbon around her neck in a small bow, if you’d like (entirely optional, but it suits her).
- For the mane: cut violet and white yarn into 8 in pieces, fold each one in half, and attach them between the ears like fringe, working down the back of the neck. The original maker used about 18 pieces — more or fewer depending on how full you want it.
- For the tail: repeat the same method with 6 in pieces of yarn.
- Trim both the mane and tail with scissors once attached, shaping them until they sit the way you imagine her hair moving.
This yarn falls into the Sport / Light Worsted (2-3) range — fine enough to keep Viola’s features delicate without making the mane look bulky.
Meet Viola
Meet Viola. She sits on my shelf with her mane a little wind-blown and her horn catching the light at an angle that always looks slightly surprised. She’s not a grand, galloping sort of unicorn — she’s the quiet kind, the one who’d rather watch from a windowsill than lead anyone anywhere. That’s the thing about giving a shape a face and a name: she stops being yarn and starts being someone who was always going to turn out exactly like this. Name yours. Give her a spot on a shelf, somewhere she can watch the room. She’s earned it. 🧶
FAQ
What yarn is best for this crochet unicorn amigurumi?
A Sport/DK weight (3) cotton-acrylic blend is ideal, such as Lion Brand Comfy Cotton Blend, which gives the unicorn a soft, storybook look.
How long does it take to crochet this unicorn?
This intermediate-level pattern typically takes about 6 to 9 hours to complete, depending on your pace and experience.
What size hook do I need for amigurumi?
This pattern uses a 1.75mm fine steel crochet hook to keep the stitches tight so that no fiberfill stuffing peeks through the finished piece.