Free Unicorn Amigurumi Pattern — Easy Beginner Plush
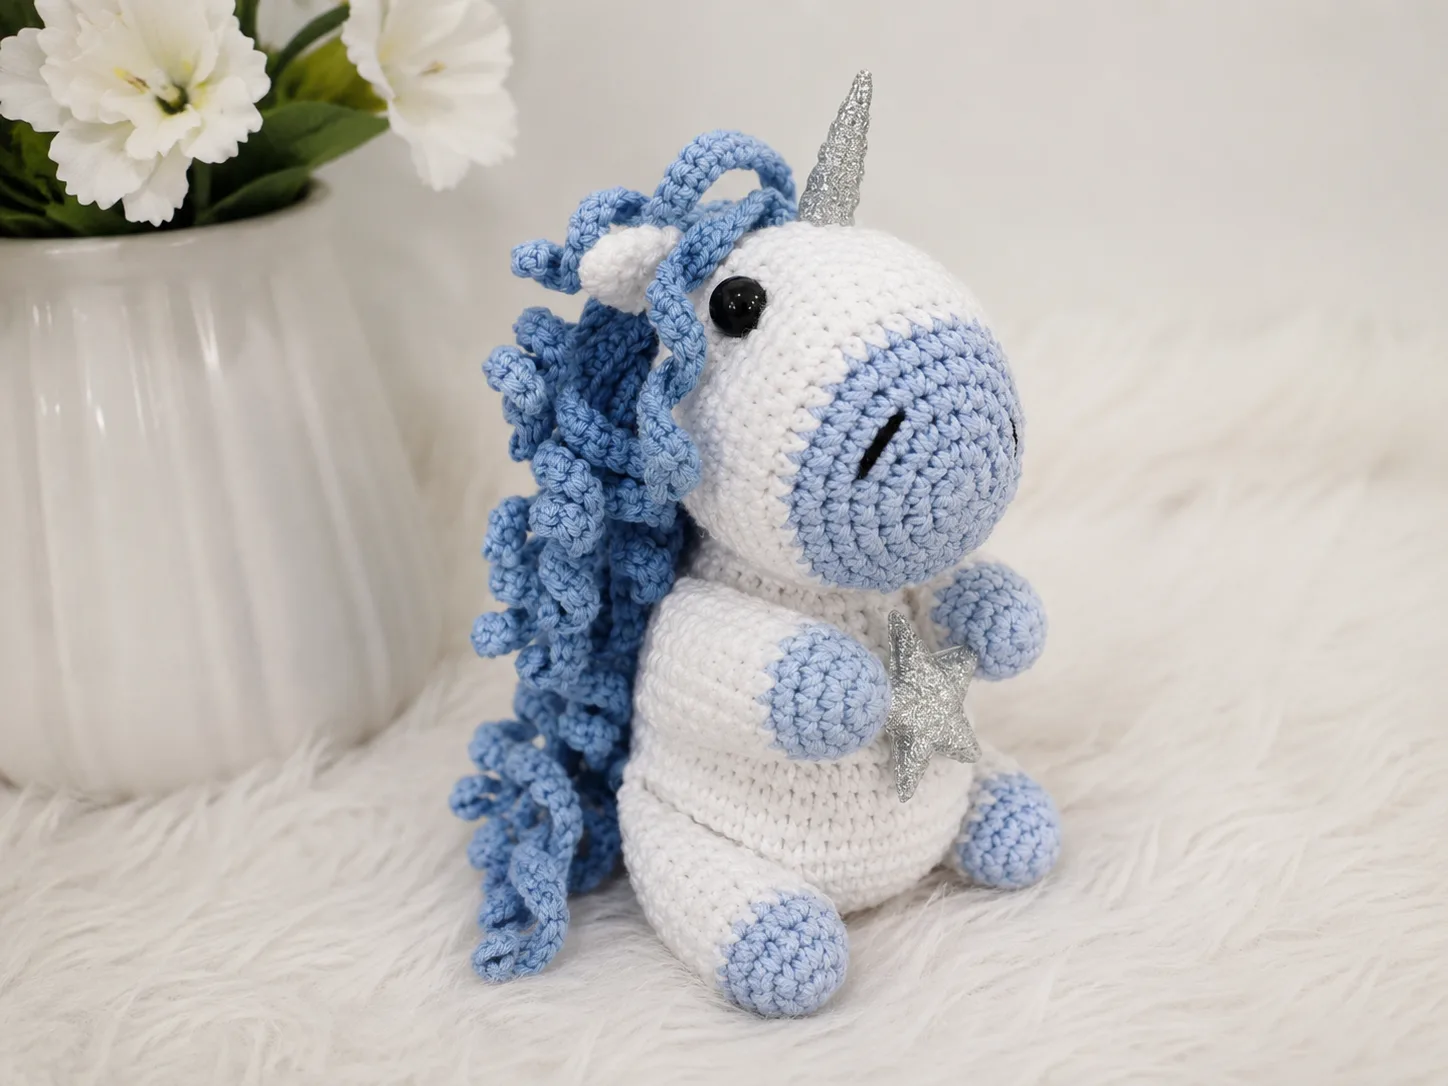
This free unicorn amigurumi pattern is one of those projects that makes you feel like you leveled up as a crocheter. It’s a little more involved than my usual quick makes — there’s shaping, color changes, and yes, actual sewing — but that’s what makes the finished unicorn look so impressive. Grab your yarn, get comfortable, and let’s build this magical little friend one round at a time.
🧶 Why You’ll Love This Pattern
- ⭐ Difficulty: Easy, but it rewards patience
- ⏱️ Time: 5-7 hours, best spread across a couple of sittings — not a one-evening project, but no single step is hard
- 🪡 Sewing: Standard — ears, head, four limbs, mane, tail, and star appliques all get sewn on
- 🧵 Yarn: A lightweight cotton, not my usual chunky chenille — but it gives this unicorn beautifully crisp stitch definition
- 💰 Yarn needed: Roughly 150-200 yards total, split across three colors
Okay, honestly? This one has more sewing than I’d normally sign up for. But between the horn, the mane, and that little star detail, it just wouldn’t be the same unicorn without it. Here’s the thing — it’s actually easier than it looks, because every single piece is small. No giant seams, just a bunch of tiny, satisfying ones.
What You’ll Need for This Free Unicorn Amigurumi Pattern
- Yarn: A lightweight cotton yarn in light blue, white, and dark blue. The original pattern uses Gazzal Baby Cotton, which isn’t easy to find in the US — this yarn falls in the sport-to-DK range, so Lily Sugar’n Cream, Paintbox Cotton DK, or We Crochet Dishie all work as substitutes. You’ll find these at Joann, Michaels, or Hobby Lobby.
- Crochet hook: 1.75mm. Quick heads-up — this one doesn’t have a standard US letter size, since it’s smaller than the lettered hooks most US crocheters own. Look for it labeled by millimeter (steel or thread hooks sometimes go this small) rather than hunting for a matching letter.
- Safety eyes: 10mm, plus the locking washers that come with them.
- Horn: A small plastic doll horn with a sewing loop — usually found in the doll-making section of craft stores or online.
- Star appliques: 2 small stars to glue together and attach to the body.
- Black embroidery thread for the nostrils.
- Polyester stuffing (Poly-Fil is my go-to).
- Tapestry needle and stitch marker.
Don’t stress if your exact yarn colors are different from mine — as long as you’ve got a main body color and two accent colors for the mane, tail, and legs, you’re set. And since safety eyes are involved, if this little unicorn is headed for a small child, it’s worth reviewing general toy safety guidance before you gift it.
Abbreviations Used in This Pattern
| Abbreviation | Meaning | What It Actually Means |
|---|---|---|
| mr | magic ring | An adjustable loop that closes up tight so there’s no hole in the center. This is how almost every part starts. |
| ch | chain | Yarn over, pull through. Used for the mane and tail strips here. |
| sc | single crochet | The basic stitch you’ll use for almost this entire pattern. |
| inc | increase | 2 single crochets worked into the same stitch. This is what makes the pieces get wider. |
| dec | decrease | Worked as an invisible decrease so you don’t get a gap — more on that below. |
Before You Start This Free Unicorn Amigurumi Pattern: Beginner Tips
Never made a magic ring before? No worries — our magic ring tutorial walks you through it in under two minutes, and every single part of this unicorn starts with one.
Whenever you see “dec” in this pattern, use an invisible decrease instead of a standard sc2tog — it closes up so much cleaner. Our invisible decrease tutorial makes it click almost instantly.
This pattern has more pieces to sew together than most of my picks, so before you start assembly, it’s worth skimming our guide to sewing amigurumi parts. Pinning everything in place before you sew makes a huge difference — trust me.
The Pattern
Head (make 1)
Yarn: light blue, switching to white partway through
Starting method: magic ring
Row 1: 6 sc in mr [light blue] (6)
Row 2: (inc) × 6 (12)
Row 3: (1 sc, inc) × 6 (18)
Row 4: (2 sc, inc) × 6 (24)
Row 5: (3 sc, inc) × 6 (30)
Row 6: (4 sc, inc) × 6 (36)
Row 7: (5 sc, inc) × 6 [switch to white here] (42)
Rows 8-18: sc around, no shaping (11 rows) (42)
🎉 You’re past the halfway point! That long stretch of plain rounds feels a little repetitive, but it’s what gives the head its rounded shape. Put a show on in the background — you’ve got this.
Row 19: (5 sc, dec) × 6 (36)
Row 20: (4 sc, dec) × 6 (30)
Row 21: (3 sc, dec) × 6 (24)
Row 22: (2 sc, dec) × 6 (18)
Row 23: (1 sc, dec) × 6 (12)
Row 24: (dec) × 6 (6)
Insert the safety eyes between rows 14 and 15, spacing them 12 stitches apart. Insert the horn between rows 15 and 16, centered evenly between the eyes, and sew it in place from the inside using its loop. Time to add some stuffing — squeeze it in there until the head feels firm but still squishy.
Finishing: Once stuffed, gently press an indentation from one eye across to the other to sculpt the face a little. Embroider small nostrils with black thread.
Ears (make 2)
Yarn: white
Starting method: magic ring
Row 1: 6 sc in mr (6)
Row 2: sc around, no shaping (6)
Row 3: (1 sc, inc) × 3 (9)
Rows 4-5: sc around, no shaping (2 rows) (9)
Row 6: (1 sc, dec) × 3 (6)
Leave a tail for sewing and set both ears aside — no stuffing needed here, they stay flat.
Body (make 1)
Yarn: white
Starting method: magic ring
Row 1: 6 sc in mr (6)
Row 2: (inc) × 6 (12)
Row 3: (1 sc, inc) × 6 (18)
Row 4: (2 sc, inc) × 6 (24)
Row 5: (3 sc, inc) × 6 (30)
Row 6: (4 sc, inc) × 6 (36)
Row 7: (5 sc, inc) × 6 (42)
Row 8: (6 sc, inc) × 6 (48)
Rows 9-14: sc around, no shaping (6 rows) (48)
Row 15: (2 sc, dec) × 6, then 24 sc (42)
Row 16: sc around, no shaping (42)
Row 17: (1 sc, dec) × 6, then 24 sc (36)
Row 18: sc around, no shaping (36)
Row 19: (4 sc, dec) × 6 (30)
Row 20: sc around, no shaping (30)
Row 21: (3 sc, dec) × 6 (24)
Row 22: sc around, no shaping (24)
Row 23: (2 sc, dec) × 6 (18)
Stuff the body firmly, leaving the last round open — this is where the head attaches.
Arms and Legs (make 4)
Yarn: light blue, switching to white
Starting method: magic ring
Row 1: 6 sc in mr [light blue] (6)
Row 2: (inc) × 6 (12)
Row 3: (3 sc, inc) × 3 (15)
Row 4: sc around, no shaping (15)
Rows 5-12: sc around, no shaping (8 rows) [switch to white] (15)
Rows 13-16: sc around, no shaping (4 rows) [white] (15)
Row 17: (3 sc, dec) × 3 (12)
🎉 Four down! Making the same limb four times in a row sounds tedious, but honestly, this is the part where your hands start moving on autopilot — it goes fast.
Stuff each limb lightly — you want them a little floppy, not stiff, so the finished unicorn can sit nicely.
Mane (make 1)
Yarn: dark blue
Starting method: chain
Row 1: Chain 30. Starting from the 3rd chain from the hook, sc across 28 stitches. Then immediately chain 30 again and sc across 28 stitches again. Repeat this whole process until you have 14 strips total.
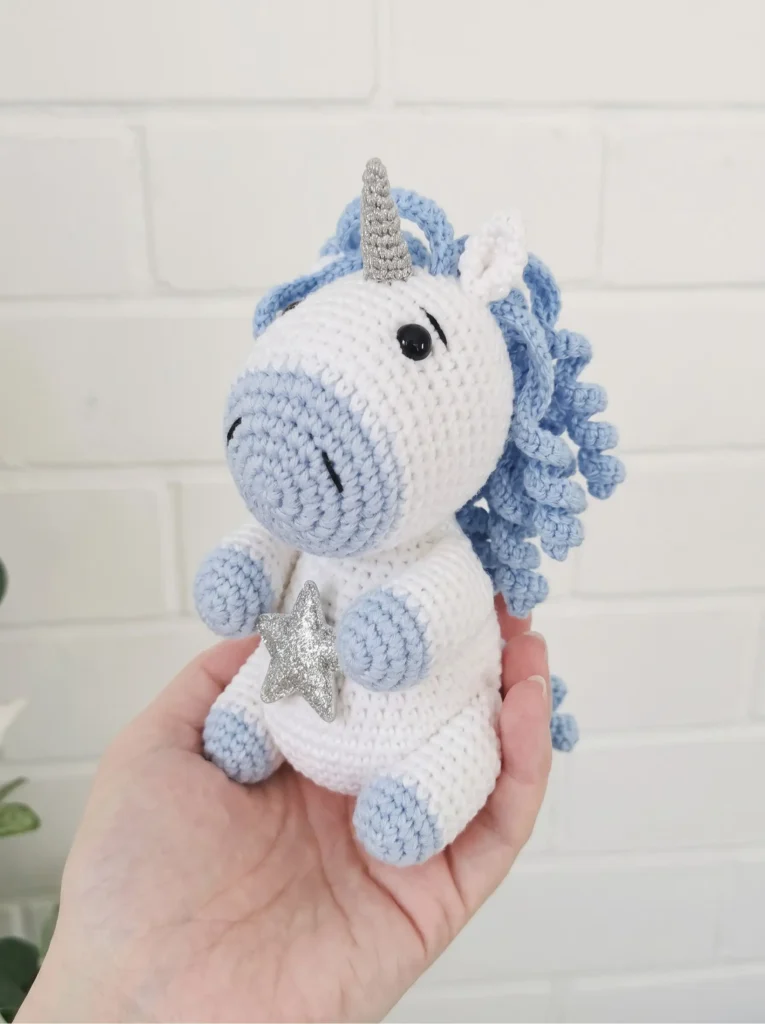
Finishing: Fold the mane strip in half lengthwise and sew both halves at once — this doubles it up so the mane looks nice and full instead of thin.
Tail (make 1)
Yarn: dark blue
Starting method: chain
Row 1: Chain 20. Starting from the 3rd chain from the hook, sc across 18 stitches. Then immediately chain 20 again and sc across 18 stitches again. Repeat until you have 5 strips total.
Finishing: Twist the strips together and sew them onto the body while they’re twisted — that’s what gives the tail its curl.
Star Appliques (make 1 set)
Row 1: Take your 2 star appliques and glue them together, back to back.
Finishing: Sew or glue the finished star onto the body and one of the legs.
Assembly
- Insert the safety eyes between rows 14 and 15 of the head, spaced 12 stitches apart, before you finish stuffing.
- Insert the horn between rows 15 and 16 of the head, centered evenly between the eyes, and sew it in place from the inside using its loop.
- Sew the ears onto the head between rows 19 and 21.
- Sew the head onto the open end of the body (row 23).
- Sew two arms to the sides of the body, between rows 20 and 22.
- Sew two legs to the lower sides of the body, between rows 6 and 9, so the unicorn can sit.
- Fold the mane in half and sew it along the back of the head and upper body.
- Twist the tail strips together and sew them to the back of the body, around row 7.
- Glue the two star appliques together, then sew or glue the star to the body and one leg.
- Sculpt a gentle indentation across the face from eye to eye, and embroider the nostrils with black thread.
Pin everything in place before you commit to sewing — it’s so much easier to adjust a pinned leg than a sewn one. I promise the pinning step saves you more time than it costs.
You Did It! Your Free Unicorn Amigurumi Pattern Is Complete
Look at that little face! This one had more sewing than I usually sign myself up for, and if you pushed through every seam, you should be genuinely proud — that’s not nothing. If this was your first amigurumi with this many pieces, welcome to the world of “actually, I can do hard things.” Tag AmiLoops when you share yours — I want to see every horn, every mane, every slightly wonky star. 🧶
FAQ
What yarn is best for this free unicorn amigurumi pattern?
A lightweight cotton yarn in the sport-to-DK range (like Lily Sugar’n Cream or Paintbox Cotton DK) works best for beautifully crisp stitch definition.
How long does it take to crochet this unicorn?
It takes approximately 5 to 7 hours. It’s an easy pattern but has several parts to sew, so it’s best spread across a couple of sittings.
Are safety eyes safe for a baby toy?
While safety eyes have locking washers, they can still pose a choking hazard for very small children under 3. If gifting to a baby, it’s safer to embroider the eyes instead.