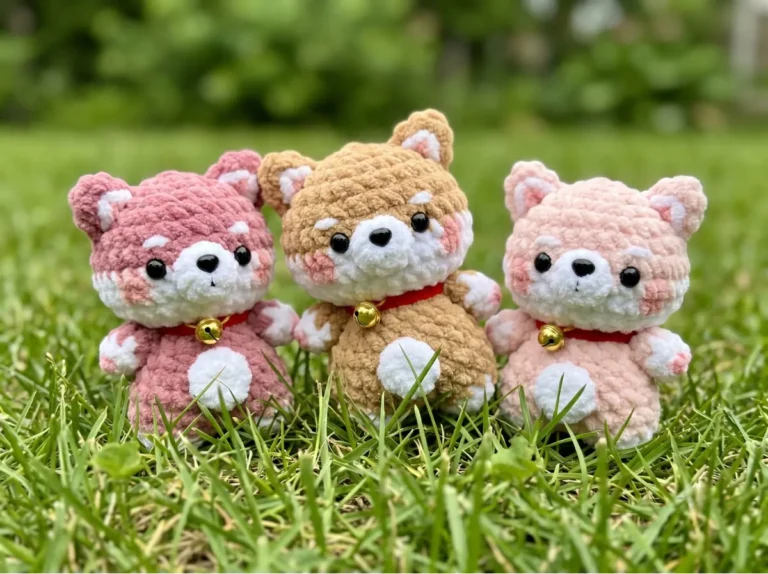
Free Fox Crochet Amigurumi Pattern — Meet Quinn, the Scrap-Friendly Mini Fox
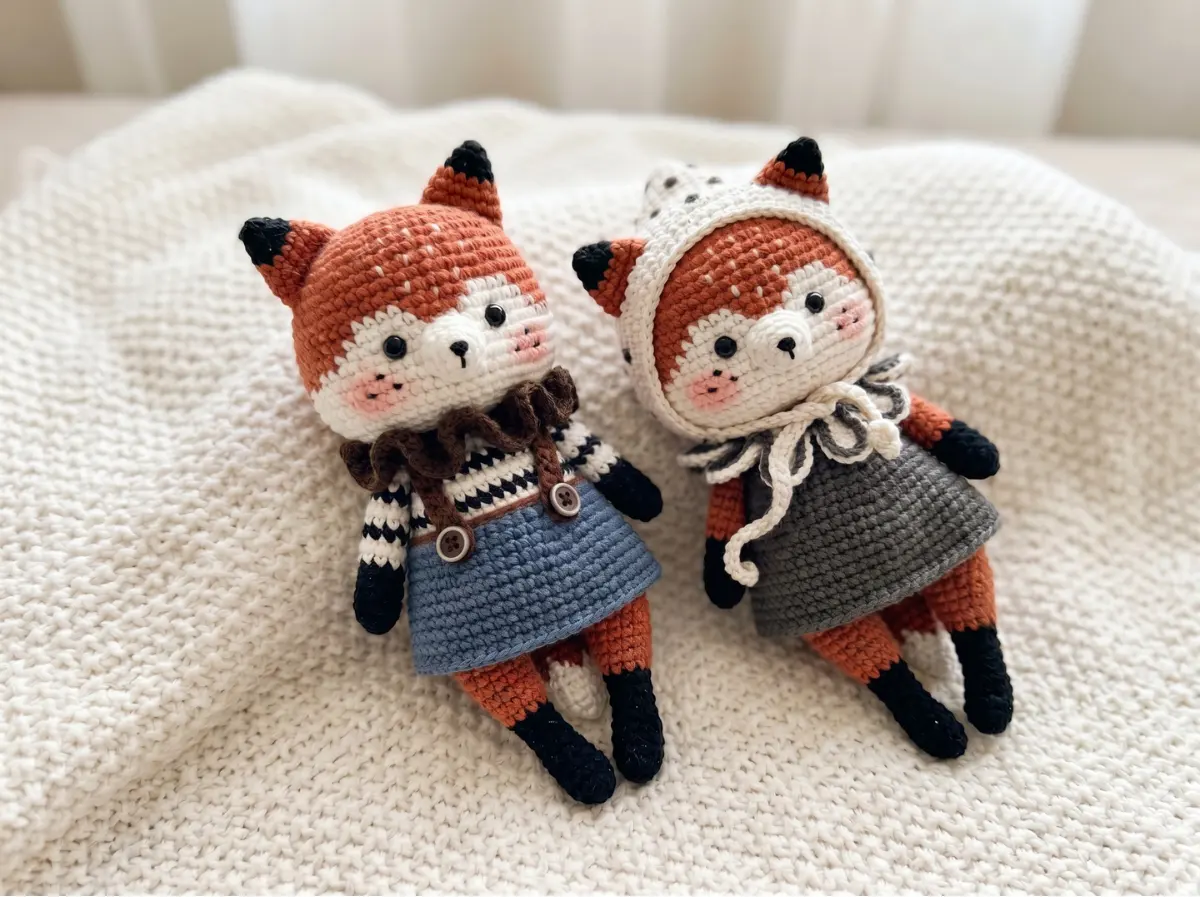
This free fox crochet pattern is exactly the kind of multi-project design your scrap bin was built for — one fox body, two outfit options, a working keychain version, and a pixie hat, all from a modest pile of terracotta, white, and black yarn. The full doll works up to about 6.25 inches, and the keychain version comes in at under 2.5 inches depending on your hook. Whether you’re making one as a shelf piece or a dozen as bag charms, Quinn delivers serious personality for minimal yardage. Grab your leftover DK and your 2.0mm hook. Let’s go.
🧶 What You’ll Need From Your Stash
- 💰 Yarn Needed: ~150 yards total for full doll (terracotta ~80 yds, white ~40 yds, black ~20 yds, plus small amounts for dress and hat of your choice); keychain version: ~25–35 yards total
- 🎨 Colors: terracotta (or any rust/orange-brown), white, black — plus any scraps for the dress, collar, and hat
- 🪝 Hook: 2.0mm (steel 4) for full doll; 1.0mm for small keychain version
- ⏱️ Time: 5–8 hours for full doll with outfit; 45–60 min for keychain version
- 📏 Finished Size: 6.25 in (16 cm) full doll; 1.4–2.25 in (3.6–5.8 cm) keychain
- 💡 Difficulty: Intermediate
- 🎁 Great For: gifts, bag charms, market items, keychain sets, shelf display
Materials for This Fox Crochet Pattern
- Yarn — Main body (full doll): DK/Light Worsted weight (CYCA 3), approximately:
- Terracotta: ~80 yards (any rust, burnt orange, or copper-toned DK from your stash works)
- White: ~40 yards
- Black: ~20 yards
- Yarn — Dress, hat, collar: Small amounts in any color(s) you have on hand — this is the perfect spot to raid your scrap bin. Even 15–20 yards of a fun color is enough for the collar or hat ties.
- Yarn — Keychain version: Lace weight (CYCA 0), approximately 25–35 yards total across all colors. A leftover ball of fingering cotton works beautifully here.
- Hook: 2.0mm (steel 4) for full doll; 1.0mm for keychain
- Safety eyes: 5mm black (full doll); 3mm (keychain)
- Additional eye detail: 4mm black plastic eye for the muzzle decoration
- Fiberfill/polyfill: Small amount — head and tail only
- Black embroidery thread: For nose embroidery
- Small button(s): 0.9–1 cm, for collar and dress (Option 2 uses 2–3 buttons)
- Tapestry needle, stitch marker, pins
- Pink blush: For cheek makeup (optional but worth it)
🧶 Scrap Check: The dress, hat, and collar are completely color-flexible — the pattern says “of your choice” for a reason. This is your chance to use those 20-yard leftovers that have been sitting in the bottom of your basket. Mix and match. Mismatched colors on this fox look intentional and charming.
Abbreviations Used in This Fox Crochet Pattern
| Abbreviation | Meaning |
|---|---|
| mr | magic ring |
| ch | chain |
| sl st | slip stitch |
| sc | single crochet |
| hdc | half double crochet |
| dc | double crochet |
| inc | increase (2 sc in same stitch) |
| dec | invisible decrease (through front loops only of next 2 sts) |
| BLO | back loop only |
| [t] | terracotta yarn |
| [w] | white yarn |
| FO | fasten off |
Smart Crafter Tips
First time making a magic ring? Our magic ring tutorial walks you through it step by step — it’s the cleanest way to start any round piece, and it closes completely so you won’t see a hole at the tip of Quinn’s ears or tail.
The head on this fox starts from a chain, not a magic ring — it’s an oval construction that creates the pointed snout shape. If you’ve never worked into both sides of a foundation chain, it can feel awkward the first time. Take it slow on Row 1 and use your stitch marker religiously. Our guide on working in continuous rounds covers the spiral method that keeps this head seamless.
The invisible decrease is used throughout — and it matters here. Quinn’s muzzle area and head closure involve a lot of decreasing in a visible zone. Using the invisible method (through front loops only of the next two stitches) keeps the surface smooth. Our invisible decrease tutorial shows the exact technique — it’s faster than it sounds once your hands know the motion.
💡 Quick Hack: The legs, arms, ears, and tail are all closed by folding the edges flat and crocheting through both layers — no sewing needed to close those pieces. That alone saves you 10 minutes of fiddly finishing per doll. Make sure you leave long enough tails for sewing on, though — at least 12 inches per piece.
Fox Crochet Pattern — Full Instructions
Ears (×2)
Colors: black (Rows 1–3), terracotta (Rows 4–6)
Start: magic ring
Row 1: 4 sc in mr (4)
Row 2: inc, 3 sc (5)
Row 3: 5 inc (10)
Switch to terracotta before Row 4.
Row 4: (4 sc, inc) x 2 (12)
Row 5: (5 sc, inc) x 2 (14)
Row 6: 14 sc (14)
Do not stuff. FO, leaving a tail for sewing.
🧶 Scrap Check: Each ear uses roughly 3–4 yards of black and 5–6 yards of terracotta. If you’re making a keychain version, a single leftover thread of each color is genuinely all you need.
Nose (×1)
Color: white
Start: magic ring
Row 1: 5 sc in mr (5)
Row 2: 5 inc (10)
Row 3: 10 sc (10)
Do not stuff. FO, leaving a tail for sewing.
Head (×1)
Colors: terracotta and white (color changes detailed per row)
Start: Ch 9, begin in 2nd ch from hook. Work in a continuous spiral.
Row 1: inc, 6 sc, 4 sc in last st, on the other side: 6 sc, inc (20)
Row 2: 2 inc, 6 sc, 4 inc, 6 sc, 2 inc (28)
Row 3: inc, 1 sc, inc, 8 sc, inc, 1 sc, 2 inc, 1 sc, inc, 8 sc, inc, 1 sc, inc (36)
Row 4: 2 sc, inc, 12 sc, inc, 4 sc, inc, 12 sc, inc, 2 sc (40)
Row 5: 2 sc, inc, 14 sc, inc, 4 sc, inc, 14 sc, inc, 2 sc (44)
Row 6: 44 sc (44)
Row 7: 2 sc, inc, 16 sc, inc, 4 sc, inc, 16 sc, inc, 2 sc (48)
Row 8: 48 sc (48)
Row 9: 3 sc, inc, 16 sc, inc, 6 sc, inc, 16 sc, inc, 3 sc (52)
Row 10: [t] 7 sc, [w] 4 sc, [t] 5 sc, [w] 4 sc, [t] 32 sc (52)
Row 11: [t] 6 sc, [w] 6 sc, [t] 3 sc, [w] 6 sc, [t] 31 sc (52)
Row 12: [t] 3 sc, inc, 1 sc [w] 8 sc, [t] 1 sc, [w] 8 sc, [t] inc, 6 sc, inc, 18 sc, inc, 3 sc (56)
Row 13: [t] 4 sc, [w] 21 sc, [t] 31 sc (56)
Row 14: [t] 2 sc, [w] 25 sc, [t] 29 sc (56)
Switch to white completely before Row 15.
Row 15: 3 sc, inc, 20 sc, inc, 6 sc, inc, 20 sc, inc, 3 sc (60)
Rows 16–17: (2 rows) 60 sc (60)
Row 18: (8 sc, dec) x 6 (54)
Row 19: (7 sc, dec) x 6 (48)
Row 20: (2 sc, dec) x 12 (36)
Row 21: (4 sc, dec) x 6 (30)
Row 22: (3 sc, dec) x 6 (24)
Note on Row 22 color: use terracotta if making Body Option 1; use white if making Body Option 2 or the keychain.
FO and weave in ends. Stuff the head with fiberfill before closing fully.
Legs (×2)
Colors: black (Rows 1–9), terracotta (Rows 10–20)
Start: magic ring
Row 1: 4 sc in mr (4)
Row 2: 4 inc (8)
Rows 3–5: (3 rows) 8 sc (8)
Row 6: 2 inc, 2 sc, dec, 2 sc (9)
Row 7: 1 sc, 2 inc, 2 sc, 2 dec (9)
Row 8: 2 sc, 2 inc, 1 sc, 2 dec (9)
Row 9: 3 sc, 2 inc, 2 dec (9)
Switch to terracotta before Row 10.
Row 10: inc, 8 sc (10)
Row 11: (4 sc, inc) x 2 (12)
Row 12: (5 sc, inc) x 2 (14)
Row 13: 14 sc (14)
Row 14: (6 sc, inc) x 2 (16)
Rows 15–18: (4 rows) 16 sc (16)
Row 19: (2 sc, dec) x 4 (12)
Row 20: (1 sc, dec) x 4 (8)
After Row 20, crochet 1 more sc (shift stitch).
Do not stuff. Fold the edges flat and crochet 4 sc through both sides. FO, leaving a tail for sewing.
Tail (×1)
Colors: white (Rows 1–7), terracotta (Rows 8–14)
Start: magic ring
Row 1: 4 sc in mr (4)
Row 2: 4 inc (8)
Row 3: (1 sc, inc) x 4 (12)
Row 4: 12 sc (12)
Row 5: (2 sc, inc) x 4 (16)
Row 6: ([t] 1 sc, [w] 3 sc) x 3, [t] 1 sc, [w] 2 sc, [t] 1 sc (16)
Row 7: [t] 2 sc, [w] 1 sc, ([t] 3 sc, [w] 1 sc) x 2, [t] 5 sc (16)
Switch to terracotta completely before Row 8.
Row 8: (3 sc, inc) x 4 (20)
Rows 9–11: (3 rows) 20 sc (20)
Row 12: (3 sc, dec) x 4 (16)
Row 13: (2 sc, dec) x 4 (12)
Row 14: (1 sc, dec) x 4 (8)
Stuff with fiberfill. Fold the edge flat and crochet 4 sc through both sides. FO, leaving a tail for sewing.
🧶 Scrap Check: The tail tip is white — but honestly, any off-white, cream, or pale yellow you have on hand reads just as well. The color transition in Rows 6–7 uses both colors in a single row, so keep both strands nearby when you hit that section.
Body Option 1 — Classic Dress Version
Body — Option 1 (×1)
Color: terracotta
Start: magic ring
Row 1: 8 sc in mr (8)
Row 2: 8 inc (16)
Row 3: (1 sc, inc) x 8 (24)
Row 4: (2 sc, inc) x 8 (32)
Row 5: (3 sc, inc) x 8 (40)
Rows 6–14: (9 rows) 40 sc (40)
Row 15: (8 sc, dec) x 4 (36)
Row 16: 36 sc (36)
Row 17: BLO: (4 sc, dec) x 6 (30)
Row 18: 30 sc (30)
Row 19: (3 sc, dec) x 6 (24)
Row 20: 24 sc (24)
FO, leaving a tail for sewing. Stuff with fiberfill.
Dress — Option 1 (×1)
Color: your choice
Start: Hold the body upside down. Attach yarn to the first st of the BLO of Row 17, ch 1.
Row 1: 36 sc, sl st, ch 1 (36)
Row 2: BLO: 36 sc, sl st, ch 1 (36)
Row 3: 36 sc, sl st, ch 1 (36)
Row 4: (5 sc, inc) x 6, sl st, ch 1 (42)
Rows 5–6: (2 rows) 42 sc, sl st, ch 1 (42)
Row 7: (6 sc, inc) x 6, sl st, ch 1 (48)
Row 8: 48 sc, sl st, ch 1 (48)
Row 9: (7 sc, inc) x 6, sl st, ch 1 (54)
Rows 10–11: (2 rows) 54 sc, sl st, ch 1 (54)
Row 12: (8 sc, inc) x 6, sl st, ch 1 (60)
Rows 13–15: (3 rows) 60 sc, sl st, ch 1 (60)
FO and weave in ends.
Arms — Option 1 (×2)
Colors: black (Rows 1–5), terracotta (Rows 6–13)
Start: magic ring
Row 1: 5 sc in mr (5)
Row 2: 5 inc (10)
Row 3: 10 sc (10)
Row 4: (3 sc, dec) x 2 (8)
Row 5: (3 sc, inc) x 2 (10)
Switch to terracotta before Row 6.
Rows 6–13: (8 rows) 10 sc (10)
Do not stuff. Fold the edge flat and crochet 5 sc through both sides. FO, leaving a tail for sewing.
Collar — Option 1 (×1)
Color: white
Start: Ch 39, begin in 7th ch from hook.
Row 1: 33 sc, ch 1, turn (33)
Row 2: *Ch 6, skip 3 ch, start in 4th ch from hook: 2 dc, 1 sc in each st of the ch, 2 sl st in next 2 sts of Row 1.* Repeat from * to end of row.
Finishing: Join yarn in a contrasting color and work sl st in each st of Row 2 for a tidy edge. FO and weave in ends. Sew on a small button at center front.
Body Option 2 — Striped Suspender Dress Version
Body — Option 2 (×1)
Colors: black (Rows 1–10), with white stripe sections detailed per row
Start: magic ring
Row 1: 8 sc in mr [black] (8)
Row 2: 8 inc (16)
Row 3: (1 sc, inc) x 8 (24)
Row 4: (2 sc, inc) x 8 (32)
Row 5: (3 sc, inc) x 8 (40)
Rows 6–10: (5 rows) 40 sc [black] (40)
Rows 11–12: (2 rows) 40 sc [white] (40)
Row 13: 40 sc [black] (40)
Row 14: 40 sc [white] (40)
Row 15: (8 sc, dec) x 4 (36)
Row 16: 36 sc [black] (36)
Row 17: (4 sc, dec) x 6 [white] (30)
Row 18: 30 sc (30)
Row 19: (3 sc, dec) x 6 [black] (24)
Row 20: 24 sc [white] (24)
FO, leaving a tail for sewing. Stuff with fiberfill.
Arms — Option 2 (×2)
Colors: black and white alternating as noted
Start: magic ring
Row 1: 5 sc in mr [black] (5)
Row 2: 5 inc (10)
Row 3: 10 sc (10)
Row 4: (3 sc, dec) x 2 (8)
Row 5: (3 sc, inc) x 2 (10)
Rows 6–7: (2 rows) 10 sc [white] (10)
Row 8: 10 sc [black] (10)
Rows 9–10: (2 rows) 10 sc [white] (10)
Row 11: 10 sc [black] (10)
Rows 12–13: (2 rows) 10 sc [white] (10)
Do not stuff. Fold the edge flat and crochet 5 sc through both sides. FO, leaving a tail for sewing.
Dress — Option 2 (×1)
Color: your choice
Start: Ch 40, sl st in first ch to join in the round.
Rows 1–2: (2 rows) 40 sc, sl st, ch 1 (40)
Row 3: (7 sc, inc) x 5, sl st, ch 1 (45)
Row 4: (8 sc, inc) x 5, sl st, ch 1 (50)
Row 5: 50 sc, sl st, ch 1 (50)
Row 6: (9 sc, inc) x 5, sl st, ch 1 (55)
Row 7: 55 sc, sl st, ch 1 (55)
Row 8: (10 sc, inc) x 5, sl st, ch 1 (60)
Rows 9–10: (2 rounds) 60 sc, sl st, ch 1 (60)
Row 11: 60 sl st (60)
FO and weave in ends.
Straps — Option 2 (×1 pair)
Color: your choice
Start: Attach yarn to the first st of Row 1 of the dress.
Row 1: 3 sl st, First Strap: ch 29, start in 7th ch from hook: 23 sc, continue on the dress: 33 sl st.
Row 2: Second Strap: ch 29, start in 7th ch from hook: 23 sc, continue on the dress: 4 sl st.
FO and weave in ends. Sew two small buttons to the front of the dress where the straps meet.
Collar — Option 2 (×1)
Color: your choice
Start: Ch 36, begin in 7th ch from hook.
Row 1: 30 sc, ch 1, turn (30)
Row 2: 30 inc (60)
Row 3: 60 inc (120)
FO and weave in ends. Sew a small button at center front.
Pixie Hat (×1)
Color: your choice
Start: Ch 51, begin in 2nd ch from hook, working in rows.
Row 1: 50 sc, ch 1, turn (50)
Row 2: 15 hdc, ch 7, skip 7 sts, 6 sc, ch 7, skip 7 sts, 15 hdc, ch 1, turn (50)
Row 3: dec, 46 sc, dec, ch 1, turn (48)
Row 4: dec, 44 sc, dec, ch 1, turn (46)
Row 5: dec, 42 sc, dec, ch 1, turn (44)
Row 6: dec, 40 sc, dec, ch 1, turn (42)
Rows 7–16: (10 rows) 42 sc, ch 1, turn (42)
Row 17: 42 sc (42)
Join the two side edges using 21 sc. Turn inside out so the right side faces outward.
Bottom edge: Join yarn leaving a 100 cm tail for the tie. Sl st in each st around the bottom edge — do not cut the yarn.
First tie: Ch 21, then 20 sc back along the chain. FO and weave in ends.
Second tie: Using the remaining 100 cm tail, repeat the same process.
Note: The two ch 7 gaps in Row 2 create openings for Quinn’s ears. Once the hat is assembled on her head, the ears will poke through these holes.
Keychain Version — Head Continuation
Color: white
Pick up from Row 22 of the head (use white for Row 22 in this version).
Row 23: (2 sc, dec) x 6 (18)
Row 24: (1 sc, dec) x 6 (12)
Row 25: 6 dec (6)
Stuff the head with fiberfill before fully closing. Pull yarn through the front loops of the remaining 6 sts using a tapestry needle to close. Attach yarn to the top of the head, ch 6, join to head with sl st. FO. Attach to a keyring.
Assembly
- Install 5mm safety eyes between Rows 12 and 13 of the head, 9 stitches apart. Do this before stuffing and closing — once the head is stuffed, you can’t get the backing washer in. Our safety eye guide shows the exact placement and locking method.
- Sew the nose piece (white oval) between Rows 13 and 16, centered on the muzzle area.
- Embroider the nose with black embroidery thread directly onto the muzzle piece.
- Attach the small 4mm black plastic eye to the lower center of the muzzle piece for the nose dot detail.
- Sew the ears on top of the head — position them evenly and use pins to test placement before committing.
- For Body Option 1: Sew legs to body at Row 7. Sew tail to body at Row 4. Sew arms 2 rows from the last row of the body. Sew head to body.
- For Body Option 2: Sew arms 2 rows from the last row of the body. Sew legs to body at Row 7. Sew tail to body at Row 4. Sew head to body.
- Dress Quinn in her collar and chosen outfit.
Face Decoration
- Eye indentation: Thread a long piece of white yarn through a tapestry needle. Insert at point 1, bring out at point 2, insert at point 3, bring out at point 4. Repeat for the second eye. Gently pull both tails simultaneously until you get a subtle inward pull that makes the eyes “settle” into the face. Hide the tails inside the head.
- Cheeks: Apply pink blush with a dry brush. A light touch reads beautifully — build it up slowly.
- Freckles: Use French knots with a single strand of embroidery thread. Scatter 3–5 on each cheek for a natural look. Space them unevenly — perfectly symmetrical freckles look artificial.
- Pixie hat decoration: Add French knots across the hat surface in a contrasting yarn. Space them evenly but don’t overthink it — imperfection is the charm.
💡 Stretch It Further
Quinn’s base fox head + ears + tail is the same regardless of which outfit you make — which means one pattern, infinite variations. Here’s how to get more mileage out of the same work:
- Keychain set: Make 3 keychain versions in the same terracotta + white + black but vary the hat color — one in mustard yellow, one in sage green, one in dusty rose. Bundle them with a kraft tag as a gift set. Total yarn per keychain: roughly 25–30 yards. Total cost for three: almost nothing from your scrap bin.
- Swap the outfit: The body is finished before the dress attaches — which means you can theoretically leave Quinn undressed for a simpler, faster project, or design your own attached accessory using the BLO row as your starting point.
- Change the hat: No pixie hat scraps? The hat is optional — Quinn looks completely finished without it. Or swap the hat for a tiny crocheted bow using any 10-yard leftover.
- Market math: At roughly 150 yards of DK for the full doll and DK running $3–$6 per 100-yard skein, your yarn cost per full Quinn is under $10 — often much less from your stash. Keychains clock in under $1 each in materials.
Mia’s Take
Two outfit options, a working keychain version, a pixie hat with ear holes, embroidered freckles — this fox pattern gives you a lot to work with from a modest pile of yarn. The terracotta + white + black combination is one of those rare color stories that works regardless of which specific brands you’re pulling from your stash. Make the keychain version first to get comfortable with the head construction, then graduate to the full doll. Or make six keychains and never touch the full pattern — both are valid choices. That’s the whole point of a pattern this flexible. 🧶
What yarn is best for this fox crochet pattern?
Any DK or Light Worsted weight yarn from your stash works perfectly for the full doll. If you are making the keychain version, a leftover ball of fingering or lace weight cotton is ideal.
How long does it take to crochet this fox amigurumi?
The full 6.25-inch doll with an outfit takes approximately 5 to 8 hours to complete. The miniature keychain version works up much faster, usually taking just 45 to 60 minutes.
What size hook do I need for this fox amigurumi?
You will need a 2.0mm (steel 4) crochet hook for the full doll to ensure tight stitches, and a 1.0mm hook if you decide to make the smaller keychain version.