Pig Amigurumi — Free Crochet Mini Piggy Pattern
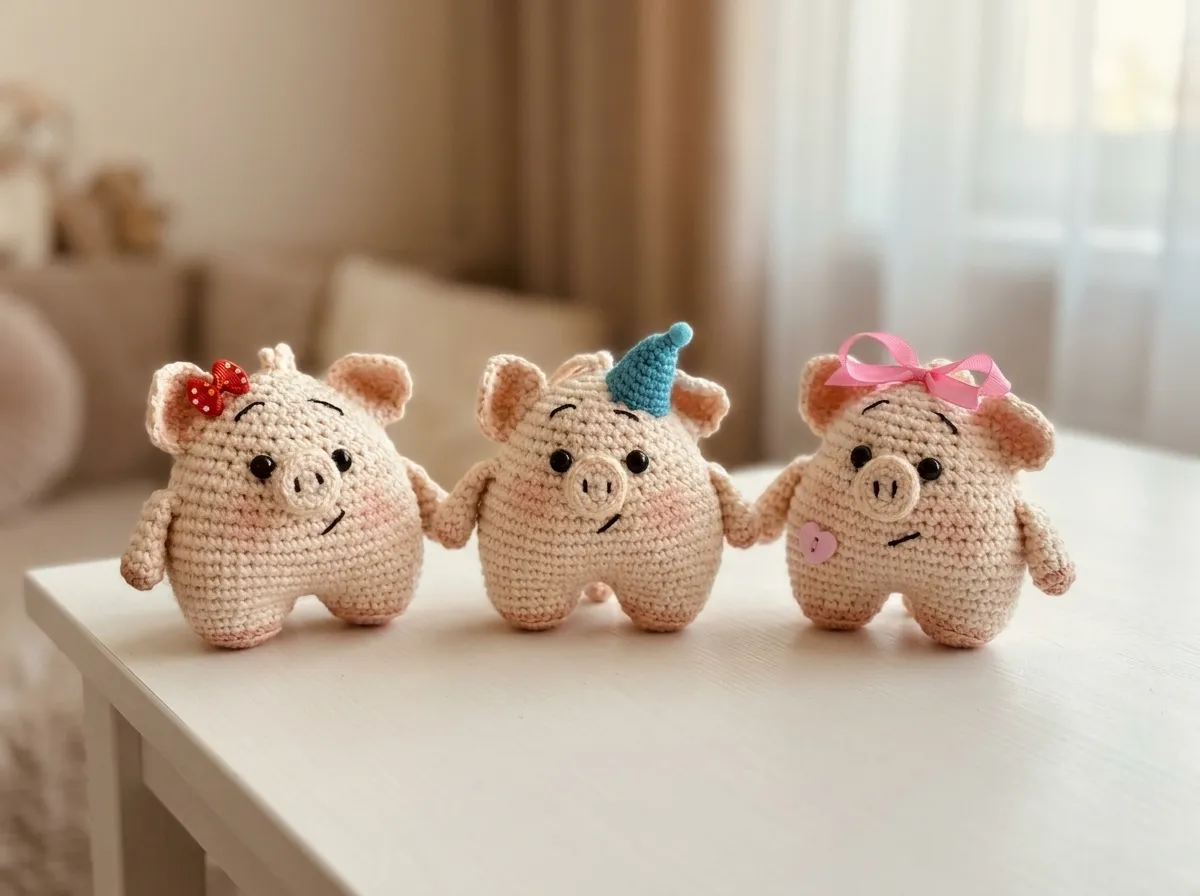
This pig amigurumi free pattern is one of those projects I keep coming back to — tiny, precise, and endlessly satisfying to finish. At just 2.6 inches tall, these little piggies work up quickly but still reward careful attention to tension. I designed my version around a tight, dense fabric that keeps the stuffing completely hidden. If you enjoy fine detail work, this one is for you.
📋 Pattern Quick Stats
- Difficulty: Beginner-Friendly
- Finished Size: 2.6 in (6.5 cm)
- Hook Size: Steel 4 (2.0 mm) — main body; 1.5 mm — snout only
- Yarn Weight: DK / Light Worsted (3)
- Techniques: magic ring, invisible decrease, BLO, color change, joining legs
- Estimated Time: 2–4 hours
Materials for Your Pig Amigurumi
- Main color (pink body): DK / Light Worsted (3) yarn — approximately 30–40 yds. Original: Yarn Art Jeans, color 73. US alternatives: Drops Muskat or Paintbox Simply DK in your preferred pink shade.
- Accent color (hooves/darker pink): DK / Light Worsted (3) yarn — approximately 10–15 yds in a slightly deeper pink or mauve. Original: Gazzal Baby Cotton, color 3412. US alternatives: Drops Safran or Paintbox Cotton DK in a coordinating shade.
- Hook: Steel 4 (2.0 mm) for all parts except the snout
- Hook: 1.5 mm (no US letter equivalent) for the snout only
- Safety eyes: Screw-in style, small size (4–5 mm works well at this scale)
- Polyfill stuffing: A small amount — Poly-Fil by Fairfield is my go-to, available at Joann, Michaels, or Hobby Lobby
- Black embroidery thread: Iris or similar, for the mouth, nostrils, and eyebrows
- Tapestry needle for sewing parts and weaving in ends
- Stitch marker to track the beginning of each round
Both main yarns fall into the DK / Light Worsted category on the Craft Yarn Council yarn weight system. If you substitute, stick with a weight 3 yarn — going heavier will make the finished pig significantly larger than the stated size.
💡 Emma’s Tip: At 2.0 mm, you’re working with a steel hook in thread-crochet territory. If your hands aren’t used to this size, take breaks. I speak from experience — tight tension on a fine hook is the fastest path to hand cramps. Stretch between parts.
Abbreviations Used in This Pig Amigurumi Pattern
| Abbreviation | Meaning |
|---|---|
| mr | magic ring |
| ch | chain |
| sc | single crochet |
| inc | increase — 2 sc worked into the same stitch |
| inv dec | invisible decrease — insert hook through front loops only of next 2 stitches simultaneously, yarn over, pull through, yarn over, pull through 2 loops |
| sl st | slip stitch |
| BLO | back loop only |
| ( ) × | repeat the number of times indicated |
Special Techniques
This pattern uses the magic ring as the starting method for most parts. If you’re new to it or have been getting a gap in the center of your rounds, our step-by-step magic ring tutorial walks through it carefully. A tight center pull makes a real difference at this scale.
All rounds are worked in a continuous spiral — no slip stitch joining at the end of each round. This is standard for amigurumi and eliminates any visible seam. If you’re unsure what that looks like in practice, take a look at our guide on working in continuous rounds.
For decreases, this pattern uses the invisible decrease (inv dec). Working through the front loops only of two stitches closes the gap that a standard sc2tog leaves behind — essential when you want clean shaping on a small piece like this. If you want to practice before starting, our invisible decrease tutorial covers the technique in full detail.
💡 Emma’s Tip: At this size, every stitch shows. I check my count at the end of every single round — no exceptions. If your count is off, don’t panic. Just frog back to the last correct round and start from there. It’s far better than discovering a mistake at Row 20.
Free Pig Amigurumi Pattern
Part 1: Legs and Body (Make 2 Legs, Then Join — ×1 Body)
Yarn: Gazzal Baby Cotton (accent color) for Rows 1–4; switch to Yarn Art Jeans or main pink (color 73 equivalent) before Row 5.
Start: Magic ring
Make 2 legs — join for body at Row 7
Row 1: 6 sc in mr (6)
Row 2: 6 inc (12)
Row 3: (1 sc, inc) × 6 (18)
Row 4: 18 sc in BLO (18)
Rows 5–6: 18 sc through both loops [switch to main pink before Row 5] (18)
💡 Joining the Legs: After Row 6, cut yarn on the first leg and fasten off. On the second leg, do not cut yarn — continue directly into Row 7, working across both legs to form the body. The join row is where you pick up stitches from both legs simultaneously. Take your time here; this is the trickiest moment in the whole pattern.
Row 7: (5 sc, inc) × 6 (42)
Row 8: 3 sc, inc, (6 sc, inc) × 5, 3 sc (48)
Rows 9–15: 48 sc (7 rows) (48)
Row 16: 3 sc, inv dec, (6 sc, inv dec) × 5, 3 sc (42)
Row 17: 42 sc (42)
Row 18: (5 sc, inv dec) × 6 (36)
Row 19: 36 sc (36)
Row 20: 2 sc, inv dec, (4 sc, inv dec) × 5, 2 sc (30)
Row 21: 30 sc (30)
Row 22: (3 sc, inv dec) × 6 (24)
Row 23: 1 sc, inv dec, (2 sc, inv dec) × 5, 1 sc (18)
💡 Emma’s Tip: Add stuffing firmly after Row 23. The body is small — you won’t need much polyfill — but pack it in gradually and shape as you go. The rounder the better at this scale.
Row 24: 18 sc (18)
Row 25: (1 sc, inv dec) × 6 (12)
Row 26: 6 inv dec (6)
End with sl st. Cut yarn, fasten off, close the opening, and weave in ends.
Part 2: Ears (×2)
Yarn: Main pink (Yarn Art Jeans color 73 equivalent)
Start: Foundation chain — worked in turning rows
Note: At the end of each row, ch 1, turn.
Row 1: Ch 2; inc in the second ch from hook (2)
Row 2: 2 inc (4)
Row 3: 1 inc, 2 sc, 1 inc (6)
Rows 4–5: 6 sc (2 rows) (6)
Row 6: inv dec, 2 sc, inv dec (4)
Leave a tail for sewing, fasten off, cut yarn.
Part 3: Arms (×2)
Yarn: Gazzal Baby Cotton (accent color) for Rows 1–2; switch to main pink before Row 3.
Start: Magic ring
Row 1: 6 sc in mr [accent color] (6)
Row 2: 6 inc [accent color] (12)
Row 3: 12 sc [switch to main pink before this row] (12)
Row 4: (2 sc, inv dec) × 3 (9)
Rows 5–7: 9 sc (3 rows) (9)
💡 Finishing the Arms: At the end of Row 7, fold the arm flat and join the opening with a row of sc across both sides. This creates a flat, clean finish that sews onto the body neatly. Leave a long tail for sewing, fasten off, cut yarn.
Part 4: Snout (×1)
Yarn: Main pink (Yarn Art Jeans color 73 equivalent)
Hook: 1.5 mm (no US letter equivalent) — smaller hook for a tighter, more defined snout
Start: Magic ring
Row 1: 6 sc in mr (6)
Row 2: 6 inc (12)
Row 3: 12 sc in BLO (12)
Row 4: 12 sc through both loops (12)
End with sl st. Leave a tail for sewing, fasten off, cut yarn.
💡 Emma’s Tip: The BLO row on the snout (Row 3) creates a subtle ridge around the base that defines the edge beautifully. It’s a small detail, but this is one of those details that makes all the difference when you hold the finished piece.
Part 5: Tail (×1)
Yarn: Main pink (Yarn Art Jeans color 73 equivalent)
Start: Foundation chain
Row 1: Ch 7; starting from the second ch from hook, work 2 sc (inc) in each ch (12)
Leave a tail, fasten off. The extra length from working two stitches into each chain naturally creates a slight curl — that’s exactly what you want.
Assembly
- Safety eyes: Insert and secure the screw-in safety eyes before you sew any parts on. Position them on the upper body, approximately centered, at a spacing that looks natural to you. Lock the washers firmly from inside — they cannot be repositioned once locked.
- Ears: Sew the ears to the third row from the center top of the body. Pin them first and check the spacing from both sides before you sew.
- Arms: Attach the arms 2 rows below the ears, one on each side of the body. The flat folded edge sews flush against the body.
- Snout: Center the snout on the front of the face and sew it down securely. The BLO ridge edge should face outward.
- Tail: Sew the tail to the back of the body, between Rows 9–11 of the body section. Tuck the curled tip slightly upward.
- Hanging loop (optional): If you’re making this as a keychain or pendant, join yarn at the top magic ring and work a chain of your desired length, then fasten off and weave in ends. Attach keychain hardware directly through the chain loop.
💡 Emma’s Tip: At 2.6 inches, everything is small and close together. I always pin every part before I sew a single stitch. A few minutes of pinning saves a lot of frogging later — and trust me, sewing something this tiny twice is not how I want to spend my evening.
Finishing and Decoration
Once all parts are sewn on, it’s time for the embroidery details that bring the pig’s face to life. Use black iris embroidery thread or a similar fine black thread throughout.
- Eyebrows: Embroider two short straight stitches slightly above and behind each eye.
- Nostrils: Work two small oval or circular stitches onto the snout surface, centered and spaced evenly.
- Mouth: A simple curved stitch just below the snout creates an expression — adjust the curve depending on whether you want a happy pig or a neutral one.
For added dimension, use a pink or dusty rose colored pencil or chalk pastel to lightly shade the insides of the ears, the cheeks, and around the edge of the snout. Blend it into the yarn with a soft brush or your fingertip.
Decorative finishing is completely optional — small accessories like a crocheted bow, a ribbon tie, or a tiny button at the neck are popular variations. Work in whatever style suits the recipient or your own taste.
Emma’s Note
I’ve always had a soft spot for miniature amigurumi — there’s something almost meditative about working this small. If your tension is tight like mine, the 2.0 mm hook will feel natural and the fabric will come out beautifully dense. Give yourself extra time on the leg join at Row 7; it’s the one moment in this pattern where you need to slow down and think. Once you’ve made one, you’ll want to make a dozen — they work up fast and they make lovely little gifts. Happy hooking! 🧶
What yarn is best for this pig amigurumi free pattern?
DK / Light Worsted (weight 3) yarn works best. The pattern uses Yarn Art Jeans for the main pink body and Gazzal Baby Cotton for the accent hooves — any quality weight-3 yarn in coordinating pink shades is a suitable substitute.
How long does it take to crochet this pig amigurumi free pattern?
Most crocheters finish in 2–4 hours. The leg join at Row 7 is the most technically demanding moment; everything else works up quickly once you’re comfortable with the 2.0 mm hook.
Can beginners make this pig amigurumi free pattern?
Yes — it’s rated beginner-friendly. You’ll need to know the magic ring, single crochet, increase, and invisible decrease. The pattern links out to dedicated tutorials for each technique if any are new to you.