The Crochet Doll Pattern That Was Made for Your Scrap Bin
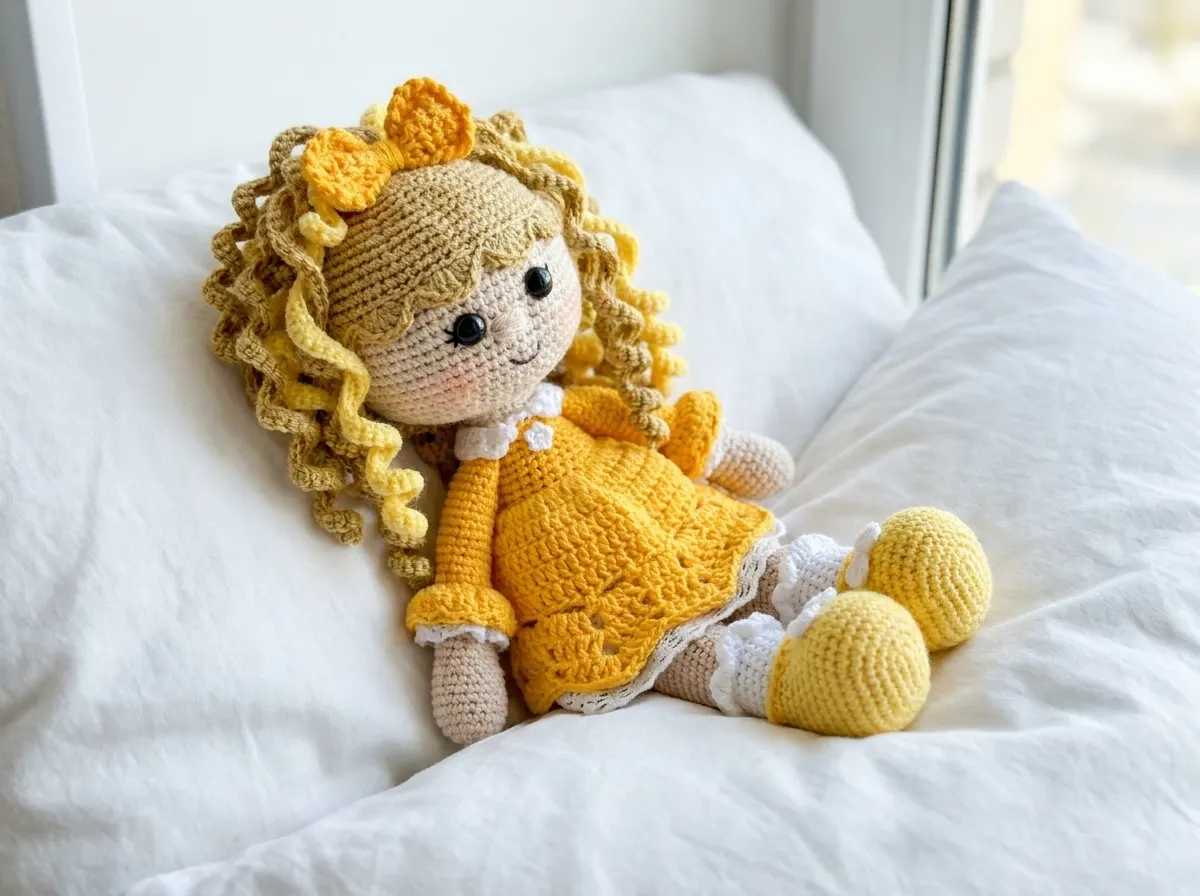
This free crochet doll pattern uses four different yarn colors spread across a dozen separate parts — which makes it one of the most efficient stash-busters you’ll find in this category. Soleil stands 12 inches tall, but each section of this crochet doll pattern asks for a surprisingly small amount of yarn. The dress, the socks, the collar, the little bow — each one uses a different color, and not one of them needs a full skein. If you’ve got DK and worsted weight partials collecting dust, this doll was built for exactly that pile.
🧶 What You’ll Need From Your Stash
- 💰 Yarn Needed: ~525 yards total — approx. 200 yds beige worsted, 150 yds yellow DK, 75 yds white DK, 100 yds wig/curl color DK
- 🎨 Colors: beige (body/head/arms), yellow (dress, shoes, curl accents), white (socks, collar, bloomers, bows), warm yellow/gold (wig and curls)
- 🪝 Hook: 1.75mm (no US letter equivalent); 1.9mm for wig and curls
- ⏱️ Time: 10–14 hours across multiple sessions
- 📏 Finished Size: 12.2 in (31 cm)
- 💡 Difficulty: Intermediate
- 🎁 Great For: shelf display, gifts, collector pieces, craft fair centerpiece item
Materials for This Crochet Doll Pattern
- Beige worsted weight yarn (CYCA 4) — approximately 200 yards. US alternative: Lion Brand 24/7 Cotton in Ecru, or any smooth worsted in a skin tone. This is your most yarn-hungry color — it covers the body, head, arms, and neck.
- Yellow DK / light worsted weight yarn (CYCA 3) — approximately 150 yards. US alternative: Paintbox Cotton DK in Mustard Yellow, or any smooth DK you’ve got in yellow. Used for the dress skirt, arm cuffs, shoes, and every third curl strand.
- White DK / light worsted weight yarn (CYCA 3) — approximately 75 yards. US alternative: Drops Safran in Off-White or Paintbox Cotton DK in Paper White. Goes toward socks, collar, bloomers trim, and the small bows on the shoes.
- Warm yellow / golden DK yarn (CYCA 3) — approximately 100 yards. This is for the wig cap and the spiral curls. A soft, slightly fuzzy DK in golden yellow works beautifully. Check what’s in your stash — if you’ve got two slightly different yellows, that actually looks great for the curls.
- Crochet hook: 1.75mm (no US letter equivalent) for the main body; 1.9mm (no US letter equivalent) for the wig and curls
- Screw-back safety eyes — 2 pieces (size to suit your preference for the head size)
- Polyfill stuffing — a good handful; firm stuffing in the hands and head, lighter in the limbs
- Wire: approximately 4 in (10 cm), with ends bent and wrapped in electrical tape — used to stabilize the neck joint
- Wide lace trim — cut to skirt circumference, for the skirt hem
- Narrow lace trim — cut to sleeve length, for the arm cuffs
- Black embroidery thread (iris thread or similar) — for eyelashes and mouth
- Tapestry needle for sewing all parts together
- Blush or chalk pastel for cheek color
- Craft glue for securing the eye backs
⚠️ Safety Note: This doll contains wire inside the neck joint and screw-back safety eyes secured with glue. It is not suitable as a toy for children under 3 — and honestly, with the level of detail here, it really is a display piece rather than a play toy. If you’re making this as a gift for a young child, swap safety eyes for embroidered eyes and skip the wire armature. The U.S. Consumer Product Safety Commission has guidance on toy safety standards worth reviewing if you’re making to sell.
Abbreviations Used in This Crochet Doll Pattern
| Abbreviation | Meaning |
|---|---|
| mr | magic ring |
| ch | chain |
| sc | single crochet |
| hdc | half double crochet |
| dc | double crochet |
| tr | treble crochet |
| inc | increase — 2 sc in the same stitch |
| dec | invisible decrease — insert hook through front loops only of next 2 stitches simultaneously |
| sl st | slip stitch |
| BLO | back loop only |
| FO | fasten off |
| st(s) | stitch(es) |
Smart Crafter Tips Before You Start
Use your two slightly-different yellows for the curls. The curl section calls for alternating colors — every third strand is worked in a second yellow. If you’ve got two partial skeins of yellow that don’t quite match, this is the place to use both. It gives the wig a dimensional, natural look that works better than perfectly uniform color.
The magic ring comes up constantly in this pattern. Legs, head, arms, and wig all start from one. If you haven’t locked it in yet, our magic ring tutorial gets you there in a few minutes — it’s the single skill that will make this whole doll easier.
Work the body in sessions and stuff as you go. With 80+ rows on the body alone, this is not a one-sitting project. Stuff the legs after Row 21 and continue adding stuffing gradually as you close the body. Lumpy dolls happen when you stuff in a rush at the end. Our guide on how to stuff amigurumi without lumps covers the technique that keeps everything smooth.
🧶 Scrap Check: The white yarn sections — socks trim, collar, bloomers trim, and both small bows — add up to roughly 75 yards total. If you’ve got a partial skein of white DK from any previous project, that is almost certainly enough to cover every white section in this doll without buying anything new.
The Pattern
Legs (Make 2)
Color: Start in yellow (shoes), change to white (socks), change to beige (leg) | Start: magic ring
Row 1: 6 sc in mr (6)
Row 2: 6 inc (12)
Row 3: (1 sc, inc) × 6 (18)
Row 4: 1 sc, inc, (2 sc, inc) × 5, 1 sc (24)
Row 5: (3 sc, inc) × 6 (30)
Row 6: 2 sc, inc, (4 sc, inc) × 5, 2 sc (36)
Row 7: 15 sc, (inc, 1 sc) × 2, inc, 15 sc, inc (40)
Row 8: 16 sc, inc, 5 sc, inc, 17 sc (42)
Rows 9–15: 42 sc (42)
Row 16: 13 sc, 8 dec, 13 sc (34)
Row 17: 13 sc, 4 dec, 13 sc (30)
Row 18: 13 sc, 2 dec, 13 sc (28)
Row 19: 13 sc, 1 dec, 13 sc (27)
Row 20: 27 sc (27)
Row 21: BLO: 27 sc — change to white here (27)
Row 22: 13 sc, dec, 12 sc (26)
Rows 23–26: 26 sc (26)
Row 27: (4 sc, dec) × 4, 2 sc (22)
Rows 28–29: 22 sc (22)
Row 30: BLO: 22 sc (22)
Rows 31–44: 22 sc — change to beige at Row 31 (22)
Row 45: 22 sc — change to white here (22)
Row 46: BLO: 22 sc (22)
Rows 47–54: 22 sc (22)
Row 55: Work 5 sc (position shift only) (5)
📌 Notes: Begin stuffing the leg after Row 21. Color changes: white at Row 21, beige at Row 31, white again at Row 45. The BLO rows at 21, 30, and 46 create ridges used for attaching trims later — don’t skip those. On the first leg, fasten off and cut yarn. On the second leg, do not cut — continue directly to the body join.
Leg Join and Body
Color: White (continuing from 2nd leg), then beige at Row 67, then yellow at Row 74 | Start: Continuation from 2nd leg
Row 55: 15 sc along 2nd leg, 1 ch, join to first leg: 22 sc along first leg, 1 sc in ch, 7 sc along second leg (46)
Rows 56–57: 46 sc (46)
Row 58: inc, 22 sc, inc, 22 sc (48)
Row 59: (14 sc, dec) × 3 (45)
Row 60: 45 sc (45)
Row 61: (13 sc, dec) × 3 (42)
Rows 62–66: 42 sc (42)
Row 67: (12 sc, dec) × 3 — change to beige here (39)
Row 68: 39 sc (39)
Row 69: (11 sc, dec) × 3 (36)
Row 70: 36 sc (36)
Row 71: (10 sc, dec) × 3 (33)
Row 72: 33 sc (33)
Row 73: (9 sc, dec) × 3 (30)
Row 74: BLO: 30 sc — change to yellow here (30)
Row 75: (8 sc, dec) × 3 (27)
Row 76: 27 sc (27)
Row 77: (7 sc, dec) × 3 (24)
Row 78: 24 sc (24)
Row 79: (6 sc, dec) × 3 (21)
Rows 80–83: 21 sc (21)
Fasten off, cut yarn.
📌 Note: The BLO row at Row 74 creates the attachment point for the skirt. Keep stuffing as you work upward — it’s much harder to go back and fill the lower body evenly once the top is closed.
Shorts Trim, Sock Trim, and Shoe Trim
Color: White (shorts and sock trim); yellow (shoe trim)
Shorts trim: Join white yarn to the free loops of Row 46 with legs facing you. Work: 3 ch, 4 dc in same st, ch 1, skip 1 st, sl st. Repeat: (5 dc in one st, ch 1, skip 1 st, sl st) × 6.
Sock trim: Join white yarn to the free loops of Row 30. Work the same shell pattern as the shorts trim.
Shoe trim: Join yellow yarn to the free loops of Row 21 with legs facing away from you. Work sc evenly around the shoe edge.
Collar
Color: White | Start: Join to center front of body, hold body facing away from you
Row 1: Working in BLO: 21 sc, 2 ch, turn (21)
Row 2: 21 hdc, turn (21)
Row 3: (3 ch, skip 1 st, sl st) repeated to end of row
Skirt
Color: Yellow | Start: Join to free loops of Row 74
Row 1: 3 ch, dc in same st, then 2 dc in each st to end of row, sl st (60)
Rows 2–5: 3 ch, dc in each st to end of row, sl st (60)
Rows 6–8: Work shell/lace pattern in the round to create the decorative skirt hem (see reference photo for stitch pattern).
🧶 Scrap Check: The skirt is where your yellow DK does the most work — eight rounds of 60 stitches adds up. Budget about 100 yards of yellow for the skirt section alone. The dress cuffs, shoes, and curl accents use the rest of your yellow allowance.
Neck
Color: Beige | Start: Join to free loops of Row 79
Rows 1–2: 21 sc (21)
End with sl st, fasten off, cut yarn.
Head
Color: Beige | Start: magic ring
Row 1: 6 sc in mr (6)
Row 2: 6 inc (12)
Row 3: (1 sc, inc) × 6 (18)
Row 4: 1 sc, inc, (2 sc, inc) × 5, 1 sc (24)
Row 5: (3 sc, inc) × 6 (30)
Row 6: 2 sc, inc, (4 sc, inc) × 5, 2 sc (36)
Row 7: (5 sc, inc) × 6 (42)
Row 8: 3 sc, inc, (6 sc, inc) × 5, 3 sc (48)
Row 9: (7 sc, inc) × 6 (54)
Row 10: 4 sc, inc, (8 sc, inc) × 5, 4 sc (60)
Row 11: (9 sc, inc) × 6 (66)
Row 12: 5 sc, inc, (10 sc, inc) × 5, 5 sc (72)
Rows 13–21: 72 sc (72)
Row 22: 5 sc, dec, (10 sc, dec) × 5, 5 sc (66)
Row 23: (9 sc, dec) × 6 (60)
Row 24: 4 sc, dec, (8 sc, dec) × 5, 4 sc (54)
Row 25: (7 sc, dec) × 6 (48)
Row 26: 3 sc, dec, (6 sc, dec) × 5, 3 sc (42)
Row 27: (5 sc, dec) × 6 (36)
Row 28: 2 sc, dec, (4 sc, dec) × 5, 2 sc (30)
Row 29: (3 sc, dec) × 6 (24)
Row 30: (4 sc, dec) × 4 (20)
End with sl st. Leave a long yarn tail for sewing to body.
📌 Eyes go in before you close the head. Count down 16–17 rows from the top of the head and insert your screw-back safety eyes, securing the backs firmly with a drop of craft glue from the inside. Do this before stuffing and before the opening gets too small to reach inside comfortably.
Wig
Color: Golden yellow wig yarn | Hook: 1.9mm | Start: magic ring
Row 1: 6 sc in mr (6)
Row 2: 6 inc (12)
Row 3: (1 sc, inc) × 6 (18)
Row 4: 1 sc, inc, (2 sc, inc) × 5, 1 sc (24)
Row 5: (3 sc, inc) × 6 (30)
Row 6: 2 sc, inc, (4 sc, inc) × 5, 2 sc (36)
Row 7: (5 sc, inc) × 6 (42)
Row 8: 3 sc, inc, (6 sc, inc) × 5, 3 sc (48)
Row 9: (7 sc, inc) × 6 (54)
Row 10: 4 sc, inc, (8 sc, inc) × 5, 4 sc (60)
Row 11: (9 sc, inc) × 6 (66)
Row 12: 5 sc, inc, (10 sc, inc) × 5, 5 sc (72)
Rows 13–15: 72 sc (72)
Row 16: (sl st, sc, hdc, 3 dc in one st, hdc, sc) repeat to end of row
Fasten off, leave yarn tail for sewing.
Curls / Tail
Color: Golden yellow wig yarn (main); yellow DK every 3rd strand | Hook: 1.9mm
Work the following chains, then work (sc, inc) alternating in each stitch from the 2nd chain from the hook to the end. This creates the spiral curl. Every 3rd strand is worked in yellow DK for color variation.
- 4 strands of 70 ch
- 4 strands of 65 ch
- 4 strands of 60 ch
- 4 strands of 55 ch
Total: 16 curl strands. Twist all strands together and sew them into a bunch before attaching to the head.
Arms (Make 2)
Color: Beige (hand and arm), change to yellow at Row 18 (sleeve) | Start: magic ring
Row 1: 6 sc in mr (6)
Row 2: 6 inc (12)
Row 3: (3 sc, inc) × 3 (15)
Row 4: (4 sc, inc) × 3 (18)
Rows 5–8: 18 sc (18)
Row 9: 8 sc, dec, 8 sc (17)
Row 10: 8 sc, dec, 7 sc (16)
Row 11: 7 sc, dec, 7 sc (15)
Rows 12–14: 15 sc (15)
Row 15: 5 sc, dec, 5 sc, dec, 1 sc (13)
Rows 16–17: 13 sc (13)
Row 18: 13 sc — change to yellow here (13)
Row 19: BLO: 13 sc (13)
Rows 20–34: 13 sc (13)
Stuff the hand and palm firmly. Leave the upper arm lightly stuffed. At the end, fold in half and join with sc across the opening.
Arm cuffs: Join yellow yarn to the free loops of Row 19 (hold arm facing you).
- 2 ch, dc in same st, then 2 dc in each st to end of row, sl st.
- ch 1, sc in each st, turn.
- (3 ch, skip 1 st, sl st) to end of row, sl st.
Large Bow
Color: Yellow DK
Row 1: 13 ch, 3 dc in 4th ch from hook, 1 hdc, 1 sc, 1 hdc, 4 dc. Turn.
Row 2: BLO: sl st, 3 ch, 3 dc, 1 hdc, 1 sc, 1 hdc, 4 dc. Turn.
Row 3: Same as Row 2.
Work a crab stitch (reverse sc) edging around the bow. Wrap the center tightly to create the bow shape. Add a bar wrap and chain two ch ties for attaching to the head.
Small Bows (Make 2, for shoes)
Color: White DK
Into mr: 3 ch, 2 dc, 3 ch, sl st, 3 ch, 2 dc, 3 ch, sl st. Pull ring tight. Leave yarn tail for sewing.
Assembly
Take your time here — good assembly is what separates a doll that looks homemade from one that looks crafted. Our guide on sewing amigurumi parts together has the technique that keeps seams clean and positioning accurate.
- Skirt lace: Sew the wide lace trim along the bottom of the skirt, gathering slightly as you go to match the skirt width.
- Sleeve lace: Sew the narrow white lace to the arm cuffs along the edge.
- Wig: Center the wig cap on the head and sew it down around the edge. Add a few additional stitches closer to the crown to anchor it securely.
- Curls: Sew the twisted curl bundle onto the top of the head, stitching through both the wig and the head underneath.
- Arms: Position the arms at approximately Rows 79–80 on the body (just below the shoulder/neck area) and sew each one firmly in place.
- Head and wire armature: Cut approximately 4 in (10 cm) of wire. Bend both ends inward and wrap entirely in electrical tape. Insert the wire halfway into the body through the neck opening. Sew the head to the body, and before closing the seam completely, push additional stuffing into the neck area to fill it out. Complete the seam.
- Shoe bows: Sew one small white bow onto each shoe, centered on the toe.
- Face embroidery: Embroider eyelashes and liner above the safety eyes using black iris thread. Secure the liner with a small drop of glue. Embroider the nose with beige thread and the mouth with black thread. Add a light brush of blush or chalk pastel to the cheeks.
- Large bow: Tie or pin the large yellow bow into the doll’s hair as a hair accessory.
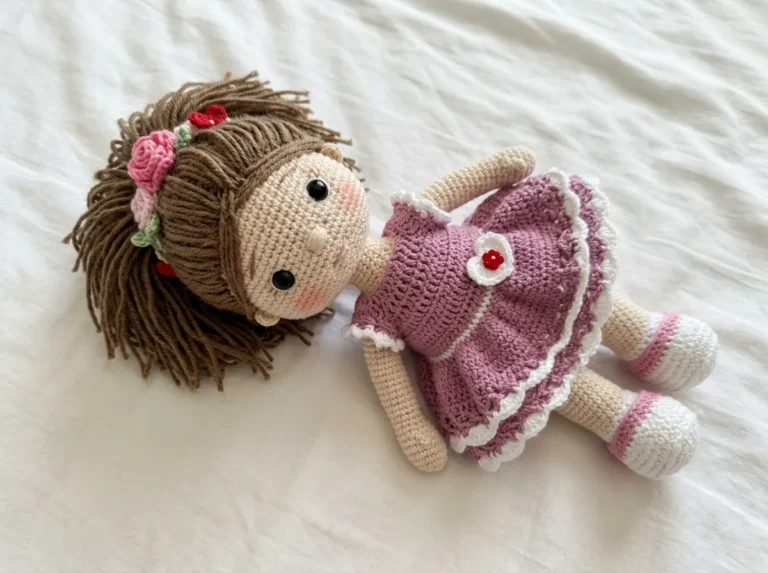
💡 Stretch It Further: The whole color palette swaps easily — work the body sections in a warm brown, the dress in dusty rose, and the wig curls in deep auburn and you’ve got a completely different doll from the same exact pattern. Make two in contrasting palettes and sell them as a set at a craft fair — that’s a table centerpiece that sells itself. Total yarn across both dolls? Still under four partial skeins. That’s a solid return on your scrap bin investment.
Mia’s Take
Four colors, twelve parts, roughly 525 yards of yarn across the whole thing — and the majority of that came from partials that had been sitting in my basket for months. This is a bigger commitment than a keychain, no question. But a finished 12-inch doll that uses up four different leftover skeins, earns a permanent spot on a shelf, and makes someone’s jaw drop when you tell them you made it? That’s what I’m calling a win. Make it twice in two different color stories and you’ve got a gift set that looks like it cost serious money and cost you almost nothing new.
What yarn is best for this crochet doll pattern?
This pattern is designed for stash-busting, using a mix of worsted weight (CYCA 4) for the body and DK weight (CYCA 3) for the clothing and hair.
How tall is the finished Soleil doll?
When using the recommended hook sizes (1.75mm and 1.9mm), the finished doll stands approximately 12.2 inches (31 cm) tall.
Is this crochet doll pattern suitable for beginners?
This is an intermediate pattern due to the multiple parts, wire armature, and frequent color changes. Beginners should be comfortable with magic rings and BLO stitches.