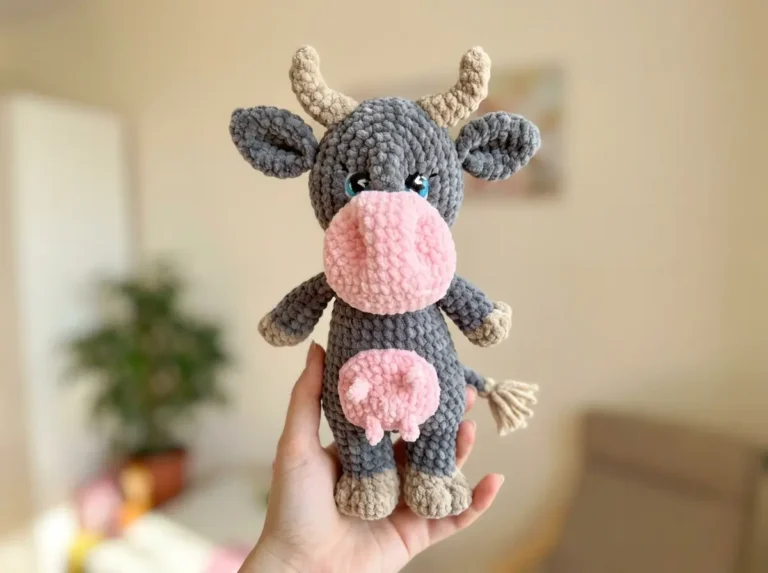
Mini Cow Crochet Pattern — Free Amigurumi
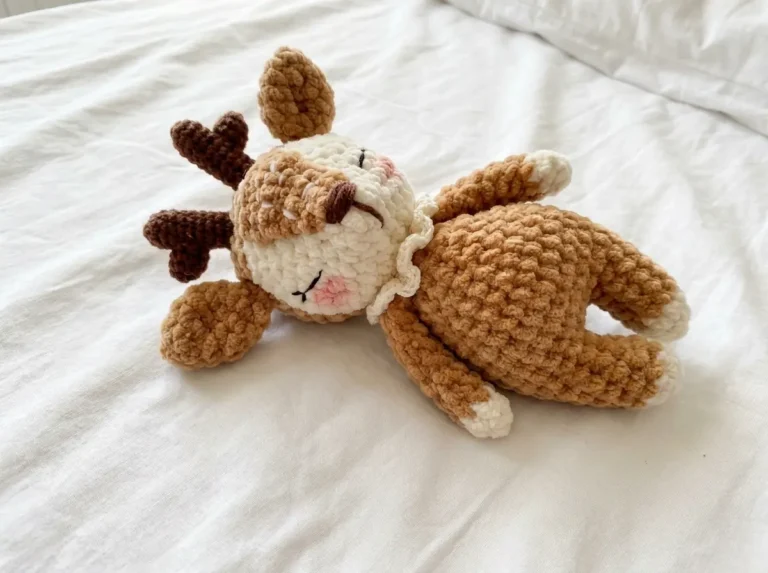
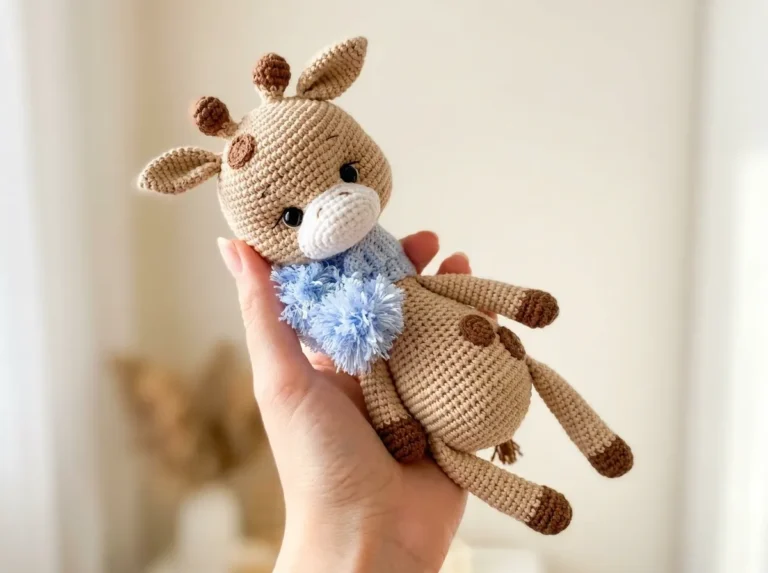
This mini cow crochet pattern free version delivers a fully-dimensional chenille plush — complete with jointed arms, an embroidered muzzle, and an optional skirt for the dressmakers in the room. I love this design for its proportion: compact but structured, with those little curved horns and a body that keeps its shape beautifully in bulky chenille. I checked every round count, and everything adds up. Grab your hook and let’s build this tiny cow together.
📋 Pattern Quick Stats
- Difficulty: Intermediate
- Finished Size: 9–9.8 in (23–25 cm)
- Hook Size: G/6 (4.0 mm) for main body; 3.0 mm (no US letter equivalent) for horns only
- Yarn Weight: Bulky (5) — chenille/velvet
- Techniques: magic ring, invisible decrease, color changes, BLO, FLO, joined limbs
- Estimated Time: 5–8 hours
What You’ll Need for This Mini Cow Crochet Pattern
Yarn:
- Bulky (5) chenille/velvet — Main Color: approximately half a skein. US alternatives: Bernat Baby Velvet, Premier Parfait Chunky. This is your body, head, ears, limbs, and tail.
- Bulky (5) chenille/velvet — Additional/Contrast Color: approximately 1/4 skein. Used for the hooves (lower arms and legs), muzzle, and horns. A warm cream against chocolate brown is a classic combination; black and white works beautifully too.
Both yarns sit in the Bulky (5) category on the Craft Yarn Council yarn weight system. If you want a firmer, more defined fabric, you can drop down half a hook size — but stay at G/6 (4.0 mm) if this is your first project in chenille.
Tools and Notions:
- G/6 (4.0 mm) crochet hook — main body, arms, legs, head, ears, muzzle, tail
- 3.0 mm crochet hook — horns only
- 8–10 mm safety eyes (×2)
- Polyester fiberfill stuffing
- Embroidery thread or thin yarn for muzzle details and hoof lines
- Tapestry needle
- Scissors
- Stitch markers (at least 2)
Abbreviations Used in This Mini Cow Crochet Pattern
| Abbreviation | Meaning |
|---|---|
| mr | magic ring |
| sc | single crochet |
| inc | increase (2 sc worked into the same stitch) |
| dec | invisible decrease — insert hook through front loops only of next 2 stitches simultaneously, yarn over, pull through, yarn over, pull through 2 loops |
| sl st | slip stitch |
| ch | chain |
| BLO | back loop only |
| FLO | front loop only |
| st(s) | stitch(es) |
💡 A note on decreases: Throughout this pattern, dec always refers to the invisible decrease — worked through the front loops only of the next two stitches. This eliminates the visible gap that a standard sc2tog would leave. If you haven’t used it before, I strongly recommend our complete invisible decrease tutorial before you start — it’s one of those techniques that changes everything once you know it.
Techniques in This Mini Cow Crochet Pattern
A few things to know before you cast on.
- Magic Ring: Almost every part of this cow starts with a magic ring. It closes completely and leaves no hole at the center — this matters more in chenille than in cotton, because the yarn’s texture hides less. See our step-by-step magic ring tutorial if you need a refresher.
- Invisible Decrease: Used throughout to shape the arms, legs, body, and head. Our invisible decrease tutorial walks through the technique in full detail — worth bookmarking for this project.
- BLO and FLO Rows: The BLO rows on the arms and legs create a clean visual ridge separating the hoof from the limb. On the body, the BLO row (Row 9 in the dress version) leaves the front loops free for the skirt to attach to later. Work these rows carefully — dropping back to a regular sc on a BLO row loses the detail entirely.
- Joining Limbs During Crocheting: The legs and tail are joined in Row 7 of the body; the arms are joined in Row 16. There is no sewing required for the limbs. This is one of my favorite construction methods — the joints are permanent and structurally solid — but it does require full attention in those two rows.
- Safety Eyes: Installed between Rows 24–25 of the head, before closing. See our tutorial on attaching safety eyes for placement guidance and locking instructions.
Free Mini Cow Crochet Pattern
Work all parts in continuous rounds unless otherwise noted. Place a stitch marker at the start of each round and move it up as you go — chenille hides stitch lines, and you will lose your count without a marker.
Right Arm (Make 1)
Start with additional/contrast color.
Row 1: 6 sc in mr (6)
Row 2: 6 inc (12)
Row 3: BLO 12 sc (12)
Row 4: 12 sc (12)
Row 5: (2 sc, dec) × 3 (9)
Row 6: 9 sc (9)
Row 7: 2 sc, 2 dec, 3 sc (7)
Rows 8–12: 7 sc (5 rows) (7)
💡 Emma’s Tip: Change to main color after Row 5. The BLO row on Row 3 is what creates the ridge at the top of the hoof — work every stitch in the back loop only on that row, or you’ll lose the clean line. Stuff only the lower portion (Rows 1–6) before closing, and keep it light.
Finishing: Fold the arm flat and work 3 sc through both layers to close. Leave a long tail for joining to the body in Row 16.
Left Arm (Make 1)
Start with additional/contrast color.
Row 1: 6 sc in mr (6)
Row 2: 6 inc (12)
Row 3: BLO 12 sc (12)
Row 4: 12 sc (12)
Row 5: (2 sc, dec) × 3 (9)
Row 6: 9 sc (9)
Row 7: 4 sc, 2 dec, 1 sc (7)
Rows 8–12: 7 sc (5 rows) (7)
💡 Emma’s Tip: The only difference between the right and left arms is Row 7 — read both rows before you begin each arm. Change to main color after Row 5 here as well.
Finishing: Fold flat and work 3 sc through both layers to close. Leave a long tail.
Legs (Make 2)
Start with additional/contrast color.
Row 1: 8 sc in mr (8)
Row 2: 8 inc (16)
Row 3: BLO 16 sc (16)
Row 4: 16 sc (16)
Row 5: (2 sc, dec) × 4 (12)
Row 6: 12 sc (12)
Row 7: (2 sc, dec) × 3 (9)
Rows 8–12: 9 sc (5 rows) (9)
💡 Emma’s Tip: Change to main color after Row 5, same as the arms. Stuff the hoof section lightly — just enough to hold the shape. You don’t want the legs overstuffed when you join them to the body in Row 7 of the body; they need to lie fairly flat against the join.
Finishing: Do not close. Set both legs aside, open end up. They join into the body during Row 7 of the body.
Tail (Make 1)
Use main color.
Row 1: 2 sc in mr (2)
Continue working 2 sc per round in continuous rounds until the tail measures approximately 1.2–1.5 in (3–4 cm).
💡 Emma’s Tip: If working with just 2 stitches feels too fiddly — and honestly, it can — you can work with 3 or 4 stitches instead. At the end, fold in half and work a decrease down to 1 stitch. Then add elongated loops at the top to create the tassel. It takes a few extra minutes but gives the tail that tufted finish. Set aside with the tail end attached; it joins into the body at Row 7.
Body (Make 1)
Use main color throughout, unless making the dress version — see notes below.
Row 1: 6 sc in mr (6)
Row 2: 6 inc (12)
Row 3: (1 sc, inc) × 6 (18)
Row 4: (2 sc, inc) × 6 (24)
Row 5: (3 sc, inc) × 6 (30)
Row 6: 30 sc (30)
Row 7: 4 sc together with left leg, 11 sc, 4 sc together with right leg, 5 sc, 1 sc with tail, 5 sc (30)
Row 8: 30 sc (30)
Row 9: (3 sc, dec) × 6 (24)
Rows 10–11: 24 sc (2 rows) (24)
Row 12: (2 sc, dec) × 6 (18)
Rows 13–14: 18 sc (2 rows) (18)
Row 15: (1 sc, dec) × 6 (12)
Row 16: 3 sc with Left Arm, 3 sc, 3 sc with Right Arm, 3 sc (12)
💡 Row 7 — Joining the Legs and Tail: This is the most technical row in the whole pattern, and it’s worth slowing down for. Position both legs with their open ends facing up and aligned with the body stitches. Work 4 sc simultaneously through both the body stitch and the top edge of the left leg, then continue 11 sc normally, then join the right leg the same way over 4 stitches. Work 5 sc normally, then work 1 sc through both the body stitch and the tail stitch to anchor the tail. Finish with 5 sc. If the alignment looks wrong, frog back now — it’s much easier to fix before the body closes.
💡 Dress Version Notes: If you’re making the cow with a dress, change to your dress color after completing Row 7 (so Row 8 onward is in dress color). Work Row 9 in BLO — this creates the ridge that the skirt picks up from later. From Row 10 onward, return to main color for the upper body. See the Skirt section at the end of the pattern.
💡 Row 16 — Joining the Arms: Same method as Row 7. Work 3 sc through both the body and the top edge of the left arm simultaneously, then 3 sc normally, then 3 sc through the right arm, then 3 sc normally. Make sure both arms point forward before you lock them in. This is worth checking twice — once joined, they’re permanent.
Finishing: Do not cut the yarn. Continue directly into the head.
Head (Continuation of Body)
Continue with the yarn attached from Row 16 of the body. The head is crocheted directly onto the body — there is no seam.
Row 17: 12 sc (12)
Row 18: (1 sc, inc) × 6 (18)
Row 19: (2 sc, inc) × 6 (24)
Row 20: (3 sc, inc) × 6 (30)
Row 21: (4 sc, inc) × 6 (36)
Rows 22–25: 36 sc (4 rows) (36)
Row 26: (4 sc, dec) × 6 (30)
Row 27: (3 sc, dec) × 6 (24)
Row 28: (2 sc, dec) × 6 (18)
Row 29: (1 sc, dec) × 6 (12)
Row 30: 6 dec (6)
💡 Safety Eyes — Install Before Row 26: Place your 8–10 mm safety eyes between Rows 24 and 25 of the head. This is the last chance to do it — once you begin the decreases, the opening closes quickly and you won’t be able to reach inside. Our safety eyes tutorial covers how to mark and test placement before committing. Begin stuffing the head firmly after Row 26; chenille compresses more than cotton, so pack it in generously.
⚠️ Stitch Count Correction: The head ends at Row 30 with 6 stitches remaining. Some versions of this pattern label the final head row as Row 26 — that is a numbering error in the original source. The head runs from Row 17 through Row 30 as written here. Every stitch count has been independently verified.
Finishing: Cut yarn, thread end through remaining 6 stitches, pull tight to close the opening. Secure and weave in end.
Ears (Make 2)
Use main color.
Row 1: 4 sc in mr (4)
Row 2: 4 sc (4)
Row 3: 4 inc (8)
Row 4: 8 sc (8)
Row 5: 4 dec (4)
Row 6: Fold in half, 2 sc through both layers (2)
Row 7: Turn and sl st (1)
Finishing: Leave a long tail for sewing. The ear will have a slight natural cup shape after folding — that’s exactly right.
Horns (Make 2)
Use additional/contrast color. Switch to your 3.0 mm hook for these parts only.
Row 1: 4 sc in mr (4)
Row 2: 4 sc (4)
Row 3: 3 sc in 1 stitch, 3 sc (6)
Row 4: 1 sc, inc, 2 sc, dec (6)
Row 5: 2 sc, inc, 2 sc, sl st (7)
💡 Emma’s Tip: The smaller hook is what gives the horns their firm, dense structure — that’s exactly the goal. If they feel solid on their own once finished, skip the stuffing entirely. A small amount at the base only is fine if you want a bit more bulk. Leave a long tail for sewing, and switch back to your G/6 (4.0 mm) hook before starting the muzzle.
Muzzle (Make 1)
Use additional/contrast color. G/6 (4.0 mm) hook.
Row 1: ch 4. In 2nd ch from hook: 4 sc in one loop, 1 sc. In the last loop: 6 sc, 1 sc, inc (14)
Row 2: (2 sc, inc, 3 sc, inc) × 2 (18)
Row 3: BLO 18 sc, sl st (19)
💡 Emma’s Tip: The muzzle is worked from a foundation chain rather than a magic ring — this is what gives it its oval shape rather than a circle. Row 3 is worked in BLO, and the front loops left free will create a subtle raised frame when you sew it to the face. Leave a long tail for sewing; you’ll need enough length to work around the full perimeter of the muzzle securely.
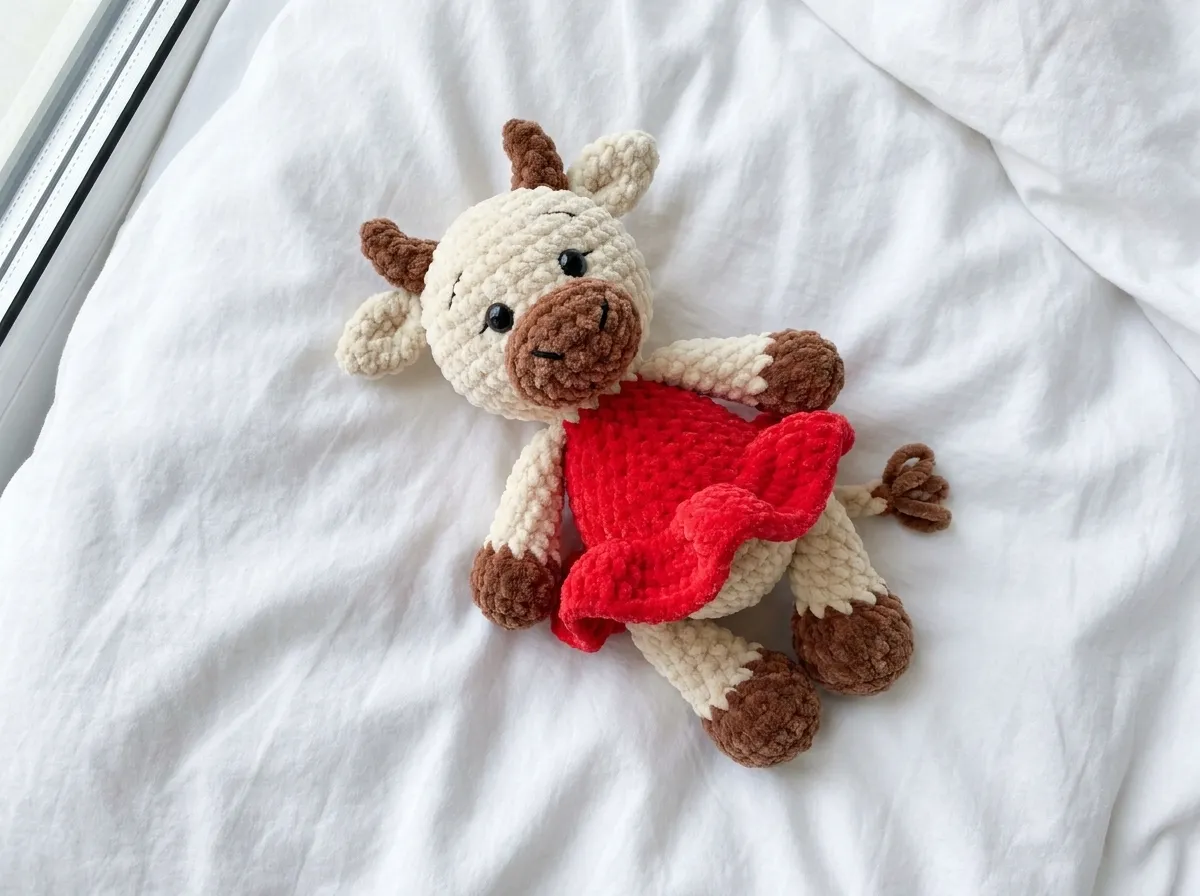
Skirt (Optional — Dress Version Only)
Use dress color. Join yarn to any front loop of Row 8 of the body. Row 8 has 30 stitches — these front loops were left available when you worked Row 9 of the body in BLO.
Row 1: inc in every stitch (60)
Row 2: sc in every stitch (60)
Row 3: sc in every stitch (60)
💡 Emma’s Tip: The skirt flares beautifully after that first increase round — chenille in a contrast color here makes for a genuinely lovely finishing detail. If your dress color is the same chenille brand, the fabric weight will match perfectly at the join. No sewing required; the skirt is structurally attached to the body.
Assembling Your Mini Cow Amigurumi
The limbs and tail are already joined to the body from the crocheting process. The main assembly involves the face pieces.
- Safety eyes: Already installed between Rows 24–25 of the head. If you haven’t done this yet, you’ll need to reopen the head — don’t skip it.
- Muzzle: Center the muzzle on the lower half of the face, roughly at Rows 26–28, centered between the safety eyes and the bottom of the head. The BLO edge of Row 3 should face outward — this is the raised frame detail. Pin in place before sewing and check it straight-on before you commit. Sew securely around the full outer edge.
- Horns: Position on the top of the head, above the eye line, approximately 3–4 stitches apart and centered on the crown. Sew firmly from the base of each horn downward.
- Ears: Place on either side of the head, just behind and slightly below the horns. The folded edge should face forward. Pin both ears before sewing either one — this is the step where I always lay the cow face-down on a flat surface and look at the symmetry from above before touching the needle.
For sewing the face pieces securely without puckering the surrounding fabric, our guide on sewing amigurumi parts has everything you need — especially useful for anchoring the muzzle cleanly.
Finishing Details — Embroidery and Decoration
Use a single strand of embroidery thread or a strand of thin yarn. Work in good light — chenille absorbs color and makes it hard to see what you’re doing in dim conditions.
- Nostrils: Two small oval stitches on the muzzle, placed symmetrically and close together. The muzzle isn’t large, so keep them compact.
- Mouth: A simple curved stitch below the nostrils, worked with a single pass of the needle. Less is more here — one clean curve reads better than multiple stitches.
- Eyebrows and lashes: Two or three short straight stitches above each eye for the brows; two to three short diagonal stitches below each eye for lashes. Match the angles on both sides before securing your thread.
- Hoof lines: One straight stitch across the top of each hoof on the arms and legs, indicating the division. The BLO ridge already provides the structural separation — the embroidered line is just the finishing detail above it.
💡 Emma’s Tip: If you can, embroider the muzzle details before you sew the muzzle onto the face — you have much better control when it’s still loose in your hand. If you’ve already attached it, take extra care not to catch the surrounding head stitches with your needle.
I’ve made quite a few joined-limb patterns over the years, and this one has one of the cleanest constructions I’ve worked through. The moment Row 7 clicks and those little legs are locked into the body is still satisfying every single time. If you’re working in chenille for the first time, this is a good project for it — the yarn is forgiving of slight tension variation, and the stuffed result is incredibly dense and huggable. Take your time on the muzzle placement and the eye symmetry, both of them define the character’s expression entirely. Happy hooking. 🧶
What yarn is best for this mini cow amigurumi?
Bulky (5) chenille or velvet yarn is highly recommended. It gives the mini cow a soft, plush finish while holding its structured shape beautifully.
Can beginners make this mini cow pattern?
This pattern is best suited for intermediate crocheters. It uses techniques like invisible decreases, back loop only (BLO) rows, and joining limbs directly during crocheting.
What size crochet hook do I need for this pattern?
You will need a G/6 (4.0 mm) hook for the main body and parts, plus a smaller 3.0 mm hook specifically to give the horns a firm, dense structure.