Unicorn Amigurumi Free Pattern — Fluffy Chenille Plush
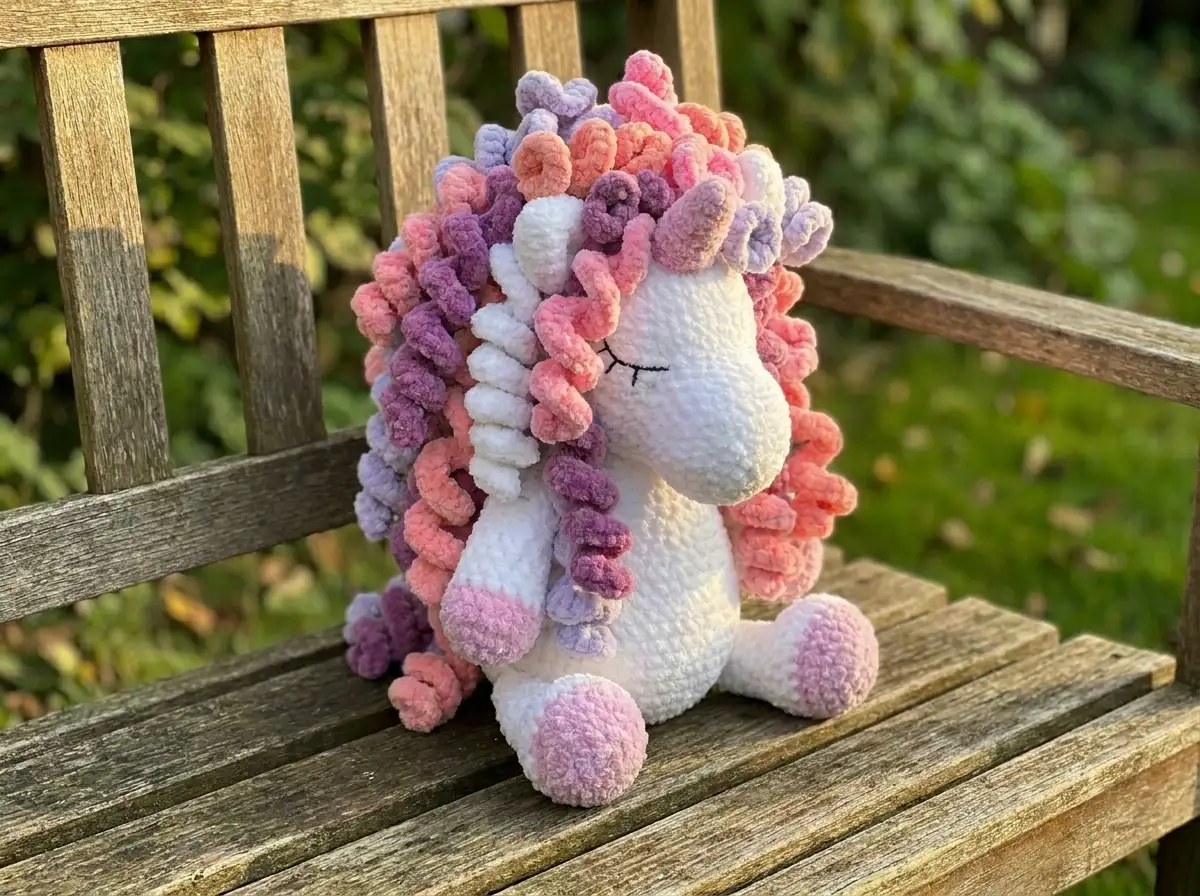
This unicorn amigurumi free pattern was made for the bulky chenille that’s been taking over your yarn basket — the half-skeins, the leftover pastels, the impulse buys you couldn’t say no to. The whole unicorn works up in a weekend, finishes at 11.8 in, and that curly mane uses up every last scrap of colorful chenille you’ve got. You probably already have most of what you need. Let’s make it.
🧶 What You’ll Need From Your Stash
- 💰 Yarn Needed: ~300 yards white bulky chenille (main body), ~60 yards pink bulky chenille (hooves + horn), ~50–60 yards each of 4 mane/tail colors in bulky chenille
- 🎨 Colors: white (main), pink (hooves, horn), plus 4 assorted pastel chenille colors for mane and tail — any combination works
- 🪝 Hook: E/4 (3.5 mm)
- ⏱️ Time: 6–8 hours across 2 sessions
- 📏 Finished Size: 11.8 in (30 cm), not including horn or mane
- 💡 Difficulty: Intermediate
- 🎁 Great For: gifts, nursery decor, birthday presents, character display
Materials for This Free Unicorn Amigurumi Pattern
The body and legs are worked in a Bulky (5) weight chenille yarn — that thick, velvety kind that crochets up fast and gives your unicorn that plush, huggable texture. The original pattern calls for Alize Softi, but any bulky chenille you’ve got on hand will work. Bernat Blanket, Premier Anti-Pilling Everyday Worsted in a pinch — just swatch first to check your gauge.
- White bulky chenille yarn — approximately 300 yards (3 standard skeins). This covers the head, body, upper and lower legs, and ears. Alize Softi is the original; US alternatives include Bernat Baby Blanket or Lion Brand Pound of Love in white.
- Pink bulky chenille yarn — approximately 60 yards (about half a standard skein). Used for the hooves and horn. This is a great place to use a partial skein.
- Assorted pastel bulky chenille yarn for the mane and tail — approximately 50–60 yards of each color across 4 colors. The original calls for Himalaya Dolphin Baby; US alternatives include Bernat Baby Velvet or Premier Parfait. This is where your scrap bin earns its keep — different shades of lavender, pink, mint, and yellow look incredible together.
- Black iris-weight yarn — a small amount for embroidering the closed eyes with lashes.
- Polyfill stuffing — one standard bag is more than enough. Poly-Fil by Fairfield is widely available at Joann, Michaels, and Hobby Lobby.
- Hook: E/4 (3.5 mm)
- Stitch marker — non-negotiable for tracking your rounds in the head and body.
- Tapestry needle — wide-eye for sewing parts and weaving ends.
- Scissors
🧶 Scrap Check: The mane and tail are made from simple crocheted chains — no complex stitches, just chain + single crochet. If you have any bulky chenille leftovers from previous projects in pastel colors, this is their moment. You need roughly 50–60 yards per color, which is well within the range of a used partial skein.
Abbreviations
| Abbreviation | Meaning |
|---|---|
| sc | Single crochet — insert hook, yarn over, pull through, yarn over, pull through both loops |
| inc | Increase — 2 single crochets worked into the same stitch |
| dec | Decrease — insert hook in next stitch, pull up loop, insert in following stitch, pull up loop, yarn over, pull through all 3 loops |
| ch | Chain — yarn over, pull through loop |
| mr | Magic ring — adjustable loop start that closes completely to eliminate the center hole |
Smart Crafter Tips for Your Unicorn Amigurumi Free Pattern
Work the head with two strands held together. The head in this pattern is specifically worked with two strands of your white chenille held together at once. This gives it extra density and prevents the polyfill from showing through the stitches. It also makes the head noticeably chunkier and more huggable than the body. Hold both strands from the same skein or pull from the inside and outside of one skein simultaneously — either works.
Swap dec for invisible decrease wherever you can. The pattern uses a standard decrease (dec), but if you want cleaner, tighter stitch lines on your unicorn, you can substitute the invisible decrease for any dec in the head and body without changing the stitch count. The invisible decrease works through the front loops only and leaves no visible gap — worth the extra second it takes on a piece this size.
Stuff the legs only halfway. Both the upper and lower legs call for stuffing only the lower half — the hoof section. Keep the upper part of each leg unstuffed and floppy. This is intentional: it makes the legs poseable and gives the unicorn its relaxed, sitting-style stance when assembled. Over-stuffing the legs is one of the most common assembly mistakes on this pattern — stuff just the pink hoof section firmly, then leave the rest soft.
💡 Quick Win: Before you start the mane, sort your chenille scraps by length. The pattern calls for five different chain lengths (55, 45, 35, 25, and 15 chains). Longer pieces go at the top of the head where the mane is fullest; shorter pieces fill in around the neck. You can cut your yarn more intentionally if you know in advance which length each piece needs to be.
New to the magic ring start? Our magic ring tutorial walks you through it in two minutes — it’s the cleanest way to start every round piece in this pattern.
Free Unicorn Amigurumi Pattern
Head (×1) — White, Two Strands Held Together
🧶 Scrap Check: The head uses the most yarn of any single part — approximately 100–120 yards of white chenille when worked with two strands held together. Pull from two separate skeins or use both ends of the same skein. This is the most yarn-intensive section; budget accordingly.
Starting method: Magic ring
Work throughout with TWO strands of white chenille held together. Stuff firmly with polyfill as you go, adding more stuffing before closing the final rounds.
Row 1: 6 sc in mr (6)
Row 2: (inc) × 6 (12)
Row 3: (1 sc, inc) × 6 (18)
Row 4: (2 sc, inc) × 6 (24)
Row 5: (3 sc, inc) × 6 (30)
Rows 6–9: 30 sc (4 rows) (30)
Row 10: (3 sc, dec) × 6 (24)
Row 11: 24 sc (24)
Row 12: (3 sc, inc) × 6 (30)
Row 13: 30 sc (30)
Row 14: (4 sc, inc) × 6 (36)
Row 15: 36 sc (36)
Row 16: (5 sc, inc) × 6 (42)
Row 17: (6 sc, inc) × 6 (48)
Rows 18–22: 48 sc (5 rows) (48)
Row 23: (6 sc, dec) × 6 (42)
Row 24: 42 sc (42)
Row 25: (5 sc, dec) × 6 (36)
Row 26: (4 sc, dec) × 6 (30)
Row 27: (3 sc, dec) × 6 (24)
Row 28: (2 sc, dec) × 6 (18)
Row 29: (1 sc, dec) × 6 (12)
Row 30: (dec) × 6 (6)
After Row 30, work a few additional decreases as needed to close. Cut yarn, use a needle to fully close the opening, and weave in the end.
Upper Legs (×2) — Pink + White
🧶 Scrap Check: Each upper leg uses roughly 20–25 yards total (about 10 yards pink for the hoof section, 10–15 yards white for the leg). A leftover pink partial skein handles both upper legs with room to spare.
Starting method: Magic ring
Begin in pink. Switch to white after Row 4. Stuff only the lower hoof section (pink rows) with polyfill — leave the upper leg unstuffed.
Row 1: 6 sc in mr [pink] (6)
Row 2: (inc) × 6 [pink] (12)
Row 3: (1 sc, inc) × 6 [pink] (18)
Row 4: 18 sc [pink] (18)
Rows 5–6: 18 sc [white] (18)
Row 7: (1 sc, dec) × 6 [white] (12)
Rows 8–20: 12 sc (13 rows) [white] (12)
Cut yarn. Do not close. Set aside for body assembly.
Lower Legs (×2) — Pink + White
🧶 Scrap Check: Lower legs are slightly larger than upper legs — expect about 30–35 yards total per leg. The pink hoof section is bigger here, so this is where more of your pink yardage goes.
Starting method: Magic ring
Begin in pink. Switch to white after Row 5. Stuff only the lower hoof section (pink rows) firmly with polyfill — leave the upper leg unstuffed.
Row 1: 6 sc in mr [pink] (6)
Row 2: (inc) × 6 [pink] (12)
Row 3: (1 sc, inc) × 6 [pink] (18)
Row 4: (2 sc, inc) × 6 [pink] (24)
Row 5: 24 sc [pink] (24)
Rows 6–7: 24 sc [white] (24)
Row 8: (2 sc, dec) × 6 [white] (18)
Row 9: 18 sc [white] (18)
Row 10: (1 sc, dec) × 6 [white] (12)
Rows 11–20: 12 sc (10 rows) [white] (12)
Cut yarn. Do not close. Set aside for body assembly.
Body (×1) — White
🧶 Scrap Check: The body uses approximately 90–100 yards of white chenille (single strand). Rows 10 and 24 are where you join your finished legs directly into the body — have all four legs ready before you start this section.
Starting method: Magic ring
Work single strand white. Stuff with polyfill as you go. Have all four finished legs ready before Row 10.
Row 1: 6 sc in mr (6)
Row 2: (inc) × 6 (12)
Row 3: (1 sc, inc) × 6 (18)
Row 4: (2 sc, inc) × 6 (24)
Row 5: (3 sc, inc) × 6 (30)
Row 6: (4 sc, inc) × 6 (36)
Row 7: (5 sc, inc) × 6 (42)
Row 8: (6 sc, inc) × 6 (48)
Row 9: 48 sc (48)
Row 10: Join lower legs: 9 sc, work 6 sc together with leg, 17 sc, work 6 sc together with leg, 10 sc (48)
Rows 11–16: 48 sc (6 rows) (48)
Row 17: (6 sc, dec) × 6 (42)
Row 18: 42 sc (42)
Row 19: (5 sc, dec) × 6 (36)
Row 20: 36 sc (36)
Row 21: (4 sc, dec) × 6 (30)
Row 22: 30 sc (30)
Row 23: (3 sc, dec) × 6 (24)
Row 24: Join upper legs: 6 sc, work 6 sc together with leg, 6 sc, work 6 sc together with leg (24)
Row 25: (2 sc, dec) × 6 (18)
Row 26: 18 sc (18)
Cut yarn, leaving a long tail. Do not close the opening yet — attach the head and stuff firmly before closing. Use the yarn tail to sew the opening shut. Weave in end.
Note on upper leg placement at Row 24: position the upper legs symmetrically on both sides of the body. If needed, shift by one or two stitches to even them out before joining.
Ears (×2) — White
Starting method: Magic ring
Row 1: 6 sc in mr (6)
Row 2: (1 sc, inc) × 3 (9)
Row 3: (2 sc, inc) × 3 (12)
Row 4: (3 sc, inc) × 3 (15)
Rows 5–7: 15 sc (3 rows) (15)
Row 8: (1 sc, dec) × 5 (10)
Row 9: 10 sc (10)
Finishing: Fold each ear in half and seam the edges together. No stuffing needed.
🧶 Scrap Check: Both ears together use roughly 20–25 yards of white. A leftover length from winding off your main skein covers this easily.
Horn (×1) — Pink
Starting method: Magic ring (5 sc)
The horn increases one stitch per round to form a gradual spiral taper. Stuff lightly with polyfill. Leave a long yarn tail for sewing to the head.
Row 1: 5 sc in mr (5)
Row 2: 4 sc, inc (6)
Row 3: 5 sc, inc (7)
Row 4: 6 sc, inc (8)
Row 5: 7 sc, inc (9)
Row 6: 8 sc, inc (10)
Row 7: 9 sc, inc (11)
Row 8: 10 sc, inc (12)
Row 9: 11 sc, inc (13)
Row 10: 12 sc, inc (14)
Row 11: 13 sc, inc (15)
Stuff lightly. Cut yarn, leaving a long tail for attachment.
Mane and Tail — Assorted Bulky Chenille
These are crocheted curl pieces — chain a length, then work 2 sc into every chain stitch. The extra stitches make each piece curl and spiral naturally. No magic ring needed; just start your chain and go.
Make the following pieces across your 4 mane/tail colors, mixing freely:
| Piece | Instructions | Quantity |
|---|---|---|
| Mane curl — long | ch 55, work 2 sc in each ch | 12 pieces |
| Mane curl — medium-long | ch 45, work 2 sc in each ch | 12 pieces |
| Mane curl — medium | ch 35, work 2 sc in each ch | 12 pieces |
| Mane curl — short | ch 25, work 2 sc in each ch | 8 pieces |
| Mane curl — mini | ch 15, work 2 sc in each ch | 4 pieces |
| Tail | ch 25, work 2 sc in each ch | 4 pieces |
🧶 Scrap Check: This mane section is the whole reason this pattern belongs in your scrap bin rotation. Each curl piece uses only a small amount of yarn — the longest pieces (ch 55) use maybe 8–10 yards of bulky chenille each. If you have any partially used skeins of pastel chenille from other projects, this is exactly where they go. Don’t worry about matching perfectly — the more variation, the better the mane looks.
Assembly
Take your time here — good assembly is what separates a wobbly unicorn from a sturdy, giftable one. Our guide on sewing amigurumi parts together covers the key techniques if this is your first time joining large pieces.
- Attach head to body. Pin the head to the open top of the body first — position it so the head tilts very slightly downward (not straight up). This gives the unicorn a softer, more natural look. Stuff the body firmly through the neck opening before closing. Sew all the way around with your tapestry needle and white yarn tail, then weave in the end.
- Sew the ears to the head. Position the ears symmetrically at approximately Rows 22–23 of the head. Leave 9 sc of space between the inner edges of the ears. Pin both before sewing either — this is the fastest way to check symmetry. Sew down securely.
- Attach the horn. Position the horn between the ears at approximately Rows 18–20 of the head. Sew down using the long pink yarn tail, catching several stitches of the head all the way around the base of the horn for stability. A wobbly horn is the one thing that ruins an otherwise perfect unicorn.
- Attach the mane curls to the head. Start at the top of the head near the horn and work back toward the neck. Use the longer curls (ch 55 and ch 45) at the top and front of the mane, transitioning to shorter curls (ch 35, ch 25) as you move toward the neck. The mini curls (ch 15) fill in gaps and the neck edge. Tie each curl off individually with a knot at the attachment point.
- Weave in all ends. Take your time here — chenille yarn ends can work loose over time if not secured. Weave each end through several stitches in multiple directions before trimming.
- Attach the tail. Sew the 4 tail pieces to the back of the body at approximately Rows 8–10. Bundle them together at the attachment point for a full, gathered tail look.
- Embroider the eyes. Using a length of black iris-weight yarn and your tapestry needle, embroider closed eyes with lashes on the front of the head. Position them at approximately Row 18–20, leaving enough space between them for the unicorn’s snout. Closed crescent-shaped eyes with 3–4 small lash strokes above each eye is the classic look for this style.
💡 Stuffing Reminder: If your unicorn feels floppy at the neck after assembly, you didn’t stuff the body firmly enough before closing. It’s worth the extra polyfill. Our stuffing guide covers exactly how to pack each section for maximum shape stability — especially useful for large head-heavy pieces like this.
Stretch It Further — Mia’s Hack Box
💡 Stretch It Further:
- Make a matching set of two. Swap the white for a soft lavender or pale blue using the exact same pattern. Two unicorns in complementary colors make an instant gift set — wrap them in tissue paper and you’ve got a handmade birthday present that looks like it cost serious money.
- Retheme the mane. This same base pattern works equally well as a horse (skip the horn, use all-brown yarn) or a pegasus (embroider small wings onto the sides). The curl technique for the mane works in any color palette — a dark mane and a cream body gives you a very different unicorn from the pink-and-white version.
- Make a mini version. Scale down by one hook size to 3.25mm (US D/3) with DK weight yarn and you’ll get a unicorn roughly half this size — perfect as a bag charm or keychain. The pattern arithmetic stays exactly the same; only the finished size changes.
- Cost breakdown: If you’re buying yarn new, expect to spend under $20 total for all materials. If you’re working from stash or partial skeins? Under $5. That’s the version I’m here for.
Mia’s Take
About 400 yards of chenille, a weekend’s worth of hooking, and one seriously satisfying mane assembly session — that’s the whole unicorn. The mane is where this pattern earns its reputation: every half-skein of leftover pastel chenille you’ve been holding onto finally has somewhere to go, and the result looks like you planned the color combination all along. Make a second one in lavender and give them as a set. Two unicorns, two happy recipients, one cleared-out scrap bin. That’s the kind of math I like. 🧶
What yarn is best for this unicorn amigurumi free pattern?
Bulky (5) weight chenille yarn is essential — the original uses Alize Softi, but Bernat Baby Blanket or Lion Brand Pound of Love work equally well. For the mane, any pastel bulky chenille scraps you have on hand are perfect.
How long does it take to crochet this unicorn amigurumi?
Plan for 6–8 hours across two sessions. The head and body take the longest; the mane curl pieces are quick and can be made in short bursts.
Can beginners make this unicorn amigurumi free pattern?
This pattern is rated intermediate. If you’re comfortable with the magic ring start, single crochet, increases, and decreases, you have all the skills needed — the assembly is the most technique-intensive part.