Amigurumi Cow — Free Crochet Pattern with Full Instructions
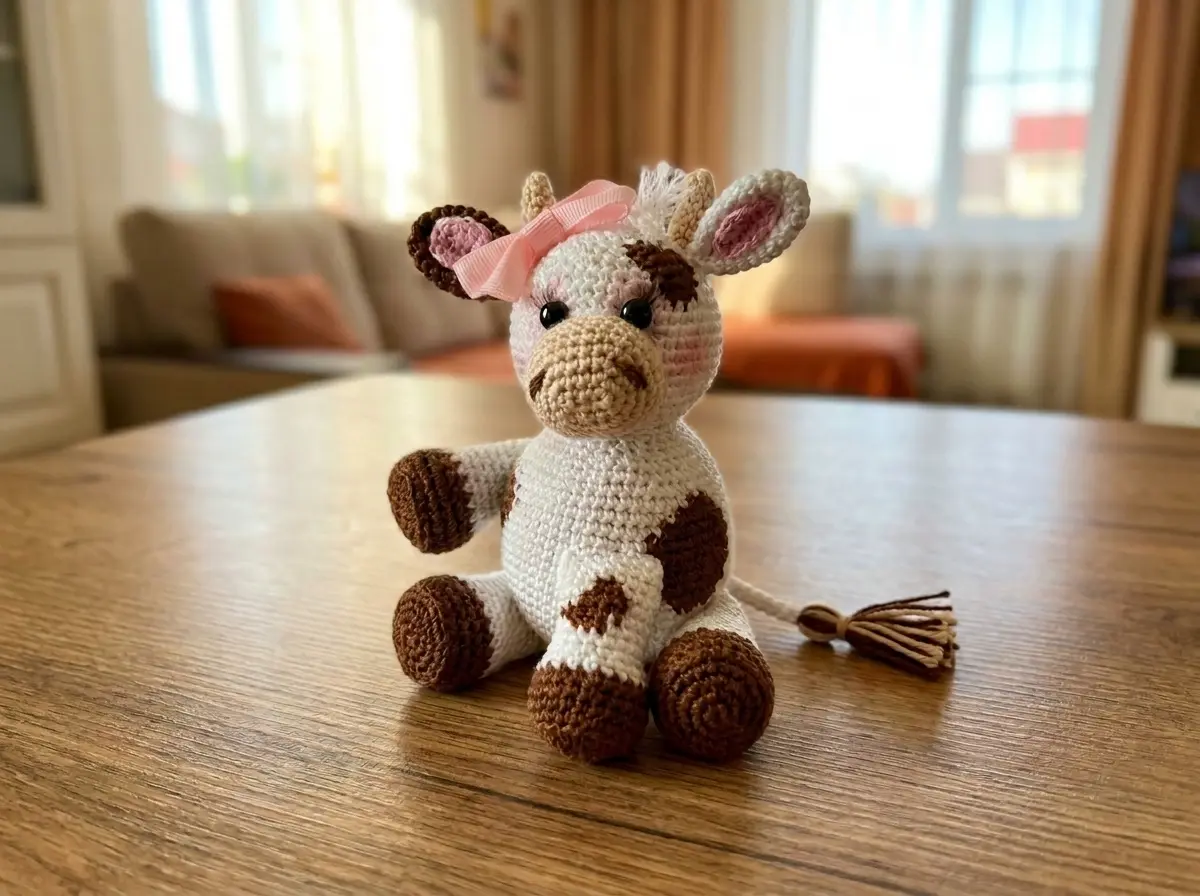
This amigurumi cow has been sitting in my queue for longer than I’d like to admit — and now that she’s finished, I completely understand why I kept coming back to her. She’s compact at just 3.5 in seated, but those color-worked spots and those tiny beige horns give her so much personality. I tested every round twice. Every count adds up. Let’s get started.
📋 Pattern Quick Stats
- Difficulty: Intermediate
- Finished Size: 3.5 in (9 cm) seated
- Hook Size: 2.5mm (approx. US C/2) recommended
- Yarn Weight: DK / Light Worsted (3)
- Techniques Used: magic ring, increases, invisible decrease, BLO, multi-color work, multi-part assembly
- Estimated Time: 6–9 hours
Materials for Your Amigurumi Cow
The original pattern uses Alize Forever, a mercerized DK-weight cotton yarn. If you can’t find it locally, any smooth DK / Light Worsted (3) yarn with good stitch definition will work well. I always reach for mercerized cotton when stitch clarity matters — and with the color work on this pattern, it does.
- Yarn — DK / Light Worsted (3) in four colors:
- White — main color (body, head, legs upper section, tail)
- Brown — spots and hoof accents
- Beige — muzzle and horns
- Pink — ear inserts (small amount only)
- Hook: 2.5mm (approx. US C/2), or size needed to achieve a tight, dense fabric
- Safety eyes: 6mm black (×2) — install before closing the head
- Stuffing: Polyester fiberfill (Poly-Fil works well)
- Cardboard: for hoof insoles, cut 1–1.5mm smaller than hoof diameter
- Stitch markers — non-negotiable for continuous rounds
- Tapestry needle for assembly
- Scissors
💡 Emma’s Tip: The hook size isn’t specified in the original source, so I recommend starting with a 2.5mm (approx. US C/2). With DK yarn and tight tension, this gives you a dense fabric where the stuffing won’t show through. If you tend to crochet loosely, try a 2.75mm and do a quick swatch before committing to the full body.
Abbreviations
| Abbreviation | Meaning |
|---|---|
| mr | magic ring |
| ch | chain |
| sl st | slip stitch |
| sc | single crochet |
| inc | increase — 2 single crochets worked into the same stitch |
| dec | decrease — worked as invisible decrease throughout: insert hook through front loops only of next 2 stitches simultaneously, yarn over, pull through, yarn over, pull through 2 loops. No visible gap. |
| BLO | back loop only — work into the back loop of the stitch only |
| ( ) * X | repeat the instructions in parentheses X times |
⚠️ A note on decreases: Every single decrease in this pattern is worked as an invisible decrease — front loops only. This is the method I use in all my amigurumi work because it closes cleanly without leaving a gap. If you haven’t tried it yet, our complete invisible decrease tutorial walks you through it step by step. It’s worth learning properly before you start.
Special Techniques
Before picking up your hook, it helps to be comfortable with a few techniques this pattern depends on.
Almost every part of this amigurumi cow begins with a magic ring. If you’ve never made one, learn it now rather than after you’ve started — it closes the center hole completely, which is what gives amigurumi heads and bodies their clean, tight centers. Our amigurumi magic ring tutorial covers the full technique, including how to close and secure it so it never loosens over time.
The entire pattern works in continuous rounds — you crochet in a spiral without joining or turning at the end of each round. Place a stitch marker in the first stitch of every round and move it up as you go. If you’ve been used to joined rounds, it takes about one body to feel natural. Our guide on working in continuous rounds has everything you need.
The legs use BLO (back loop only) in Row 5. This creates a sharp ridge where the hoof meets the upper leg. It’s easy to slip into working through both loops by habit — pay attention when you hit that row.
The Amigurumi Cow Pattern
Body (×1)
Yarn: White (main), Brown (spots beginning Row 14)
Start: Magic ring
Row 1: 6 sc in mr (6)
Row 2: 6 inc (12)
Row 3: (1 sc, 1 inc) * 6 (18)
Row 4: (2 sc, 1 inc) * 6 (24)
Row 5: (3 sc, 1 inc) * 6 (30)
Row 6: (4 sc, 1 inc) * 6 (36)
Row 7: (5 sc, 1 inc) * 6 (42)
Row 8: (6 sc, 1 inc) * 6 (48)
Row 9: 48 sc (48)
Row 10: (7 sc, 1 inc) * 6 (54)
Rows 11–13: 54 sc (3 rows) (54)
Row 14: 4 sc [brown], 49 sc [white], 1 sc [brown] (54)
Row 15: 5 sc [brown], 47 sc [white], 2 sc [brown] (54)
Row 16: 6 sc [brown], 44 sc [white], 4 sc [brown] (54)
Row 17: 8 sc [brown], 42 sc [white], 4 sc [brown] (54)
Row 18: 8 sc [brown], 42 sc [white], 4 sc [brown] (54)
Row 19: 8 sc [brown], 14 sc [white], 2 sc [brown], 27 sc [white], 3 sc [brown] (54)
Row 20: 7 sc [brown], 14 sc [white], 4 sc [brown], 26 sc [white], 3 sc [brown] (54)
Row 21: 7 sc [brown], 13 sc [white], 6 sc [brown], 26 sc [white], 2 sc [brown] (54)
Row 22: 6 sc [brown], 14 sc [white], 7 sc [brown], 27 sc [white] (54)
Row 23: 5 sc [brown], 16 sc [white], 5 sc [brown], 28 sc [white] (54)
Row 24: 2 sc [white], 2 sc [brown], 19 sc [white], 2 sc [brown], 29 sc [white] (54)
Row 25: 54 sc [white] (54)
Row 26: (7 sc, 1 dec) * 6 (48)
Row 27: 3 sc, 1 dec, (6 sc, 1 dec) * 5, 3 sc (42)
Row 28: (5 sc, 1 dec) * 6 (36)
Row 29: 2 sc, 1 dec, (4 sc, 1 dec) * 5, 2 sc (30)
Row 30: (3 sc, 1 dec) * 6 (24)
💡 Emma’s Tip: Stuff the body after Row 30, before you continue with the final decrease rows. Add the fiberfill gradually and distribute it evenly — the opening is still wide enough to work with at this stage. Pack it firmly enough that the fabric doesn’t dimple, but not so tightly that the sides bulge.
Row 31: (2 sc, 1 dec) * 6 (18)
Row 32: (1 sc, 1 dec) * 6 (12)
Row 33: 6 dec (6)
Close the opening and weave in all ends.
Head (×1)
Yarn: White (main), Brown (spot beginning Row 16)
Start: Magic ring
Row 1: 6 sc in mr (6)
Row 2: 6 inc (12)
Row 3: (1 sc, 1 inc) * 6 (18)
Row 4: (2 sc, 1 inc) * 6 (24)
Row 5: (3 sc, 1 inc) * 6 (30)
Row 6: (4 sc, 1 inc) * 6 (36)
Row 7: (5 sc, 1 inc) * 6 (42)
Row 8: (6 sc, 1 inc) * 6 (48)
Rows 9–15: 48 sc (7 rows) (48)
Row 16: 3 sc [brown], 44 sc [white], 1 sc [brown] (48)
Row 17: 4 sc [brown], 2 sc [white], 1 dec [white], (6 sc [white], 1 dec [white]) * 5 (42)
Row 18: 5 sc [brown], 1 dec [white], (5 sc [white], 1 dec [white]) * 5 (36)
Row 19: 1 sc [white], 3 sc [brown], 1 dec, 1 sc [brown], 3 sc [white], 1 dec [white], (4 sc [white], 1 dec [white]) * 4 (30)
⚠️ Note: Row 20 is absent from the original source pattern. The instructions move directly from Row 19 to Row 21. This is not a typo — simply continue to Row 21 after completing Row 19.
💡 Emma’s Tip: Attach your safety eyes before Row 22. I position them between Rows 10–12, roughly 8–10 stitches apart. Once the head is closed and stuffed, you won’t be able to reach inside to install them — and this is one of those mistakes you’ll only make once.
Row 21: (3 sc, 1 dec) * 6 [continue in white] (24)
Row 22: 24 sc (24)
Row 23: (2 sc, 1 dec) * 6 (18)
Row 24: (1 sc, 1 dec) * 6 (12)
Row 25: 6 dec (6)
Stuff firmly before the final rows close the opening completely. Close and weave in ends.
Muzzle (×1)
Yarn: Beige
Start: Chain of 5
Row 1: Starting from the 2nd ch from hook: 2 sc in first st, 2 sc, 3 sc in last st; along the other side of the chain: 2 sc, 1 sc in last st (10)
Row 2: 2 inc, 2 sc, 3 inc, 2 sc, 1 inc (16)
Row 3: (1 sc, 1 inc) * 2, 2 sc, (1 sc, 1 inc) * 3, 2 sc, 1 sc, 1 inc (22)
Row 4: (2 sc, 1 inc) * 2, 2 sc, (2 sc, 1 inc) * 3, 2 sc, 2 sc, 1 inc (28)
Row 5: (3 sc, 1 inc) * 2, 2 sc, (3 sc, 1 inc) * 3, 2 sc, 3 sc, 1 inc (34)
Rows 6–9: 34 sc (4 rows) (34)
Row 10: (3 sc, 1 dec) * 2, 2 sc, (3 sc, 1 dec) * 3, 2 sc, 3 sc, 1 dec (28)
Slip stitch to finish. Leave a long tail for sewing onto the head.
Mouth (×1)
Yarn: White
Start: Magic ring
Row 1: 6 sc in mr (6)
Row 2: 6 inc (12)
Row 3: (1 sc, 1 inc) * 6 (18)
Rows 4–5: 18 sc (2 rows) (18)
Slip stitch to finish. Leave a tail for sewing onto the center of the muzzle.
Horns (×2)
Yarn: Beige
Start: Chain of 10, joined into a ring
Row 1: 10 sc (10)
Row 2: 1 dec, 8 sc (9)
Row 3: 1 dec, 7 sc (8)
Row 4: 1 dec, 6 sc (7)
Row 5: 1 dec, 5 sc (6)
Row 6: 1 dec, 4 sc (5)
Row 7: 1 dec, 3 sc (4)
Stuff lightly before closing. The finished horn should hold a gentle natural curve — you can shape it by hand while the filling is still soft. Close the opening and leave a tail for sewing.
Ears (×2)
Yarn: One ear in brown, one ear in white
Start: Magic ring
Row 1: 6 sc in mr (6)
Row 2: 6 inc (12)
Row 3: (1 sc, 1 inc) * 6 (18)
Rows 4–7: 18 sc (4 rows) (18)
Row 8: (1 sc, 1 dec) * 6 (12)
Rows 9–10: 12 sc (2 rows) (12)
Row 11: 6 dec (6)
Leave a tail for sewing. Do not stuff the ears.
Pink Ear Inserts (×2)
Yarn: Pink
Start: Chain of 4
Row 1: 3 sc along chain, turn (3)
Row 2: 3 sc, turn (3)
Row 3: 3 sc, turn (3)
Row 4: 1 dec, 1 sc, turn (2)
Row 5: 2 sc, then sc evenly around the entire piece (approx. 13)
Slip stitch to finish. Leave a tail for sewing onto the inner face of each ear before assembly.
Legs (×4)
Yarn: Brown (hooves), White (upper leg), with optional spot detail
Start: Magic ring
Row 1: 6 sc in mr [brown] (6)
Row 2: 6 inc (12)
Row 3: (1 sc, 1 inc) * 6 (18)
Row 4: (2 sc, 1 inc) * 6 (24)
Row 5: 24 sc BLO (24)
Row 6: 24 sc (24)
Row 7: 24 sc (24)
Row 8: (2 sc, 1 dec) * 6 (18)
Row 9: 18 sc [switch to white] (18)
Rows 10–12: 18 sc (3 rows) (18)
Row 13: 5 sc [white], 3 sc [brown], 10 sc [white] (18)
Row 14: 4 sc [white], 6 sc [brown], 8 sc [white] (18)
Row 15: 4 sc [white], 4 sc [brown], 10 sc [white] (18)
Row 16: 5 sc [white], 2 sc [brown], 11 sc [white] (18)
Rows 17–18: 18 sc [white] (2 rows) (18)
💡 Emma’s Tip: Make 3 legs with the brown spot detail in Rows 13–16. For the 4th leg, work all stitches marked [brown] in white instead — this gives you one plain leg, which is exactly what the original design calls for. Before stuffing, cut cardboard insoles approximately 1–1.5mm smaller than the hoof diameter and slip them inside. This is one of those details that makes all the difference — it gives each hoof a flat, stable base so your finished cow actually sits level. Stuff the legs firmly near the hoof and more loosely toward the top.
Finishing: Fold the top edge of each leg flat and single crochet the two layers together across 9 stitches. Leave a long tail for sewing onto the body.
Tail (×1)
Yarn: White
Start: Magic ring
Row 1: 6 sc in mr (6)
Rows 2–15: 6 sc (14 rows) (6)
Leave a tail for sewing. Before attaching to the body, make a small tassel of mixed white and brown yarn at the tip of the tail.
Assembling Your Amigurumi Cow
Assembly is where this amigurumi cow really comes together. Pin every piece in place before you commit to a single stitch — especially the legs. Take your time with this part. Trust me, it’s worth the extra effort.
- Legs: Sew all four legs onto the underside of the body. Position the front two legs between Rows 6–8 of the body (one on each side), and the back two legs between Rows 2–4. Stand the cow on a flat surface and adjust until she sits without rocking before you sew through.
- Tail: Sew the tail onto the back of the body, centered between Rows 3–5.
- Head: Sew the head onto the top of the body, centered over Rows 29–33. Align carefully so the muzzle faces directly forward.
- Muzzle: Sew onto the front of the head, centered between Rows 17–22. Before you close it completely, add a small amount of fiberfill to hold its shape.
- Mouth: Sew onto the center of the finished muzzle.
- Horns: Sew onto the top of the head, one on each side, with a slight outward and upward angle. The natural curve of each horn should face outward.
- Ears: First, sew each pink insert onto the inner face of its ear. Then attach the completed ears slightly in front of the horns, angled outward rather than straight up.
Finishing Details
The final details are what separate a good amigurumi cow from a great one. None of these take long, and every one of them matters.
Nostrils: Embroider two small oval nostrils onto the muzzle in dark brown or charcoal thread. Keep them symmetrical and centered on the upper half of the muzzle.
Muzzle cinching: After the muzzle is sewn on, create a subtle chin definition by making a single stitch from the center of the muzzle down to the bottom edge and pulling gently. This gives the muzzle that rounded, slightly pouty shape you see on the finished piece.
Forelock: A small tuft of yarn between the horns adds a lot of charm. Cut 4–6 strands of white or brown yarn about 1.5 in long, fold them in half, and loop them through a stitch at the top of the head with your hook. Trim to shape.
Tail tassel: If you haven’t already added it, attach a small tassel of mixed white and brown yarn to the tip of the tail now, before sewing it onto the body. It’s a small detail — but it’s one of those things that makes the finished piece feel complete.
Emma’s Note
I’ve made this little cow twice now, and I’ll say it plainly: don’t rush the color work on the body. Those spot rows look intimidating on paper, but once you’re a few rows in, the rhythm comes naturally — and the result is so worth the extra focus. If your count ever drifts during those rows, frog back to the last clean round and start that section again. Every count in this pattern adds up, and yours will too. Happy hooking. 🧶
What yarn is best for this amigurumi cow pattern?
The original design uses Alize Forever, a mercerized DK-weight cotton. Any smooth DK / Light Worsted (3) yarn with good stitch definition works well — mercerized cotton is especially recommended for clean, crisp color work on the spots.
How long does it take to crochet this amigurumi cow?
Most crocheters complete this pattern in 6–9 hours. The body color work rows and the multi-part assembly add extra time compared to single-piece amigurumi designs.
Is this amigurumi cow pattern suitable for beginners?
This pattern is rated Intermediate. It requires comfort with color work, the invisible decrease, and multi-part assembly. Crocheters who have completed at least one simple amigurumi project should be able to follow it carefully.